Is your Shark NV352 vacuum’s headlight frustratingly dark? This is a common issue, usually caused by a simple burnt-out bulb, corroded socket, or a faulty switch. The good news is that diagnosing and often fixing the problem yourself is a straightforward DIY task that takes under 30 minutes. You’ll need a basic replacement bulb (usually an automotive 12V wedge bulb) and a few common tools. Always unplug the vacuum first, and remember that if electrical troubleshooting feels daunting, contacting Shark Support is the safest option to avoid voiding your warranty.
Key Takeaways
- Most Common Cause: A standard automotive 12V wedge bulb (like #194 or 2825) has simply burned out and needs replacement.
- Check the Socket: Corrosion, dirt, or a loose connection in the bulb socket is the second most frequent culprit and is easy to clean.
- Inspect the Wiring: Look for visibly frayed, pinched, or disconnected wires running from the handle to the vacuum head, especially at hinge points.
- Test the Switch: The on/off switch for the headlight, often located on the handle, can fail and is a more complex but possible fix.
- Safety First: Always completely unplug the Shark NV352 from the wall outlet before performing any inspection or repair.
- Warranty Consideration: If your vacuum is still under Shark’s limited warranty, opening the housing may void it; contact support first if covered.
- Prevent Future Issues: Regularly clean the bulb area to prevent debris buildup and avoid banging the vacuum head hard against furniture or walls.
📑 Table of Contents
- Why Your Shark NV352 Headlight Matters (And Why It Fails)
- Anatomy of the NV352 Light Assembly: What’s Inside?
- Diagnostic Step-by-Step: Finding the Fault
- How to Replace the Shark NV352 Light Bulb: A Complete Guide
- Beyond the Bulb: Tackling Deeper Electrical Issues
- Maintenance Tips to Keep Your NV352 Light Working Longer
- When to Call in the Pros: Recognizing Your Limits
- Conclusion: Don’t Clean in the Dark!
Why Your Shark NV352 Headlight Matters (And Why It Fails)
Let’s be honest: when the light on your Shark NV352 Navigator Lift-Away goes out, it feels like you’re cleaning blindfolded. That little bulb isn’t just for show; it illuminates dust bunnies under the couch, pet hair in dark corners, and the fine print on your floor. When it dies, your cleaning efficiency takes a nosedive. But before you panic and start shopping for a new vacuum, take a deep breath. The Shark Vacuum NV352 light bulb not working is one of the most common and usually one of the most repairable issues with this popular model. This guide will walk you through everything, from the simple “aha!” moment to the more complex electrical checks, empowering you to fix it yourself.
The NV352’s lighting system is beautifully simple in design, which works in your favor. It uses a standard low-voltage automotive-style bulb powered by the vacuum’s internal circuit. The failure points are limited: the bulb itself, the socket that holds it, the thin wires that connect it, or the switch that controls it. We’ll tackle them in order of likelihood and ease. Understanding this anatomy is your first step toward a solution.
Anatomy of the NV352 Light Assembly: What’s Inside?
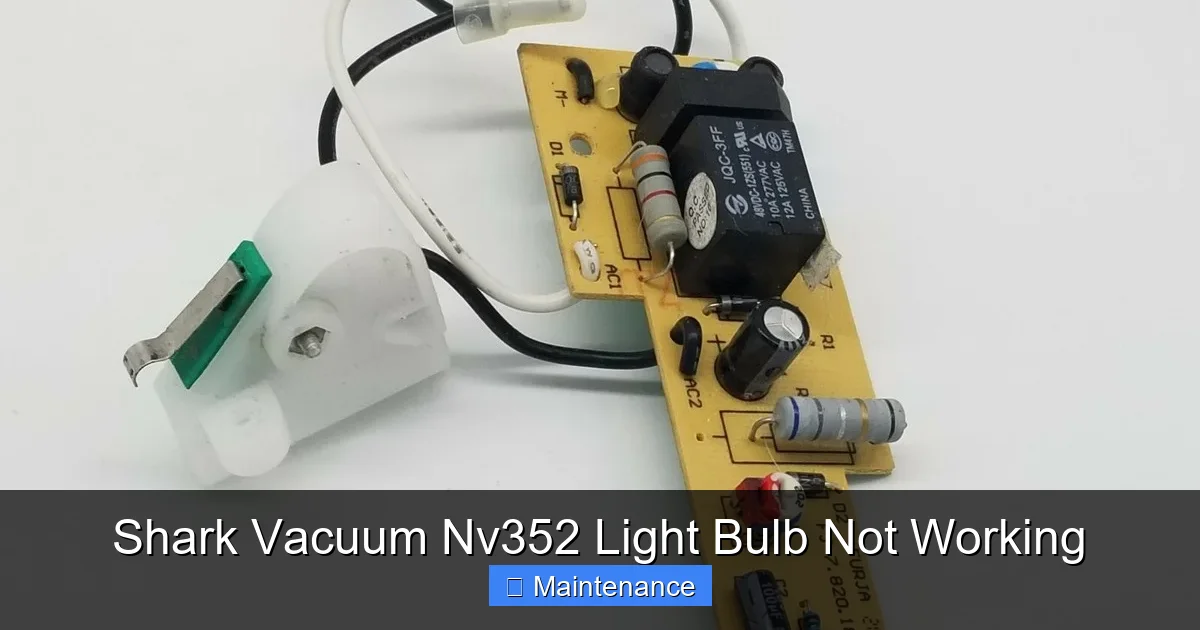
Before we start unscrewing things, it helps to know what you’re looking at. The light is housed in a small, clear plastic dome on the front of the vacuum’s floor nozzle. Behind that dome is a simple socket, much like the ones in your car’s interior. A small, wedge-base bulb (typically a 12V, 1.5-watt type 194 or 2825) presses into this socket. From the socket, two very thin, usually red and black, wires run back along the underside of the nozzle, up through the “Lift-Away” pod connection, and ultimately to the main power switch on the handle.
Visual guide about Shark Vacuum Nv352 Light Bulb Not Working
Image source: vacuumwars.com
The Bulb: The Usual Suspect
Like any incandescent bulb, these tiny workhorses have a finite lifespan. They burn out from heat cycles (turning on/off) and simple age. A filament breaks, and the light goes dark. They are consumable parts, designed to be replaced. This is the #1 fix.
The Socket and Connector: The Silent Saboteur
Over time, as you roll the vacuum across the floor, dust and debris get kicked up into the light housing. This fine dust, mixed with a bit of humidity, can create a thin insulating layer or even mild corrosion on the metal contacts inside the socket. If the bulb can’t make a good connection, it won’t light up, even if the bulb is brand new. The plastic connector where the socket wires plug into the main harness can also become loose or dirty.
The Wiring and Switch: The Hidden Challenges
The wires running from the nozzle to the handle are in a constant flexing area. Over years of use, they can fatigue, break internally, or get pinched. The switch itself, a small tactile button on the handle, has mechanical contacts that can wear out or get dirty. These are less common but possible.
Diagnostic Step-by-Step: Finding the Fault
Don’t just guess and replace parts! A systematic approach saves time and money. Follow these steps in order. Remember: unplug the vacuum from the wall before touching anything.
Visual guide about Shark Vacuum Nv352 Light Bulb Not Working
Image source: i.ebayimg.com
Step 1: The Visual Inspection
With the vacuum unplugged, flip it over. Look at the clear light cover. Is it cracked, yellowed, or covered in a thick layer of dust and carpet fuzz? A dirty cover can make a working bulb seem dim or dead. If it’s dirty, remove it (it usually snaps or screws off) and clean it with a soft cloth and mild cleaner. While you’re there, look at the bulb itself. Can you see the filament? If it’s broken or looks blackened, the bulb is dead. If it looks clear, proceed.
Step 2: The Bulb Swap (Easiest Test)
This is the most critical test. Do not skip it. You need a known-good replacement bulb. The NV352 uses a standard automotive wedge-base bulb. The most common types are the 12V 194 or 12V 2825. They are inexpensive and sold at auto parts stores, Walmart, or Amazon. Tip: Buy a multi-pack; you’ll likely need one again.
- Gently pull the clear light cover off. It’s usually clipped in place.
- You’ll see the bulb pushed into a white or black plastic socket. Pull the bulb straight out. It might be tight; wiggle it gently.
- Insert the new bulb exactly the same way. It only fits one orientation. Press it in firmly until it seats.
- Plug the vacuum in and turn it on. If the light comes on, you’ve solved it! Reinstall the cover.
If the new bulb does not light up, do not assume the bulb is bad. The problem is elsewhere. Move to the next step.
Step 3: Socket and Connection Check
With the vacuum still unplugged, inspect the socket where the bulb goes.
- Look inside: Are the two metal contacts (tabs) inside the socket springy and clean? If they look tarnished, greenish, or coated in dust, clean them.
- How to clean: Use a cotton swab dipped in a tiny bit of isopropyl alcohol (rubbing alcohol) or electronic contact cleaner. Gently rub the contacts. For stubborn corrosion, use a pencil eraser—it’s mildly abrasive and safe for the metal. Let it dry completely.
- Check the wire connector: Follow the two thin wires from the socket. They will join a larger plastic plug that connects to the main wire harness coming from the body of the vacuum. Unplug this connector (press the tab and pull). Look inside both halves for dirt or corrosion. Clean the metal pins with your swab/eraser.
- Reconnect the plug firmly. Push the bulb (the new one is already in) back in. Plug in and test.
Step 4: The Handle Switch Test
If the bulb and socket are clean and connected but still no light, the fault may be the switch or the wiring. This is trickier. The light switch is integrated into the main on/off rocker switch on the handle. You’ll need a multimeter for this part.
- Access the switch: You need to open the handle housing. This usually requires removing several Torx screws (often T10 or T15). Take photos as you go so you remember screw locations and clip positions.
- Once open, locate the small switch assembly connected to the rocker button. You’ll see two thin wires (from the light circuit) soldered or clamped to it.
- Set your multimeter to the continuity setting (the diode symbol or “beep” setting). With the vacuum unplugged, touch one probe to each of the two light switch terminals.
- Press the vacuum’s main power button ON. You should hear a beep (continuity), meaning the switch is closed and allowing power through. If no beep, the switch is faulty and needs replacement. This is a more advanced repair.
How to Replace the Shark NV352 Light Bulb: A Complete Guide
Assuming your diagnostic pointed to a dead bulb (the most likely scenario), here is the detailed, safe replacement process. It’s a 5-minute job.
Visual guide about Shark Vacuum Nv352 Light Bulb Not Working
Image source: roundtheyear.com
Tools and Parts You’ll Need
- Replacement bulb: 12V 194 or 12V 2825 wedge base. (Confirm by checking your old bulb or manual).
- Small flat-head screwdriver (optional, for prying covers).
- Gloves (optional, to avoid oils from your skin on the bulb).
Step-by-Step Replacement Procedure
- Safety First: Unplug the Shark NV352 from the wall outlet. This is non-negotiable.
- Access the Bulb: Flip the vacuum over onto its side or upside down. Locate the clear plastic light cover on the front of the floor nozzle.
- Remove the Cover: The cover is typically held by 2-4 plastic clips. Gently insert a flat-head screwdriver into a seam and pry carefully. Start at one corner and work your way around. The plastic can become brittle with age, so be patient and gentle. Some models use a single screw; check if you see one.
- Remove the Old Bulb: The bulb is held in its socket by friction. Pull it straight out firmly. Do not twist—it’s a wedge base, not a bayonet. If it’s stuck, wiggle it gently side-to-side as you pull.
- Install the New Bulb: Hold the new bulb by the base (wearing gloves is good practice). Align the flat sides of the bulb’s base with the socket’s opening and push it in firmly until it is fully seated. You should feel it click into place. Ensure it’s not tilted.
- Test Before Reassembly: Do not put the cover back on yet. Plug the vacuum in and turn it on. The new bulb should light up immediately. If it doesn’t, re-seat the bulb or check your connections (see Diagnostic section).
- Reinstall the Cover: Once confirmed working, unplug the vacuum. Align the cover with its clips and press it back into place until all clips snap securely. Ensure it’s flush and sealed.
- Final Test: Plug the vacuum back in and use it normally. Verify the light comes on when the vacuum is running.
Pro-Tips for a Smooth Replacement
- When you buy bulbs, get a pack of 5-10. They are cheap, and you’ll likely need another in 6-18 months.
- If the plastic cover is yellowed or cracked from heat/age, consider ordering a replacement part from Shark or a third-party supplier while you have it off.
- While the cover is off, use a small vacuum attachment or compressed air to blow out any dust from inside the housing. This prevents future socket corrosion.
Beyond the Bulb: Tackling Deeper Electrical Issues
If a new, cleanly installed bulb still doesn’t work, your investigation moves from simple to advanced. The problem is now in the power delivery system: wiring, connectors, or the switch. This requires more comfort with tools and electricity.
Chasing the Faulty Connection
The most common “beyond bulb” issue is a bad connection at the plug between the nozzle’s wire harness and the main vacuum body. This plug is located where the Lift-Away pod detaches. Over time, the constant connecting/disconnecting can loosen pins or introduce dirt.
- Detach the Lift-Away pod (the canister) from the floor nozzle by pressing the release lever.
- Locate the multi-pin electrical connector on the back of the nozzle where it mates with the pod.
- Unplug it firmly (press the tab). Inspect both sides. Look for bent pins, dirt, or corrosion. Clean all pins with contact cleaner and a cotton swab. A pencil eraser works on metal pins too.
- Reconnect firmly until the tab clicks. Test the vacuum.
Examining the Flex Hose Wiring
The wires from the floor nozzle run up through the flexible hose that connects to the pod. This hose bends constantly. Over years, the copper strands inside the insulation can break. You might see a visible kink, crack, or chew mark on the black sheath. Gently flex the hose along its length while watching the light circuit. If it flickers on and off, you have a break. Repair involves splicing in a short section of wire, which is a skilled soldering job. For most users, this means it’s time to call Shark Support or consider a replacement hose assembly.
Diagnosing a Failed Handle Switch
As detailed in the diagnostic section, this requires opening the handle and using a multimeter for continuity testing. If the switch is confirmed dead, you must source the correct replacement switch assembly from Shark (part number varies) or a reputable parts supplier. Replacing it involves desoldering the old wires and soldering the new switch, or unclamping and reclamping them, then carefully reassembling the handle. If you are not confident with electronics soldering, this is a professional repair.
Maintenance Tips to Keep Your NV352 Light Working Longer
An ounce of prevention is worth a pound of cure. While bulbs will burn out, you can maximize their lifespan and prevent other failures with simple habits.
Keep It Clean, Inside and Out
Dust is the enemy. Every few months, when you’re doing other vacuum maintenance:
- Remove the light cover and use a soft brush (a clean paintbrush works) to dislodge dust from the bulb and socket area.
- Blow out any debris from the housing with compressed air.
- Wipe the exterior of the light cover with a microfiber cloth to prevent haze.
Be Gentle With the Hardware
The NV352 is a workhorse, but its plastic components have limits.
- Avoid using the vacuum as a battering ram. Don’t ram the front of the nozzle into furniture legs or baseboards. This can crack the light housing, dislodge the bulb, or stress internal connections.
- When detaching the Lift-Away pod, use the designated release lever and don’t yank on the electrical connector.
- Don’t over-tighten the screws when reassembling the handle. Snug is sufficient; overtightening can crack the plastic and misalign internal parts.
Use Genuine or High-Quality Replacement Parts
When buying bulbs, don’t grab the cheapest no-name pack from a gas station. Stick with reputable brands (like Philips, GE) or those specifically listed for automotive interior use. They have better filaments and seals, leading to longer life and less chance of the bulb shattering in the socket. For any internal parts like switches or connectors, genuine Shark parts, while more expensive, ensure compatibility and safety.
When to Call in the Pros: Recognizing Your Limits
DIY is empowering, but knowing when to stop is crucial. Continuing past your skill level can cause more damage, create safety hazards (like electrical shorts), and void warranties.
Call Shark Customer Support or a qualified appliance repair technician if:
- Your vacuum is still under the original manufacturer’s warranty. Opening the housing will likely void it. Let them handle it.
- You have confirmed a good bulb and clean socket, but there’s no power at the connector. This indicates a break in the wiring or a failed switch. If you are not comfortable with multimeters and soldering, stop.
- You smell burning plastic or see signs of melting around the switch or connectors. This is a serious fire risk. Unplug immediately and seek professional help.
- The plastic housing around the light or the handle switch is cracked or broken. This often requires a full part replacement, which is more involved.
- You’ve followed all diagnostic steps and the problem remains a mystery. Intermittent issues can be the hardest to track down and require advanced expertise.
There is no shame in calling a pro. Your safety and the longevity of your appliance are worth more than the satisfaction of a DIY fix.
Conclusion: Don’t Clean in the Dark!
A Shark Vacuum NV352 light bulb not working is an annoyance, but it is almost never a death sentence for your machine. In the vast majority of cases, the solution is a simple, inexpensive bulb replacement that you can do in the time it takes to watch a TV show. By following the systematic diagnostic approach—bulb first, then socket/connector, then switch/wiring—you efficiently rule out the easy fixes before tackling the hard ones.
Remember the golden rules: always unplug first, use the correct 12V wedge bulb (194/2825), and keep those electrical connections clean. With a little care and this guide in your back pocket, you can keep your NV352 illuminating every corner of your home for years to come. Now, go forth and see what you’ve been missing in those dark corners!
Frequently Asked Questions
What type of bulb does the Shark NV352 vacuum use?
The Shark NV352 uses a standard 12-volt automotive wedge-base bulb, most commonly the 194 or 2825 type. These are small, glass bulbs with a flat-sided base that slides into the socket. You can find them at auto parts stores, Walmart, or online retailers like Amazon.
Why did my new bulb burn out so quickly?
If a new bulb burns out almost immediately, the problem is not the bulb itself. It’s almost certainly a shorted circuit or a faulty switch delivering too much voltage. First, double-check that the bulb you installed is the correct 12V type (not a 120V household bulb). If it is correct, the issue lies with the vacuum’s wiring or the handle switch, requiring further electrical diagnosis.
Can I use a LED bulb instead of the standard incandescent one?
While LED bulbs last longer and draw less power, they are not recommended for this application. The Shark NV352’s light circuit is designed for a simple resistive incandescent load. LEDs have electronic drivers that can cause flickering, interference with other electronics, or simply not work properly with the vacuum’s power delivery system. Stick with the specified 12V incandescent bulb for guaranteed compatibility and safety.
The bulb is fine, the socket is clean, but the light still doesn’t work. What’s next?
You’ve ruled out the two easiest fixes. Your next steps are to check the electrical connector where the floor nozzle plugs into the Lift-Away pod (clean the pins), and then to test the handle switch with a multimeter for continuity. If the switch is dead, it needs replacement. If the switch tests fine, the fault is likely a break in the thin wiring running through the flexible hose, which is a more complex repair.
Is it safe to operate the Shark NV352 without the light bulb?
Yes, it is electrically safe to run the vacuum without the bulb installed. The circuit is designed to function with or without the bulb. However, you will be cleaning blind, which can lead to missed debris, bumping into objects, and generally inefficient cleaning. It’s best to replace the bulb as soon as possible for optimal use.
Will opening the vacuum to fix the light void my warranty?
Very likely, yes. Shark’s limited warranty typically states that unauthorized disassembly voids the warranty. If your vacuum is still within the warranty period (check your manual), your best and safest course of action is to contact Shark Customer Support directly. They may provide warranty service or specific, approved guidance. Only proceed with DIY repairs if the vacuum is out of warranty or you are willing to forfeit that coverage.