The “Dust Bin Not Installed” error on Shark vacuums is a common safety feature, not a major malfunction. It usually means the vacuum’s sensors can’t detect the bin due to improper seating, a dirty connection, or a damaged seal. Fixing it is often a simple DIY task involving checking the bin’s alignment, cleaning contact points, and inspecting for cracks. Never ignore this warning—operating without the bin engaged can damage the motor and void your warranty.
You’re all set to tackle your cleaning chores. You press the power button on your trusty Shark vacuum, and instead of the familiar roar, you’re greeted by a frustrating message on the LCD screen or a blinking light: “Dust Bin Not Installed”. Your heart sinks. Is it broken? Is it expensive to fix? Before you panic or call for service, take a deep breath. This is one of the most common Shark vacuum error messages, and in the vast majority of cases, it’s not a sign of a broken machine—it’s a sign of a simple, fixable issue. Think of it as your vacuum’s way of saying, “Hey, I can’t find my hat! Please put my hat on correctly.” This comprehensive guide will walk you through everything you need to know, from exactly what this error means to step-by-step solutions for every Shark model, ensuring you get back to efficient, worry-free cleaning.
Key Takeaways
- It’s a Safety Feature: The error prevents the vacuum from running without the dust bin securely locked, protecting the motor from debris and airflow blockage.
- Misalignment is the #1 Culprit: The bin is often not clicked fully into place or is slightly crooked, breaking the sensor connection.
- Cleanliness is Key: Dust, hair, and debris on the bin’s electrical contacts or the vacuum’s connection port are a frequent cause of the error.
- Inspect for Damage: Cracked seals, broken tabs, or warped plastic on the bin or vacuum body can prevent a proper seal and trigger the sensor.
- Model Variations Matter: The exact latching mechanism and sensor location differs between Shark Navigator, Vertex, and IZ400 series models.
- Reset After Fixing: Once the bin is correctly reinstalled, you often need to power cycle the vacuum (unplug for 30 seconds) to clear the error.
- Don’t Force It: Forcing a bin that won’t click can break plastic clips. Identify the obstruction before applying pressure.
📑 Table of Contents
- Understanding the “Dust Bin Not Installed” Error: It’s All About the Seal
- Most Common Causes: Why Your Shark Thinks the Bin is Missing
- The Step-by-Step Fix: Your Diagnostic and Repair Guide
- Model-Specific Nuances: Navigator, Vertex, and IZ Series
- When Fixing Doesn’t Work: Advanced Troubleshooting
- Prevention is the Best Cure: Long-Term Care Tips
- Conclusion: Knowledge is Power (and a Clean Home)
Understanding the “Dust Bin Not Installed” Error: It’s All About the Seal
First, let’s demystify what your Shark vacuum is actually detecting. This isn’t a weight sensor; it’s a position and seal sensor. Modern Shark vacuums use a combination of mechanical latches and electronic sensors to confirm two critical things: 1) the dust bin is physically present in the vacuum’s body, and 2) it is sealed tightly enough to create the proper airflow path. The vacuum’s motor and suction system are designed to work with a specific air resistance. If the bin is missing or not sealed, air escapes, suction plummets, and the motor can overwork or even burn out. The error message is a preemptive safety lockout.
The Two Main Detection Methods
Shark primarily uses two methods to check the bin:
- Mechanical Switch/Latch: A small plastic prong or tab on the bin presses down on a switch inside the vacuum’s bin cavity when the bin is fully clicked into place. If the switch isn’t depressed, the circuit stays open, and the error triggers.
- Magnetic Sensor: Some newer models (like certain Vertex or IZ series) use a magnet embedded in the bin and a magnetic reed switch in the vacuum. When the bin is seated, the magnet aligns with the switch, closing the circuit.
Understanding which system your model has can help you diagnose the problem faster, but the troubleshooting steps are largely the same for both.
Most Common Causes: Why Your Shark Thinks the Bin is Missing
Before you start taking things apart, it’s crucial to understand the usual suspects. Pinpointing the cause saves time and prevents unnecessary force that could cause damage.
Visual guide about Shark Vacuum Dust Bin Not Installed
Image source: live.staticflickr.com
Cause #1: Improper Seating and Alignment (The Usual Suspect)
This accounts for over 70% of these calls. You may have thought you clicked the bin in, but it’s sitting just a millimeter off-kilter. The latch isn’t fully engaged, or the bin is twisted slightly. This happens often when you’re in a hurry or if the bin is slightly overfilled, preventing it from sliding fully back.
Cause #2: Dirty Electrical Contacts or Sensor Points
Over time, a fine layer of dust, carpet fibers, and static-charged hair can coat the metal contact pads on the back of the dust bin or the corresponding prongs inside the vacuum’s bin chamber. This insulating layer prevents the electrical connection needed to signal “bin present.” This is especially common in homes with pets or thick carpets.
Cause #3>Damaged or Worn Seals and Gaskets
Many Shark bins have a soft rubber or foam seal around the opening that creates an airtight connection with the vacuum’s intake. If this seal is torn, cracked, flattened, or has debris stuck in it, the vacuum’s sensor may interpret the imperfect seal as a missing bin. Some models also have a small rubber gasket on the latch mechanism itself.
Cause #4: Broken Latch or Tab Mechanism
The plastic is subject to stress. The tab that presses the switch, or the clip that holds the bin, can snap or become severely warped. If you hear a snap when trying to install the bin, this is likely your issue. Also, check for any plastic碎片 (fragments) in the bin cavity that might be blocking full insertion.
Cause #5: Debris Jam in the Bin Cavity
A large chunk of carpet fiber, a sock, or even a children’s toy can lodge itself in the vacuum’s bin chamber, physically preventing the bin from sliding all the way back. The bin will feel like it’s “stopped” before it’s fully seated.
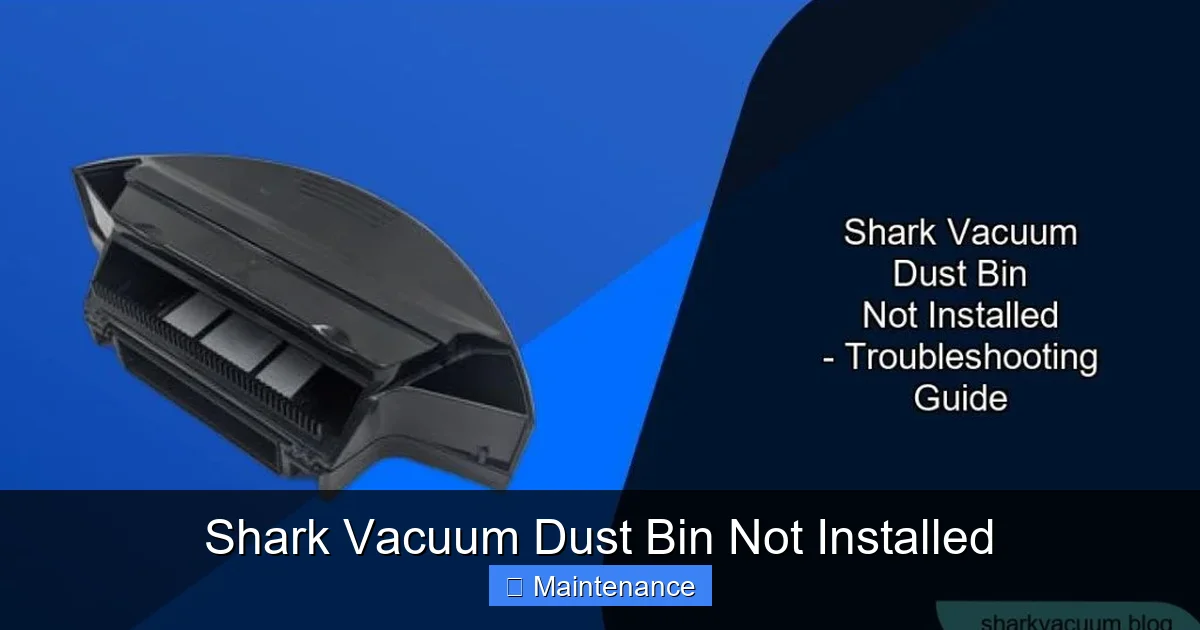
The Step-by-Step Fix: Your Diagnostic and Repair Guide
Now, let’s get our hands dirty (in a clean way). Follow this systematic approach for any Shark model, from the classic Navigator to the latest Vertex.
Visual guide about Shark Vacuum Dust Bin Not Installed
Image source: sharkvacuum.blog
Step 1: The Power Down and Visual Inspection
Always unplug the vacuum from the wall outlet first. This is non-negotiable for safety and to reset the electronic control board. With the vacuum off and unplugged, remove the dust bin completely. Place it on a clean surface. Now, look into the empty bin cavity on the vacuum. Use a flashlight. What do you see?
- Are there any obvious obstructions like hair balls, large debris, or foreign objects?
- Do you see the sensor switch (a small plastic button) or the magnetic reed switch (a small glass capsule)? Is it visibly damaged or stuck?
- Check the path the bin slides on. Is it clear of grit and hair?
Remove any debris you find with a dry cloth or compressed air. Never use water inside the electrical cavity.
Step 2: Inspect and Clean the Dust Bin Itself
Now, turn your attention to the bin. This is where 90% of the solution lies.
- Check the Latch: Operate the release latch multiple times. Does it move smoothly? Does it spring back? Look for any cracks in the plastic around the latch housing.
- Find the Contacts: On the back or bottom of the bin, you’ll find two small, usually silver or copper, metal pads or prongs. These are the electrical contacts. They must be clean and shiny to conduct electricity.
- Clean the Contacts: Use a cotton swab lightly dampened with isopropyl alcohol (rubbing alcohol). Gently rub the metal contacts until they are free of any dark tarnish or film. The alcohol evaporates quickly and leaves no residue. Important: Do not use water, soap, or household cleaners here, as they can leave conductive residues or cause corrosion.
- Inspect the Seal: Run your finger along the entire rubber or foam seal that goes around the bin’s opening. Feel for any nicks, cracks, or areas that have lost their elasticity. Also, look for any debris (hair, thread) pinched in the seal channel.
Step 3: The Re-Seating Ritual
This is the most critical step and must be done with intention.
- Hold the dust bin by the handle. Align the bottom grooves of the bin with the tracks inside the vacuum’s bin cavity.
- Push the bin in firmly and straight. You should feel a solid “CLICK” as the primary latch engages. Do not just push it until it stops; you must hear and feel that click.
- Now, locate the secondary safety latch. This is often a small lever or tab on the bin’s handle or front that you flip or push down to lock the bin in its final position. Engage this latch securely. On some models (like the Shark IZ400), you must rotate a dial on the bin to lock it.
- Give the bin a gentle but firm tug backward. It should not move at all. If it wiggles, it’s not locked.
Pro Tip: Watch the official Shark installation video for your specific model on YouTube. Seeing the correct motion is invaluable.
Step 4: The Power Cycle Reset
Even with the bin perfectly installed, the error message may persist on the vacuum’s display because the control board’s memory still holds the “bin missing” fault. You must reset it.
- Ensure the bin is locked in place.
- Plug the vacuum back into the wall outlet.
- Press the power button. If the error is still there, unplug it again.
- Wait a full 30 seconds. This allows the capacitors in the control board to fully discharge.
- Plug it back in and try again.
Model-Specific Nuances: Navigator, Vertex, and IZ Series
While the core process is the same, the devil is in the details. Here’s what’s unique about popular Shark lines.
Visual guide about Shark Vacuum Dust Bin Not Installed
Image source: sharkvacuum.blog
Shark Navigator & Rotator (NV350, NV356, etc.)
These models use a simple push-and-click system with a secondary latch lever on the front of the bin. The most common issue here is users forgetting to flip the secondary lever after the initial click. The contacts are on the back of the bin. The seal is a simple foam strip.
Shark Vertex (AZ6002, AZ6003, etc.)
The Vertex has a more complex, rotating bin lock. After pushing the bin in, you must rotate the large dial on the front of the bin clockwise until it locks. The error is frequent if you stop rotating too soon. The contacts are on the bottom rear of the bin. The seal is a more robust rubber gasket that can attract a lot of embedded hair.
Shark IZ Series (IZ400, IZ420, etc.)
These are the “anti-hair wrap” stick vacuums. The bin installation is different—you slide it in from the front, then twist and lock it. The sensor is very sensitive to alignment. The bin’s release button must be fully depressed during installation. The contacts are tiny and can be easily clogged with fine dust.
When Fixing Doesn’t Work: Advanced Troubleshooting
You’ve cleaned, you’ve clicked, you’ve reset. The error persists. Now what?
1. Perform a Thorough Deep Clean
With the bin removed, use a soft, dry toothbrush to gently scrub the contact pads on both the bin and inside the vacuum cavity. Follow with a cotton swab and alcohol. For the seal, use a damp cloth to clean its groove, then dry it completely. Ensure no lint or fibers remain.
2. Check for Physical Damage Meticulously
Under good light, inspect every plastic tab, clip, and slot on both the bin and vacuum. Use a magnifying glass if needed. Look for:
- Micro-cracks in the plastic, especially around stress points.
- Warped areas that would prevent a flush fit.
- Missing or mangled plastic tabs on the bin that are supposed to press the sensor switch.
If you find damage, you may need a replacement part. Shark sells parts directly, or you can find them on sites like VacParts.com.
3. Test the Sensor Switch Manually (Advanced)
This is for the technically inclined. With the vacuum unplugged and bin removed, locate the small sensor switch inside the cavity. Gently press it down with a non-metallic tool (like a plastic pen cap). You should feel a soft click. While holding it down, have someone plug in the vacuum and try to turn it on. If it starts, the switch is working, and the problem is definitely the bin not pressing it. If it still gives the error, the switch or the control board may be faulty.
4. The Factory Reset
Some Shark models have a hidden reset procedure involving holding certain buttons while plugging in. This varies wildly by model. Search online for “[Your Exact Shark Model Number] factory reset”. The model number is on the back or bottom of the vacuum. This can clear erroneous error codes stored in memory.
Prevention is the Best Cure: Long-Term Care Tips
To avoid this annoying error in the future, adopt these simple habits.
Make Cleaning the Contacts Part of Your Routine
Every 1-2 months, or if you notice a drop in suction, do a quick contact clean. It takes 60 seconds. Just swab those metal pads with an alcohol-dampened cotton swab. It’s the single most effective preventive measure.
Don’t Overfill the Bin
Empty the bin when it’s about two-thirds full. An overfilled bin can bulge, preventing it from seating correctly. It also makes cleaning the seal and contacts messier.
Be Gentle with the Latches
Never force the bin. If it doesn’t click easily, remove it and check for obstructions. Use the correct motion (push, click, flip/rotate). Aggressive handling is what breaks the plastic latches.
Regular Full-System Cleaning
Once a quarter, do a full tear-down. Wash the bin (top rack dishwasher safe for most, check manual), clean the pre-motor filter, and check the brush roll for hair wraps. A clean system is a happy system that functions as designed.
Conclusion: Knowledge is Power (and a Clean Home)
The dreaded “Dust Bin Not Installed” message on your Shark vacuum is almost always a manageable, user-fixable issue. It’s a testament to the machine’s smart engineering, designed to protect itself and your home from a loss of suction and potential motor damage. By understanding that this error is about position and seal detection, not a broken motor, you empower yourself to be the fixer. Remember the core sequence: Unplug, Inspect, Clean Contacts & Seal, Click Firmly, Power Cycle. Armed with this knowledge and a little patience, you can diagnose and solve this problem in minutes, not days. You’ll save money on unnecessary service calls and extend the life of your valuable cleaning tool. So next time that message pops up, smile, roll up your sleeves, and get to know the intricate, clever machine that keeps your floors sparkling. It’s not a foe; it’s just a friend who needs its hat put on straight.
Frequently Asked Questions
Why does my Shark vacuum say “dust bin not installed” when it clearly is?
This almost always means the bin is not fully seated or locked. The most common reason is forgetting to engage the secondary latch or safety lock after the initial “click.” It can also be caused by dirty electrical contacts on the bin or inside the vacuum, which prevent the sensor from making a connection.
Is it dangerous to run my Shark vacuum with this error showing?
Yes, it is not recommended. The vacuum is designed to lock out operation without the bin properly installed to prevent debris from blowing back into the air and to protect the motor from overheating due to incorrect airflow. Forcing it to run could cause damage and void your warranty.
How do I clean the electrical contacts on my Shark dust bin?
First, unplug the vacuum and remove the bin. Locate the small metal pads on the back or bottom of the bin. Lightly dampen a cotton swab with isopropyl (rubbing) alcohol and gently rub the contacts until they are clean and shiny. Do the same for the corresponding prongs inside the vacuum’s bin cavity. Let everything dry completely before reinstalling.
My bin clicks but the error won’t go away even after a reset. What now?
If you’ve cleaned the contacts and are sure the bin is locked, inspect the soft rubber seal around the bin’s opening for cracks or debris. Also, closely examine the plastic latch mechanism on both the bin and vacuum for any broken tabs or cracks. A damaged seal or broken latch tab can prevent the sensor from activating even if the bin feels secure.
Does the “dust bin not installed” error affect all Shark models the same way?
The core principle is the same across all models, but the latching mechanism differs. Navigator models use a push-and-flip lever. Vertex models require a rotating dial after pushing the bin in. IZ stick vacuums involve a slide-and-twist motion. Always consult your user manual for the exact installation steps for your specific model number.
When should I contact Shark customer support about this error?
Contact support if you’ve completed all troubleshooting steps: thoroughly cleaned contacts and seals, confirmed no physical damage to latches, and performed a full power cycle reset, and the error persists. Also, contact them if you identify a broken plastic part on the vacuum body itself or if the vacuum is still under warranty and you suspect a faulty sensor or control board.