Is your Shark SV780 vacuum refusing to charge? This is a common but frustrating issue often caused by simple, fixable problems like dirty charging contacts, a failing battery, or a faulty charger. Don’t replace parts blindly! Our guide walks you through a systematic, step-by-step diagnosis from the easiest checks to more complex solutions, empowering you to identify and fix the root cause yourself and get your vacuum back in action.
You’ve just finished a great cleaning session with your trusty Shark SV780 Vertex Pro, feeling that satisfying buzz of a job well done. You place it back on its sleek charging dock, the little LED light should blink to life, and you walk away. But later, you notice… nothing. No light. No charging sound. Just a dead vacuum on its stand. The dreaded “Shark SV780 not charging” problem has struck. Before you panic and start shopping for a new vacuum or an expensive battery, take a deep breath. This is one of the most common issues with all cordless vacuums, and the solution is often simpler and cheaper than you think. We’re going to diagnose this problem together, methodically, like a mechanic with a checklist. We’ll cover everything from the 30-second fix you can do right now to understanding when a part truly needs to be replaced. Let’s get your Shark back to its hunting best.
Key Takeaways
- Start Simple: Over 50% of “not charging” issues are resolved by simply cleaning the vacuum and charger’s metal charging contacts with a dry, lint-free cloth.
- Check the Obvious: Always verify the wall outlet is working, the charger’s LED indicator is lit (if equipped), and the vacuum is seated correctly on the charging dock.
- Battery Lifespan is Key: The SV780’s lithium-ion battery typically lasts 2-3 years. A sudden drop in runtime or failure to hold a charge usually means the battery needs replacement.
- Charger Failure is Common: Charger cables can fray internally, and adapter circuits fail. Testing with a known-good charger (same model) is the definitive test.
- Software Glitches Happen: A full power cycle reset by removing the battery for 30 seconds can clear temporary electronic faults that prevent charging communication.
- Warranty First: If your SV780 is under the limited warranty, contact Shark Customer Support before attempting repairs that could void coverage.
- Safety First: Never attempt to charge a swollen, leaking, or physically damaged battery. Dispose of it properly at an e-waste facility.
📑 Table of Contents
- Understanding the Charging Ecosystem: It’s a Team Effort
- Step 1: The Immediate 5-Minute Diagnostic Routine
- Step 2: Advanced Troubleshooting – Isolating the Faulty Component
- Step 3: The Battery Deep Dive – Health, Age, and Replacement
- Step 4: The Charger & Dock – When the Power Supply Fails
- Step 5: When All Else Fails – Internal Electronics & Professional Help
- Preventive Maintenance: Keeping Your SV780 Charging for Years
- Conclusion: Empowered to Fix
Understanding the Charging Ecosystem: It’s a Team Effort
To solve the puzzle of a non-charging Shark SV780, we must first understand that charging isn’t a single action. It’s a conversation between three key players: the Battery inside the vacuum, the Charging Dock & Contacts on the vacuum itself, and the Wall Charger & Adapter. If any one of these fails to do its part, the entire system grinds to a halt. The vacuum’s internal charging circuit also acts as the referee, ensuring safe communication. Our troubleshooting will follow this chain, checking each link from the wall outlet to the battery cells.
The Role of the Lithium-Ion Battery
Your SV780 uses a high-capacity lithium-ion (Li-ion) battery pack, typically rated around 300-400 mAh for its runtime. These batteries are fantastic but have a finite lifespan measured in “charge cycles.” A full cycle is going from 100% to 0% and back. After 2-3 years of regular use (300-500 cycles), the battery’s ability to hold a charge degrades significantly. It might charge to 100% in minutes but die in 5 minutes of use. Or, it might fail to accept a charge at all if its internal protection circuit has tripped due to age or a past event like overheating.
The Critical Connection: Charging Contacts
Look at the bottom of your SV780 and the top of its charging dock. You’ll see two (sometimes three) silver metal pins. These are the points of physical and electrical connection. Hair, dust, carpet fibers, and general grime can coat these pins, creating an insulating layer. This is the #1 cause of charging failures. The vacuum may sit perfectly on the dock, but if the pins can’t touch, no power flows. It’s like having a plug with a layer of paint on the prongs.
The Power Supplier: The Charger and Adapter
The brick-like charger that plugs into your wall is more than just a simple wire. It contains circuitry that converts your home’s AC power into the specific DC voltage (usually around 18-20V) and amperage your vacuum battery requires. These chargers can fail internally—a capacitor blows, a solder joint cracks—without any visible signs. The cable can also develop internal breaks from constant bending, especially near the connectors. If the charger’s output is weak or inconsistent, the vacuum’s smart circuitry will refuse to charge to prevent damage.
Step 1: The Immediate 5-Minute Diagnostic Routine
Before you touch a screwdriver or open anything, perform this essential sequence. It solves most user-reported “Shark SV780 not charging” cases.
Visual guide about Shark Sv780 Not Charging
Image source: static-data2.manualslib.com
1. The Power Source Check
This sounds absurdly simple, but it’s crucial. Unplug the charger from the wall and plug a lamp or phone charger into the same outlet. Does it work? If not, you have a tripped breaker, a switched-off outlet, or a faulty circuit. Check your home’s electrical panel. Also, avoid using power strips or extension cords if possible; plug the charger directly into a known-good wall outlet.
2. The Visual Inspection & Clean
This is the most important physical step. With the vacuum off and unplugged from everything, grab a dry, lint-free microfiber cloth. Gently but firmly rub the charging pins on the bottom of the vacuum. Then, do the same for the corresponding pins on the charging dock. You’re looking to remove any film of dust or debris. For stubborn grime, slightly dampen the cloth with a drop of isopropyl alcohol (rubbing alcohol), wring it out until nearly dry, clean the pins, and let them air dry for 60 seconds. Never use water or liquids directly on the vacuum or dock.
3. The Seated Position Test
Place the vacuum on the dock. Apply a little downward pressure at the handle end and then the front. Sometimes the dock’s alignment can shift slightly. Listen for a faint click or feel for a slight magnetic pull that indicates proper seating. The vacuum should sit flush and level without wobbling. Consult your manual for the exact correct alignment.
4. The Charger & Indicator Light Analysis
Does your SV780 charger have a status LED light (usually on the brick itself)? If yes, what does it do when you plug it into the wall (with the vacuum NOT on the dock)? A solid green light typically means “ready.” A blinking or red light might indicate a fault. Now, place the vacuum on the dock. Does the light change? If there’s no light at all on the charger when plugged into the wall, the charger or the wall outlet is the problem. If the charger light is on but the vacuum’s own battery indicator (on the vacuum body) doesn’t light up when on the dock, the communication path is broken—likely dirty contacts or a vacuum-side issue.
Step 2: Advanced Troubleshooting – Isolating the Faulty Component
If the quick fixes didn’t work, we need to play detective and isolate which part of the chain is broken. This requires a bit of methodical swapping and testing.
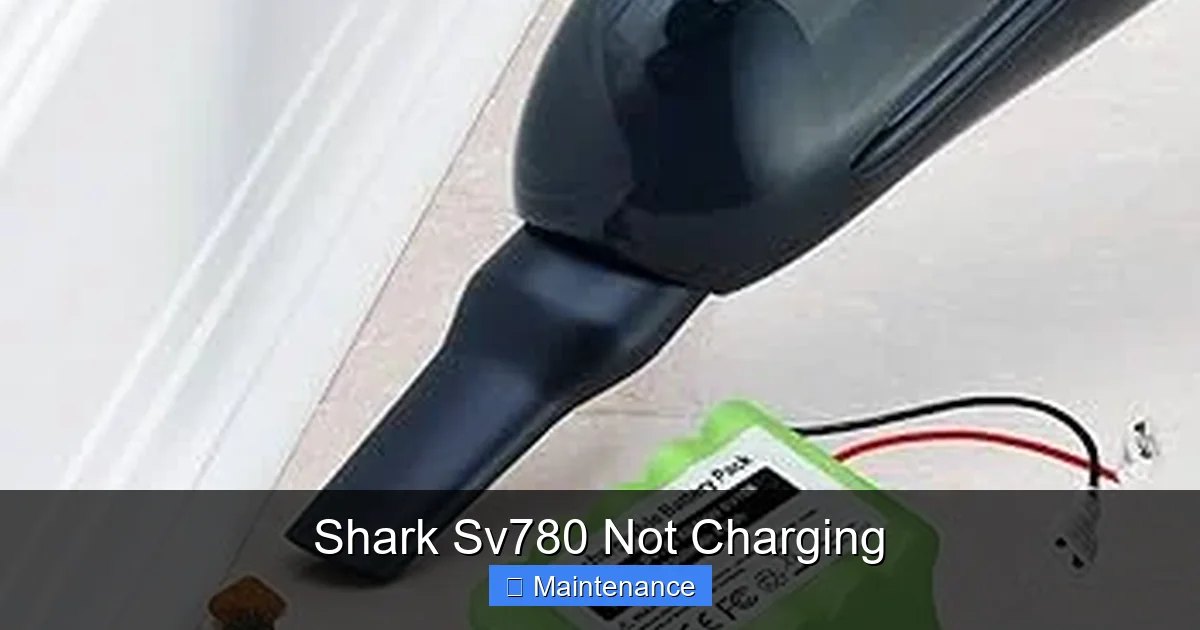
Visual guide about Shark Sv780 Not Charging
Image source: m.media-amazon.com
Testing the Wall Charger
The easiest way to test a charger is with a multimeter set to DC volts, but not everyone has one. The next best method is the known-good swap. Do you have a friend or family member with a compatible Shark cordless vacuum (like an SV780, SV780 series, or sometimes other models with the same barrel plug)? Borrow their charger. Plug yours into your vacuum on their dock or on the floor. If it charges, your original charger is dead. If it still doesn’t charge, the problem lies within the vacuum itself (battery or internal circuit).Important: Ensure the borrowed charger has the exact same output voltage and amperage rating printed on it. Using an incompatible charger can damage your battery.
Accessing and Inspecting the Battery
The SV780’s battery is removable. Locate the release latch (usually on the back or underside) and slide or press it to remove the battery compartment. Gently lift out the battery pack. Visually inspect it. Look for:
- Swelling or Bulging: Any puffiness, distortion, or separation of the plastic casing is a severe safety hazard. Stop immediately. Do not charge it. Dispose of it properly.
- Corrosion or Damage: Check the battery’s own metal contact points (where it connects to the vacuum) for green/white crust (corrosion) or bent pins. Clean these gently with a pencil eraser or isopropyl alcohol and a cotton swab.
- Physical Trauma: Any cracks, dents, or punctures? A damaged battery must be replaced.
If the battery looks pristine, re-seat it firmly into the vacuum. Sometimes the connection can become slightly loose. Listen for a click. Try charging again.
The Forced Reset: Power Cycle the Vacuum
Like rebooting your phone, a full power cycle can clear temporary electronic glitches in the vacuum’s charging management system.
- Remove the battery from the vacuum.
- Press and hold the power button on the vacuum for 15-20 seconds. This drains any residual capacitor charge.
- Reinsert the battery firmly.
- Place the vacuum on the charger and wait 5-10 minutes before checking for any indicator lights.
This simple reset fixes a surprising number of “firmware freeze” scenarios.
Step 3: The Battery Deep Dive – Health, Age, and Replacement
If we’ve eliminated the charger and the contacts, the battery is the prime suspect. But how do we know for sure it’s dead and not just a symptom of another problem?
Visual guide about Shark Sv780 Not Charging
Image source: vacuupedia.net
Symptoms of a Failing SV780 Battery
Beyond the absolute “won’t charge at all” scenario, look for these telltale signs of battery degradation:
- Extremely Short Runtime: It used to run for 45 minutes, now it dies in 5.
- Charges Incredibly Fast, Dies Incredibly Fast: This is a classic sign of a cell that has lost most of its capacity. It fills up in 10 minutes because there’s almost no “space” to fill, but it has no energy to give.
- Charger Light Behavior Change: The charger light might blink rapidly or change color after only a few minutes, indicating the battery is “full” (because it can’t take more) but it’s clearly not.
- Vacuum Powers On, But Loses Suction Immediately: Some models have a low-battery cut-off that reduces power before total death.
How to Test Battery Voltage (The DIY Way)
If you have a multimeter, you can get a clear answer. CAUTION: Only attempt this if you are comfortable with basic electronics.
- Remove the battery from the vacuum.
- Locate the battery’s output terminals (the metal pins). Identify the positive (+) and negative (-). Your vacuum’s manual or a teardown video online can help.
- Set your multimeter to DC Volts (20V range is fine).
- Touch the red probe to the + terminal and the black probe to the – terminal.
What you should see: A healthy, fully charged SV780 battery should read slightly above its rated voltage (e.g., if rated 18V, it might read 18.5V-19.5V). A completely dead or failed battery will read below 15V, or fluctuate wildly, or read 0V. A battery that reads in the 16-17V range is likely weak and needs replacement.
Sourcing a Replacement Battery
When replacement is necessary, you have two main paths:
- OEM (Original Equipment Manufacturer): Purchase the exact Shark part number (e.g., XBAT-… series) from Shark’s website, an authorized retailer, or a reputable parts supplier like eReplacementParts.com. This guarantees fit, safety, and performance but is the most expensive option (typically $70-$120).
- High-Quality Third-Party: Companies like Ansmann, Powerextra, or AntonBauer manufacture batteries to the same or higher specifications. Look for ones with robust reviews, explicit compatibility with the SV780, and a solid warranty (2+ years). They often cost 30-50% less than OEM. Avoid ultra-cheap, no-name batteries on Amazon/eBay. They often use inferior cells and lack proper safety circuits, posing fire risks and damaging your vacuum.
Replacing the battery is usually as simple as removing the old one and slotting the new one in. Ensure it clicks into place securely.
Step 4: The Charger & Dock – When the Power Supply Fails
Let’s assume you’ve confirmed the battery is good (voltage is correct) by testing it with a friend’s charger or a multimeter. Now the charger and dock are under suspicion.
Diagnosing a Faulty Charger
Beyond the swap test, inspect the charger cable meticulously. Flex it along its entire length, especially near the plugs. Do you feel or hear a crackle? Does the connection feel loose at either end? These are signs of internal wire breakage. Also, look for pin damage on the barrel plug that goes into the vacuum. A bent or flattened pin won’t make proper contact. Try gently straightening it with needle-nose pliers.
Dock Issues: Alignment and Internal Contacts
The charging dock itself can fail. The metal contact pads on the dock can become oxidized or bent. With the vacuum off, look at the dock’s pins. Are they straight? Are they shiny metal or dull/oxidized? Clean them as described earlier. Also, check the dock’s connection to the wall charger. Is the cable plugged in securely? Is the dock’s plug (if it’s a separate piece) damaged?
If you’re technically inclined, you can open the dock (usually screws on the bottom) to check for loose solder joints on the contact pins or a blown internal fuse. Only do this if the vacuum is out of warranty.
Step 5: When All Else Fails – Internal Electronics & Professional Help
If you’ve tested with a known-good battery and a known-good charger, and the vacuum still shows zero signs of life or charging, the fault lies within the vacuum’s internal charging circuit board or power management system. This is the least common but most complex failure.
The Charging Circuit Board
This small board, often located near the battery compartment, regulates the flow of power from the dock to the battery. It communicates with the battery’s protection circuit. A failed capacitor, a burnt resistor, or a damaged connector here will stop all charging. Diagnosing this requires soldering skills and component-level electronics knowledge.
When to Contact Shark Support or a Repair Shop
If your SV780 is still under the limited warranty (typically 1-3 years depending on purchase date and region), this is your moment. Contact Shark Customer Support. Have your model number (usually on a sticker on the back/underside) and proof of purchase ready. They will troubleshoot with you and, if needed, authorize a repair or replacement. Do not open the vacuum’s main housing if it’s under warranty, as this will almost certainly void it.
If out of warranty, you can contact Shark for out-of-warranty repair quotes, but they often approach the cost of a new vacuum. Your alternative is a local appliance repair shop that specializes in vacuums or small motors. They may be able to diagnose and replace the charging board for a reasonable fee.
Preventive Maintenance: Keeping Your SV780 Charging for Years
An ounce of prevention is worth a pound of cure. Incorporate these habits to maximize your battery life and charging reliability.
Establish a Charging Routine
Lithium-ion batteries prefer to be kept between 20% and 80% for long-term health. Avoid always charging to 100% and leaving it on the dock for weeks at a time (this causes “high voltage stress”). For long-term storage (over a month), charge the battery to about 50%, remove it from the vacuum, and store it in a cool, dry place.
Clean Contacts Monthly
Make it a habit. Once a month, wipe down the charging pins on the vacuum and dock with a dry microfiber cloth. This 10-second habit prevents the #1 cause of failure.
Mind Your Environment
Don’t charge the vacuum in a hot garage, next to a radiator, or in direct sunlight. Heat is the number one enemy of lithium batteries. Also, ensure the vacuum’s air pathways (pre-motor and post-motor filters) are clean. A clogged filter makes the motor work harder, draining the battery faster and generating more heat during use and charging.
Use It Regularly
Don’t let a fully charged battery sit untouched for months. Every few months, run it down to about 30% and recharge it. This helps maintain battery chemistry health.
Conclusion: Empowered to Fix
Facing a “Shark SV780 not charging” issue is frustrating, but it’s rarely a death sentence for your vacuum. By understanding the charging ecosystem—battery, contacts, and charger—you can methodically diagnose the problem. Start with the simple, free fixes: check your outlet, clean those critical metal contacts, and ensure a perfect dock seat. Move on to the battery swap test or charger swap test to isolate the faulty component. Remember that batteries have a lifespan, and replacement is a normal and expected part of ownership for any cordless vacuum after a few years. Always prioritize safety: never ignore signs of a swollen battery, and consult your warranty first. With this guide, you’re no longer a passive victim of a charging problem; you’re an empowered troubleshooter equipped to restore your Shark SV780 to its full, powerful cleaning potential. Now, go grab that microfiber cloth and get started!
Frequently Asked Questions
Why is my Shark SV780 not charging even though it’s on the dock?
The most common reason is dirty charging contacts on either the vacuum or the dock. Hair and dust create an insulating barrier. Clean both sets of metal pins thoroughly with a dry microfiber cloth. Also, ensure the vacuum is seated correctly and level on the dock.
The charger has a light, but the vacuum still won’t charge. What gives?
If the charger’s own LED is lit when plugged into the wall, the wall power is good. The issue is likely in the connection between the charger and the vacuum, or within the vacuum itself. First, clean the charger’s barrel plug and the vacuum’s charging port. If that fails, the charger’s output may be weak, or the vacuum’s internal charging circuit/battery may be faulty.
How do I know if my SV780 battery is dead and needs replacing?
Key signs include: a sudden, drastic drop in runtime (e.g., from 45 mins to 5 mins), the battery charging to 100% in just a few minutes but then dying instantly, or physical swelling. A battery that is 2-3 years old is at the end of its typical lifespan and is a prime candidate for replacement.
Can I use a third-party charger for my Shark SV780?
You can, but you must ensure it has the exact same voltage (V) and at least the same amperage (A) rating as the original Shark charger. Using a charger with the wrong specs can damage your battery or vacuum. For safety and longevity, the original or a high-quality, guaranteed-compatible replacement is best.
My vacuum was working fine, then just stopped charging overnight. Why?
This often points to a temporary electronic glitch or “firmware freeze” in the vacuum’s charging management system. Perform a full power cycle reset: remove the battery, press and hold the vacuum’s power button for 20 seconds, reinsert the battery firmly, and try charging again.
Is it safe to leave my Shark SV780 on the charger all the time?
For short periods (a few days), it’s generally safe due to the battery’s built-in protection circuit that stops charging at 100%. However, for long-term storage or if you rarely use the vacuum, it’s better to charge the battery to ~50%, remove it from the vacuum, and store it separately in a cool, dry place to maximize battery lifespan.