Is your Shark SV1106 handheld vacuum refusing to charge? This frustrating issue is common but often fixable. The problem typically stems from battery degradation, dirty charging contacts, a faulty charger, or a tripped thermal cutoff. This guide provides a step-by-step diagnostic process, from simple cleaning to advanced resets and battery replacement advice. By following these structured troubleshooting steps, you can diagnose the exact cause and restore your Shark SV1106 to full power, saving you from an unnecessary replacement.
Key Takeaways
- Understanding Shark Sv1106 Not Charging: Provides essential knowledge
📑 Table of Contents
- Introduction: The Dreaded “Shark SV1106 Not Charging” Moment
- Understanding Your Shark SV1106: The Power System
- Phase 1: The 15-Minute Diagnostic & Basic Fixes
- Phase 2: Advanced Troubleshooting & Reset Procedures
- Phase 3: When to Suspect the Battery or Internal Electronics
- Prevention: Keeping Your Shark SV1106 Alive and Charging
- Conclusion: From “Not Charging” to Fully Powered
Introduction: The Dreaded “Shark SV1106 Not Charging” Moment
You go to grab your trusty Shark SV1106 handheld vacuum for a quick spill cleanup. You press the power button. Nothing. No lights, no whir. You think, “Maybe I left it on.” You plug it into its wall charger. Still nothing. The charging indicator light, that little beacon of hope, remains dark. Panic sets in. Is it dead? Is it a paperweight now? The phrase “Shark SV1106 not charging” becomes your new, frustrating reality.
Take a deep breath. This is one of the most common issues with the Shark SV1106 and its siblings, and while incredibly annoying, it is frequently solvable without needing to buy a new vacuum. The problem usually lies somewhere between the wall outlet and the battery cells inside the machine. Your mission, should you choose to accept it, is to become a detective and systematically eliminate possible causes. This guide will walk you through every single step, from the 30-second fix to the more involved procedures, giving you the knowledge to diagnose and potentially fix your “Shark SV1106 not charging” problem yourself.
Understanding Your Shark SV1106: The Power System
Before we start poking and prodding, it helps to understand the basic components involved in charging your SV1106. Think of it as a simple chain: Wall Outlet -> Charger Brick & Cable -> Charging Port on Vacuum -> Charging Circuit -> Battery. If any single link in this chain is broken, the vacuum won’t charge. The “Shark SV1106 not charging” symptom is the final output of that broken chain.
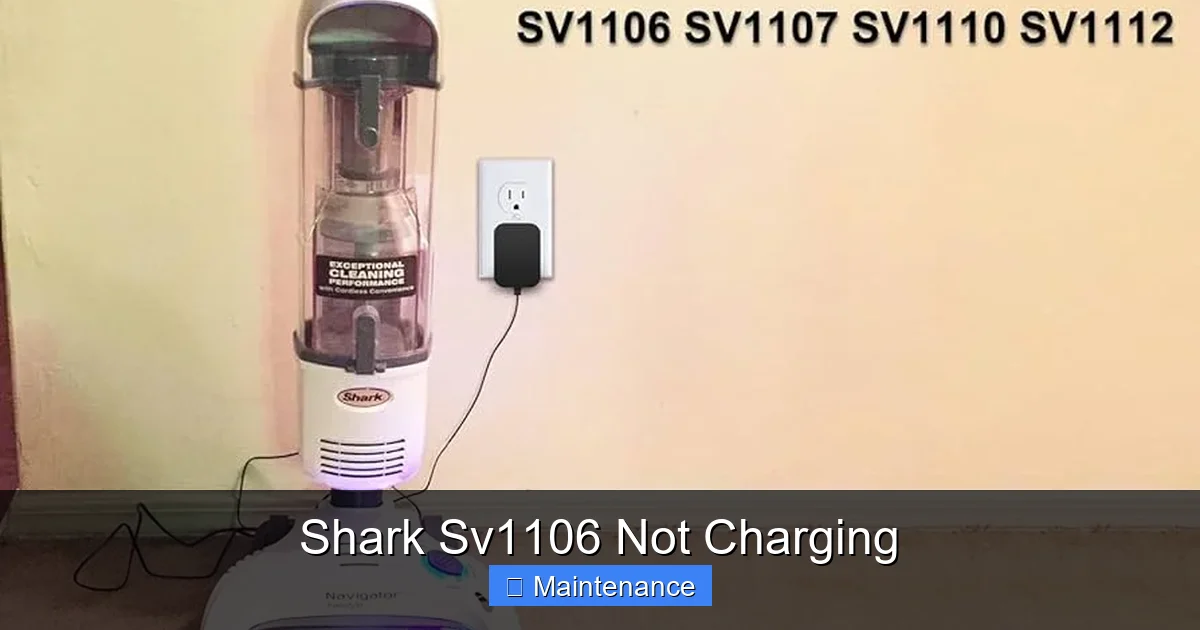
Visual guide about Shark Sv1106 Not Charging
Image source: m.media-amazon.com
The Heart of the Matter: The Lithium-Ion Battery
The SV1106 uses a lithium-ion (Li-ion) battery pack. These are fantastic power sources but have a finite lifespan. They are rated for a certain number of charge cycles (usually 300-500 full cycles). A “cycle” isn’t necessarily a full 0-100% charge; it’s cumulative. Over time, the battery’s ability to hold a charge diminishes. After 2-3 years of regular use, it’s very common for the battery to be so depleted that it won’t accept a charge at all, or it charges for 5 minutes and dies instantly. This is the single most likely culprit for an older SV1106 that simply won’t charge.
The Gateway: Charging Contacts and Port
Look at the bottom of your SV1106. You’ll see two metal charging pins. Inside the charging dock (the part you plug into the wall), there are two metal springs or pads. These must make perfect, clean contact for power to flow. Dust, hair, debris, and oxidation (a white, crusty buildup) can insulate these contacts, preventing any electrical connection. It’s astonishing how often a thorough cleaning of these tiny pins solves the “not charging” mystery.
The Middleman: The Charger Adapter
That little black brick with the cord is more than just a wire. It’s an AC/DC adapter that converts your wall’s high-voltage AC power into the lower-voltage DC power (typically around 15-20V) the vacuum needs. These adapters can fail internally. A frayed cable, a loose connection at either end, or a dead adapter will give you the exact same symptoms as a dead battery.
Phase 1: The 15-Minute Diagnostic & Basic Fixes
This is your first line of attack. Don’t skip these steps. They solve a huge percentage of “Shark SV1106 not charging” cases with zero cost and minimal effort.

Visual guide about Shark Sv1106 Not Charging
Image source: i.ytimg.com
Step 1: The Power Source Check
Before you blame the vacuum, blame the wall. Plug a known-working device (like your phone charger) into the same outlet you use for the Shark. Does it work? If not, check your circuit breaker. Try a different outlet in a different room. This rules out a dead or switched-off wall outlet as the problem.
Step 2: The Charger & Cable Inspection
Examine your Shark charger from tip to tail. Look for any cuts, frays, or chew marks on the cable. Check the connection points at both the wall plug and the small round plug that goes into the vacuum. Wiggle the cable gently at both ends while the other end is plugged into a powered outlet. Do you see the charging light on the vacuum flicker? If so, you have a broken wire or loose connection in the cable or plug. The fix is a new, compatible charger. You can often find third-party replacements cheaper than an official Shark part, but ensure the voltage (V) and amperage (A) ratings match exactly. Using an incorrect charger can damage your vacuum.
Step 3: The Contact Cleaning Ritual (The Most Common Fix)
This is the golden step. You will need:
- A cotton swab (Q-tip)
- Isopropyl alcohol (90%+ is best, 70% works)
- A toothpick or plastic dental tool (optional)
- A dry, lint-free microfiber cloth
Procedure:
- Unplug everything. Safety first.
- Turn the SV1106 over. Locate the two silver charging pins on the bottom. They are likely covered in a gray/black film of dust and oxidation.
- Dampen a cotton swab with isopropyl alcohol. It should be wet, not dripping.
- Gently scrub each metal pin, rotating the swab to clean all surfaces. You’ll see the grime transfer to the swab. Use a dry swab afterward to wipe away any residue.
- For stubborn white oxidation crust, gently use a toothpick to lightly scrape it off. Be careful not to gouge the metal or plastic.
- Now, clean the inside of the charging dock. Use a cotton swab dipped in alcohol to clean the metal springs/pads. Ensure debris isn’t blocking the path.
- Let both the vacuum pins and the dock contacts air dry for 2-3 minutes. Isopropyl alcohol evaporates incredibly fast.
- Place the vacuum firmly into the dock. You should feel it seat properly. Plug the charger into the wall.
Watch for the charging light (usually orange or red). If it comes on, you’ve fixed it! If not, proceed to the next phase.
Phase 2: Advanced Troubleshooting & Reset Procedures
If the simple cleaning didn’t work, we need to dig a little deeper. These steps address internal safety features and potential electronic glitches.
Visual guide about Shark Sv1106 Not Charging
Image source: lightcheckup.com
The Thermal Reset: Bypassing the Safety Switch
Your Shark SV1106 has a thermal cutoff fuse. If the motor gets too hot (from a clogged filter, a full dustbin, or running on a thick carpet for too long), this fuse “trips” and cuts power to protect the electronics. A side effect is that it can also prevent the vacuum from charging. The fuse needs to cool down and reset, but sometimes it gets stuck. Here’s how to force a full reset:
- Unplug the charger from the wall.
- Remove the vacuum from the charger.
- Press and hold the power button on the vacuum for 15-30 seconds. This drains any residual power from the capacitors.
- While still holding the button, plug the charger back into the wall and seat the vacuum in the dock. Keep holding the power button for another 10 seconds.
- Release the button. Look for the charging light. This “hard reset” often clears a tripped thermal switch and wakes up a seemingly dead unit.
Filter and Dustbin Check: The Hidden Culprit
A severely clogged filter or an overflowing dustbin can cause enough backpressure and motor strain to overheat the unit and trigger safety locks. Even if it’s not the primary cause of the charging issue, it’s a critical check.
- Empty the dustbin completely. Tap it out and wipe the inside.
- Remove the filter (usually a gray foam pre-motor filter and a white HEPA post-motor filter).
- Gently tap out debris. Do not wash the HEPA filter unless the manual explicitly says it’s washable. The foam filter is often washable with cold water—let it dry completely for 24 hours before reinserting.
- Check the air pathways for any clumps of hair or lint blocking airflow.
- Reassemble everything correctly and try charging again.
The “Wiggle and Wait” Test
Sometimes the connection between the charger plug and the vacuum’s port is slightly loose or the internal charging port solder joints are cracked (a common failure point after drops). Plug the charger into the vacuum. Gently wiggle the plug side-to-side and up-and-down. Watch the charging light intently. Does it flicker on at any point? If yes, you likely have a loose charging port inside the vacuum. This requires opening the machine and re-soldering the port or replacing it—a job for someone with electronics repair skills.
Phase 3: When to Suspect the Battery or Internal Electronics
If you’ve meticulously cleaned contacts, tried a known-good charger, performed the thermal reset, and ensured filters are clean, and you still have a “Shark SV1106 not charging” situation, the problem is almost certainly internal.
Signs of a Dead Battery
How can you be sure it’s the battery?
- Age: Is your vacuum more than 2-3 years old? That’s the typical lifespan.
- Sudden Death: It was working fine, then one day it wouldn’t hold a charge at all.
- No Light, No Sound: When plugged in, there is absolutely no indicator light, even after cleaning contacts.
- Extremely Short Runtime: If it charges but dies in under 60 seconds, the battery is at end-of-life.
The only definitive test is a multimeter. With the vacuum unplugged, you can carefully open the battery compartment (usually screws on the bottom) and test the battery pack’s voltage output. If it reads significantly below its rated voltage (often 14.4V or 16V for the SV1106), it’s dead. Replacing the battery is the solution. You can find replacement batteries online by searching for “Shark SV1106 battery.” Ensure you get a reputable brand with good reviews, as cheap batteries can be unsafe.
The Frightening Possibility: Charging Circuit Failure
Less common, but possible, is a failure of the small charging circuit board inside the vacuum. This is the logic board that manages the flow of electricity to the battery. If this fails, the vacuum won’t charge even with a perfect battery and charger. Symptoms include a completely dead vacuum with no lights, even after a battery swap. Diagnosing this requires electronics expertise. At this point, the cost of professional repair may approach the cost of a new vacuum, especially for an older model.
Prevention: Keeping Your Shark SV1106 Alive and Charging
An ounce of prevention is worth a pound of cure. Adopt these habits to maximize the life of your SV1106 and avoid the “not charging” headache.
Develop a Charging Routine
Lithium-ion batteries prefer to be kept at a moderate charge. The best practice is to store your SV1106 on its charging dock after every use. The charger is designed to switch to a “trickle charge” or maintenance mode once the battery is full, so keeping it plugged in is not harmful. Avoid repeatedly using the vacuum until it’s completely dead (0%). Try to recharge it when you notice a significant drop in power. Deep discharges stress the battery.
Environmental and Storage Care
Do not store your vacuum in a hot garage or freezing cold basement. Extreme temperatures (above 85°F/29°C or below 32°F/0°C) degrade Li-ion batteries rapidly. Store it in a climate-controlled area, ideally on its dock. Also, ensure the charging dock itself is placed on a clean, dust-free surface. Dust settles into the dock’s contact points over time.
Regular Maintenance Schedule
Make it a habit to clean the charging contacts on the vacuum and in the dock every 1-2 months with a dry cotton swab. Do a more thorough alcohol cleaning every 6 months. Clean or replace your filters as per the manual (usually every 3 months with regular use). A clean vacuum runs cooler and more efficiently, reducing stress on the motor and battery.
Conclusion: From “Not Charging” to Fully Powered
Facing a “Shark SV1106 not charging” problem is a rite of passage for owners of this otherwise fantastic little vacuum. It’s a testament to its popularity that so many units are still in circulation, facing the inevitable challenges of battery age and wear. The key takeaway is this: do not immediately assume the worst. The solution is almost always found in the systematic process we’ve outlined. Start with the free, fast fixes—checking the outlet, inspecting the charger, and especially cleaning those critical metal contacts. You will be amazed how often this resolves the issue.
If those steps fail, the thermal reset is your next powerful tool. Only after exhausting these simple, no-cost interventions should you begin to suspect the battery or internal electronics. And even then, a battery replacement is often a viable and economical fix, breathing new life into your trusted cleaning tool for another 2-3 years. Remember to always consult your warranty first. By understanding your Shark SV1106’s power system and committing to regular, simple maintenance, you can keep it charging strongly and ready to tackle messes for the long haul. Now, go plug it in, clean those contacts, and hear that satisfying charging light come on. Your clean floors await.
Frequently Asked Questions
What is Shark Sv1106 Not Charging?
Shark Sv1106 Not Charging is an important topic with many practical applications.