Choosing the correct Shark Rocket vacuum filters replacement is non-negotiable for maintaining peak suction power and ensuring clean, healthy air in your home. These filters trap fine dust, allergens, and debris that your primary brushroll misses. Using worn or incorrect filters reduces performance, strains the motor, and can send pollutants back into your living space. Regularly replacing or cleaning your filters—typically every 3-6 months for foam/felt and 6-12 for HEPA—is the simplest, most cost-effective way to extend your vacuum’s life and safeguard your family’s respiratory health. Always verify your exact Shark Rocket model number for a perfect fit.
Key Takeaways
- Correct Filter Identification is Crucial: Shark Rocket models (like HV322, HV301, HV380) use different filter types and sizes. Always confirm your model number before purchasing a replacement.
- Multiple Filter Types Serve Different Jobs: Most systems use a 2 or 3-stage filtration: a foam pre-motor filter, a felt filter, and often a post-motor HEPA filter. Each has a specific role and replacement schedule.
- Regular Replacement Boosts Performance & Health: Clogged filters restrict airflow, drastically reducing suction and potentially overheating the motor. They also fail to capture allergens, compromising indoor air quality.
- Reusable vs. Disposable Filters: Foam and some felt filters are often washable and reusable. True HEPA filters are typically disposable and must be replaced, not washed, to maintain their 99.97% efficiency rating.
- Installation is Simple but Must Be Done Correctly: Filters usually click or slide into place. Installing them backwards, missing seals, or forgetting to reinstall all filters will cause immediate performance loss and error codes.
- Genuine vs. Generic Filters: Genuine Shark filters guarantee fit and performance. High-quality third-party filters can be cost-effective but must meet exact specifications to avoid damage or poor filtration.
- Maintenance is More Than Just Replacement: Between replacements, gently tap out loose debris from foam filters and wash them monthly (if designed for it). This extends their life and maintains optimal airflow.
📑 Table of Contents
- Why Your Shark Rocket’s Filters Are the Unsung Heroes of Clean
- Decoding Your Shark Rocket Filtration System: It’s Usually a Team Effort
- How to Identify Your Exact Model and Find the Perfect Replacement
- The Step-by-Step Guide to Replacing Your Shark Rocket Filters
- Maintenance Between Replacements: Maximizing Filter Life and Performance
- Buying Shark Rocket Filters: Genuine vs. Aftermarket & Where to Shop
- The Real Cost of Neglect: What Happens When You Skip Filter Replacement
- Conclusion: A Simple Habit for a Powerful, Healthy Home
Why Your Shark Rocket’s Filters Are the Unsung Heroes of Clean
You love your Shark Rocket vacuum. Its powerful suction, versatile design, and agile handling make quick work of dust bunnies, pet hair, and tracked-in dirt. But that impressive performance doesn’t happen by magic. At the heart of every powerful, efficient Shark Rocket is a sophisticated multi-stage filtration system, and its filters are the hardworking heroes that often go unnoticed—until they fail. Understanding Shark Rocket vacuum filters replacement isn’t just a maintenance chore; it’s the key to preserving your investment, ensuring your home is truly clean, and protecting your family’s health.
Think about it: your vacuum’s brushroll agitates carpet fibers and lifts debris. The motor creates powerful suction to pull that debris—along with microscopic particles like dust mite feces, pollen, mold spores, and bacteria—into the machine. Without a proper filtration system, all those particles would simply be blown back out into your breathing space through the exhaust. The filters are the critical barrier, trapping what you can’t see. When these filters become clogged with fine dust and debris, airflow chokes. Suction power plummets, the motor works harder and hotter (potentially shortening its lifespan), and the very particles you’re trying to remove are recirculated. This makes timely Shark Rocket vacuum filters replacement one of the most important aspects of vacuum ownership.
Decoding Your Shark Rocket Filtration System: It’s Usually a Team Effort
Shark Rocket vacuums, including popular models like the HV322, HV301, HV380, and newer versions, typically employ a multi-stage filtration process. This means air passes through several filters, each designed to catch particles of different sizes. Identifying which filters your specific model uses is the first step in proper maintenance. Don’t worry; it’s simpler than it sounds.

Visual guide about Shark Rocket Vacuum Filters Replacement
Image source: sharkvacuum.blog
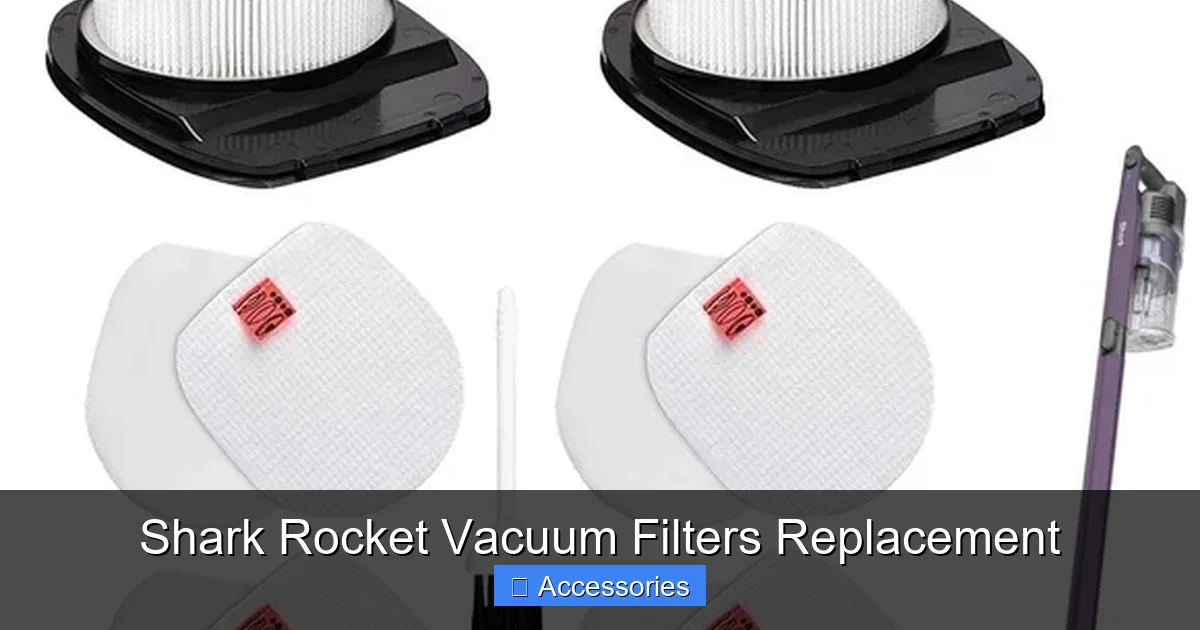
The Common Filter Lineup: Foam, Felt, and HEPA
Most Shark Rocket upright and stick vacs use a combination of the following:
- Foam Pre-Motor Filter: This is usually the first line of defense after the air and debris enter the vacuum. It’s a thick, spongy, typically gray or blue filter that traps larger particles like hair, lint, and bigger dust clumps. Its primary job is to protect the more delicate downstream filters and the vacuum’s motor from getting clogged with large debris. Crucially, this foam filter is almost always washable and reusable. You should clean it regularly—every month or so with mild soap and water—and let it dry completely for 24 hours before reinserting. Its replacement schedule, when it eventually wears out, is often cited as every 3-6 months with regular use.
- Felt Filter (or Secondary Filter): Located after the foam filter, the felt filter is denser. It captures medium and fine particles that the foam missed. It’s usually a pleated, tan or brown fabric disc or rectangle. Some Shark models combine the foam and felt into a single assembly, while others have them separate. This filter may also be washable depending on the model, but it degrades faster than foam. Check your manual. Its typical replacement interval is also in the 3-6 month range for heavy use.
- Post-Motor HEPA Filter: This is the final guardian. Positioned after the motor, its job is to capture the tiniest, most harmful particles—down to 0.3 microns—with 99.97% efficiency. This includes allergens, bacteria, and viruses. A true HEPA filter is almost always a rigid, pleated paper or fiberglass element (often white) and is never washable. It must be replaced. Shark typically recommends replacing the HEPA filter every 6-12 months, but in homes with allergies, asthma, or pets, you may need to do it more frequently.
Some older or specific Shark Rocket models might have a slightly different configuration, like omitting the separate felt filter. This is why your model number is your best friend. You can usually find it on a sticker on the back or bottom of the vacuum body or on the charging base.
How to Identify Your Exact Model and Find the Perfect Replacement
Before you even think about clicking “buy,” you must know your vacuum’s exact model number. This alphanumeric code (e.g., HV322, HV301, HV380, IZ682) is the key that unlocks the correct filter compatibility. Here’s your foolproof step-by-step guide:
Visual guide about Shark Rocket Vacuum Filters Replacement
Image source: i0.wp.com
Step 1: Locate Your Model Number
Turn your Shark Rocket over and look for a silver or white sticker. It’s commonly on:
- The back of the vacuum wand or body.
- The underside of the foot/head assembly.
- The charging base.
The model number will be clearly printed, often near a barcode. Write it down or take a photo. This is your shopping list item #1.
Step 2: Consult the Official Shark Resource
Go to the official Shark-Ninja website. Navigate to their “Support” or “Parts & Accessories” section. Enter your model number. This will pull up a full parts diagram and list for your specific vacuum. This is the gold standard. You’ll see exactly which filter part numbers (e.g., SF400, SF281, HF40) your machine uses and how they are installed. You can purchase directly from Shark or use this info to shop elsewhere.
Step 3: Understand Part Numbers vs. “Fits” Lists
When shopping on Amazon, Walmart, or vacuum specialty sites, you’ll see listings like “Fits Shark Rocket HV322, HV301, HV380.” This is helpful, but be cautious. A filter might “fit” physically but not perform correctly if the materials or pleat design are different. The safest bet is to find a replacement that lists the exact Shark OEM part number (e.g., “Replaces Shark Part # SF400”). Reputable third-party brands will proudly state which OEM part they replicate.
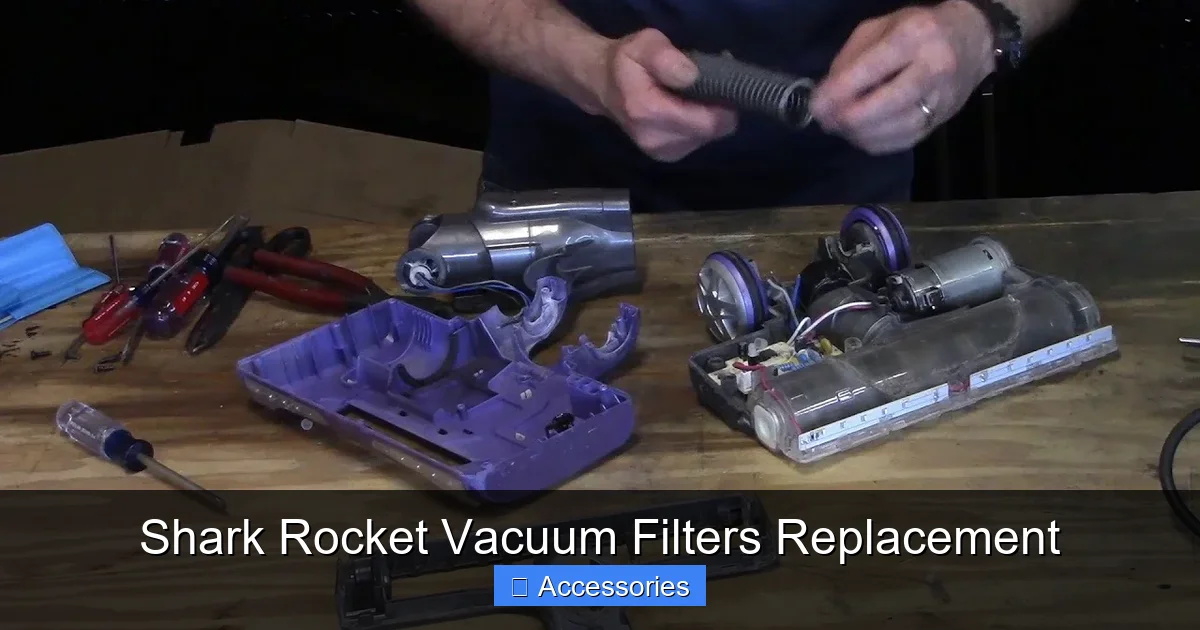
The Step-by-Step Guide to Replacing Your Shark Rocket Filters
Once you have the correct filters in hand, the replacement process is designed to be user-friendly. However, doing it wrong is a common cause of “sudden loss of suction.” Here’s a universal guide, but always cross-reference with your specific model’s manual.
Visual guide about Shark Rocket Vacuum Filters Replacement
Image source: i5.walmartimages.com
General Disassembly and Replacement Process
Tools Needed: Usually none. Just your hands. Maybe a soft brush for cleaning.
- Unplug and Cool Down: Always disconnect the vacuum from the charger and let it cool completely if it was recently used.
- Access the Filter Chamber: On most Shark Rockets, you’ll find a filter access door or cover on the back of the main canister body (the “rocket” part). It’s typically secured with one or two clips or a simple twist-lock. Press the release clips and pull the cover off.
- Remove the Old Filters: You’ll see the filter stack. The foam filter is usually on top. Gently pull it out by its tab or edges. The felt filter or HEPA filter may be sitting in a holder or have a pull tab. Note their orientation—which side faced the incoming air (often the dirtier side) and which faced the motor/outtake.
- Clean the Housing: This is a perfect opportunity. Use a soft brush or a dry cloth to gently remove any dust buildup from inside the filter chamber and from the filter seals/gaskets. A clean housing ensures a good seal with the new filter.
- Install the New Filters: Place the new filters in the exact reverse order of removal. The pre-motor filters (foam/felt) go in first, with the “dirty” side facing the intake. Ensure they sit flat and seal properly against the housing. The HEPA filter goes in last, often clicking into a dedicated slot. Double-check that all filters are seated correctly and any seals are intact. A misaligned filter creates an air leak, killing suction.
- Reattach the Cover: Snap or twist the filter access cover back into place until you hear it click securely.
- Test: Reconnect the charger (if needed for your model) and turn the vacuum on. You should immediately notice a difference in suction strength and sound if the old filters were clogged.
Pro Tip: Take a photo of the correctly installed filter stack with your phone the first time you do it. It’s the fastest reference guide for future replacements.
Maintenance Between Replacements: Maximizing Filter Life and Performance
Replacement is inevitable, but you can stretch the life of your reusable filters and keep your system running efficiently with simple, regular care.
Washing Your Reusable Foam (and Sometimes Felt) Filters
For washable filters, a monthly cleaning is a game-changer.
- How to Wash: Remove the filter. Rinse it under cool running water. Gently squeeze and massage it to release trapped dust. Do not use soap or detergent unless your manual specifies a mild soap, as residues can damage the filter material and reduce airflow. Some users find a tiny drop of dish soap helpful for greasy residue, but rinse, rinse, rinse.
- Drying is Critical: This is the most important step. A damp filter will grow mildew and bacteria, and it will also reduce suction. Squeeze out excess water, then let the filter air-dry completely for at least 24 hours in a well-ventilated area, away from direct sunlight or heat sources. Never use a hair dryer or oven. Patience is required.
- Inspect: Once dry, inspect the foam. Is it still springy and intact, or is it crumbling, tearing, or permanently compressed? If it’s damaged, it’s time for a replacement, even if it hasn’t hit the 3-month mark.
Gentle Cleaning for All Filters
Between washes, you can extend life by tapping a clogged foam or felt filter firmly against the side of a trash can to dislodge loose debris. You can also use a soft-bristle brush (like a clean paintbrush) to gently sweep the surface. Never beat a HEPA filter or attempt to wash it.
Listen to Your Vacuum
Your vacuum will give you signs. A high-pitched whine, a noticeable drop in suction from the wand, or the vacuum frequently shutting off (a safety feature for overheating) are all classic signs of clogged filters. Don’t ignore these warnings; replace or clean the filters immediately.
Buying Shark Rocket Filters: Genuine vs. Aftermarket & Where to Shop
When it’s time to buy, you face a choice: buy genuine Shark filters or opt for third-party replacements. Here’s a balanced breakdown.
The Case for Genuine Shark Filters
Genuine Shark filters are engineered to exact specifications for your model. They use Shark’s proprietary filter media, ensuring the promised filtration efficiency (like their “Anti-Allergen Complete Seal” technology with HEPA). The fit is guaranteed—no guesswork, no air leaks. For critical HEPA filters, where performance and safety are paramount, genuine is often the worry-free choice. The downside? They are the most expensive option.
The Case for Quality Aftermarket Filters
Many reputable third-party brands (like BestAir, EnviroCare, Hoover) manufacture filters to meet or exceed OEM standards. They can offer significant savings, especially for bundles (foam + HEPA kits). The key is to research. Look for brands with high ratings and reviews that specifically mention your Shark Rocket model. Check that they state they meet HEPA standards (for HEPA filters) and that the dimensions match the OEM part exactly. Avoid ultra-cheap, no-name filters from obscure sellers; they often use inferior materials that clog quickly and fail to filter properly.
Where to Buy: Your Best Options
- Official Shark Website: The most reliable source for genuine parts. Use their parts finder tool.
- Major Retailers: Target, Walmart, Bed Bath & Beyond (online), and Home Depot often carry both genuine and popular aftermarket filters in-store and online.
- Amazon: A vast selection of both genuine and third-party filters. Read reviews carefully, filter by your specific model number, and pay attention to seller ratings.
- Vacuum Specialty Stores: Online stores like Vacuum.com or local vacuum repair shops are excellent resources. The staff often have deep knowledge and can verify compatibility.
Final Buying Tip: Consider buying a multi-pack or annual filter kit. It’s usually cheaper per filter and ensures you have replacements on hand when needed, preventing you from using an old, clogged filter while you wait for a shipment.
The Real Cost of Neglect: What Happens When You Skip Filter Replacement
It’s easy to put off a $20-$40 filter purchase, but the consequences of neglect are far more costly.
- Plummeting Suction Power: A clogged filter is the #1 cause of reduced suction. You’ll find yourself going over spots repeatedly, negating the “power” you paid for.
- Motor Damage and Shortened Lifespan: Your vacuum’s motor needs adequate airflow to stay cool. A blocked filter forces the motor to work harder and hotter, leading to premature wear, burnout, and costly repairs or replacement—a bill that far exceeds the cost of a few filters.
- Poor Indoor Air Quality: A failing filter becomes a source of pollution. It can’t capture allergens, so they are blown back into your home’s air. For allergy sufferers, this can mean constant sneezing, itchy eyes, and aggravated asthma. You’re essentially vacuuming to make things worse.
- Bad Odors: Trapped, damp dust and debris in a saturated filter start to smell. Your vacuum can begin emitting a musty, old-dust odor with every use, which is the last thing you want in a tool meant to freshen your home.
- Voiding Warranties: Some warranties stipulate that damage caused by improper maintenance, including neglecting filter replacement, is not covered. Keeping receipts and a log of filter changes can be useful.
In short, Shark Rocket vacuum filters replacement is not optional maintenance; it’s essential operational care. It’s the difference between a powerful, long-lasting cleaning tool and a weak, smelly, motor-killing dust blower.
Conclusion: A Simple Habit for a Powerful, Healthy Home
Your Shark Rocket vacuum is a powerful ally in the fight for a clean, healthy home. But its power is only as good as the filter system that manages the air it moves. By making Shark Rocket vacuum filters replacement a regular, informed part of your cleaning routine, you do more than just maintain a appliance—you invest in superior suction, protect your vacuum’s motor from premature death, and actively improve your home’s indoor air quality. The process is straightforward: know your model, understand your filter types, clean washable filters monthly, and replace disposable filters on schedule. Don’t wait until performance drops. Proactive filter care is the secret to getting countless hours of powerful, reliable cleaning from your Shark Rocket for years to come. A clean filter truly means a clean home.
Frequently Asked Questions
How do I know which Shark Rocket filter I need?
You must find your vacuum’s exact model number (e.g., HV322, HV301) on a sticker on the machine. Use this number on the Shark website’s parts finder or to search for compatible filters online. Never guess based on the “Rocket” name alone, as different generations use different filters.
Can I wash the HEPA filter in my Shark Rocket?
No. True HEPA filters are made of dense, pleated paper or fiberglass and are not washable. Washing will destroy their structure and eliminate their 99.97% filtration efficiency. They must be replaced when their service life is up. Only foam and some felt filters are designed to be washable.
What happens if I put a filter in backwards?
Installing any filter backwards will create an air leak, causing an immediate and severe drop in suction power. The vacuum may also make unusual noises or trigger an error light. Always check your manual for the correct airflow direction arrow on the filter frame and ensure it points toward the motor/exhaust.
How often should I really replace my Shark Rocket filters?
It depends on use and your home’s environment. For an average home: washable foam/felt filters should be cleaned monthly and replaced every 3-6 months. Disposable HEPA filters should be replaced every 6-12 months. If you have pets, allergies, or a dusty home, shorten these intervals.
Are off-brand Shark Rocket filters safe to use?
High-quality off-brand filters from reputable sellers that specify your exact model and OEM part number are generally safe and cost-effective. However, cheap, poorly made filters can have incorrect dimensions (causing leaks), inferior materials (clogging quickly), or may not meet HEPA standards, compromising air quality and potentially harming your vacuum.
Why does my vacuum smell musty even after I emptied the bin?
A musty odor is almost always caused by old, damp debris trapped in a clogged filter. The filter has become a breeding ground for mildew. The solution is to immediately replace or (if washable) deep clean and thoroughly dry the pre-motor foam filter. If the smell persists, the HEPA filter may also be saturated and need replacement.