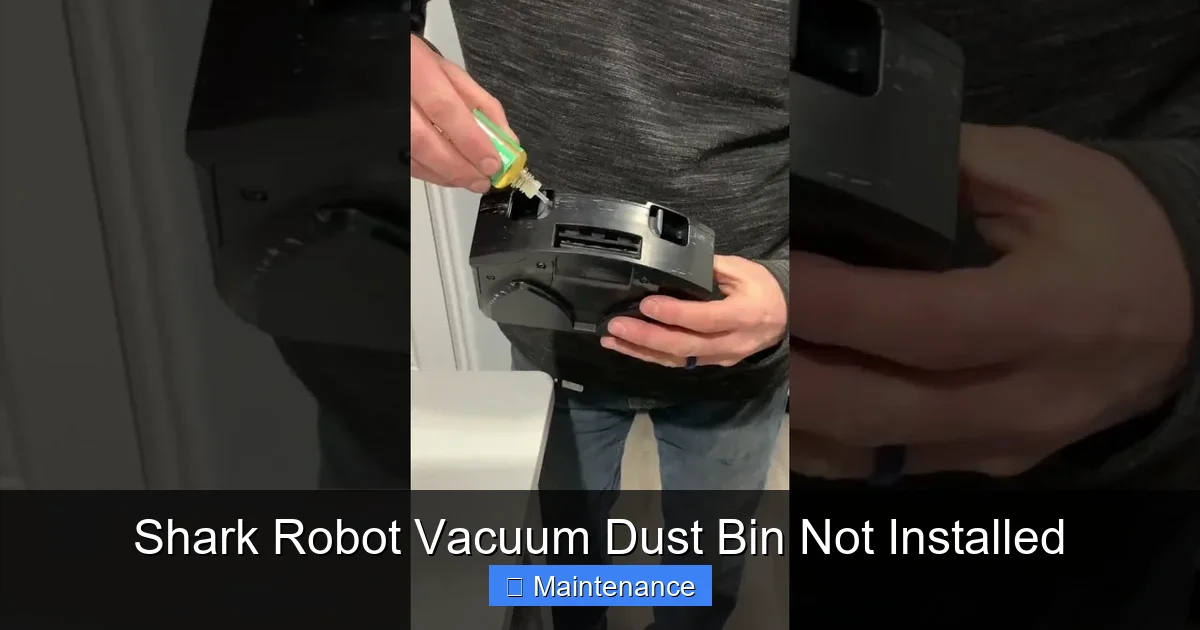
Seeing the “Shark robot vacuum dust bin not installed” error? It’s usually a simple fix, not a major breakdown. This message means your vacuum’s safety sensors think the dust bin is missing or not seated correctly, often due to improper installation, a full bin, or dirty sensors. Stop using the machine, power it off, and check the bin’s physical connection and cleanliness first. Most issues are resolved by reseating the bin properly and wiping down the sensor ports.
Key Takeaways
- The error is a safety feature: Your Shark vacuum won’t run if its internal sensors detect the dust bin isn’t properly installed, preventing it from scattering debris without containment.
- Check the physical connection first: 80% of the time, the issue is the bin not being pushed in firmly or completely until you hear a click, or a latch that didn’t engage.
- A full or clogged bin can trigger the error: The bin’s full sensor or the airflow path can be blocked by excessive dust and debris, fooling the system into thinking the bin is missing.
- Dirty sensor ports are a common culprit: Tiny infrared sensors in the vacuum’s dock and bin can get coated in dust, blocking the signal that confirms the bin is present.
- Always perform a power cycle: After reseating or cleaning the bin, turn the robot completely off and back on to reset the sensor logic before testing.
- Inspect for damage: Look for cracked plastic on the bin, broken latches, or bent pins on the vacuum’s connection point, which can prevent proper communication.
- Consult your manual for model-specifics: Shark models like the ION, AI, and Vertex have slightly different bin designs and latching mechanisms; your guide has the exact diagram.
📑 Table of Contents
- Frustration on Wheels: When Your Shark Says “Dust Bin Not Installed”
- How Your Shark “Knows” the Bin is There: The Tech Behind the Alert
- The Usual Suspects: Top Causes of the “Dust Bin Not Installed” Error
- Step-by-Step Fix Guide: From Quick Check to Deep Dive
- Prevention is Key: Maintenance Habits to Stop the Error Before It Starts
- When the Fixes Don’t Work: Navigating Advanced Troubleshooting and Support
- Conclusion: Your Robot is a Partnership
Frustration on Wheels: When Your Shark Says “Dust Bin Not Installed”
You press the start button on your trusty Shark robot vacuum, ready to delegate the dreaded vacuuming chore. Instead of the familiar whir and beeline across your floor, you hear a series of sad beeps and see a glaring LED light or an app notification: “Dust Bin Not Installed”. Your heart sinks. Is it broken? Did a part fall off during its last journey under the couch? Before you panic or call customer service, take a deep breath. This is one of the most common—and thankfully, most fixable—error messages on Shark robot vacuums. It is almost never a sign of a dead machine. Instead, it’s your vacuum’s sophisticated safety system talking, telling you it can’t confirm that its essential dust collection system is in place. Think of it like a car refusing to start if the brake isn’t pressed; it’s a protective measure. Our complete guide will walk you through every possible reason for this alert, from the absurdly simple to the more obscure, and give you the step-by-step knowledge to solve it yourself. We’ll talk about the Shark robot vacuum dust bin not installed issue like a mechanic talking to a friend—clear, simple, and without the confusing jargon. Let’s get your little cleaning buddy back in action.
How Your Shark “Knows” the Bin is There: The Tech Behind the Alert
To fix the problem, it helps to understand what your Shark is actually sensing. It’s not magic; it’s a simple, reliable system. Most Shark robot vacuums use a small infrared (IR) sensor pair. One emitter is located on the robot’s main body, usually around the dust bin compartment door. The corresponding receiver is on the dust bin itself or the compartment’s interior. When you slide the bin in and latch it, these two sensors line up perfectly. The vacuum sends a tiny IR beam. If the beam is received by the sensor on the bin, it gets a clear “ALL CLEAR” signal. If the bin is missing, crooked, or the sensor is dirty, the beam is broken, and the robot interprets that as “NO BIN.” It immediately halts operation and sounds the alarm. Some newer models with app connectivity might also use a physical switch or a magnetic sensor, but the principle is identical: physical confirmation of the bin’s presence is required. This is a brilliant safety feature. Running the vacuum without the bin would mean it would just kick up dust and hair into the air, accomplishing nothing and making a mess. So, that annoying message is your vacuum being a responsible little cleaner.
Visual guide about Shark Robot Vacuum Dust Bin Not Installed
Image source: i.ytimg.com
The Role of the “Full Bin” Sensor
Complicating things slightly is the “full bin” sensor. Many Shark models have a small optical sensor inside the bin that detects when the internal chamber is packed with debris. If this sensor is triggered—because the bin is genuinely full or, more commonly, because the sensor lens is covered in a fine layer of dust—the system may also issue a warning. In some firmware versions, the logic might conflate a “full” signal with a “bin not present” error, or it might give a separate “bin full” alert. However, a severely clogged bin can physically prevent the bin from seating fully, which *does* trigger the primary “not installed” sensor. So, always treat a full bin as a potential cause of the installation error.
The Usual Suspects: Top Causes of the “Dust Bin Not Installed” Error
Now for the detective work. Over years of troubleshooting, certain causes emerge far more frequently than others. Let’s rank them from most to least likely, so you can check the simplest things first.
Visual guide about Shark Robot Vacuum Dust Bin Not Installed
Image source: live.staticflickr.com
1. Improper Seating: The #1 Offender
This is the culprit 80% of the time. You *think* you pushed the bin in, but it’s not fully engaged. Shark bins typically have a two-step engagement: you slide it in until it stops, then you press down or push it in slightly further until you hear a definitive click or feel a latch lock into place. If you’re rushing, you might miss that final click. The bin will look like it’s in, but it’s millimeters away from perfect alignment, breaking the sensor beam. Models like the Shark ION Robot and Shark AI Ultra have a distinctive “thunk” when the bin’s rear latch clicks into the body.
2. A Filthy Connection Zone
Imagine trying to see through a dusty window. That’s what happens to your vacuum’s IR sensors. Dust, pet hair, and fine debris constantly float around during cleaning. Over time, a thin film coats the emitter on the robot’s body and the receiver on the bin. This film blocks the IR beam, tricking the robot into thinking the bin is gone. The area around the bin latch and the inside of the bin compartment is a prime spot for this buildup. It’s sneaky because you often can’t see the dust layer with the naked eye.
3. The Bin is Actually Full or Clogged
A bin stuffed to the brim with carpet fibers and pet hair isn’t just gross; it’s a mechanical problem. The sheer volume of debris can physically push against the bin’s walls, preventing it from sliding all the way back into the vacuum’s chassis. The bin might appear to go in, but it’s stopped by the packed contents. Furthermore, debris can clog the small air intake port on the bin itself, which some models monitor as part of the “bin present” logic. A clogged bin also means poor suction, so even if it runs, it’s ineffective.
4. Damaged or Misaligned Latches/Locks
If you’ve ever forced the bin in or had a particularly enthusiastic collision with a chair leg, you might have bent the small plastic latch or lock mechanism. On Shark models, this is often a flexible plastic tab or a rotating lever. If it’s cracked, broken, or bent out of shape, it won’t hold the bin securely, allowing even a slight wobble that disrupts the sensor alignment. Check the bin’s edges and the vacuum’s intake port for any visible cracks or deformities.
5. Faulty or Disconnected Wiring (Less Common)
Inside the vacuum, a tiny wire harness connects the bin sensor to the main motherboard. If this connection has come loose—perhaps from a hard bump—the vacuum gets no signal from the bin, even if it’s perfectly installed. This is less common but possible, especially on older units or after a major impact. You’d typically need to open the vacuum’s top cover to check this, which may void your warranty if not done carefully.
6. Software/Firmware Glitch
Like your smartphone, your robot vacuum has software. A rare bug in the firmware can cause a false positive error. A simple reset or power cycle often clears this temporary glitch. If the problem persists after all physical checks, a firmware update via the Shark app might resolve a known sensor logic bug.
Step-by-Step Fix Guide: From Quick Check to Deep Dive
Armed with the knowledge of what could be wrong, let’s fix it. Follow these steps in order. Start with Step 1 for every single occurrence of this error. Do not skip to advanced steps.
Visual guide about Shark Robot Vacuum Dust Bin Not Installed
Image source: bhg.com
Step 1: The Power Down and Physical Reinstall
This is your golden first move. Turn the robot vacuum OFF using the physical power button on its top or side. Do not just rely on the app. Unplug the charging dock if it’s on it. Wait 10 full seconds. This ensures the system fully resets. Now, locate the dust bin release latch (usually a button or a sliding tab). Press it and fully remove the dust bin. Look inside the vacuum’s bin compartment. Use a flashlight. You’re looking for any obvious obstructions—a toy piece, a large hair wad, a sock fragment—that could be blocking the bin from going all the way back. Remove any debris you see. Now, take the bin itself. Empty it completely into a trash can. Even if it looks half-full, empty it. Then, take a dry, soft microfiber cloth and wipe down the entire exterior of the bin, paying special attention to the edges, the latch mechanism, and the back panel where the sensor connector is. Now, reinsert the bin. Slide it in firmly and slowly until you feel it hit the back stop. Now, press down firmly on the front of the bin (or push it in, depending on your model) until you hear and feel a solid CLICK. You should feel the bin lock in place and not wiggle. Apply a gentle tug backward; it should not move. Once seated, power the robot back on and try to start a cleaning cycle. For many users, this resolves the Shark robot vacuum dust bin not installed error instantly.
Step 2: Deep Clean the Sensor Ports
If Step 1 failed, the sensors are almost certainly dirty. You’ll need a few supplies: cotton swabs (Q-tips), isopropyl alcohol (rubbing alcohol, 90% is best), and a can of compressed air (optional but helpful). First, locate the sensor on the robot. It’s a small, dark plastic window, usually on the side or rear wall of the bin compartment. It’s tiny, about the size of a pencil eraser. Dip a cotton swab in a *tiny* drop of isopropyl alcohol. It should be damp, not wet. Gently swab the sensor window in a circular motion. The goal is to dissolve and remove the invisible film of dust. Follow up with a dry cotton swab to remove any residue. Now, locate the corresponding sensor on the dust bin itself. It’s typically on the back of the bin, near the top where it connects to the robot. Clean this one the same way with the alcohol-dampened swab, then dry. Avoid touching the sensor surface with your fingers. Use a blast of compressed air to blow away any loose lint from the compartment and the bin’s connector. Reinstall the bin with the firm click, power on, and test.
Step 3: Inspect for Damage and Full Bin Syndrome
With the bin out, give it a thorough inspection. Look at the plastic housing. Are there any cracks, especially around the sensor area or the latch? Even a small hairline crack can let in ambient light and confuse the sensor. Check the latch mechanism. Does it spring back? Is it broken off? On the robot, inspect the connector pins inside the compartment. Are they straight? Are any bent or pushed in? Bent pins won’t make proper contact with the bin’s socket. Next, check the bin’s internal filter and pre-motor filter (if accessible). These are often white or felt-like. If they are saturated with dark dust and debris, they need cleaning or replacement. A clogged filter restricts airflow, which some models monitor. Finally, peer into the bin’s main chamber. Is there a solid wall of packed hair and carpet fibers? You may need to use a tool like a long, thin screwdriver or a specialized brush to dig out packed debris from the corners and the air intake port on the bin’s side. A truly clean bin should have clear pathways for air to flow through.
Step 4: The Full System Reset
If the physical world seems perfect but the error persists, it’s time for a software reset. First, remove the robot from its charging dock. Press and hold the POWER button for 10-15 seconds until you hear a long tone or see all lights flash. This is a hard reset, clearing the robot’s temporary memory. Place it back on the dock to recharge fully. Once the charging indicator shows a full battery, try a cleaning cycle. If your model is connected to the Shark app, open the app, go to your robot’s settings, and look for a “Reset” or “Factory Reset” option. This will clear any saved maps and Wi-Fi settings but often clears persistent sensor errors. After the reset, re-setup the robot in the app. Then test.
Step 5: Advanced: Check Internal Connections (For the Technically Inclined)
Warning: This step may void your warranty if you damage clips or screws. Only proceed if your vacuum is out of warranty and you’re comfortable with minor electronics. You will need a small Phillips-head screwdriver. Turn the robot over. Locate and remove the screws holding the top cover (the lid with the “Shark” logo). Gently pry the cover off, being mindful of any ribbon cables or wires attached. Your goal is to find the small wire harness that runs from the bin sensor (a small green or black circuit board with the IR LED) to the main motherboard. Ensure this connector is firmly clicked in on both ends. Look for any signs of damage, corrosion, or burnt smell. If it’s loose, reseat it firmly. Reassemble the cover, screw it in, and test. If you’re unsure, skip this step and move to the next section.
Prevention is Key: Maintenance Habits to Stop the Error Before It Starts
Once you’ve vanquished the “dust bin not installed” alert, your mission shifts to prevention. A few minutes of regular care will save you from repeated frustration.
Make Bin Emptying and Cleaning a Ritual
Don’t wait for the bin to be full. Get into the habit of emptying the dust bin after every single cleaning cycle. It takes 10 seconds, prevents odors, and ensures the bin can always seat fully. Once a week, perform a deeper clean. Take the bin to the sink (avoiding the electronic connector at the back). Use a soft brush and mild soap to clean out the fine dust that a dry wipe misses. Rinse thoroughly and allow it to air dry completely for at least 2 hours before reinserting. Never use harsh chemicals that could degrade the plastic or sensors.
Weekly Sensor Wipe-Down
Incorporate sensor cleaning into your weekly routine. While the bin is out, take your dry microfiber cloth and gently wipe the IR sensor window on the robot’s body. Do the same for the sensor on the back of the bin. This simple 30-second action removes the dust film before it can cause a problem. You can also use a soft, dry paintbrush to dislodge any lint from around the sensor area.
Handle with Care: Avoiding Impact Damage
Your robot is sturdy, but its plastic components can be brittle. Avoid letting it repeatedly crash at high speed into furniture legs or thresholds. Use virtual walls or boundary strips to protect it in high-risk areas. When placing it on the dock, guide it gently to avoid a hard knock that could jar the bin latch or sensor alignment out of spec. When removing the bin, use the designated release button; don’t try to pry it out with a tool, which can crack the plastic.
Stay Updated
Shark occasionally releases firmware updates through its app that can improve sensor logic and error handling. Ensure your robot is connected to Wi-Fi and check for updates in the app every month or so. An update might refine how the “bin not installed” check is performed, making it less susceptible to minor dust interference.
When the Fixes Don’t Work: Navigating Advanced Troubleshooting and Support
You’ve followed every step. The bin clicks perfectly, the sensors are sparkling clean, the bin is empty, you’ve reset the system, and the error still mocks you. Now what?
Consider the Environment
Is your vacuum operating in an extremely dusty environment, like a workshop or a home with multiple shedding pets? The sensor film might be rebuilding itself between cleanings. Try cleaning the sensors daily for a week. Also, ensure you’re using the correct dust bin. Some Shark models have different bins for different floor types (e.g., a self-empty base bin vs. a standard bin). Using the wrong bin model will not trigger the sensors correctly and will cause this error constantly.
The “Bypass” Question: Should You Just Ignore It?
Absolutely not. Do not try to tape the bin in place or trick the sensor. The “dust bin not installed” alert is a critical safety interlock. Running the vacuum without a securely installed bin means all the dirt, dust, and allergens it picks up will be ejected back into your home’s air through the exhaust port. You are essentially using a powerful fan to spread contamination. It also risks damage to the vacuum’s internal motor as debris bypasses the bin and clogs other pathways. The error is your friend; listen to it.
Warranty and Professional Repair
If your Shark robot vacuum is still under warranty (typically 1-3 years), now is the time to contact Shark Support. Have your model number (found on the underside label) and serial number ready. Explain the exact error message and all troubleshooting steps you’ve already taken (sensor cleaning, bin reseating, reset). They may offer to send a replacement dust bin if they suspect a defect in the bin’s sensor or latch. If the issue is internal (faulty motherboard or wiring), they will guide you through a warranty repair or replacement process. For out-of-warranty units, a certified appliance repair shop that handles small motors and robotics might be able to diagnose a faulty sensor board or loose connection, but often, the cost approaches that of a new robot, especially on older models. Use this as a judgment call.
Conclusion: Your Robot is a Partnership
The “Shark robot vacuum dust bin not installed” error is not a curse; it’s a conversation. It’s your Shark’s way of saying, “Hey, I need my collection system to be ready before we go!” By understanding the simple sensor technology behind this message and adopting a few minutes of regular, mindful maintenance, you can ensure this conversation is brief and infrequent. Remember the sequence: always power off, remove and fully empty the bin, check for obstructions, clean those tiny sensor windows with alcohol, and reseat with a confident click. Treat your robot’s dust bin and sensors with the same care you’d give its charging contacts or brushes. This small investment of time keeps your Shark operating at peak efficiency, with optimal suction and flawless navigation. It prevents the spread of allergens and protects your investment from preventable damage. So the next time that light blinks and the beeps sound, don’t sigh in defeat. Smile, because you now have the knowledge to fix it in under five minutes. Your clean floors—and your happy, communicative robot—will thank you.
Frequently Asked Questions
Why does my Shark robot vacuum say “dust bin not installed” when I can clearly see the bin is in?
This almost always means the bin is not fully seated or the sensor is dirty. Push the bin in firmly until you hear a definitive click. If that doesn’t work, power off the robot, remove the bin, and clean the tiny infrared sensor windows on both the bin and inside the vacuum’s compartment with a cotton swab and a drop of rubbing alcohol.
Can I run my Shark robot vacuum without the dust bin to see if it’s the bin’s fault?
No, you should never run it without the bin. The robot is designed not to operate without it as a safety feature. Running it empty will cause it to scatter dust and debris into the air and could damage internal components by allowing dirt to bypass the filtration system.
How often should I clean the sensors that detect the dust bin?
For optimal performance, wipe the sensor ports with a dry microfiber cloth during your weekly bin emptying routine. If you have multiple pets or a very dusty home, clean them every few days. A quick 15-second wipe prevents the dust film that causes most false errors.
My bin clicks into place, I’ve cleaned the sensors, but the error still comes back after a few minutes of cleaning. What gives?
This suggests the bin may be becoming dislodged during operation. Check for any damage to the bin’s latch or the vacuum’s connector. Also, ensure the bin is not overfilled. A packed bin can physically shift during movement. Try a completely empty bin for a test cycle. If it runs fine, your issue is a full/clogged bin.
Is there a way to manually reset the “dust bin” sensor without turning the robot off?
No, the sensor check is part of the robot’s startup sequence. The only way to reset the sensor logic is to power the unit completely down (hold the power button until it turns off), wait 10 seconds, and power it back on. This clears any temporary fault state.
My Shark is out of warranty and the error persists after all cleaning and resets. Is it worth repairing?
Often, the cost of diagnosing and repairing an internal sensor or motherboard issue can approach the price of a new mid-range robot. If the unit is several years old, replacement is usually more cost-effective. However, if you’re comfortable, you can inspect the internal wiring harness connecting the bin sensor to the motherboard for a loose connection, which is a free fix if found.