Is your Shark robot vacuum completely dead or unresponsive? This is a common but frustrating problem, often caused by simple power or battery issues rather than a major failure. We walk you through a logical, safe troubleshooting sequence from the absolute basics (like checking the outlet) to more advanced resets and sensor cleaning. Most power-on problems can be resolved at home in minutes without needing a professional. Follow our guide to diagnose and fix the issue yourself.
Key Takeaways
- Always Start with Absolute Basics: Confirm the charging dock is powered, the outlet works, and the robot is seated correctly on the dock before assuming a complex fault.
- Battery Issues are the Prime Suspect: A completely depleted or failed battery is the #1 cause of a Shark robot not turning on. A reset or a full 12-24 hour charge cycle is often the cure.
- Software Glitches Cause “Soft” Lockups: The robot’s internal computer can freeze. A forced hard reset (holding the power button for 10+ seconds) is the primary fix for this.
- Physical Obstructions Can Prevent Power: Debris jamming the charging contacts on the robot or dock will stop charging. Regular cleaning of these metal plates is critical maintenance.
- Sensor Problems Can Mimic Power Failure: If cliff, bumper, or wheel sensors are dirty or faulty, the robot may refuse to start as a safety measure. Cleaning is a key first step.
- Internal Component Failure is Rare: Issues like a faulty power button, damaged charging circuit, or failed motherboard are uncommon and usually require Shark customer support or a repair service.
📑 Table of Contents
- So Your Shark Robot Won’t Turn On: Let’s Fix This
- Section 1: The Absolute Foundation – Power Source & Charging
- Section 2: The Battery – Heart of the Matter
- Section 3: The Brain & Senses – Software & Sensor Glitches
- Section 4: Physical Obstructions & Mechanical Jams
- Section 5: Advanced Diagnostics & When to Seek Help
- Section 6: Prevention – Keeping Your Shark Robot Alive
- Conclusion: Your Robot’s Second Chance
So Your Shark Robot Won’t Turn On: Let’s Fix This
You walk into your living room, ready for a clean space, and press the power button on your trusty Shark robot vacuum. Nothing. No lights, no beeps, no whirring. That familiar, helpful little helper is just a silent, inert lump on the floor. Panic sets in—did it finally die? Is it expensive repair time?
First, take a deep breath. A Shark robot vacuum not turning on is one of the most frequently reported issues, and the vast majority of the time, the solution is something you can handle yourself in under ten minutes. It’s rarely a sign of a terminal breakdown. Think of it like your smartphone: sometimes it just needs a forced restart or a longer charge. We’re going to walk through a systematic, easy-to-follow diagnostic process, starting with the simplest, most overlooked checks and moving toward more advanced steps. Our goal is to get your Shark ION, Shark IQ, or Shark AI robot back to navigating your floors.
This guide is written for everyone, regardless of technical skill. We’ll use plain language, focus on practical actions, and explain the why behind each step so you understand what you’re fixing. Let’s get started.
Section 1: The Absolute Foundation – Power Source & Charging
Before we even touch the robot, we must verify the source of its energy. If there’s no power getting to the robot, it can’t turn on. Period. This section is non-negotiable and solves a shocking number of “dead robot” cases.
Visual guide about Shark Robot Not Turning On
Image source: sharkvacuum.blog
1.1. Is the Charging Dock Actually Powered?
This is the very first thing to check. Unplug the Shark docking station’s power adapter from the wall outlet, wait 10 seconds, and plug it firmly back into a known-good outlet. Avoid using power strips or extension cords if possible, as these can fail or be switched off. If your outlet is controlled by a wall switch, ensure the switch is on. Look for the small LED indicator light on the dock itself—it should be solid or blinking (usually amber or blue) to show it has power. No light on the dock means no power is reaching it, and thus, your robot can’t charge.
1.2. Check the Wall Outlet Itself
It sounds silly, but it happens. Plug a lamp or your phone charger into the same outlet the Shark dock uses. Does it work? If not, you’ve found your problem—a tripped breaker, a blown fuse, or a faulty outlet. Reset your home’s electrical panel and test again. This simple check rules out an entire category of issues.
1.3. Is the Robot Properly Seated on the Dock?
Your Shark robot must be making perfect physical and electrical contact with its charging pins on the dock. Look underneath the robot. You’ll see two metal charging contacts. On the dock, there are two corresponding metal probes.
- Action: Gently lift the robot and place it back on the dock, aligning it exactly with the guides. You should feel it click or settle into place.
- Inspect: Shine a flashlight on the robot’s contacts and the dock’s probes. Are they both clean, shiny metal? Or are they coated in dust, hair, and grime? Any film of debris acts as an insulator and prevents the electrical connection. We’ll clean these thoroughly in a later section.
1.4. The “Leave It Alone” Charge Test
If the dock has power and the robot is seated correctly, but it still won’t turn on, the battery may be so deeply discharged that it needs a long, uninterrupted charge. This can happen if the robot was left in a closet for months or if it got stuck somewhere and drained completely.
- Procedure: Ensure the robot is on the dock with a powered dock. Do NOT try to turn it on. Leave it completely alone for a full 12-24 hours. The charging system will slowly trickle-charge a severely depleted lithium-ion battery back to a usable level. After this period, try pressing the power button again.
Section 2: The Battery – Heart of the Matter
Assuming the power path from wall to dock to robot is clear, the next most common culprit is the battery itself. Shark robot vacuums use lithium-ion batteries that degrade over time (typically 2-3 years of regular use). A failed or critically low battery will prevent the robot from powering on at all.
Visual guide about Shark Robot Not Turning On
Image source: sharkvacuum.blog
2.1. Understanding Battery Health & Age
Like the battery in your phone, your Shark’s battery has a finite number of charge cycles. Over time, its capacity shrinks. If your robot is more than 2 years old and has been used daily, the battery is a strong candidate. A battery that can’t hold a charge may show a light when on the dock but will die instantly when you try to run it, or it may not power on at all because the voltage is too low to trigger the internal circuits.
2.2. The Critical Reset: A Full Power Cycle
Sometimes, the robot’s internal battery management system gets into a confused state. It thinks the battery is dead or charging when it’s not. A full power cycle can clear this memory.
- For Most Shark Models (IQ, ION, AI): Remove the robot from the dock. Press and hold the Power button (the big circular button on top) for at least 10 seconds. Release it. Wait 30 seconds. Now, place the robot back on the powered dock. Do not press any buttons. Let it charge for at least 1 hour before trying to turn it on via the button or the app.
- Why this works: This forces a complete shutdown of the mainboard, draining residual power from capacitors and resetting the battery gauge. It’s the equivalent of pulling the plug on a frozen computer.
2.3. When Battery Replacement Becomes Necessary
If you’ve done the 24-hour charge and the hard reset with no success, and your robot is several years old, the battery has likely reached the end of its life. The good news is that Shark batteries are user-replaceable. You can purchase an official Shark replacement battery (search for your exact model number, like “Shark IQ RV1001 battery”) from Shark’s website, Amazon, or authorized retailers. The replacement process is usually straightforward—you’ll need to remove the bottom plate (often with a screwdriver), disconnect the old battery connector, and connect the new one. Always follow the specific instructions for your model.
Section 3: The Brain & Senses – Software & Sensor Glitches
Your Shark robot is a small computer on wheels. Like any computer, its software can crash, and its sensors can get confused. This can manifest as a complete refusal to power on or start a clean.
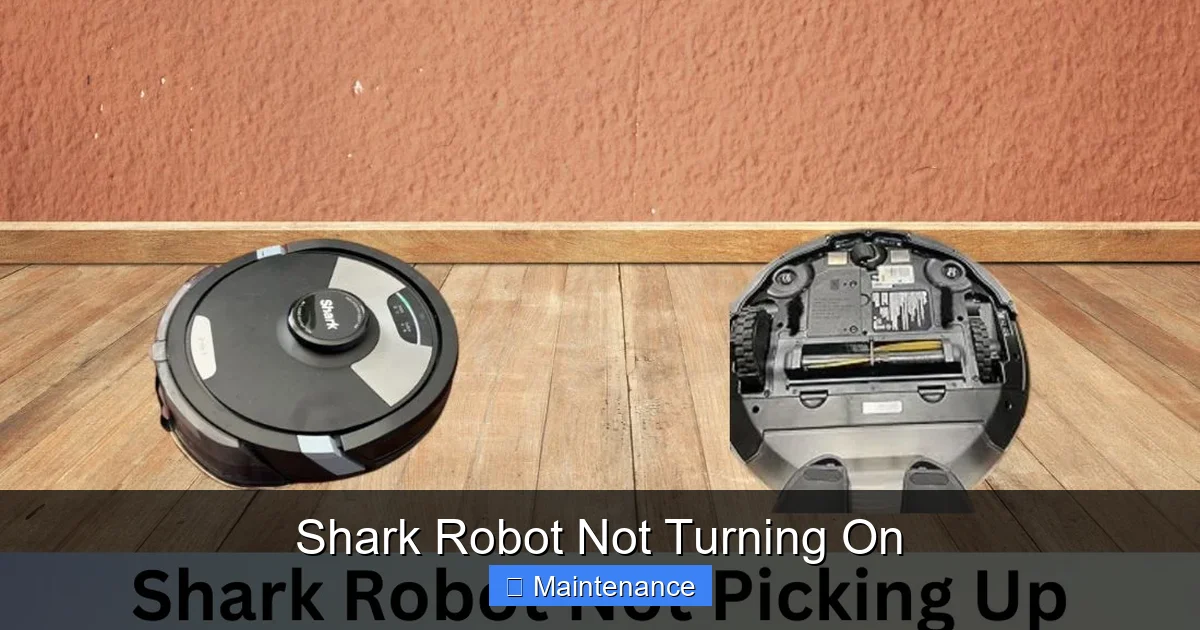
Visual guide about Shark Robot Not Turning On
Image source: sharkvacuum.blog
3.1. The Forced Reboot (Hard Reset)
We touched on this in the battery section, but it’s so vital it bears repeating as a primary software fix. A forced reboot clears temporary memory and resets the main controller.
- Method: With the robot OFF the dock, locate the power button. Press and hold it for 10-15 seconds. You may see a light flash or hear a sound, but not always. Release the button. Wait 30 seconds. Then, place it on the dock and try again.
- Note: This will NOT delete your cleaning maps or scheduled cleanings stored in the cloud (if your model has an app). It only resets the robot’s immediate operating state.
3.2. Cleaning the Sensors – The Invisible Culprit
Shark robots have multiple sensors: cliff sensors (under the front bumper), bumper sensors (in the bumper itself), and sometimes side brush sensors. If these are dirty, the robot’s safety systems may kick in and prevent it from moving, which can feel like it won’t turn on.
- Cliff Sensors: These are small, clear or black windows on the underside of the front bumper. Use a dry, lint-free microfiber cloth to gently wipe them. Do not use liquids or sprays directly on the sensors.
- Bumper Sensor: Press the bumper in several places to ensure it clicks freely and isn’t jammed with debris. Wipe the entire front bumper clean.
- Wheel & Brush Sensors: Remove the main brush and side brush. Wipe the axles and the areas where they spin. Debris here can cause the robot to detect a jam and refuse to start.
3.3. App & Wi-Fi Connection Issues
For connected models (Shark IQ, AI), a corrupted app state or a failed Wi-Fi connection can sometimes cause control issues. While this rarely stops the robot from turning on manually via its physical button, it can stop app-based starts.
- Fix: Open your Shark app. Go to your robot’s settings. Look for a “Reset Wi-Fi” or “Reconnect” option and follow the steps to re-establish the connection. Ensure your home Wi-Fi network is on the 2.4GHz band, as most robot vacuums do not support 5GHz.
- App Reinstall: If problems persist, delete the Shark app from your phone, reinstall it, and log back in. Re-add your robot.
Section 4: Physical Obstructions & Mechanical Jams
A robot vacuum is a complex mechanical device. Physical jams can trigger safety cut-offs that mimic a power failure.
4.1. The Main Brush and Side Brush
These are the most common jam points. Hair, string, carpet fibers, and pet fur wrap around the axles and brush bristles, creating immense resistance.
- Action: Flip the robot over. Use the provided cleaning tool or a pair of scissors to carefully cut and remove all debris wrapped around the main rubber brush and its bearings. Remove the side brush and clear any hair from its base and the motor shaft. Spin each brush by hand—it should rotate freely with minimal resistance.
4.2. The Wheels
Debris can also jam the drive wheels or the caster wheel (the small front wheel).
- Action: Pull each drive wheel outward (they usually pop off). Clean any hair from the wheel itself and, more importantly, from the axle and the wheel well inside the robot. For the caster wheel, remove it (it often screws out) and clear all debris from its socket. A seized wheel can prevent the robot from moving and may trigger an error that stops startup.
4.3> The Charging Contacts – Deep Clean
We mentioned these in Section 1, but they deserve their own deep-clean callout. Oxidation and grime build-up is a silent killer of charging.
- Procedure: With the robot OFF and unplugged from the dock, use a cotton swab lightly moistened with isopropyl alcohol (90% or less). Gently rub the metal charging contacts on the underside of the robot until they are shiny. Do the same for the metal probes on the docking station. The alcohol will evaporate quickly and leave no residue. This ensures a perfect electrical connection.
Section 5: Advanced Diagnostics & When to Seek Help
You’ve run the gauntlet: checked power, done the 24-hour charge, performed the hard reset, cleaned every sensor and brush, and still, your Shark robot is a paperweight. Now what?
5.1. Listening and Looking for Signs of Life
Before you give up, do one final check:
- When you press the power button, do you hear a very faint click or see a tiny, momentary flash of an LED light (even if it’s just one light on the button)? Any sign of life, no matter how small, indicates the mainboard is receiving some power. The issue is likely downstream—a failed battery, a broken power button, or a short circuit.
- If there is absolutely no sound or light whatsoever, the problem is in the initial power path: the dock’s power isn’t reaching the robot’s charging circuit, or the circuit itself is dead.
5.2. Checking for Physical Damage
Inspect the robot and dock carefully. Did it take a tumble down the stairs? Has it been chewed on by a pet? Look for:
- Cracks in the plastic housing, especially around the charging port area.
- Pins on the robot’s charging contacts that are bent, broken, or pushed in.
- Probes on the dock that are loose or damaged.
- Any signs of liquid damage (corrosion, sticky residue) inside the dustbin or near the charging ports.
Visible damage of this nature almost always requires professional repair or component replacement.
5.3. The Power Button Itself
The physical power button can wear out or become stuck. With the robot off the dock, press the power button multiple times firmly but gently. Listen/feel for a consistent, satisfying click. If it feels mushy, sticky, or doesn’t click, the button mechanism may be faulty. This is a more involved repair that requires disassembling the top cover to access the button assembly.
5.4. Contacting Shark Customer Support
If you have exhausted all the steps in this guide and your robot is still under warranty (typically 1-3 years depending on model and region), it’s time to contact Shark.
- Have your model number and serial number ready. These are on a sticker on the underside of the robot.
- Be prepared to explain the exact troubleshooting you’ve done. Tell them: “I verified outlet power, cleaned all contacts and sensors, performed a 10-second hard reset, and left it on the dock for 24 hours with no result.” This shows you’re proactive and helps them diagnose faster.
- They may offer to send a replacement part (like a battery) or, if the issue is more complex, a warranty replacement unit.
Section 6: Prevention – Keeping Your Shark Robot Alive
The best fix is preventing the problem in the first place. A few minutes of regular maintenance will keep your Shark robot turning on reliably for years.
6.1. The Weekly Maintenance Ritual
Set a calendar reminder. Every week, spend 5 minutes:
- Empty the dustbin.
- Remove and clean the main brush and side brush, cutting away any wrapped hair.
- Wipe the charging contacts on the robot and dock with a dry microfiber cloth.
- Use the included cleaning tool to pick out debris from the wheel wells and around the bumper.
- Give the cliff sensors a quick wipe with a dry cloth.
6.2. The Monthly Deep Clean
Once a month, go deeper:
- Remove the main brush assembly entirely and wash the rubber blades with mild soap and water. Let dry completely before reinserting.
- Check the filter. If it’s a washable filter, rinse it under cold water and let it air-dry for 24 hours. If it’s a replaceable filter, note the age and plan for replacement (usually every 3-6 months).
- Inspect the battery contacts on the robot for any corrosion. A quick alcohol swab as described earlier is perfect.
6.3. Smart Charging Habits
Never store your Shark robot with a completely dead battery for long periods. If you won’t be using it for a month or more (e.g., going on vacation), charge it fully, then power it off using the button and store it in a cool, dry place. Avoid extreme temperatures (hot garage, freezing basement), which degrade lithium batteries rapidly.
Conclusion: Your Robot’s Second Chance
A Shark robot vacuum not turning on is an inconvenience, not necessarily a catastrophe. By following this structured approach—starting with the power source, moving to the battery, then addressing software and physical obstructions—you’ve diagnosed the problem yourself. You’ve learned that the most common fixes are simple: a firm re-seat on the dock, a long, patient charge, a 10-second hard reset, and a thorough cleaning of contacts and sensors.
Remember, your robot is a hardworking tool. It needs a little TLC. That investment of 15 minutes once a week and a deeper clean monthly will pay off in years of reliable service. You’ve now empowered yourself with the knowledge to bring your Shark robot back from the brink. Now, go plug that dock in, clean those contacts, and give your little cleaning companion the second chance it deserves. It will thank you by whisking away the dust and pet hair once again.
Frequently Asked Questions
My Shark robot is on the dock and the dock light is on, but the robot won’t turn on. What gives?
This usually points to a communication issue between the dock and the robot. First, remove the robot and clean the metal charging contacts on both the robot’s underside and the dock’s probes with a dry cloth or alcohol swab. Then, perform a hard reset: hold the power button for 10+ seconds, place it back on the dock, and wait an hour before trying again. If this fails, the battery may be so depleted it needs a very long charge (12+ hours), or the battery itself may be faulty.
How do I perform a factory reset on my Shark robot?
For most Shark IQ, ION, and AI models, there is no “factory reset” that erases maps via a button combo. The primary reset is the hard reset: remove the robot from the dock, press and hold the power button for 10-15 seconds until you see a light flash or hear a beep (if any), then release. Wait 30 seconds and place it on the dock. To reset Wi-Fi and app connection, you must do this through the Shark app in the robot’s settings menu. A true factory reset (erasing all data) is typically only done via the app or during a warranty replacement process.
Can a dirty filter prevent the robot from turning on?
No, a clogged filter will not stop the robot from powering on. It will cause poor suction and reduced runtime, but the robot will still start and run. Power-on issues are related to the battery, charging system, power button, or mainboard. However, maintaining a clean filter is crucial for overall performance and battery health, as a strained motor drains the battery faster.
What does a flashing red light on my Shark robot mean when it’s on the dock?
A flashing red light on a Shark robot while on the dock typically indicates a charging error. Common causes include: dirty charging contacts, a severely depleted battery that’s not accepting a charge, or a faulty battery. Start by thoroughly cleaning the metal contacts on both the robot and dock. If that doesn’t work, try the 24-hour charge cycle and hard reset. A solid red light often means the battery is critically low and needs charging.
Is it worth replacing the battery on an older Shark robot?
It depends on the robot’s age and your attachment to it. If your model is 3+ years old and has been used heavily, other components (motors, sensors) may also be nearing the end of their life. Replacing the battery (costing $50-$100) can buy you 1-2 more years of service. If the robot is 4+ years old, investing in a newer model with better technology and a fresh warranty might be more cost-effective long-term.
My robot was working fine, then I moved it to a new house and it won’t turn on. Why?
This is almost always a power issue related to the new location. First, test the wall outlet with another device. Second, check that the dock’s power adapter is fully plugged in and undamaged. Third, ensure you are using the correct, original Shark power adapter—using a different voltage/amperage adapter can damage the robot. Finally, it could be a coincidence that the battery failed or a sensor got jammed during the move; perform the standard troubleshooting steps of cleaning contacts, resetting, and a long charge.