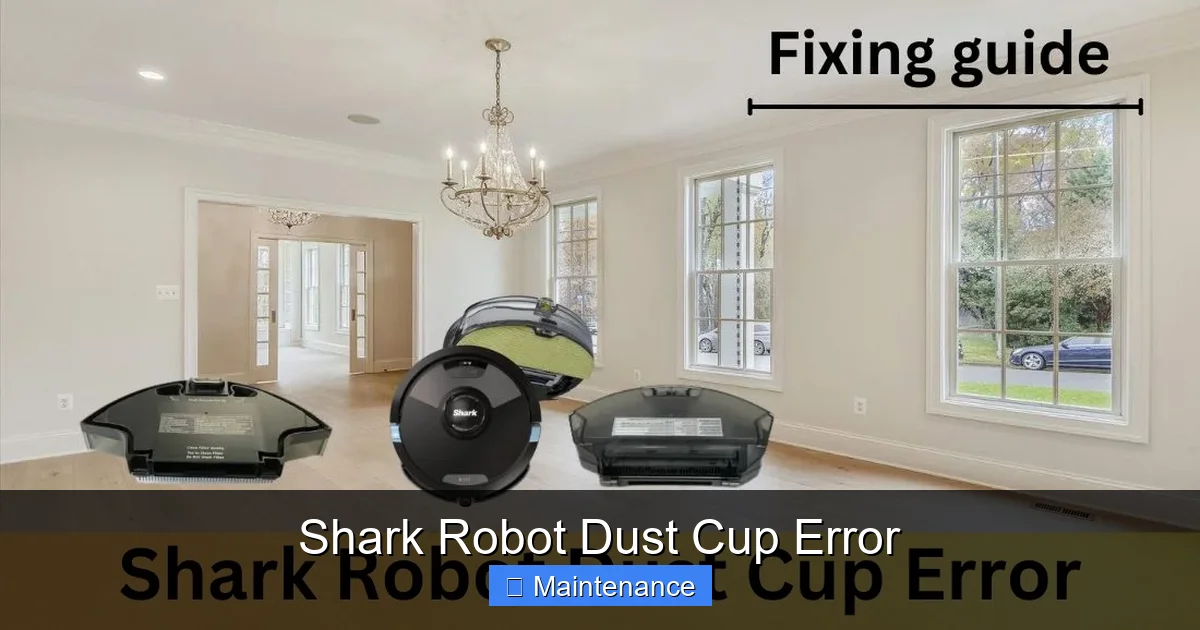
The Shark Robot Dust Cup Error is a common safety alert that stops your robot mid-clean. It typically signals a full dust cup, an improperly seated bin, or dirty internal sensors. This article provides a complete, step-by-step troubleshooting guide, from immediate fixes to deep-cleaning protocols and long-term prevention strategies. By following these clear instructions, you can resolve the error yourself, avoid costly service calls, and keep your Shark robot operating at peak efficiency for years.
So, you’re in the middle of a cleaning cycle, and your trusty Shark robot vacuum suddenly stops, beeps frantically, and a cryptic message flashes on its LED screen or app: “Dust Cup Error.” Or maybe it just refuses to start, complaining about the dust cup. Annoying, right? This little hiccup is one of the most common issues Shark robot owners face, and while it’s designed to protect your machine, it can be a real headache. But here’s the great news: in 95% of cases, this is a problem you can solve yourself in under 15 minutes with no tools and no technical expertise. It’s almost always a matter of a simple sensor being tricked by dust, a slightly misaligned bin, or a cup that needs a more thorough cleaning than a quick tap-out. Forget about immediate panic or calling for expensive support. This guide will walk you through everything you need to know, from the “why” behind the error to a foolproof, deep-cleaning ritual that will have your Shark zipping across your floors again. Let’s get into it.
Key Takeaways
- The error is primarily a sensor issue, not necessarily a full cup: Shark robots use optical or electrical sensors to detect if the dust cup is full or correctly installed. A false alarm is often caused by dirty sensors or a misaligned bin.
- Always power down completely before any inspection: For safety and to prevent false error codes, turn off the robot, remove it from the charging dock, and if possible, take out the battery before accessing the dust cup.
- Cleaning the dust cup is only half the battle: You must also meticulously clean the cup’s seals, the metal contact points, and the sensor ports inside the robot’s cavity where the cup sits.
- Dryness is critical: Any moisture inside the dust cup, on the sensors, or within the robot’s intake will trigger the error. Ensure every component is bone-dry before reassembly.
- A full reset clears the error memory: After cleaning and reassembling, performing a factory reset (via the app or button combination) is often necessary to clear the stored error code and resume normal operation.
- Preventive maintenance is the ultimate solution: Emptying the dust cup after every single use, performing a weekly light clean of the sensors, and ensuring the cup clicks firmly into place will prevent the vast majority of these errors.
- Consult your specific model’s manual: While principles are similar, Shark models like the ION, AI Ultra, and Matrix have slight variations in dust cup design and sensor locations. Your manual is the final authority.
📑 Table of Contents
What Exactly Is the “Shark Robot Dust Cup Error”?
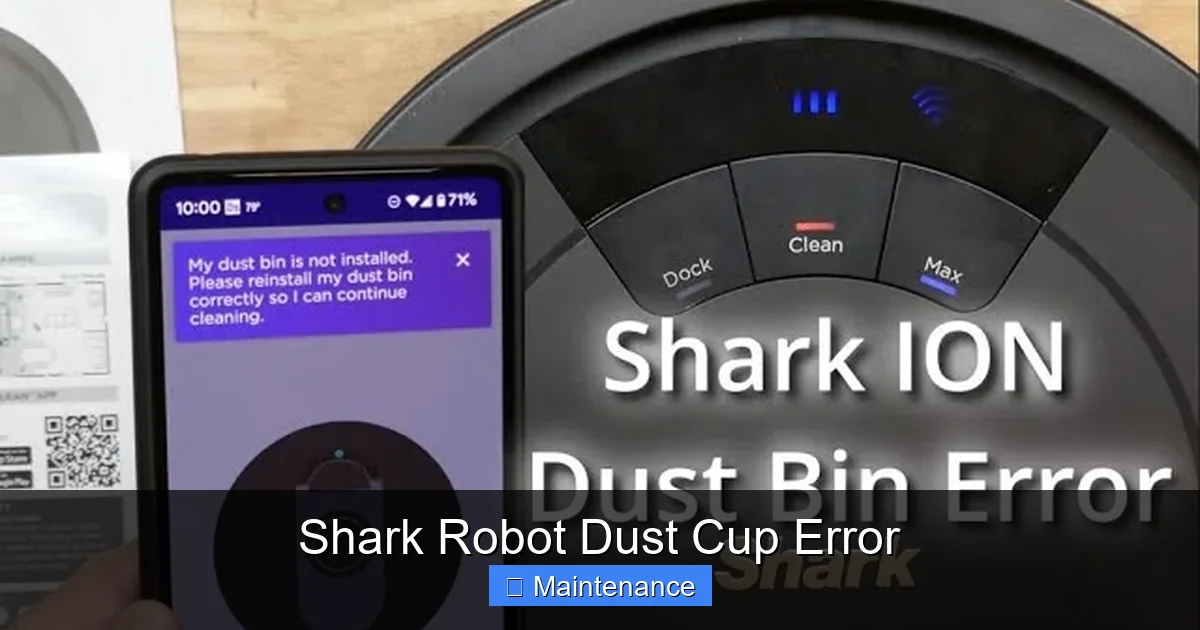
Before we start fixing it, let’s understand what we’re dealing with. Your Shark robot isn’t just guessing when it says the dust cup has an issue. It’s using a sophisticated little system to monitor it. Most Shark robots employ either an optical sensor (a small infrared emitter and receiver) or electrical contact points (two tiny metal pins) located in the dust cup housing. When you slide the dust cup into the robot, these sensors must make proper contact or “see” a clear path. Their job is to confirm two things: first, that the cup is physically present and locked in place, and second, that the internal flap or full-bin indicator isn’t stuck in the “full” position.
The Sensor’s Critical Role
Think of it like a security guard at a door. The guard (sensor) needs to see the door (dust cup) is fully closed and that nothing is blocking the view (like dust or debris). If the guard’s glasses are dirty (sensor is dusty), it thinks the door is open or blocked and sounds the alarm—that’s your error. Similarly, if the door is ajar (cup not fully seated), the guard raises the alert. The system is brilliantly simple but also brilliantly sensitive. A single speck of fine carpet fuzz or a faint film of dust on those sensor lenses or metal contacts is enough to break the beam or interrupt the electrical circuit, causing your robot to shut down with the dust cup error.
It’s a Safety Feature, Not a Death Sentence
This error is a protective measure. If your robot thinks the dust cup is full or missing, it stops to prevent a few bad outcomes: it doesn’t want to overfill and spill debris back onto your floor, it doesn’t want to run without a filter (which would blow dust into the air), and it doesn’t want to damage its internal motors by sucking in large debris without containment. So, when you see this error, your robot isn’t broken—it’s being cautious and asking for a quick check-up. That’s a good thing! It means your machine’s diagnostics are working perfectly.
Diagnostic Steps: Is It Really the Dust Cup?
Before you dive into a full disassembly, let’s do a quick 3-minute diagnostic to confirm the culprit. Sometimes, the error message can be misleading, pointing to the dust cup when the real issue is something else that trips the same sensor.
Visual guide about Shark Robot Dust Cup Error
Image source: sharkvacuum.blog
The Visual and Physical Check
First, remove the dust cup completely. Give it a firm, decisive pull. It should click out easily. Now, look at the empty cup. Is the internal flap (a small plastic piece inside the cup near the filter) moving freely? Tilt the cup and watch it. If it’s stuck, that’s your problem. Gently nudge it with a plastic toothpick to free it. Next, inspect the filter. Is it absolutely saturated with dust? A clogged filter can cause a pressure drop that some models interpret as a full cup. Tap it out vigorously over a trash can. If it’s washable (most Shark filters are), now is the time to rinse it with cold water, squeeze it dry, and let it air dry for 24 hours. Never operate your robot with a wet filter.
Check the Robot’s “Mouth”
With the cup out, peer into the cavity on the robot where the cup sits. You’ll see either two small, clear plastic lenses (optical sensors) or two tiny metal pins (contact points). Are they visibly coated in a grey film of dust? Are there any cobwebs, hair strands, or larger debris chunks lodged in there? Use a flashlight. This is the most common source of the error. Also, check the rubber gasket or seal around the opening. Is it torn, warped, or covered in sticky debris? A poor seal can also trigger the alert.
The Simple Reset Test
Sometimes, the error code gets “stuck” in the robot’s memory after a temporary glitch. Before cleaning, try a basic reset. For most models: power the robot off, remove it from the dock, and press and hold the “Clean” or power button for 10 seconds until you hear a tone or see the lights cycle. Place it back on the dock and let it charge for a full hour. Then, try to start a clean. If the error persists, you definitely have a physical cleaning issue. If it’s gone, it was a transient glitch, but you should still perform the cleaning steps below as a preventive measure.
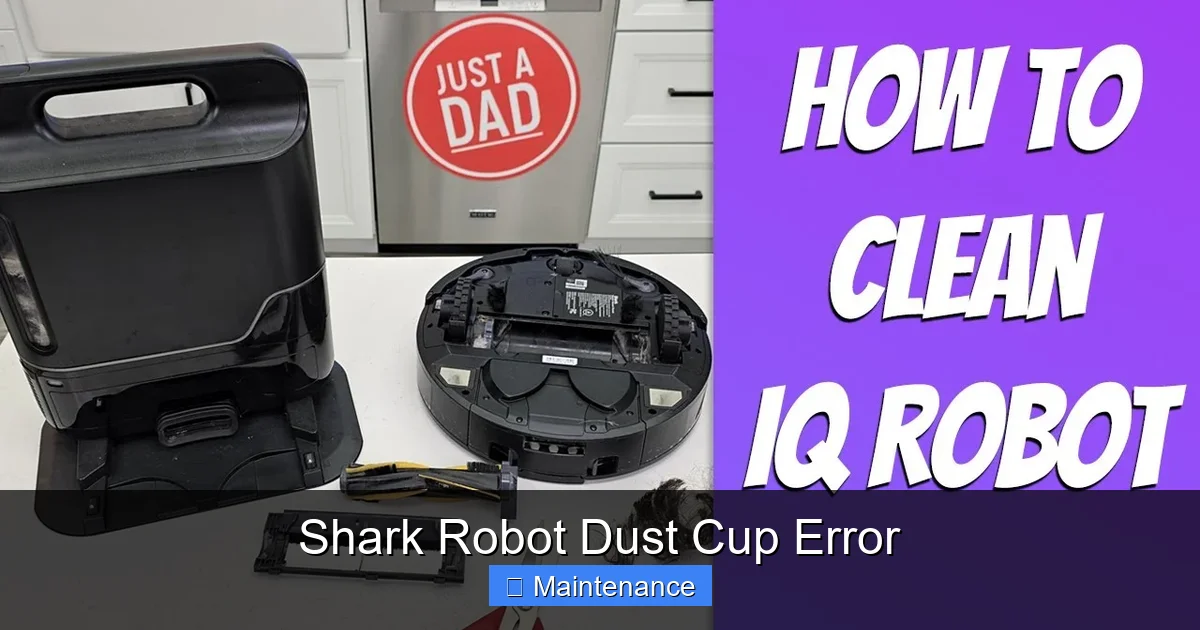
The Complete Dust Cup Deep-Clean Protocol
Okay, let’s assume the quick checks didn’t solve it. Time for the full deep clean. This is a systematic process that addresses every possible point of failure. Grab your tools: a clean, dry microfiber cloth, a soft-bristled brush (an old toothbrush works perfectly), a can of compressed air (optional but helpful), and your Shark robot.
Visual guide about Shark Robot Dust Cup Error
Image source: i.ytimg.com
Step 1: Disassembly and Initial Tapping
Remove the dust cup. Over a trash can, give it several firm, sharp taps on all sides, including the top and bottom. This dislodges fine dust that’s packed into the crevices. Then, open the cup’s lid (usually a button or latch) and remove the filter. Tap the filter out as well. If your model has a pre-motor filter (a secondary, smaller foam filter), remove and tap that out too. Set all filters aside for cleaning.
Step 2: Washing and Drying (If Applicable)
If your filters are the washable type (most are), rinse them under cold running water. Gently squeeze them, but do not wring. For the main pleated filter, you can rinse from the inside out to push debris out. For foam filters, squeeze repeatedly. This is non-negotiable: Allow all filters to air dry completely for a minimum of 24 hours. Place them in a warm, dry spot with good airflow. Never use a hair dryer or place them in direct sunlight/heat, as this can damage the filter media. Reinserting a damp filter will instantly trigger the dust cup error and could damage the motor.
Step 3: Cleaning the Dust Cup Itself
While the filters dry, focus on the plastic dust cup. Use your damp microfiber cloth (wring it out so it’s barely moist) to wipe down the entire interior. Pay special attention to the corners and the path where debris travels. The most critical area is the seal/gasket—that rubber ring that creates an airtight closure. Wipe it meticulously, removing any dust hair or sticky residue. A compromised seal is a common culprit. After wiping with a damp cloth, immediately dry the entire cup, inside and out, with a separate dry microfiber cloth. Ensure it is 100% dry.
Step 4: The Critical Sensor & Contact Cleaning
This is the step that solves 80% of persistent errors. With the dry cup set aside, take your dry microfiber cloth and gently wipe the two sensor areas inside the robot’s cavity. If they are optical sensors (clear plastic), breathe lightly on them to fog them up, then wipe with the dry cloth—this helps remove oily films. For metal contact points, gently rub them with the dry cloth to remove any oxidation or dust. Now, look at the dust cup itself. On the part that inserts into the robot, you’ll find either two small clear plastic windows (for optical sensors) or two metal pads (for contacts). Clean these with the same dry cloth. Any speck of dust here will break the connection. Finally, use your soft brush to sweep away any loose debris from the cavity floor and around the sensor housings. A quick shot of compressed air can also blow out hidden dust.
Step 5: Model-Specific Considerations
While the above is universal, some models have quirks. For Shark ION Robot models, the dust cup has a prominent plastic flap. Ensure this flap hinge is clean and moves freely. For Shark AI Ultra and Matrix models, the dust cup is often larger and has a more complex seal. Be extra vigilant cleaning the long, curved rubber seal. Some newer models have a “bin full” indicator window on the outside of the cup—wipe this clean as well. If your model has a self-emptying base, you must also check the connection port on the robot and the corresponding connector on the base for dust.
Resetting and Verifying Your Robot’s Health
With everything sparkling clean and bone-dry, it’s time to reassemble and reset. A proper reset tells the robot’s brain, “Hey, the problem is fixed, clear the error flag.”
Visual guide about Shark Robot Dust Cup Error
Image source: i.ytimg.com
Reassembly Done Right
Place the completely dry filter back into the dust cup. Ensure it sits flat and is properly oriented (there’s usually only one way it fits). Close the cup lid firmly until it clicks. Now, take the dust cup and align it with the robot’s cavity. You should feel a slight resistance. Push it in firmly and evenly until you hear a definitive click. On most models, a small LED on the robot or cup will illuminate to show it’s powered and connected. Give it a gentle wiggle; it should not move at all. A loose cup is a guaranteed repeat of the error.
Performing the Reset Sequence
Place the robot on its charging dock and ensure it’s making a good connection (the dock lights should activate). Now, the reset method varies:
- Most Models (ION, Classic): Press and hold the “Clean” button for 8-10 seconds until you hear a beep and see the power indicator ring spin or flash.
- App-Connected Models (AI, Matrix): Open the SharkClean app. Go to your robot’s settings (gear icon). Look for “Factory Reset” or “Reset Robot.” Confirm. This clears all error history and network settings.
- Physical Reset Button: Some models have a small pinhole reset button on the underside or side. Use a paperclip to press and hold for 5 seconds.
After the reset, let the robot charge for at least an hour to get a full battery. Then, initiate a manual clean from the app or by pressing the “Clean” button. Watch it start. If it begins moving normally without beeping, success! If the error returns immediately, double-check your sensor cleaning and cup seating. If it runs for a few minutes and then errors, the cup might be filling up incredibly fast due to a clogged filter you missed, or there’s a deeper mechanical issue.
Proactive Maintenance: Your Shield Against Future Errors
You’ve fixed it. Now, let’s keep it fixed. The best way to deal with a Shark Robot Dust Cup Error is to never get one. A little consistent care is all it takes.
The “After Every Use” Rule
Make it a habit: every single time your robot finishes a cleaning cycle, empty the dust cup. Don’t wait until it’s full. Tap it out over the trash, give it a quick wipe with a dry cloth, and check that the filter isn’t overly saturated. This prevents dust from packing in and caking onto sensors and seals. It takes 10 seconds and saves you from a major headache later.
Weekly Sensor Wipe-Down
Once a week, during your cup emptying ritual, take a dry microfiber cloth and give the sensor lenses/contacts on both the robot and the dust cup a quick polish. Also, sweep around the charging dock—dust bunnies kicked up during cleaning can settle into the robot’s base and eventually be transferred to the sensors.
Monthly Deep Clean Calendar
Mark your calendar. Once a month, perform the full deep-clean protocol described above, even if you haven’t had an error. This includes washing the filters (if washable), cleaning the seals, and brushing out the brushroll and wheels. Hair and string wrapped around the brushroll can create extra drag and debris that finds its way into the cup housing, indirectly causing issues.
The Importance of a Dry Environment
Never store your robot in a damp basement or humid bathroom. Moisture is the enemy of electronics and sensors. If you must clean pet accidents or spills with your robot (check your manual first), be prepared for a potential dust cup error later as humidity can cause dust to clump and stick to sensors. After such a job, do an extra sensor wipe.
When to Escalate: Calling in the Pros
You’ve followed every step. The cup is immaculate, the sensors are spotless, you’ve reset it a dozen times, and the error is as stubborn as ever. Now what? It’s time to consider professional help, but not before you’ve ruled out a few final things.
Possible Internal Failures
If the dust cup error persists after a flawless cleaning and reset, the fault may lie deeper:
- Faulty Sensor: The optical sensor or contact points themselves may have failed or become permanently damaged by moisture or debris.
- Wiring Issue: The tiny wire connecting the sensor to the mainboard could be loose or frayed.
- Full-Bin Mechanism Failure: The small mechanical flap inside the cup or its actuator in the robot may be broken.
Diagnosing these requires opening the robot’s shell, which voids warranty for most users.
Warranty and Support Pathway
If your Shark robot is still under warranty (typically 1-3 years), this is your best path. Before calling, have your serial number (on the underside) and proof of purchase ready. Explain you’ve performed all recommended troubleshooting from the manual and online resources. They may offer to mail you a new dust cup assembly (which includes the sensors), which is a common fix. If the robot is out of warranty, they can still provide the correct part number for you to purchase and install yourself if you’re handy, or offer a flat-rate repair service.
The Cost-Benefit Analysis
For older models, a repair cost might approach the value of a new robot. For newer, high-end models like the AI Ultra, a $50-$80 part replacement is often worth it. Use this error as a checkpoint: if your robot is 4+ years old and showing other signs of age (shorter battery life, louder operation), it might be time to consider an upgrade, as the technology has improved significantly in recent years.
Frequently Asked Questions
How do I reset my Shark robot after fixing the dust cup error?
After cleaning and reassembling, place the robot on its dock. For most models, press and hold the “Clean” button for 8-10 seconds until you hear a tone. For app-connected models, use the “Factory Reset” option in the SharkClean app settings. Always ensure the robot is fully charged after a reset.
How often should I clean the dust cup and sensors to prevent this error?
Empty the dust cup after every single use. Perform a quick dry wipe of the cup’s interior, seal, and the robot’s sensor ports weekly. Do a full deep clean, including washing filters, once a month or immediately if you notice reduced suction or the error light.
Why does the dust cup error come back even after I’ve cleaned everything thoroughly?
This usually means either 1) a component is still damp (filters, cup, or sensors), 2) the dust cup is not clicked into its final, firm position, 3) the internal flap inside the cup is stuck, or 4) a sensor or wiring has failed and needs replacement. Re-check for moisture and ensure the click is audible.
Will cleaning the dust cup myself void my Shark robot’s warranty?
No. Routine maintenance like emptying and cleaning the dust cup and filter is expected and does not void the warranty. However, if you need to open the robot’s main shell to access internal components, that could void it. Stick to the accessible dust cup and filter maintenance covered in the manual.
Are certain Shark robot models more prone to dust cup errors?
Models with self-emptying bases (like the Shark AI Ultra with Base) can be slightly more susceptible because debris travels through more pathways. The error is universal across all Shark robots that use a dust cup sensor, but models with simpler, single-chamber cups (like the ION) are often slightly easier to keep clean and error-free.
Can I use third-party filters or dust cups to avoid errors?
We strongly recommend using only genuine Shark replacement parts. Third-party filters often have different pore sizes and densities that can affect airflow and pressure, potentially triggering the error. Third-party dust cups may have poorly molded seals or incorrect sensor alignment, leading to constant errors. Stick to Shark OEM parts for reliable performance.