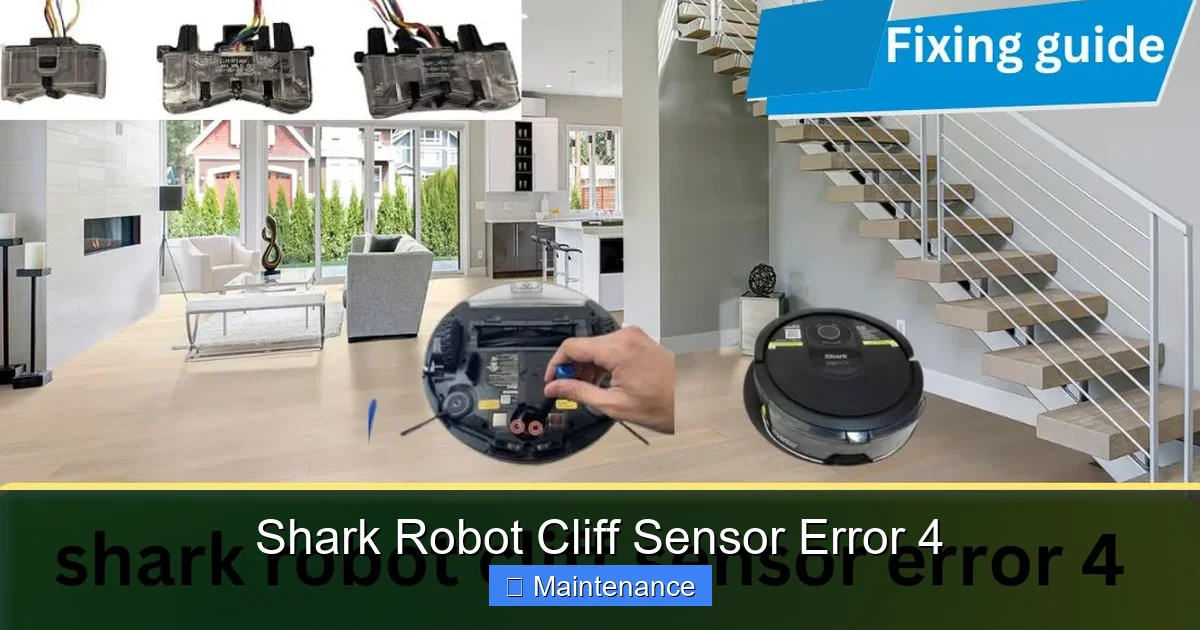
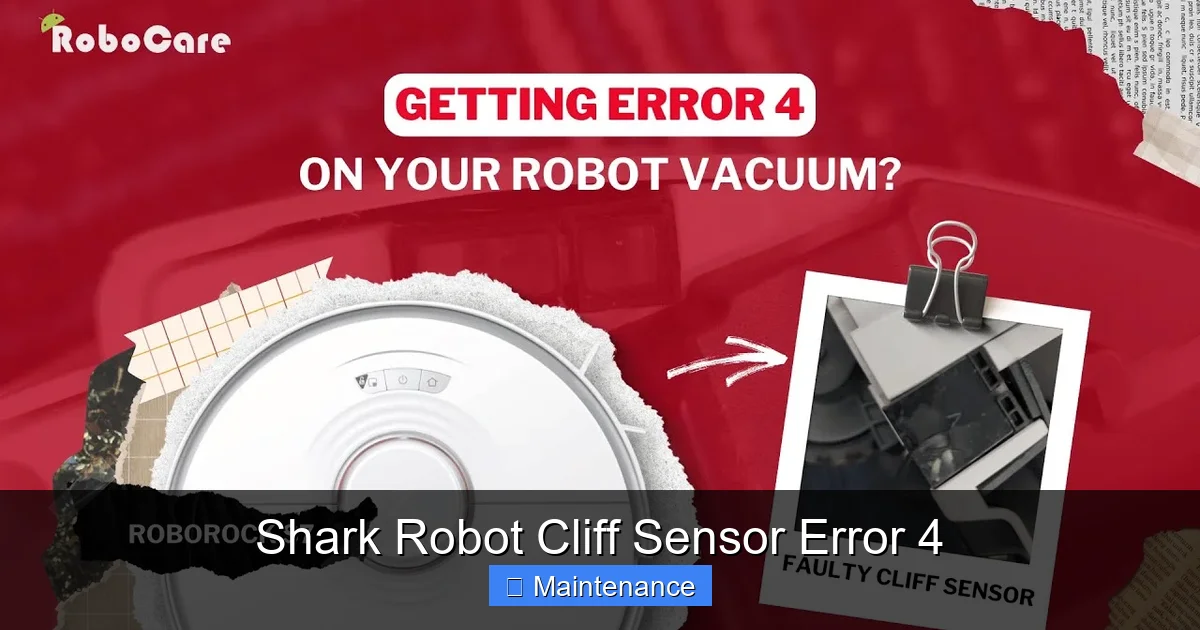
Shark Robot Cliff Sensor Error 4 is a common issue indicating your robot vacuum’s drop sensors are blocked or malfunctioning. This guide provides a comprehensive, easy-to-follow troubleshooting process, from simple cleaning to deeper checks. Learn exactly what causes this error, how to fix it yourself, and essential maintenance tips to prevent it from happening again and keep your Shark robot running smoothly.
Key Takeaways
- Error 4 means sensor obstruction: The “Cliff Sensor Error 4” specifically points to a physical blockage or dirt on one or more of the downward-facing cliff/drop sensors, preventing them from working correctly.
- Start with a simple clean: In 90% of cases, a thorough cleaning of the sensor windows with a dry, soft cloth resolves the issue immediately.
- Check the environment first: Dark-colored carpets, rugs with thick fringe, or floors with deep grout lines can trick sensors; understanding your home’s layout is key.
- Inspect for physical damage: Look for cracked sensor windows, loose wires, or damage from impacts with furniture or stairs.
- Software resets are a valid step: Power cycling the robot and performing a factory reset can clear temporary software glitches that might mimic a hardware error.
- Regular maintenance prevents recurrence: Making sensor cleaning a part of your weekly robot maintenance routine is the most effective long-term solution.
- Know when to seek help: If cleaning and resets fail, the sensor module itself may be faulty and require professional repair or replacement under warranty.
📑 Table of Contents
- Understanding the Shark Robot Cliff Sensor Error 4
- The Most Common Culprit: Dirt and Debris
- Environmental Triggers: When Your Home “Fools” the Robot
- Inspecting for Physical Damage and Hardware Issues
- Software Glitches and Resets: The Digital Reset
- Advanced Troubleshooting: Deep Dive into Components
- Prevention and Long-Term Care for Your Shark Robot
- When to Contact Shark Support or Seek Professional Repair
Understanding the Shark Robot Cliff Sensor Error 4
You’re enjoying the quiet efficiency of your Shark AI Ultra or Shark Ion robot vacuum when it suddenly stops, beeps frantically, and displays a cryptic message on its LED screen: Cliff Sensor Error 4. It’s a frustrating moment. That friendly cleaning companion has hit a roadblock, and you’re left wondering what it means and how to fix it. Don’t panic. This is one of the most common error codes for Shark robots, and it almost always points to a fixable issue with the robot’s “eyes.”
Think of the cliff sensors as your robot’s safety net. These are small, usually clear or dark plastic windows located on the underside of your Shark robot, near the front bumper and sometimes on the sides. Their job is simple but critical: they constantly emit a beam of infrared light downward. If that beam hits a surface and reflects back quickly, the robot knows it’s on solid ground. If the beam doesn’t return (like when it’s over a stair edge or a deep drop), the robot stops immediately to prevent a fall. Error 4 is your robot’s way of saying, “I can’t see the ground properly—something is blocking my view or my sight is broken.”
This guide will walk you through everything you need to know about Shark Robot Cliff Sensor Error 4. We’ll move from the simplest, most likely solution to more complex checks. Our goal is to empower you to diagnose and fix this problem yourself, saving you time, money, and the hassle of a service call. By the end, you’ll understand your robot better and have a clear action plan to get it back to work.
The Most Common Culprit: Dirt and Debris
Before you dismantle anything or worry about expensive parts, understand this: the number one cause of Cliff Sensor Error 4 is dirt. It’s that simple. The sensor windows are tiny, and they sit close to the floor. Over time, they accumulate a fine layer of dust, pet hair, carpet fibers, and general grime. This film acts like a dirty windshield, scattering or absorbing the infrared beam before it can do its job. The robot receives a “no signal” reading and throws the error code.
Visual guide about Shark Robot Cliff Sensor Error 4
Image source: sharkvacuum.blog
How to Properly Clean Your Shark’s Cliff Sensors
Cleaning these sensors is a delicate task. You need to remove all obstructions without scratching the plastic windows. Here is your step-by-step process:
- Gather Your Tools: You need only a few items: a dry, lint-free microfiber cloth (like one for cleaning glasses), a few cotton swabs, and optionally, a can of compressed air. Do not use liquids, cleaners, or paper towels, as they can leave residues or scratch the sensors.
- Power Down and Flip: Turn your Shark robot completely off using the power button. Then, place it upside down on a soft, clean towel or mat to protect its wheels and brushes from dirt.
- Locate the Sensors: On most Shark models (Ion, AI Ultra, IQ), you will find the main cliff sensor array as a black or dark gray rectangular strip running across the front underside of the bumper. There may also be smaller, individual sensors on the sides near the drive wheels. Consult your user manual for the exact locations for your specific model.
- Gentle Wipe: Take your dry microfiber cloth and gently wipe across each sensor window. Use a fresh, clean part of the cloth for each pass. Apply minimal pressure. You are just polishing away the surface dust.
- Detail with Swabs: For the edges of the sensor windows where the cloth can’t reach, use a dry cotton swab. Gently roll it along the seam between the sensor window and the plastic housing to dislodge any packed-in fibers.
- Blow Out Debris: If you have compressed air, give a very short, gentle burst across each sensor to blow away any remaining loose particles. Hold the can upright to avoid spraying liquid.
- Inspect: Shine a bright light on the sensors. You should see a clear, clean surface with no visible smudges, films, or debris.
- Test: Turn the robot right-side up, power it on, and try a cleaning cycle. In the vast majority of cases, the Cliff Sensor Error 4 will be gone.
Pro Tip: Make this cleaning a weekly habit. A quick 60-second wipe of the sensor array with a dry cloth during your regular filter cleaning routine will prevent this error from ever interrupting your clean.
Environmental Triggers: When Your Home “Fools” the Robot
Sometimes, the sensors are perfectly clean, but your home’s flooring is tricking them. The cliff sensors rely on the reflection of infrared light. Certain surfaces absorb or scatter this light in ways that confuse the robot, making it think it’s over a cliff when it’s perfectly safe on the ground.
Visual guide about Shark Robot Cliff Sensor Error 4
Image source: i.ytimg.com
Problematic Flooring Scenarios
Here are the most common environmental triggers for a false Cliff Sensor Error 4:
- Dark, Shaggy Carpets and Rugs: Very dark-colored carpets (black, navy blue) absorb infrared light rather than reflecting it. Similarly, high-pile or shaggy rugs with long fibers can engulf the sensor beam, preventing a return signal. The robot will stop at the edge of these rugs, thinking it’s a drop-off.
- Rugs with Thick Fringe or Tassels: The fringe can physically block the sensor window or dangle into it, creating a constant obstruction. The robot may see this as a cliff.
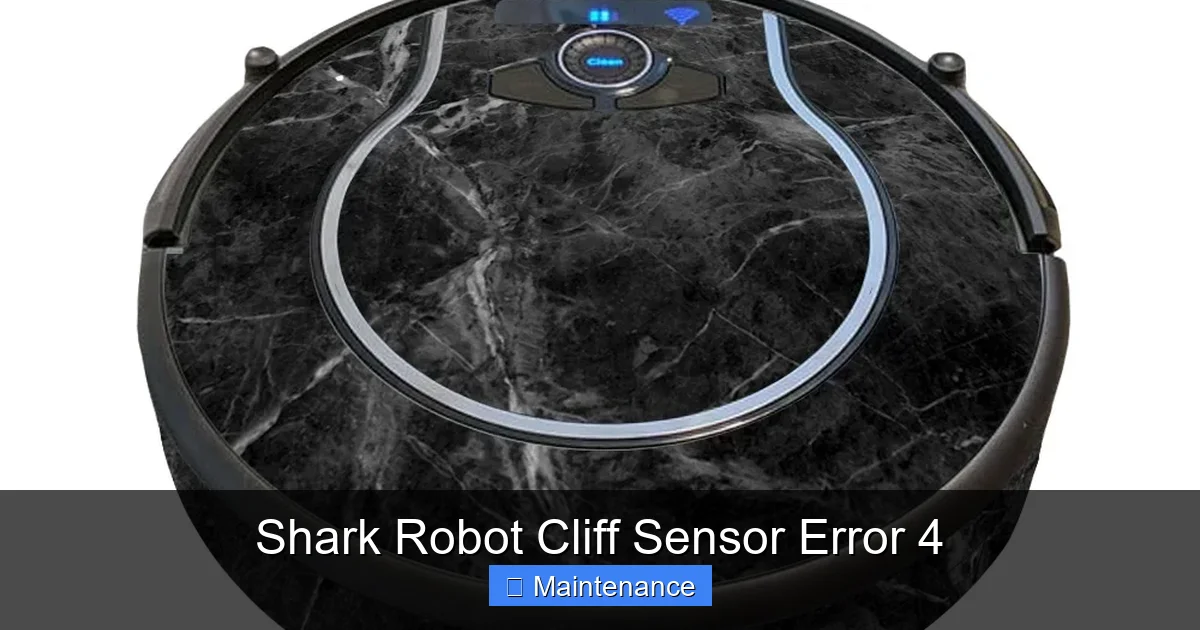
- Highly Reflective Surfaces: Very shiny, polished marble or some laminate floors can reflect the beam at such a sharp angle that it never returns to the receiving sensor, causing an error.
- Deep Grout Lines or Textured Tile: If you have large-format tiles with very deep, wide grout lines, the robot’s front bumper may dip into the grout. This changes the distance and angle to the sensor so drastically that it registers as a drop. The same can happen with heavily textured stone or concrete floors.
- Thresholds and Doorway Transitions: Some metal or dark wood thresholds between rooms can be just dark enough to trip the sensors as the robot crosses from one surface to another.
Solutions for Environmental False Alarms
You can’t change your floors, but you can work around them:
- Use “No-Go” Lines in the App: This is your primary tool. If your Shark model is compatible with the SharkClean app, use the virtual wall or “no-go” line feature. Draw a line just before the problematic rug or threshold. The robot will simply avoid that area entirely.
- Physical Barriers: For rugs with fringe, temporarily turn the rug 90 degrees so the fringe runs parallel to the robot’s path, or use a rug pad to flatten the fringe. You can also use small, clear plastic “bumper” strips (available online) to create a gentle ramp over deep thresholds.
- Manual Carry-Over: For a single problematic rug, simply pick up the robot and place it on the other side of the rug to continue cleaning.
- Adjust Cleaning Mode: Some Shark models have different navigation modes. Experiment with “Standard” vs. “Max” or “Deep” cleaning to see if one handles the transition better.
If the error only happens on one specific rug or in one specific room, you’ve almost certainly found an environmental trigger, not a hardware fault.
Inspecting for Physical Damage and Hardware Issues
If you’ve meticulously cleaned the sensors and ruled out tricky flooring, the next step is a physical inspection of the sensor components themselves. Damage can occur from impacts, wear and tear, or even a factory defect.
Visual guide about Shark Robot Cliff Sensor Error 4
Image source: i2.wp.com
What to Look For During Your Inspection
With the robot still upside down and powered off, use a flashlight to examine the sensor area closely:
- Cracked or Scratched Sensor Windows: The clear plastic covers over the infrared emitters and receivers are vulnerable. A crack, even a hairline one, or a deep scratch can distort the beam path or let in excess ambient light, causing failure. If the window is compromised, it needs to be replaced.
- Loose or Disconnected Wires: Gently wiggle the bumper assembly. You should feel no excessive movement. Look closely at where the small ribbon cables or wires connect from the bumper to the main robot body. A loose connector or a frayed wire will break the circuit. If you see a disconnected plug, carefully reseat it. If a wire is damaged, it requires professional repair.
- Obstruction Inside the Bumper: Sometimes, a small object—a piece of hard plastic, a broken toy fragment, a large accumulation of pet hair—can get jammed *behind* the sensor window from the inside. This is less common but possible. You may need to carefully remove the front bumper assembly (consult your manual for instructions) to check the sensor housings from the inside.
- Corrosion or Moisture Damage: If your robot has encountered a large spill or been used in very humid conditions, you might see white, crusty corrosion on the sensor connectors or the circuit board they plug into. This is serious damage that typically requires professional servicing.
The Bumper Assembly Check
The entire front bumper is a single unit that houses the cliff sensors and the contact sensors for bumps. A hard collision with furniture or a stair edge can jar this assembly out of alignment or crack the internal sensor mounts.
- Press down gently on different parts of the bumper. It should feel solid and not flex excessively.
- Listen for any rattling noises when you gently shake the robot (upside down). A loose component inside the bumper is a bad sign.
- Check that the bumper is seated evenly against the robot’s body. A gap on one side can indicate a misalignment that affects sensor positioning.
Finding any of these physical damages means the likely fix is a part replacement—either the individual sensor module, the entire bumper assembly, or the connecting wires. At this point, your warranty status becomes very important.
Software Glitches and Resets: The Digital Reset
We’ve focused on hardware so far because Cliff Sensor Error 4 is primarily a hardware-related code. However, the robot’s mainboard and software interpret the sensor signals. A temporary software glitch or corrupted data can sometimes cause the robot to misinterpret a perfectly good sensor signal as an error.
Performing a Full Power Cycle
This is the first and simplest software step, and it’s always worth trying after cleaning and before more invasive measures.
- Soft Reset: Press and hold the POWER button on your Shark robot for 10-15 seconds until you hear a beep and see the lights cycle off. The robot will fully power down. Wait 30 seconds, then press the power button again to turn it back on. Attempt a cleaning cycle.
- Hard Reset (Battery Removal): For a more thorough reset, you need to access the battery compartment (usually on the underside, often under a small panel). Ensure the robot is OFF. Remove the battery connector, wait 60 seconds, then reconnect it firmly. Reassemble and power on. This clears the volatile memory more completely.
Factory Reset via the SharkClean App
If you have your robot connected to Wi-Fi and the SharkClean app, a factory reset is a powerful tool. This will erase all learned maps, schedules, and preferences, returning the robot to its out-of-box state. It can clear deep software bugs.
- Open the SharkClean app and ensure your robot is connected and shown as online.
- Go to your robot’s settings menu (usually a gear icon).
- Look for an option called “Factory Reset,” “Reset Robot,” or “Clear Data.”
- Confirm the reset. The robot will reboot and you will need to go through the initial setup and mapping process again.
Important: A factory reset is a last-resort software step before assuming hardware failure. It’s also a necessary step if you end up replacing a part, as the robot may need to re-calibrate its sensors with the new hardware.
Advanced Troubleshooting: Deep Dive into Components
If you’ve exhausted cleaning, environmental checks, physical inspection, and all reset options, it’s time to consider that a specific component has failed. This level of troubleshooting is for the technically confident. If you are uncomfortable with electronics, this is the point to contact Shark Support.
Testing Sensor Circuits with a Multimeter
The cliff sensors are essentially simple infrared emitter-receiver pairs. You can test them for continuity if you have a multimeter.
- Safety First: Completely disconnect the robot from any power source. Remove the battery if possible.
- Access the Connector: Locate the small plug that connects the front bumper assembly (containing the sensors) to the mainboard. This is usually found under a removable plastic cover on the top or side of the robot’s chassis.
- Identify Pins: Consult a service manual or a reliable teardown video for your specific Shark model online to identify which pins on that connector correspond to the cliff sensors. This is the trickiest part.
- Test: Set your multimeter to the continuity setting (beep mode). Touch the probes to the identified pins. You should get a beep, indicating a closed circuit. If you get no beep (open circuit), the sensor LED or its wiring has failed.
Note: This test confirms if the circuit is broken but does not test the sensor’s *functionality* (its ability to emit and receive IR light correctly). A sensor could pass a continuity test but still be weak or misaligned.
The Mainboard Possibility
In rare cases, the fault lies not with the sensors or wires, but with the main control board that reads the sensor signals. A failing component on the board could stop it from interpreting the sensor data correctly, throwing Error 4 even with brand-new sensors. Diagnosing this requires advanced electronics knowledge and is almost always a job for a professional repair technician. The telltale sign is if you replace the sensor assembly and the error persists immediately.
Prevention and Long-Term Care for Your Shark Robot
Once you’ve vanquished Cliff Sensor Error 4, your mission shifts to prevention. A few minutes of proactive care each month will keep your robot reliable and your home consistently clean.
Building a Maintenance Routine
Integrate these steps into your monthly checklist:
- Sensor Wipe-Down: As emphasized, a dry microfiber cloth wipe of all sensor windows (cliff, bump, wall follow) is non-negotiable. Do this every time you clean the filter.
- Bumper Cleaning: While you’re down there, wipe the entire front bumper. Dust and hair can pack into the seam between the bumper and the robot body, eventually working its way toward the sensors.
- Wheel and Caster Inspection: Check the main drive wheels and the front caster wheel (the small ball or wheel that steers). Hair and string wrapped around the axles can put strain on the motors and, in extreme cases, slightly lift the front of the robot, changing the sensor’s angle to the floor.
- Floor Preparation: Be mindful of your home environment. Before a scheduled clean, do a quick scan for rogue socks, small toys, or pet beds with long tassels that could interfere with sensors or get caught.
- App Utilization: Use the “no-go” lines and room select features proactively. If you know a certain area is problematic, block it off in the app permanently. This reduces the robot’s need to make risky judgments at that spot.
Understanding Your Robot’s “Senses”
Think of your Shark robot as having a suite of senses:
- Cliff Sensors: “Eyes” looking down.
- Bump Sensors: “Nose” for physical contact.
- Wall Follow Sensors: “Side vision” for staying along edges.
- Optical Encoders on Wheels: “Inner ear” for knowing how far it’s turned and traveled.
- Camera/VSLAM (on AI models):strong> The “visual cortex” for mapping.
Cliff Sensor Error 4 is specifically a failure of the “eyes.” Keeping all these sensory organs clean and unobstructed is the golden rule of robot vacuum ownership. A clean robot is a smart, efficient, and long-lasting robot.
When to Contact Shark Support or Seek Professional Repair
You’ve followed this guide from top to bottom. You’ve cleaned obsessively, checked your floors, performed every reset, and even inspected for damage. The Cliff Sensor Error 4 remains stubbornly on the display. Now what?
Assessing Your Warranty Status
This is your first and most important consideration. Shark robot vacuums typically come with a limited warranty (often 1-3 years depending on model and region). If your robot is still within that warranty period:
- DO NOT attempt to disassemble the bumper or mainboard beyond simple cleaning. Opening the unit can void the warranty.
- Contact Shark Customer Support directly. Have your model number (found on a label on the underside) and serial number ready. Explain the error code and the troubleshooting steps you have already taken (e.g., “I have cleaned the cliff sensors thoroughly, performed a factory reset, and the error persists”). This shows you are informed and will speed up the process.
- Shark will likely guide you through additional steps and, if unresolved, will initiate a warranty repair or replacement process. They may send you a prepaid shipping label to send the robot to their service center.
Out-of-Warranty Repair Options
If your warranty has expired, you have a few choices:
- Official Shark Repair: You can still contact Shark for out-of-warranty service. They will provide a quote for repair. Given the cost of a new mid-range robot, this quote will be critical in your decision.
- Local Appliance Repair Shops: Some small appliance repair shops are willing to work on robot vacuums. They may be able to diagnose and replace a faulty sensor module or bumper at a lower cost than the manufacturer.
- Third-Party Parts & DIY: If you are technically skilled, you can often find replacement bumper assemblies or sensor modules on sites like eBay or Amazon (search for your exact Shark model number + “bumper” or “cliff sensor”). Replacing these usually involves removing several screws from the underside and disconnecting a few plugs. Only pursue this if you are confident in your abilities. Incorrect reassembly can cause more damage.
- Replacement Decision: Sometimes, the most practical choice is to recycle the old unit and invest in a new model. Technology improves, and a new robot will have better sensors, navigation, and battery life. Compare the cost of a reliable repair against the cost of a new unit in the same performance tier.
Frequently Asked Questions
What exactly does “Cliff Sensor Error 4” mean on my Shark robot?
It means the robot’s downward-facing safety sensors, which detect drops like stairs, are blocked, dirty, or malfunctioning. The robot cannot confirm it’s on solid ground and stops to prevent a fall.
I cleaned the sensors, but the error is still there. What should I do next?
After cleaning, check your flooring. Dark carpets, shaggy rugs, or deep tile grout can trick sensors. Use the SharkClean app’s “no-go” lines to block these areas. If that fails, perform a full power cycle reset and then a factory reset via the app.
Can I use a wet cleaner or alcohol on the cliff sensors?
No. Always use a dry, lint-free microfiber cloth. Liquids, cleaners, or paper towels can leave residues or scratch the delicate sensor windows, causing permanent damage and worsening the problem.
My robot works fine on hard floors but gives Error 4 on my dark area rug. Is this normal?
Yes, this is a classic environmental false alarm. Very dark surfaces absorb the infrared beam, making the robot think it’s over a cliff. The solution is to use a virtual “no-go” line in the app to keep the robot off that specific rug.
Will opening my robot to inspect the sensors void the warranty?
Yes, likely. For warranty service, you should only perform external cleaning and resets. If those fail, contact Shark Support directly. They will guide you and may request you send the robot in for service without you having disassembled it.
The error comes and goes randomly. What could cause an intermittent cliff sensor error?
Intermittent errors usually point to a loose connection—a wire or ribbon cable that has become partially unseated from vibration. It could also be a wire that’s fraying internally. This requires careful inspection of the bumper connector to the mainboard, often necessitating professional repair.