Is your Shark Professional Steam Mop S3601 suddenly refusing to produce steam? This frustrating issue is almost always fixable and typically stems from a few common culprits: water supply problems, mineral clogs in the steam nozzles or hose, a faulty heating element, or a tripped safety thermostat. Before you panic or call for service, you can diagnose and often resolve the “no steam” problem yourself with systematic troubleshooting, starting with the simplest checks like water level and type, then moving to cleaning and component inspection. Most solutions require only common household tools and a bit of patience, saving you time and money.
Key Takeaways
- Water is the First Check: Always verify the tank is filled with clean, cool water. Using distilled water prevents mineral buildup, a leading cause of steam failure.
- Clogs are the Prime Suspect: Mineral deposits from hard water are the #1 reason for clogged nozzles and steam pathways, blocking steam flow entirely.
- Heating Element Failure is Possible but Less Common: If the mop heats up but produces no steam, the heating element or its thermal fuse may have failed.
- Safety Thermostats Can Trip: Overheating from clogged steam jets or running dry can trigger a resettable thermal cut-out, stopping steam production.
- Preventive Maintenance is Key: Regular descaling, proper storage, and using the right water type will prevent most “not steaming” issues from ever happening.
- Simple Fixes Often Work: A thorough cleaning of all steam jets with a paperclip and a vinegar-water descaling cycle solves the problem in many cases.
- Warranty and Professional Help: If all DIY steps fail and the unit is under warranty, contact Shark customer service before attempting complex internal repairs.
📑 Table of Contents
- Introduction: The Frustration of a Cold Steam Mop
- Section 1: The Water System – Supply Issues & The Right Water Type
- Section 2: The Heating Element – Heart of the Steam
- Section 3: Clogged Steam Jets and Pathways – The Most Common Culprit
- Section 4: Electrical Components and Safety Sensors
- Section 5: Advanced Troubleshooting and Common Misconceptions
- Section 6: Maintenance Best Practices – Prevention is Everything
- Conclusion: Empowering the DIY Home Technician
Introduction: The Frustration of a Cold Steam Mop
You’ve filled the tank, plugged in your trusty Shark Professional Steam Mop S3601, and waited for that satisfying hiss of steam. Instead, you’re met with silence, a cold mop head, and a growing pile of dirt. The “Shark Professional Steam Mop S3601 not steaming” problem is a common household headache, but it’s rarely a death sentence for your appliance. This model, known for its power and professional-grade results, relies on a simple but precise system: water must be heated to boiling, and that steam must travel unimpeded through tiny jets to your floor. A break anywhere in that chain—supply, heating, or delivery—results in a cold, useless mop.
The good news is that with a methodical approach, you can diagnose and likely fix the issue yourself. This guide will walk you through every potential cause, from the embarrassingly simple to the more complex, with clear, step-by-step instructions. We’ll talk about water, clogs, heaters, sensors, and the essential maintenance that keeps your S3601 purring. Forget the expensive service call for now; let’s become your own steam mop technician.
Section 1: The Water System – Supply Issues & The Right Water Type
Before blaming any internal component, you must rule out the most fundamental requirement: a proper water supply. It sounds obvious, but many “not steaming” cases trace back to this starting point. The Shark S3601 has a specific water tank and delivery system that must function correctly.
Visual guide about Shark Professional Steam Mop S3601 Not Steaming
Image source: sharkvacuum.blog
Is the Tank Properly Filled and Seated?
The first, fastest check is the most basic. Ensure the water tank is inserted correctly into the mop’s body. It should click or lock into place. An improperly seated tank breaks the seal between the tank and the internal water inlet, preventing any water from entering the heating chamber. Next, check the water level. The S3601 has minimum and maximum fill lines. If the water is below the minimum line, the internal pump or gravity feed won’t draw water. Fill it to between the lines with cool or room-temperature water. Never use hot water from the tap, as it can damage the seals and affect the heating cycle’s calibration.
The Critical Importance of Water Type: Distilled vs. Tap
This is the single most important preventive measure for your Shark steam mop. Tap water contains minerals like calcium and magnesium (hard water). When this water is heated and turned into steam, these minerals don’t vaporize; they are left behind as limescale deposits. Over time, these deposits build up inside the tiny water pathways, heating chamber, and especially the steam nozzles, creating a solid blockage that steam cannot penetrate. Shark recommends using distilled water for exactly this reason. If you’ve been using tap water, mineral clogging is the likely villain. Even with distilled water, occasional descaling is needed, but the frequency is drastically reduced.
Practical Tip: Keep a gallon jug of distilled water (available at any grocery store) dedicated solely to your steam mop. It’s a small investment that prevents major headaches and maintains the mop’s performance and lifespan.
Checking the Fill Cap and Seal
Inspect the tank’s fill cap. Ensure it is screwed on tightly but not forced. Inside the cap is a small rubber gasket or seal. If this seal is cracked, torn, or missing, air can enter the system, preventing the creation of the vacuum needed to pull water from the tank. It can also cause leaks. A faulty seal is a cheap and easy fix—replacement caps are available from Shark or third-party appliance parts suppliers.
Section 2: The Heating Element – Heart of the Steam
If your water supply is verified (correct tank, good seal, proper water type, full to the line) and you still have no steam, the next major system to investigate is the heating element. This is the component that electrically heats the water to over 200°F to create steam. Failure here means cold water, no matter how clean.
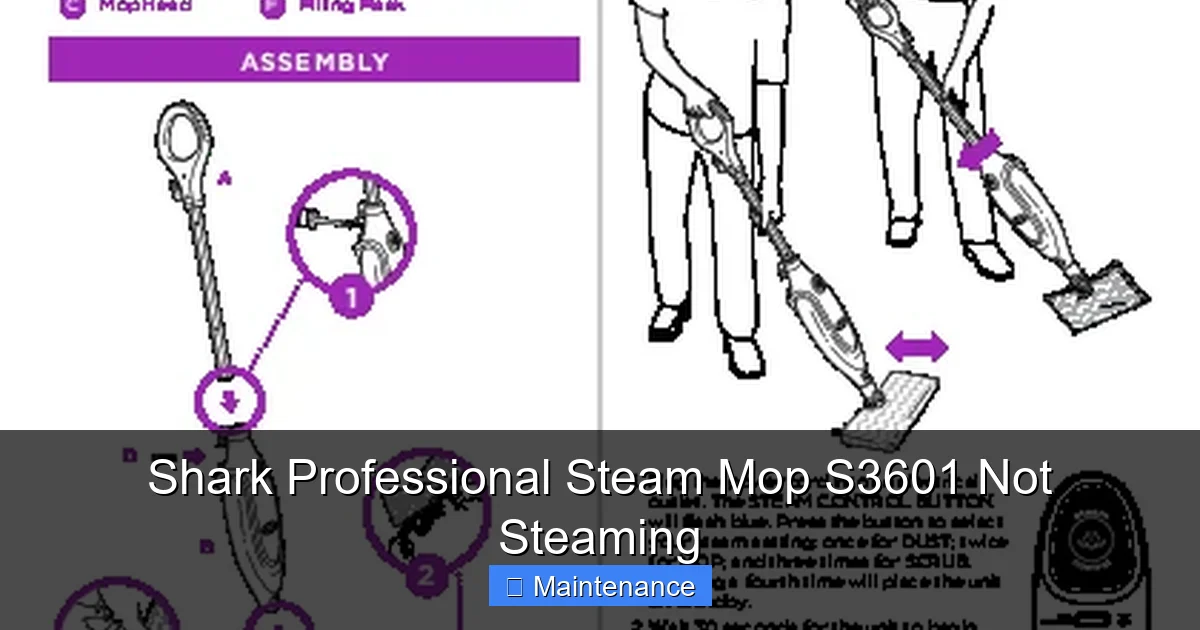
Visual guide about Shark Professional Steam Mop S3601 Not Steaming
Image source: device.report
Is the Mop Actually Getting Hot?
This is your first diagnostic test. Plug in the mop and turn it on. After the normal pre-heating cycle (usually 30-60 seconds for the S3601), carefully feel the base of the mop head or the body near the water chamber. Is it warm or hot? Use caution—it can get very hot. If the body is completely cold after several minutes, the heating element is not energizing. If the body is hot to the touch, the element is likely working, and the problem is a steam blockage (covered in the next section). A hot body with no steam points to a severe clog between the heating chamber and the nozzles.
Potential Heating Element Failures
If the mop isn’t heating, the fault could be:
- Blown Thermal Fuse: This is a common failure point. The S3601 has a thermal fuse (or a resettable thermal cut-out) as a safety device. If the mop overheated previously—perhaps from running dry or a severe clog—this fuse will blow or trip, cutting power to the element. Some models have a small, recessed reset button on the body. Consult your manual. If there’s no reset button or it doesn’t work, the fuse needs replacement.
- Faulty Power Cord or Switch: Visually inspect the entire power cord for cuts or fraying. Test the outlet with another device. The on/off switch can also wear out. Listen for a faint click when you press the switch.
- Failed Heating Element: The element itself is a resistive coil that can burn out. This is less common than a fuse failure but requires a multimeter to test for continuity and, if faulty, replacement.
- Control Board or Thermostat Issue: The electronic control or a high-limit thermostat might not be signaling the element to turn on. This is more complex to diagnose.
Important Safety Note: Always unplug the mop before inspecting any internal components. If you are not comfortable testing electrical parts, this is the stage where you should consider contacting Shark support or a qualified appliance repair technician, especially if your unit is under warranty.
Section 3: Clogged Steam Jets and Pathways – The Most Common Culprit
Assuming your Shark S3601 is heating up nicely but you still get no steam, or only a weak sputter, you have a classic case of mineral blockage. Steam has to travel through a maze of tiny passages from the boiler to the mop head. Any obstruction stops the flow.
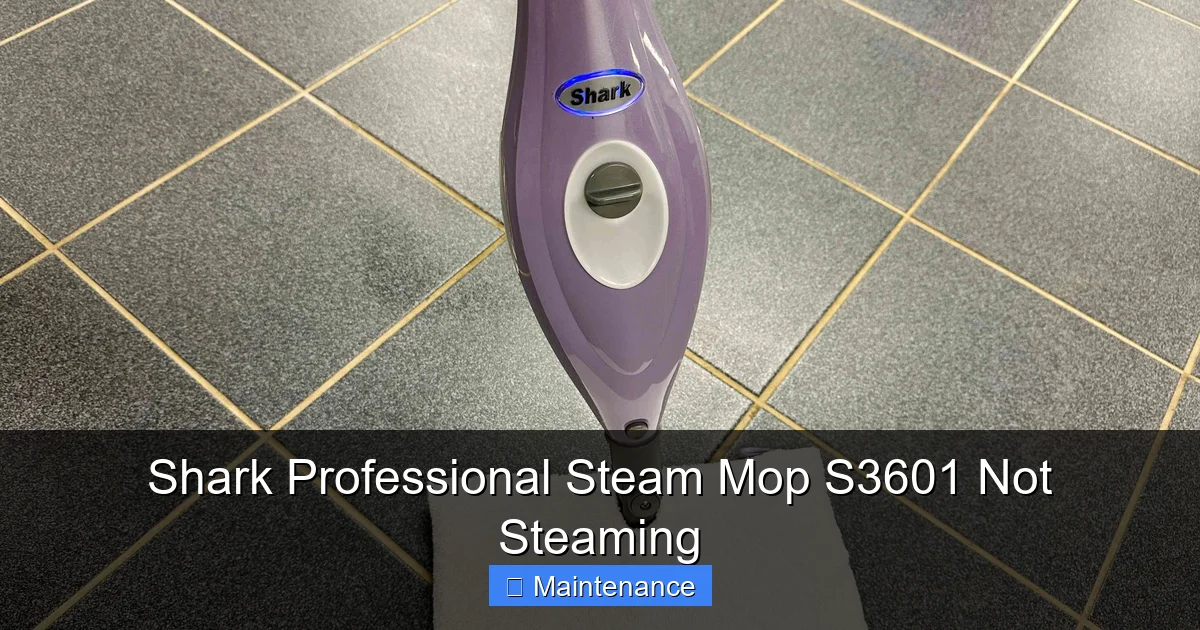
Visual guide about Shark Professional Steam Mop S3601 Not Steaming
Image source: thespruce.com
Understanding the Steam Path
Steam is generated in the sealed heating chamber. It is forced under pressure through a main steam hose that runs from the body to the mop head. At the mop head, this steam is distributed through a series of small jets (often 10-15 holes) on the underside. Additionally, some models have a “steam blast” button that sends a extra burst through a dedicated jet. Every single one of these orifices is a potential clog site.
Visual Inspection and Manual Unclogging
This is the most hands-on, and often most effective, part of the repair.
- Unplug and Cool: Ensure the mop is unplugged and completely cool.
- Detach the Mop Head: Usually, it clicks or unscrews from the main body. Lay it flat.
- Locate All Jets: Turn the mop head over. You’ll see the series of small steam holes. Also, check the connection point where the steam hose attaches to the head—there’s often a small inlet hole there.
- The Paperclip Method: Take a straightened metal paperclip. Gently insert it into each steam jet hole. You are not drilling; you are carefully probing to break up the crusty mineral deposit. You will feel a slight resistance if there’s a clog. Work the clip in and out gently. You may see a tiny flake of white scale emerge. Be very gentle to avoid scratching the mop head’s surface or enlarging the jet hole.
- Check the Steam Hose: Detach the steam hose from both the body and the mop head (there are usually release clips). Look through it from both ends. Shine a flashlight through it. If you see an obstruction, use the flexible end of a wire coat hanger (wrapped in a little tape to avoid scratching) to gently clear it.
- Clean the Main Jet on the Body: Where the steam hose connects to the main unit, there is a small pin-sized hole. Insert your paperclip here as well.
Descaling the Entire System with Vinegar
Manual unclogging handles the visible jets, but scale builds up inside the internal waterways. A vinegar descaling cycle is essential.
- Prepare the Solution: Mix a 1:1 solution of white distilled vinegar and water. You’ll need enough to fill the tank (about 12-14 oz).
- Run the Cycle: Fill the tank with the vinegar solution. Reassemble the mop (head attached). Plug it in and turn it on. Let it heat and produce steam. Important: Do not use it on your floor! Vinegar is corrosive to some finishes. Instead, point the mop head into a large, heat-resistant sink, bucket, or outside onto a concrete surface. Let it steam for 5-7 minutes. The vinegar’s acidity will dissolve internal limescale.
- Flush Thoroughly: After the vinegar cycle, unplug and let cool. Empty any remaining solution. Rinse the tank thoroughly with clean water. Fill it with fresh, cold distilled water and run another full steam cycle (again, pointing the mop into a sink) to flush out all vinegar residue. Repeat the rinse cycle with a second tank of fresh water.
Warning: Never use commercial descaling products or CLR unless explicitly approved by Shark for your model. They can be too harsh and damage seals.
Section 4: Electrical Components and Safety Sensors
If you’ve confirmed the mop heats up (hot body) but after descaling and unclogging, there’s still no steam, the issue may be electrical or sensor-related. The S3601 has safety systems that can interrupt steam production.
The Resettable Thermal Cut-Out
As mentioned, this is a safety thermostat designed to cut power to the heater if the temperature gets too high. It can trip if the mop was used with a severe clog (causing the element to overheat because steam couldn’t escape) or if it was run dry. Locate your user manual. It will show if your S3601 model has a user-resettable thermal cut-out and where it is located (often a small red or black button on the underside or back of the main body). With the mop unplugged and cool, press this button firmly until it clicks. Plug in and try again. If it trips again immediately, there is an underlying cause (like a persistent clog) that must be fixed first.
Water Level Sensor or Float
Inside the tank, there is often a small float switch or sensor that tells the mop if there is enough water to operate. If this sensor is stuck in the “empty” position (perhaps due to mineral deposit or mechanical failure), the mop will not initiate the heating cycle, thinking it’s out of water. Check your manual for the location. Sometimes, gently moving the float up and down can free it. If it’s coated in scale, a vinegar soak may help.
Pressure Switch or Steam Pressure Sensor
Some steam mop models use a pressure switch to confirm steam is being generated and flowing. If this switch fails, it might signal a “no steam” condition to the control board, shutting the heater down. Diagnosing this requires a multimeter and technical knowledge. This is a less common failure point but possible.
Section 5: Advanced Troubleshooting and Common Misconceptions
Let’s address some specific symptoms and pitfalls that can mislead you during diagnosis.
“It Hisses But Doesn’t Clean”
If you hear a faint hissing or see a tiny wisp of steam, but the mop isn’t performing, you likely have a partial clog. The pressure is building and escaping through one or two open jets, but not enough to saturate the pad or clean effectively. This is a strong sign to repeat the manual unclogging and descaling process. Focus on ensuring every single jet hole is completely clear.
Water Leaking from the Mop Head
Water (not steam) leaking usually indicates a different problem. It could be a cracked water hose inside the handle, a failed seal at the connection between the hose and the mop head, or a damaged water tank seal. Trace the leak’s source. If it’s from the head, the internal water distribution manifold might have a crack. Leaks are often separate from “no steam” issues but can coincide if a seal fails and air is drawn in.
Strange Noises (Gurgling, Bubbling)
A gurgling or bubbling sound, especially if accompanied by sputtering steam, often means air is being sucked into the water system. This points to a leak in the sealed system (tank seal, hose crack) or an improperly seated tank. Air pockets prevent the pump from moving water effectively. Re-seat the tank, check all connections, and inspect hoses for damage.
The “Just Bought It” Problem
If your new S3601 isn’t steaming out of the box, it’s almost always a simple issue. Did you remove all the protective packaging? Check for plastic plugs in the steam jets or a protective sticker over the tank inlet. Also, new units sometimes have manufacturing residue. A full descaling cycle with vinegar may be needed even on a new mop.
Section 6: Maintenance Best Practices – Prevention is Everything
Fixing a clogged steam mop is satisfying, but preventing the clog is better. Adopt this routine for a happy Shark S3601.
Water Discipline
Use only distilled water. This is non-negotiable for long-term health. Keep a dedicated jug. After each use, empty any remaining water from the tank. Do not let water sit in the tank for days, as it can grow bacteria or algae and will still leave minerals as it evaporates.
Post-Use Cleaning Ritual
After each use, while the mop is still slightly warm (but unplugged and safe to handle):
- Wipe the mop head and pad with a clean, damp cloth to remove residual dirt.
- Use the paperclip method on all visible steam jets. This quick 30-second step removes fresh, soft scale before it hardens.
- Store the mop upright, with the tank empty and the cap off, to allow any residual moisture to evaporate completely.
Monthly/Quarterly Deep Clean
Even with distilled water, perform the full vinegar descaling cycle described in Section 3 every 1-3 months, depending on your usage and water hardness. This dissolves internal scale you can’t reach. Follow it with two fresh water rinse cycles.
Pad Care
Always use the correct Shark microfiber pads. Wash them separately in the washing machine with mild detergent, no fabric softener. Fabric softener coats the fibers and makes them hydrophobic, repelling water and steam. Replace pads when they become overly stiff or stained, as a dirty pad impedes steam transfer to the floor.
Conclusion: Empowering the DIY Home Technician
Your Shark Professional Steam Mop S3601 is a robust machine built for heavy-duty cleaning. Its “not steaming” symptom is almost always a solvable puzzle. By following this structured approach—starting with the water supply, moving to the critical step of unclogging and descaling, then considering heating and sensor issues—you have a clear roadmap to diagnosis and repair. Remember, in the vast majority of cases, the problem is mineral buildup from using tap water. The combination of manual jet cleaning with a vinegar descaling cycle is your most powerful tool.
Embrace the preventive maintenance routine. Using distilled water and performing quick post-use jet cleanings will likely mean you never encounter a severe clog again. This simple habit protects your investment, ensures consistent cleaning power, and saves you from future frustration. You’ve now got the knowledge to keep your steam flowing. Now, go enjoy that clean, sanitized floor—you’ve earned it.
Frequently Asked Questions
Why is my Shark S3601 steam mop producing no steam at all, not even a sputter?
First, ensure the tank is properly seated and filled with cool distilled water to the fill line. If the mop body gets hot but no steam comes out, you have a complete clog in the steam path. Perform the paperclip cleaning on every jet and run a full vinegar descaling cycle. If the body stays cold, check for a tripped thermal reset button or a power issue.
My steam mop heats up and hisses, but the mop pad stays dry. What’s wrong?
This indicates a partial clog. Steam is building pressure and escaping through only one or two open jets, but not enough to saturate the pad. You must thoroughly clean all steam jets on the mop head with a paperclip and immediately perform a vinegar descaling cycle to clear internal mineral buildup.
Can I use tap water in my Shark S3601 if I descale it regularly?
While regular descaling is necessary if you use tap water, it’s a reactive fix. We strongly recommend using only distilled water. Tap water minerals continuously build up, and aggressive descaling is needed more frequently to combat it. Distilled water prevents the buildup altogether, is cheaper in the long run, and extends the life of your mop’s internal components.
Where is the reset button on the Shark Professional Steam Mop S3601?
The user-resettable thermal cut-out is typically located on the underside of the main handle/body unit. It is often a small, red, circular button that is recessed. You must press it firmly until it clicks. Consult your printed user manual for the exact location and diagram for your specific model number.
My mop is steaming but also leaking water from the head. Is this related?
A water leak is usually a separate issue from a “no steam” problem. It’s commonly caused by a cracked internal water hose, a damaged seal where the steam hose connects to the mop head, or a faulty tank cap seal. Air being drawn into the system from a leak can also cause sputtering or weak steam. You’ll need to inspect and likely replace the faulty seal or hose.
How often should I descale my Shark steam mop to prevent steaming issues?
If you use only distilled water, a descaling cycle with a vinegar-water solution is recommended every 3-6 months as preventive maintenance. If you use tap water, you should descale monthly or at the very least every 6-8 weeks, as mineral buildup occurs much faster. Always follow a descaling cycle with two thorough rinses using fresh distilled water.