When your Shark Navigator vacuum suddenly loses suction, it’s almost always a fixable issue, not a failed machine. The problem typically stems from a simple clog, a full dust cup, or a dirty filter—all things you can diagnose and resolve in minutes. Don’t rush to replace it; follow a systematic troubleshooting process starting with the most common culprits. This guide walks you through every potential cause, from basic maintenance to more complex blockages, to restore your vacuum’s powerful cleaning performance.
You’re in the middle of cleaning, pushing your trusty Shark Navigator across the floor, and you notice it. That familiar, powerful sound has changed. The vacuum isn’t picking up debris like it should. You look down, and the dirt is just sitting there, mocking you. The panic sets in. Is it broken? Did the motor give out? Before you resign yourself to a costly repair or a new vacuum, take a deep breath. The phrase “Shark Navigator not suctioning” is one of the most common search queries for a reason—it’s a frequent issue, and it’s almost always something you can fix yourself, quickly and for free. This isn’t about complex engineering; it’s about understanding the simple path air takes through your vacuum and clearing the obstacles along the way. Let’s get your Shark back to its powerful, efficient self.
Key Takeaways
- Loss of suction is rarely a motor failure: In over 90% of cases, the issue is caused by a preventable clog, a full dust cup, or neglected filters, not a broken vacuum.
- Always unplug before inspecting: Safety is paramount. Always disconnect the Shark Navigator from the wall outlet before checking for clogs or removing any components.
- Check the simplest things first: Begin your diagnosis by emptying the dust cup and cleaning or replacing the pre-motor and post-motor filters—this solves most suction problems.
- The brush roll is a common hidden clog point: Hair, string, and carpet fibers can wrap tightly around the brush roll bearings and block the suction path directly behind it.
- Inspect the entire air pathway: Suction is a closed system. You must check from the floor nozzle, up through the wand and hose, and into the canister for any obstruction.
- Regular maintenance prevents most issues: A quick rinse of the filters after every few uses and a weekly check of the brush roll will keep your Shark Navigator suctioning optimally for years.
- Warranty and professional help are options: If you’ve methodically checked everything and the motor still doesn’t create suction, contact Shark support. Your vacuum may be under warranty.
📑 Table of Contents
- Understanding Your Shark Navigator’s Suction System
- First Line of Defense: The Dust Cup and Filters
- The Hidden Culprit: Brush Roll and Roller Housing
- Inspecting the Wand and Hose for Obstructions
- Less Common but Possible Causes
- Preventative Maintenance: Keep the Suction Flowing
- When to Contact Shark Support or Consider Replacement
Understanding Your Shark Navigator’s Suction System
Before we start taking things apart, it helps to understand the basic journey of suction. Think of your Shark Navigator as a long, flexible straw. The motor at the top creates a powerful airflow (suction). That air gets pulled in from the floor nozzle at the bottom, travels up through the brush roll housing, into the wand, through the hose, and finally into the dust cup and filters before being expelled out the back. If any single part of that pathway is blocked, restricted, or leaking, your suction will drop significantly or stop entirely. The good news? Every single point in that pathway is accessible and cleanable. Your troubleshooting mission is to become an air-path detective, finding where the flow is interrupted.
The Role of the Motor and Fans
At the heart of your Shark Navigator is the motor. It spins a fan at incredibly high speeds. This fan doesn’t “suck” in the way we think; it actually pushes air out the exhaust, which creates a lower pressure zone inside the vacuum’s internal tubing. Nature abhors a vacuum (literally), so higher-pressure air from your room rushes in through the nozzle to fill that low-pressure space. That rushing air is what we call suction. If the motor is running but you have no suction, the air is finding an easier escape route (a big leak) or is completely blocked from entering. True motor failure is rare and usually accompanied by a burning smell or the motor not running at all.
First Line of Defense: The Dust Cup and Filters
When you encounter a Shark Navigator not suctioning, your first stop is always the collection system. This is the most common cause of lost power and the easiest to fix.
Visual guide about Shark Navigator Not Suctioning
Image source: sharkvacuum.blog
Step 1: Empty the Dust Cup Completely
This seems obvious, but many users only empty the cup when the “full” indicator lights up. By then, the cup is packed so full that it acts as a physical barrier, severely restricting airflow. Here’s the pro tip: Don’t just tap it out. Take it to the trash and give it a firm shake, then use a tool (even a butter knife wrapped in a paper towel) to scrape out any fine dust caked in the corners and along the mesh filters inside the cup itself. A visibly empty cup can still be 20% full of compacted dust that chokes suction. Empty it after every single use for optimal performance.
Step 2: Clean or Replace the Filters
Your Shark Navigator has at least two critical filters: the pre-motor filter (protects the motor from dust) and the post-motor filter (cleans the exhausted air). Many models also have a foam pre-filter. These filters are not just for air quality; they are part of the sealed suction system. If they are clogged with dust, hair, and debris, air can’t pass through them efficiently, creating a massive bottleneck.
- Pre-Motor Filter (usually rectangular, foam or felt): Remove it. If it’s foam, rinse it under cool water until the water runs clear. Squeeze out excess water—do not wring. Let it air dry completely for at least 24 hours before reinserting. Never operate the vacuum with a wet filter; it will destroy the motor.
- Post-Motor Filter (usually pleated paper or HEPA): This one is typically not washable. Gently tap it over a trash can to dislodge dust. If it’s heavily soiled or damaged, it needs to be replaced. A clogged post-motor filter can feel like a total suction loss because the motor is working against a sealed wall.
- Check Filter Seals: Ensure the filter housings are clean and the rubber seals around the filters are intact and seating properly. A misaligned filter or a dried-out seal creates air leaks that kill suction.
The Hidden Culprit: Brush Roll and Roller Housing
If your dust cup is spotless and your filters are clean (or new), the next most likely spot for a Shark Navigator not suctioning is right at the business end: the brush roll housing.
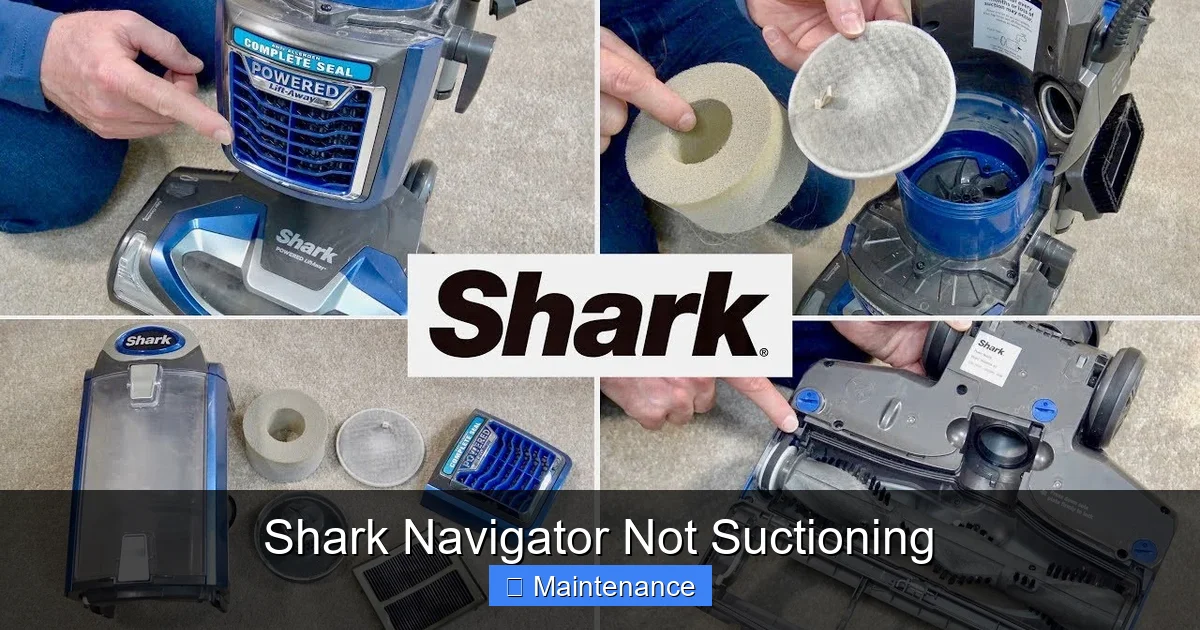
Visual guide about Shark Navigator Not Suctioning
Image source: i.ytimg.com
Hair, Fibers, and Debris Wrap
The brush roll (the cylindrical brush with bristles) is designed to agitate carpet fibers. This makes it a magnet for human hair, pet fur, carpet string, and carpet fibers themselves. Over time, these materials don’t just wrap around the bristles—they wind tightly around the metal axles and bearings at each end of the brush roll. This creates a solid “belt” of material that physically blocks the suction opening right behind the brush roll. To check: Flip the vacuum over. Use a seam ripper, a sharp knife, or even dedicated brush roll cleaning scissors to carefully cut and remove all wrapped material from the ends of the brush roll. You must clear the area directly under the bearings. Once clear, spin the brush roll by hand. It should rotate freely with no resistance. If it’s stiff, you haven’t gotten it all.
Check the Suction Opening
With the brush roll out of the way (you can usually pop it out by pushing the release tabs), look into the cavity where it sits. You’ll see a large opening that leads to the hose/wand. Is it clogged with a sock, a large piece of paper, or a compacted ball of pet hair? Use a long, flexible tool (like a wire coat hanger with a small hook bent on the end) to gently dislodge and pull out any obstruction. Be careful not to push debris further in.
Inspecting the Wand and Hose for Obstructions
Now we move up the air path. A small object—a coin, a child’s toy piece, a pen cap—can travel up into the wand or hose and lodge there, creating a perfect seal and stopping all suction.
Visual guide about Shark Navigator Not Suctioning
Image source: thespruce.com
The “Blow-Through” Test
This is the definitive test for a blockage in the upper airway. With the vacuum unplugged:
- Remove the wand and hose from the vacuum’s body.
- Detach the floor nozzle from the wand.
- Now, look into the open end of the wand. You should be able to see light through to the other end (where it connects to the vacuum). If it’s blocked, you’ll see an obstruction.
- The Test: Take the hose/wand assembly outside or to a well-ventilated area. Plug the vacuum back in and turn it on. Place your hand over the open end of the wand. You should feel a strong pull. Now, quickly move your hand away. You should hear and feel a strong burst of air blowing out of the wand. This confirms the motor is creating airflow in the correct direction.
If no air blows out: The blockage is between the motor and where you’re holding the wand. The obstruction is in the hose or the wand itself. Use a long, flexible brush (a drain cleaning brush works perfectly) to feed through the hose and wand from both ends to dislodge the item.
If air DOES blow out strongly: Your motor and upper airway are fine. The blockage is below the wand—in the brush roll housing or the floor nozzle itself.
Less Common but Possible Causes
If you’ve meticulously cleaned the cup, filters, brush roll housing, and cleared the wand/hose, there are a few other, less frequent reasons for a Shark Navigator not suctioning.
Damaged or Leaking Hoses and Connections
Inspect the entire length of the hose for cracks, holes, or tears, especially where it bends. Check the plastic connectors at each end for cracks. Even a small pinhole leak will allow outside air to be pulled in, which drastically reduces the pressure differential (suction) at the nozzle. A quick way to test: with the vacuum running, run your hand along the hose. If you feel a significant draft of air on your skin, you’ve found a leak. Small cracks can sometimes be sealed temporarily with strong tape, but a damaged hose usually needs replacement.
Worn or Damaged Seals and Gaskets
Your Shark Navigator has several rubber or foam seals: around the dust cup lid, where the hose connects to the canister, and inside the wand connections. Over time, these can become brittle, torn, or dislodged. A compromised seal creates an air leak. Visually inspect each seal. Clean off any dust that might be preventing a tight seal. If a seal is visibly cracked or flattened, it needs to be replaced. Shark sells seal kits for most models.
Faulty or Missing Internal Components
Inside the motor housing, there are internal plastic ducts and a one-way valve (in some models) that direct airflow. If a plastic piece has cracked or broken (sometimes from a major clog causing backpressure), it can redirect air. This is a more advanced diagnosis. Also, ensure the exhaust grill at the back of the vacuum isn’t clogged with dust bunnies. While less common, it can restrict the airflow out and impact overall performance.
Preventative Maintenance: Keep the Suction Flowing
The best fix for a Shark Navigator not suctioning is to prevent it from happening. Incorporate these habits into your cleaning routine:
After Every Use: The 60-Second Routine
- Tap and Shake: Give the dust cup a vigorous tap and shake over the trash can.
- Quick Filter Tap: Remove the pre-motor foam filter and give it a few firm taps to dislodge loose dust. If it’s visibly dirty, rinse it.
- Brush Roll Glance: Flip the vacuum over and quickly look at the brush roll. If you see hair wrapped around it, cut it off now before it winds tighter.
Weekly/Monthly Deep Clean
- Full Filter Wash: Wash the foam pre-filter with cool water weekly if you have pets or a dusty home. Let it dry for 24 hours.
- Brush Roll Extraction: Once a month, fully remove the brush roll and clean out all debris from the bearings and housing.
- Hose and Wand Wipe-Down: Wipe the inside of the hose and wand with a damp cloth. You’d be surprised how much fine dust coats the interior walls over time.
Mind Your Surfaces
Never use your dry Shark Navigator on wet spills or puddles. Liquid will soak the filters and dust cup, creating a solid mud-like blockage that is nearly impossible to fully clean and will ruin the motor. For wet messes, use a dedicated wet/dry vac or the appropriate wet mode if your model has one (most Navigators are dry-only).
When to Contact Shark Support or Consider Replacement
You’ve followed every step. The dust cup is empty, filters are new and clean, the brush roll spins freely, the hose is clear, and there are no leaks. You turn it on, and you hear the motor running, but there’s still no suction at the floor. At this point, the issue is likely internal and serious.
Diagnosing Internal Failure
The most probable internal cause is a failed motor fan. The fan blades may have broken off or become so clogged with debris they no longer move air. This requires disassembly and expertise. Another rare possibility is a broken internal one-way valve that is stuck open, allowing air to recirculate without creating suction. These are not DIY repairs for most users.
Check Your Warranty First
Shark vacuums typically come with a 5-year to lifetime warranty on the motor and a 1-2 year warranty on parts. Do not attempt major disassembly if your vacuum is under warranty. Opening the motor housing will likely void the warranty. Contact Shark customer support. Explain the troubleshooting steps you’ve already taken (empty cup, clean filters, clear clogs). They may offer to mail you a new motor assembly or, for older units, a discounted replacement. It’s often more cost-effective to replace an older vacuum with a new, more efficient model than to pay for out-of-warranty motor repair.
Frequently Asked Questions
My Shark Navigator’s motor is running, but there’s zero suction. What is the most likely cause?
The single most common cause is a severely clogged pre-motor or post-motor filter. A filter packed with dirt acts like a brick wall to airflow. Empty the dust cup and thoroughly clean or replace both filters before checking anything else.
How often should I wash the filters on my Shark Navigator?
For normal use in a non-pet, non-allergy home, rinse the foam pre-motor filter every 3-6 months. If you have pets, allergies, or a dusty environment, rinse it after every 1-2 uses. The post-motor filter should only be tapped clean and replaced when visibly dirty, as it is not washable.
Can I use my Shark Navigator on wet surfaces?
No. Standard Shark Navigator models are designed for dry debris only. Using them on wet surfaces will soak the filters and dust cup, creating a permanent mud blockage that will destroy the motor and void the warranty. Use a wet/dry vacuum for liquid spills.
What’s the best way to remove hair from the brush roll?
>Do not try to pull it off with your fingers. Use a dedicated brush roll cleaning tool, a seam ripper, or a sharp pair of scissors. Carefully cut the hair lengthwise along the brush roll, then pull the sections out. Always remove hair from the bearing housings at each end.
My vacuum smells like burning plastic and has no suction. What happened?
This is a serious issue. The burning smell indicates the motor is overheating, often because it’s working against a complete blockage (like a clogged filter or a solid obstruction in the hose). Unplug the vacuum immediately. Continuing to run it in this state will burn out the motor. Perform all cleaning steps, but if the smell returns, the motor may be damaged and needs professional assessment.
Is it worth fixing an old Shark Navigator with no suction?
It depends on the model’s age and your warranty status. First, ensure you’ve done all basic troubleshooting. If the motor is the failure and the vacuum is older than 5-7 years, parts and labor may cost more than a new mid-range vacuum. Check your warranty status with Shark (have your model number and serial ready). They often offer significant discounts on replacement units for older, out-of-warranty models.