Is your Shark Navigator vacuum’s extension wand stuck and refusing to come off? This is a common but frustrating issue, usually caused by debris jamming the release mechanism or a worn lock. Our guide provides a clear, safe troubleshooting path. We start with simple, non-invasive cleaning methods to dislodge hair and dust. If that fails, we detail a careful manual disassembly process. Most importantly, we explain what to avoid (like excessive force) and when it’s time to contact Shark support or utilize your warranty, preventing costly damage to your valuable appliance.
You’re standing there, vacuum in hand, ready to switch to the crevice tool for that stubborn spot behind the couch. You press the release buttons on your Shark Navigator’s extension wand, give a firm pull… and nothing. It’s stuck. Solid. That familiar feeling of frustration sets in. You try again, pressing harder, pulling at an angle. Still locked tight. The “Shark Navigator extension wand doesn’t come off” problem is one of the most frequently reported minor headaches for owners of these otherwise fantastic vacuums. It’s incredibly common, and while it feels like a major failure, it’s almost never a broken machine. It’s almost always a simple, solvable case of a jammed mechanism. This guide will walk you through exactly why this happens and, most importantly, how to fix it safely and effectively, without turning your vacuum into a paperweight.
We’ll start with the gentle, no-tool methods that solve the problem 90% of the time. Then, we’ll escalate to more involved cleaning and, as a very last step, a guided manual disassembly. Throughout, we’ll emphasize the critical “don’ts” that prevent turning a 5-minute fix into a $150 repair bill. By the end, you’ll not only have your wand unstuck but also the knowledge to keep it that way for the life of your Shark Navigator.
Key Takeaways
- The problem is almost always debris: Hair, string, and dust accumulate in the wand’s locking mechanism, preventing the release tabs from engaging properly. A thorough, targeted clean is the solution 80% of the time.
- Technique is everything: The correct way to detach the wand involves pressing the release buttons *firmly and simultaneously* while pulling straight back. Awkward angles or partial presses are a primary cause of the “stuck” feeling.
- Never use excessive force: Yanking, twisting, or using tools to pry the wand can break the plastic locking clips or damage the vacuum’s main hose connection, leading to expensive repairs.
- Prevention is key: Regularly wiping down the wand connection points and periodically checking the release mechanism for buildup will drastically reduce the chance of it jamming again.
- Disassembly is a last resort: Manually removing the locking collar should only be attempted if cleaning fails, and it carries a risk of damaging the clips. Proceed with extreme caution and have your model’s parts diagram handy.
- Your warranty is your friend: If your Shark Navigator is still under warranty, a stuck wand is a known issue they will often resolve for free. Contacting support before breaking anything is highly recommended.
- Model variations exist: While this guide covers the most common Shark Navigator Lift-Away and Professional designs, your specific model’s mechanism might differ slightly. Always consult your user manual first.
📑 Table of Contents
- Understanding Your Shark Navigator’s Wand Locking Mechanism
- Step 1: The Immediate, Non-Invasive Fixes (Do This First!)
- Step 2: Deep Cleaning the Locking Mechanism
- Step 3: The Careful Manual Disassembly (Last Resort)
- Prevention: Keeping Your Wand Detachable
- When to Seek Professional Help or Use Your Warranty
Understanding Your Shark Navigator’s Wand Locking Mechanism
Before we start pulling and prying, it helps to understand what you’re dealing with. The connection between your Shark Navigator’s main vacuum body/hose and its various extension wands and tools isn’t just a simple friction fit. It’s a clever, spring-loaded locking system designed to be secure during vigorous cleaning but easy to detach with the press of a button.
The Anatomy of the Connection
On the male end (the end that inserts—usually on the wand or tool), you’ll find two small, spring-loaded plastic tabs or “clips.” These are the locking elements. On the female end (the vacuum hose or preceding wand), there is a corresponding plastic collar with two slots. When you push the wand in, those clips snap outward into the slots, locking it in place. The release buttons you press are directly connected to these clips; pressing them pulls the clips inward, out of the slots, allowing the wand to slide free.
Why It Gets Stuck: The Usual Suspects
With this mechanism in mind, the reasons for failure become obvious:
- Debris Ingress: This is the #1 culprit. Every time you vacuum, a fine mist of dust, hair, string, and carpet fibers is swirling around inside the air path. Some of it inevitably gets forced into the tiny gap between the wand and the hose, packing into the space around the locking clips and their springs. Over time, this creates a solid plug that physically prevents the clips from retracting fully.
- Worn or Broken Springs: The tiny springs that push the locking clips outward can lose tension or break. If a spring is weak, the clip might not engage fully, causing a wobbly connection that allows more debris in, or it might not retract fully when the button is pressed. This is less common than debris but is a wear-and-tear issue.
- Damaged or Deformed Clips: A clip can crack or bend if excessive force was used during a previous attachment/detachment attempt. A bent clip won’t slide smoothly in its channel.
- Improper Technique: Pressing only one release button, pressing them incompletely, or pulling at an angle instead of straight out can cause the clips to bind against the edge of the slot, making it feel stuck even if the mechanism itself is clean.
Step 1: The Immediate, Non-Invasive Fixes (Do This First!)
Before you take anything apart, you must exhaust the simple, safe methods. This is where you’ll likely win. The goal here is to dislodge and remove the packed-in debris that is jamming the clips.
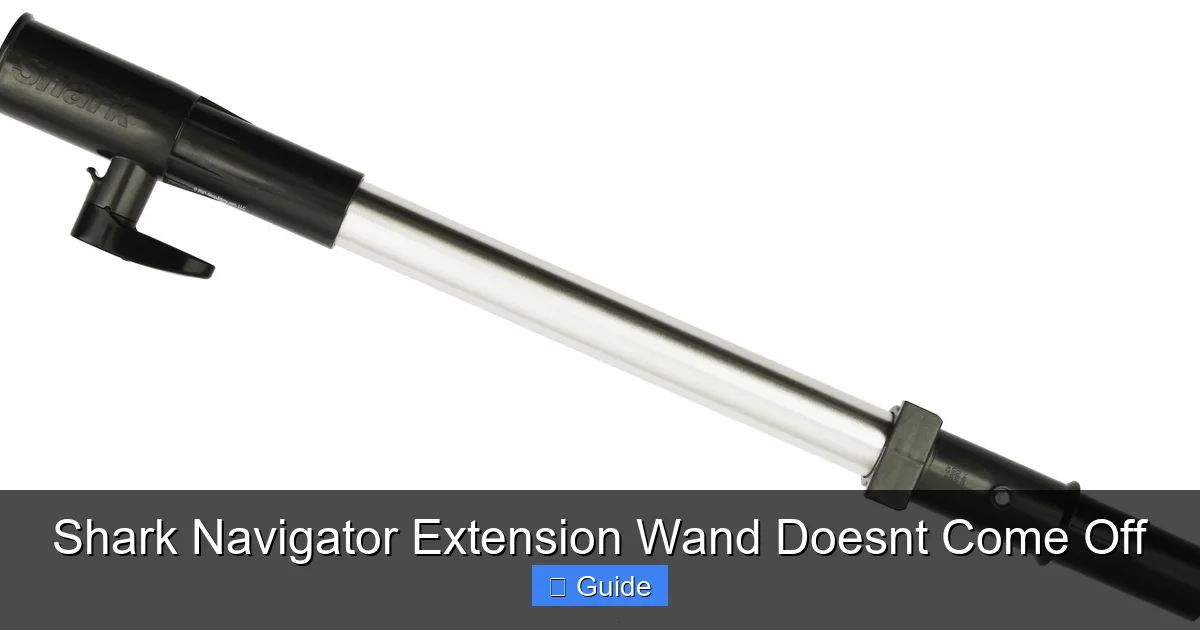
Visual guide about Shark Navigator Extension Wand Doesnt Come Off
Image source: sharkvacuum.blog
1. The Vigorous Button Press & Pull (The Correct Technique)
This sounds too simple, but many people don’t do it correctly. Place the vacuum on the floor for stability. Locate the two release buttons—they are typically on the side of the wand connection, near where it meets the hose. Using the pad of your thumb, press both buttons in as far as they will go. You should feel a definite “click” or give. While holding them all the way in, grip the wand firmly with your other hand and pull straight back with a steady, strong motion. Do not twist. Do not rock it. A straight axial pull. Sometimes the debris jam is just loose enough that a truly full button press and a confident pull will break it free.
2. The “Tap and Twist” Method
If the straight pull fails, we need to vibrate the debris loose. While holding the vacuum body/hose securely, give the stuck wand a sharp, downward tap on its side against a carpeted floor or a folded towel (to avoid scratching). The impact can shake packed hair loose. Immediately after the tap, try the vigorous button press and pull again. You can also try a very slight, gentle twisting motion while holding the buttons in. A tiny wiggle (less than 10 degrees) can sometimes free a clip that’s caught on a fiber. If it resists, stop twisting—don’t force it.
3. The Flashlight and Pin Approach
Now we get surgical. Get a bright flashlight and peer directly into the gap between the wand and the hose. You are looking for the obvious: thick mats of hair, string, or carpet fibers wrapped around the plastic collar of the hose (the female part). If you see a visible clog right at the lip, use a pair of needle-nose pliers or even a sturdy, straight pin to carefully tease and pull that debris out. Work slowly. You might be surprised how much you can remove just by getting the outermost layer. After removing visible chunks, try the detachment process again.
Step 2: Deep Cleaning the Locking Mechanism
If the above didn’t work, the jam is deeper inside the mechanism. We need to clean the clips and their housing. This step requires a bit more access but still no disassembly.
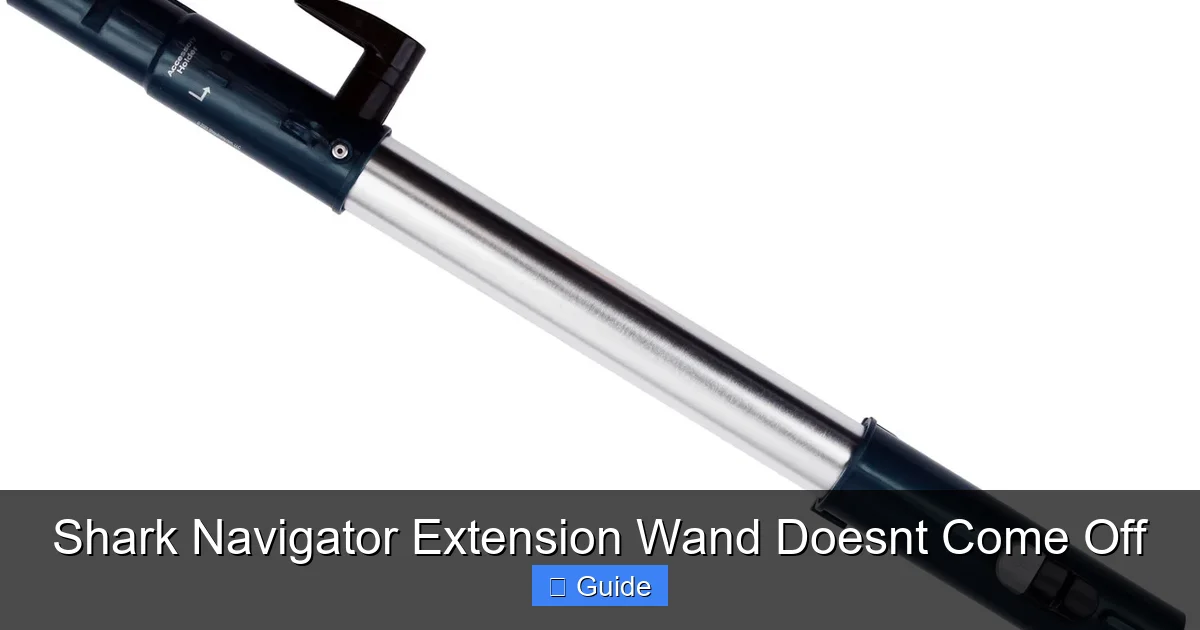
Visual guide about Shark Navigator Extension Wand Doesnt Come Off
Image source: cdn11.bigcommerce.com
Creating Access: The “Compressed Air” Trick
The key is to get cleaning tools into the small channel where the locking clips sit. First, try to create a tiny gap. Press the release buttons fully in and hold them. Now, use your other hand to push the wand inward slightly (about 1/4 inch). You’re not trying to re-lock it; you’re just taking pressure off the clips. While holding the buttons in and the wand slightly pushed in, you might get a sliver more space on the side. Now, use a can of compressed air (held upright) to blast short bursts of air into the gap from different angles. The goal is to blow the compacted dust and hair out of the clip channels. This is surprisingly effective for dry, dusty jams.
Tool-Assisted Cleaning: The “Floss and Brush” Method
For tangled hair and string, you need a scraping tool. Take a piece of strong, thin dental floss or a plastic dental pick (the flat, angled ones). While holding the buttons in, work the floss into the gap. You can often slide it behind a clog and saw back and forth to cut and remove fibrous material. A small, stiff-bristled brush (like an old toothbrush or a parts cleaning brush) can also be worked into the channel. Dip the brush in a little rubbing alcohol to help dissolve any sticky dust and evaporate quickly. Scrub vigorously in the areas where you see the clips (you can often see their edges). The alcohol helps break up the “glue” of compacted dust and evaporates without causing rust.
Step 3: The Careful Manual Disassembly (Last Resort)
WARNING: This step carries a real risk of breaking plastic clips. Only proceed if you are comfortable with a delicate, tactile process and your vacuum is out of warranty or you’re prepared to pay for a repair. If at any point you feel resistance that isn’t just debris, stop. The goal is to remove the plastic locking collar from the hose to clean it externally.
Visual guide about Shark Navigator Extension Wand Doesnt Come Off
Image source: cdn11.bigcommerce.com
Identifying the Locking Collar
On most Shark Navigator Lift-Away models, the plastic piece that holds the locking clips is a separate, dark-colored (usually black or dark gray) ring that snaps onto the end of the flexible hose. It’s the part your wand plugs into. This collar is often held on by plastic tabs on its inner circumference that snap into grooves on the hose.
The Disassembly Process
1. Maximize Exposure: Use the flashlight and your pin/brush from Step 2 to clean out as much debris as you can from around the entire circumference of the collar. The cleaner you get it, the easier the next step will be.
2. Find the Seam: Rotate the collar. You will usually feel or see a slight seam line where it was snapped onto the hose. This is often at the top or bottom.
3. Prying Technique: Take a plastic spudger (a non-conductive tool for electronics) or a very sturdy, flat wooden toothpick. Do not use a metal screwdriver—it will gouge the plastic. Insert the tip of your tool into the seam. You need to gently pry the collar outward, just enough to get one of the internal locking tabs to pop out of its groove. Work your way around the collar, prying little by little at different points. It’s a matter of releasing the tension on the plastic clips one by one. Be patient. Listen for faint “snap” sounds—that’s a tab releasing.
4. Removal and Cleaning: Once the collar is loose, slide it off the hose. You will now see the entire mechanism exposed. Clean the inside of the collar thoroughly with your brush and alcohol. Clean the end of the hose where the collar attaches. Most importantly, inspect the small plastic locking clips on the inside of the collar. Are they broken? Severely worn? If they look damaged, you will need a replacement collar (available online by model number). If they look intact but dirty, clean around them meticulously.
5. Reassembly: Reassembly is the reverse, but it can be tricky. Align the collar with the hose. You usually need to press it on evenly all around until you hear/feel a series of clicks as all the tabs snap back into their grooves. Ensure it’s seated flush and even all the way around before testing.
Prevention: Keeping Your Wand Detachable
Once you’ve freed your wand, you’ll want to never deal with this again. Prevention is straightforward and takes seconds.
Routine Wipe-Down
Every time you empty your Shark Navigator’s dust cup, take 10 seconds to wipe the connection points. Use a dry microfiber cloth and wipe the male end of your wands/tools and the female end of the hose and other wands. This removes the fine dust paste that eventually hardens into a jam. Also, wipe the release buttons themselves to keep them free of grime that can impede their travel.
Periodic Active Cleaning
Once a month, or if you have pets that shed heavily, do a proactive cleaning of the wand connections. With the wand detached, use your compressed air or a small brush to clean out the channels on the hose collar. This is a 30-second habit that prevents 90% of future jams.
Proper Attachment/Detachment Technique
Always use the full, two-button press and a straight pull. Never store the vacuum with a wand or tool attached under tension (e.g., hanging on a wall hook by the wand). This can slightly deform the plastic over time. Store it with wands detached or resting loosely.
When to Seek Professional Help or Use Your Warranty
You’ve tried everything. You’ve cleaned, you’ve pounded, you may have even carefully disassembled. The wand is still fused to the hose. Now what?
Assessing the Damage
Before you do anything else, inspect the mechanism again. Are the plastic locking clips on the wand or on the hose collar visibly broken, cracked, or missing chunks? If yes, you have a broken part. This is not something you can fix with cleaning. You need a replacement part.
Contacting Shark Support
Shark is generally known for decent customer service. Have your vacuum’s exact model number (on the back/bottom rating label) ready. Call their support line or use their online chat. Describe the issue: “The extension wand is locked and will not detach after thorough cleaning. I believe the locking clips are broken.” They will often, especially within the first few years, offer to send a replacement part (like the hose assembly or locking collar) for free or a small shipping fee. They may also offer a warranty repair if the whole vacuum needs to be sent in. This is almost always cheaper and less risky than a local appliance repair shop.
Purchasing Replacement Parts
If the vacuum is out of warranty, you can still buy parts. Search for “[Your Shark Navigator Model Number] hose assembly” or “locking collar.” Websites like Shark’s own parts store, Amazon, and eBay are sources. Replacing a hose assembly is a simple plug-and-play task—no tools needed. This is a far better option than trying to glue a broken clip or rigging a solution.
Frequently Asked Questions
Can I use WD-40 or another lubricant to loosen the stuck wand?
No, you should avoid lubricants. They will attract and trap more dust and hair, creating a worse, gummy jam later. They can also degrade the plastic over time. Stick to dry methods (air, brushing) and isopropyl alcohol for cleaning, as it evaporates cleanly.
My Shark Navigator is still under warranty. Will they fix a stuck wand?
Almost certainly yes. A stuck wand due to debris or a failed locking mechanism is a known issue. Contact Shark customer support first, before attempting any disassembly. They will typically guide you through basic steps and, if needed, arrange to send a replacement part or repair the unit at no cost to you.
How often should I clean the wand connections to prevent this?
For best prevention, do a quick wipe-down of all connection points every time you empty the dust cup (usually every few uses). Then, perform a more thorough monthly cleaning with a brush and/or compressed air, especially if you have pets or vacuum fine dust like drywall debris.
Is it safe to use pliers or a screwdriver to pry the wand off?
It is not safe. Using metal tools against the plastic housing almost always results in scratches, gouges, and cracked clips. This guarantees permanent damage. Use plastic or wood tools like spudgers or toothpicks if you must pry, and apply minimal, controlled force.
After disassembly, my plastic locking clips look worn but not broken. Can I still use it?
If the clips are worn down and don’t snap firmly into the hose slots, the connection will be weak. The wand may fall off during use or allow air leaks that reduce suction. It’s best to replace the part (the locking collar on the hose) to ensure a secure, functional connection.
Why does this seem to happen more with certain attachments, like the pet tool?
Attachments like the pet hair eraser tool often have a different, sometimes larger, connection point or are used more aggressively on upholstery, which can force more debris into the mechanism. The same principles apply, but you may need to clean those specific connection points more frequently.