A Shark Navigator broken swivel is a common issue that makes your vacuum difficult or impossible to steer. This problem typically stems from a snapped plastic pivot pin or a cracked swivel housing, not a faulty motor. You can often diagnose and repair it yourself with basic tools like a screwdriver and pliers, saving significant money on a new vacuum or professional service. This guide provides a detailed, step-by-step repair process, preventative maintenance tips, and clear advice on when replacement is the better option.
Let’s be honest: there’s nothing more frustrating during a cleaning session than your trusty Shark Navigator vacuum suddenly refusing to turn. You’re pushing it forward, but it just wants to go in a straight line, like a stubborn shopping cart with a locked wheel. That maddening lack of steerability is the classic, tell-tale sign of a Shark Navigator broken swivel. Before you resign yourself to a costly professional repair or the expense of a brand-new vacuum, take a deep breath. This is one of the most common—and most fixable—issues with these popular uprights. In this complete guide, we’ll walk you through everything you need to know, from understanding exactly what the swivel is and why it breaks, to diagnosing the problem with confidence, and finally, executing a successful repair with your own two hands. Think of this as your friendly, detailed conversation with a vacuum repair expert.
Key Takeaways
- Common Culprit: A Shark Navigator broken swivel is almost always caused by a fractured plastic pivot pin or a cracked swivel housing, not an electrical failure.
- DIY Viability: Most repairs are feasible at home with simple tools (screwdrivers, pliers, lubricant) and can save you $100+ compared to replacement or professional service.
- Diagnosis First: Always confirm the swivel is the issue by checking for physical cracks, excessive play, or complete detachment before disassembling the vacuum.
- Part Sourcing: Genuine Shark replacement swivel assemblies are available online; third-party parts are common but quality varies. Verify your exact model number (e.g., NV356, NV502).
- Prevention is Key: Avoid aggressive pivoting, impacts with furniture, and regularly clean the swivel joint to prevent debris buildup that accelerates wear.
- Warranty Check: If your vacuum is still under Shark’s limited warranty (typically 5-7 years for the motor, 1 year for parts), a broken swivel may be covered—contact Shark support first.
- Know When to Replace: If the main vacuum body or hose is also damaged, or if repair costs approach 50% of a new unit’s price, purchasing a new Shark Navigator is often more economical.
📑 Table of Contents
- Understanding the Swivel: Your Vacuum’s Steering Wheel
- Diagnosing Your Shark Navigator Broken Swivel: A Systematic Approach
- The Step-by-Step Repair Guide for a Shark Navigator Broken Swivel
- Maintenance Tips to Prevent a Future Shark Navigator Broken Swivel
- When to Consider Replacement Over Repair
- Conclusion: Getting Back to Effortless Cleaning
Understanding the Swivel: Your Vacuum’s Steering Wheel
To fix a Shark Navigator broken swivel, you first need to understand what you’re dealing with. The swivel joint isn’t a complex motorized part; it’s a brilliantly simple mechanical component that provides the entire cleaning head with its iconic agility. It’s the pivot point where the main vacuum body (the canister) connects to the cleaning head (the brush roll housing and wheels).
The Anatomy of the Swivel Joint
On most Shark Navigator models (like the NV350, NV356, NV500 series), the swivel consists of two main plastic pieces that lock together. Inside, a small metal pin or bushing acts as the pivot. When you turn the handle, the upper housing rotates smoothly on this pin against the lower housing. This allows the entire cleaning head to swivel 180 degrees or more, letting you glide around chair legs and under furniture with minimal effort. The entire assembly is held together by a couple of screws and sometimes a plastic retention clip. It’s a design built for convenience, but the constant stress of pivoting, combined with occasional impacts (like running the vacuum into a table leg), puts immense strain on these small plastic components.
Why Does the Swivel Break?
- Pivot Pin Fracture: The most frequent failure point. The small plastic pin that the swivel rotates on can snap cleanly in half. This often happens after a sharp impact or simply from years of cumulative stress. The vacuum will feel loose and wobbly at the connection point.
- Cracked Housing: The plastic sockets that hold the pivot pin can develop stress cracks. A hairline crack might cause stiffness; a full crack means the pin pops out entirely, and the head will dangle or detach.
- Worn Bushing: Some models use a small, separate nylon or metal bushing. If this wears down or falls out, you’ll get excessive play and a clunking sensation.
- Debris Jam: While less common, a buildup of hair, string, and carpet fiber packed into the swivel joint can physically prevent it from rotating, mimicking a break. Always rule this out first!
Understanding which of these you’re dealing with is half the battle. A completely detached head usually means a snapped pin or a major housing crack. A stiff, gritty feeling often points to debris. A head that wobbles excessively but stays attached likely has a worn bushing or a pin that’s partially sheared.
Diagnosing Your Shark Navigator Broken Swivel: A Systematic Approach
Before you grab a screwdriver, you must be 100% certain the swivel is the problem. Misdiagnosis leads to wasted time and frustration. Follow this systematic check to confirm a Shark Navigator broken swivel.
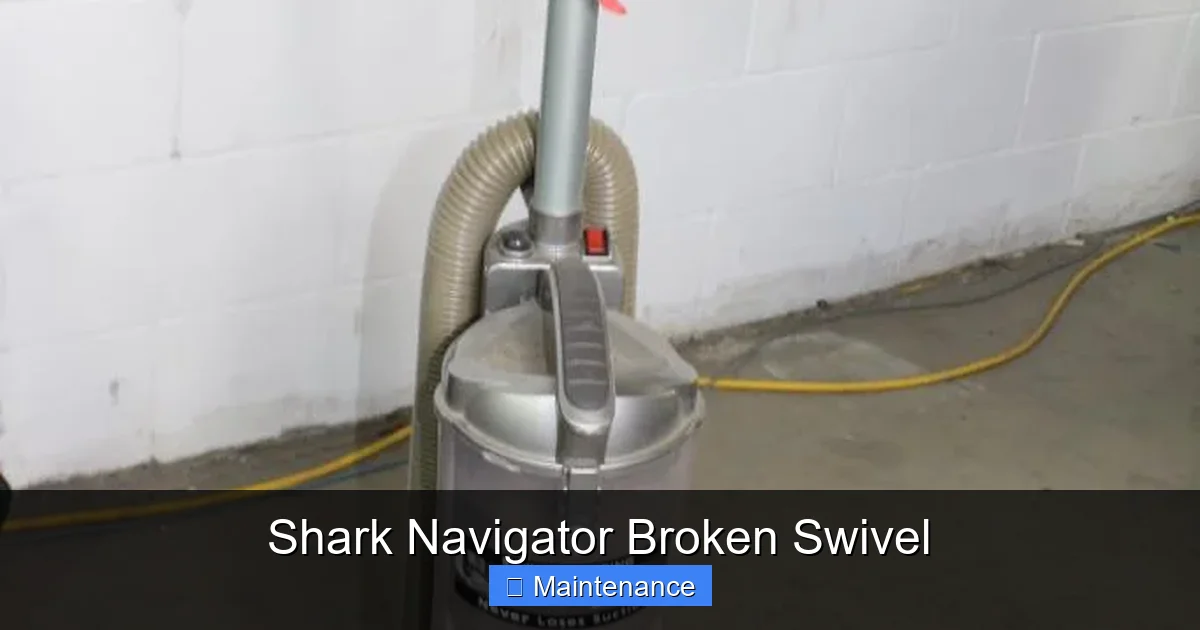
Visual guide about Shark Navigator Broken Swivel
Image source: i5.walmartimages.com
Step 1: The Visual and Physical Inspection
Unplug the vacuum! Safety first. Tilt the vacuum onto its side or lay it flat. Locate the swivel joint—it’s the large, usually gray or black, rotating connection right behind the brush roll housing. Manually try to pivot the cleaning head side-to-side. Does it feel gritty, stiff, or loose? Now, pull the head gently away from the body. Is there more than a 1/4 inch of play? Look closely at the seam where the two swivel halves meet. Do you see any visible cracks in the plastic? Use a flashlight. If you see a crack, or if the head feels like it’s about to come off, you’ve found your culprit.
Step 2: The Debris Elimination Test
Often, what feels like a broken swivel is just a clogged one. Use a pair of needle-nose pliers or a dedicated vacuum seam ripper to meticulously clean out any and all hair, thread, and carpet fibers from around the swivel joint. Pay special attention to the circular groove where the two halves meet. Pull, cut, and remove every bit. Once clean, try pivoting the head again. If it moves freely now, you didn’t have a broken swivel—you had a packed one! Reassemble and test on the floor. If it’s still stiff or loose, proceed to the next step.
Step 3: The “Handle Wiggle” Test
Stand the vacuum upright. Gripping the handle, try to twist it slightly left and right while the vacuum is off. You’re checking for play in the upper wand assembly itself. If you feel movement *before* the cleaning head starts to turn, the issue might be higher up in the wand or handle connection. However, if the handle is solid and the *entire cleaning head* pivots independently with a clunk or excessive wobble, the swivel joint is definitely the source of the problem.
Step 4: Partial Disassembly for Confirmation
This is the definitive test. You’ll need to remove the two screws that hold the swivel halves together. Usually, one screw is on top, accessible from above, and one is on the bottom, accessible by looking up into the joint from underneath the vacuum head. Once the screws are out, the two halves may stay together via a plastic clip. Gently pry them apart with a flat-head screwdriver. Look inside. Is the pivot pin intact and standing up straight? Or is it snapped, missing, or is the hole it sits in cracked? This visual confirmation is your final diagnosis. If the pin is broken or the housing is cracked, you have a Shark Navigator broken swivel.
The Step-by-Step Repair Guide for a Shark Navigator Broken Swivel
Assuming your diagnosis confirmed a broken pin or cracked housing, let’s get that vacuum turning again. This process is generally the same across most Shark Navigator upright models. Always have your model number (found on the back or underside label) handy to reference any model-specific quirks.
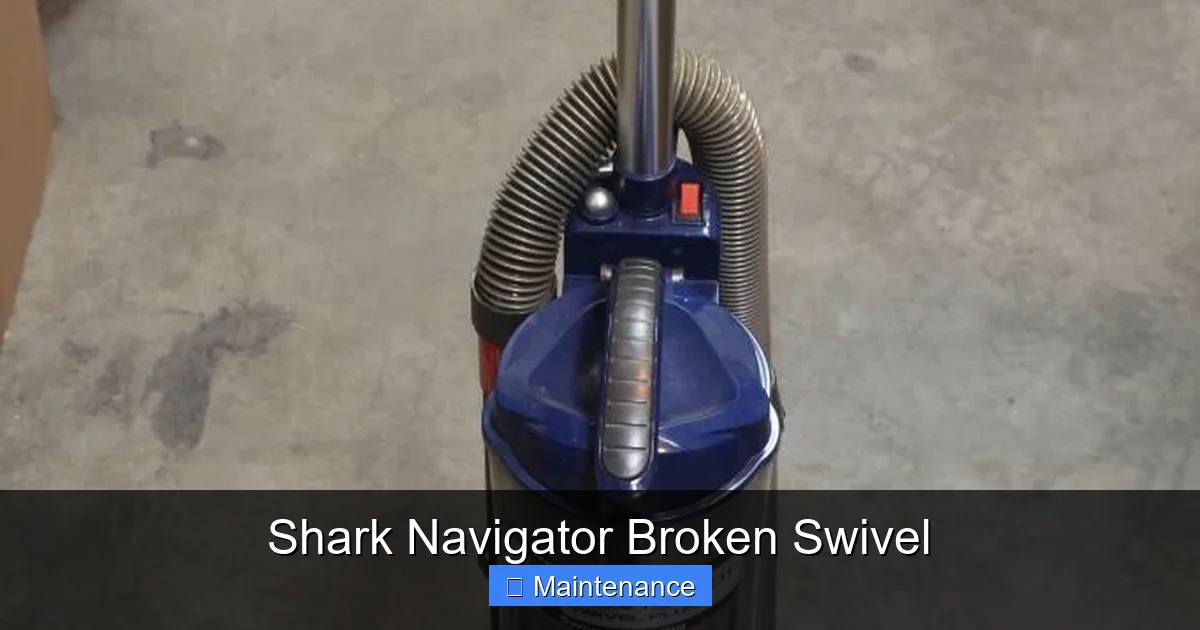
Visual guide about Shark Navigator Broken Swivel
Image source: content.propertyroom.com
Gathering Your Tools and Parts
You won’t need a toolbox. Just a few simple items:
- Philips-head screwdriver: The #2 size is almost always correct for the swivel screws.
- Small flat-head screwdriver or plastic pry tool: For gently separating the swivel halves without marring the plastic.
- Needle-nose pliers: Extremely helpful for removing small pins or clips and for cleaning.
- Replacement Swivel Assembly: This is the critical part. Do not try to glue the plastic pin; it will fail again under stress. You need a new swivel. Search online for “Shark Navigator swivel replacement [Your Model Number]”. Genuine Shark parts are best, but reputable third-party OEM-style parts are often half the price and work perfectly. A typical cost is $25-$45.
- Optional but Recommended: A tube of silicone-based lubricant (like Super Lube) for the pivot pin. Avoid WD-40, as it attracts dust.
Disassembly: Taking It Apart Safely
- Unplug and Prep: Ensure the vacuum is unplugged. Lay it on its side on a soft towel to protect the finish.
- Remove the Cleaning Head: On most Navigators, you can press the release button on the wand and lift the entire cleaning head assembly off. This gives you much better access to the swivel screws.
- Locate and Remove Screws: Find the two screws securing the swivel. One is on top, often hidden under a rubber grommet or a small plastic cap. The other is on the bottom, accessible from the underside of the head. Remove both screws and set them aside safely.
- Separate the Halves: The two plastic halves of the swivel may be clipped together. Starting at the seam, gently insert your flat-head screwdriver and twist. Work your way around the circumference. The plastic clips will pop. Be patient and gentle to avoid snapping any healthy plastic clips on the new part.
- Remove the Old Pivot Pin/Bushing: Once separated, the old pivot pin (if it hasn’t already fallen out) will be visible. It may be a simple plastic peg or a metal pin with a nylon bushing. Use needle-nose pliers to pull it straight out. Note its orientation and how it sits in the housing.
- Clean Thoroughly: This is crucial. Use a damp cloth and your pliers to remove every trace of old hair, dust, and plastic shavings from both the old housing (which you’ll reuse) and the new swivel assembly. Any debris will cause premature wear on your new part.
Installation: Putting It Back Together Correctly
- Inspect the Old Housing: Before installing the new part, closely examine the lower half of the old swivel housing that remains attached to the vacuum body. Are there any cracks? If the housing itself is damaged, you may need to replace the entire lower assembly, which is a more involved job. If it’s sound, proceed.
- Lubricate (Optional): Apply a tiny dab of silicone lubricant to the pivot pin on the new upper swivel half. You want a thin film, not a glob.
- Align and Engage: This is the trickiest part. Hold the new upper swivel half (with the brush roll housing attached) and align it with the lower housing on the vacuum body. You need to get the pivot pin perfectly aligned with its socket. You may need to gently wiggle and rotate the head. You’ll feel and hear a distinct click or snap as the plastic retention clips around the circumference engage. Ensure it’s seated fully and evenly all the way around.
- Reinstall Screws: Insert the two screws. Hand-tighten them first to avoid cross-threading. Then, using your screwdriver, tighten them firmly but do not overtighten. Plastic strips easily. Snug is sufficient; you are clamping two plastic pieces together, not securing an engine block.
- Reattach the Cleaning Head: If you removed the entire head from the wand, reattach it now. Ensure the electrical connectors click together securely.
- Final Check: Before you test on carpet, manually pivot the head left and right several times. It should move smoothly, with no gritty feeling and minimal side-to-side play (a tiny amount is normal).
Maintenance Tips to Prevent a Future Shark Navigator Broken Swivel
You’ve fixed it. Now, let’s keep it fixed. A little preventative care goes a very long way in extending the life of your vacuum’s most vulnerable joint.
Visual guide about Shark Navigator Broken Swivel
Image source: content.propertyroom.com
Clean the Swivel Joint Regularly
Every 3-5 cleaning sessions, take 60 seconds to inspect and clean the swivel area. With the vacuum unplugged, use your fingers or a tool to pull out any hair or fibers wound around the pivot area. This debris acts as an abrasive, grinding against the plastic and accelerating wear. It also prevents the halves from seating properly.
Mind Your Pivoting Technique
This is the #1 behavioral cause of a Shark Navigator broken swivel. Avoid violent, jerky pivots. Don’t use the handle as a lever to yank the vacuum around corners. Instead, use smooth, deliberate steering motions. When you need to make a sharp turn, lift the front wheels slightly off the ground by pushing down on the handle, pivot, and then set it down. This takes weight off the swivel joint during the most stressful movement.
Protect from Impacts
The swivel is directly in the line of fire when you bump the vacuum into furniture. Be mindful of where you’re pushing, especially around table and chair legs. A solid impact can instantly snap a pivot pin. Consider using corner guards on vulnerable furniture if your cleaning routes are tight.
Periodic Lubrication
Once or twice a year, after cleaning the joint, apply a drop of silicone lubricant to the seam. Work it in by pivoting the head. This keeps the plastic-on-plastic contact smooth and reduces friction and heat buildup.
When to Consider Replacement Over Repair
While a DIY fix is almost always worth trying, there are scenarios where replacement is the smarter, more economical choice.
Assessing the Overall Health of Your Vacuum
If your Shark Navigator is already 8+ years old, has weak suction, a worn-out brush roll, or a frayed power cord, investing time and $30 in a swivel repair might only buy you 6 more months of service. Consider the vacuum’s total remaining value.
Extent of Damage
If your diagnosis revealed that the lower housing—the part that’s permanently attached to the main vacuum body—is cracked, the repair becomes major. You’d need to replace that entire lower section, which often involves disassembling much more of the vacuum (motor housing, etc.). For most owners, this is beyond a comfortable DIY project. If both the upper and lower housings are damaged, the cost of two replacement parts plus your time may exceed the price of a new, current-model Shark Navigator on sale.
Warranty and Cost Analysis
Check your purchase date and Shark’s warranty terms. If the vacuum is under its limited warranty (parts are typically 1 year), a broken swivel might be covered. Call Shark customer service. If they deny the claim (they often exclude “normal wear and tear” or damage from misuse/impacts), then you’re back to DIY or replacement. Do a quick cost-benefit analysis: New Navigator (~$150-$250) vs. Parts + Your Time (~$30-$50). If the vacuum has sentimental value or is a higher-end model (like the Vertex series), repair is more justified.
Conclusion: Getting Back to Effortless Cleaning
A Shark Navigator broken swivel doesn’t have to be a death sentence for your vacuum. It’s a predictable, mechanical failure with a predictable, mechanical solution. By understanding the simple anatomy of the swivel joint, performing a methodical diagnosis, and following a careful disassembly/reassembly process, you can restore your vacuum’s legendary maneuverability for the cost of a pizza and a couple of beers. The key is patience, cleanliness, and not forcing any parts. Treat the plastic with respect, and it will serve you well for years to come. Remember, the gentle pivot is your best friend. So, roll up your sleeves, order that $25 swivel kit, and get ready to feel that satisfying, smooth turn again. Your floors—and your cleaning sanity—will thank you.
Frequently Asked Questions
Is a Shark Navigator broken swivel covered under warranty?
It’s unlikely. Shark’s limited warranties typically cover manufacturing defects for 1 year on parts. A broken swivel is usually considered “normal wear and tear” or damage from impacts/misuse, which is excluded. Always call Shark support with your model and serial number to get a definitive answer for your specific case.
How much does a Shark Navigator swivel replacement part cost?
A genuine Shark replacement swivel assembly typically costs between $35 and $55 from authorized dealers or Shark’s website. Aftermarket OEM-compatible parts are widely available on sites like Amazon and eBay for $15 to $30. Always verify your exact model number (e.g., NV356, NV502) before purchasing to ensure compatibility.
Can I just glue the broken plastic pivot pin?
No. Do not use glue. The pivot pin endures constant rotational stress and shear forces. Any adhesive, even plastic weld, will fail quickly under normal use, often within minutes or days. You will be right back where you started, and the broken plastic pieces may now be jammed inside the housing, making the proper repair harder. Replacement of the entire swivel assembly is the only correct fix.
What if the lower swivel housing (on the vacuum body) is also cracked?
If the lower half, which is screwed to the main vacuum canister, is cracked, the repair is significantly more complex. You must replace that entire lower housing assembly. This often involves disassembling the motor housing, brush roll, and other components to access its mounting screws. For most users, if the lower housing is damaged, it’s a sign of significant impact and may be a good time to consider vacuum replacement.
My vacuum’s head is completely detached and the pin is missing. What do I do?
First, ensure the lower housing isn’t damaged. Then, purchase the correct replacement swivel assembly for your model. During installation, carefully align the new upper swivel’s pivot pin with the socket in the old lower housing. You may need to gently rotate and wiggle the head to get the plastic retention clips to snap into place around the entire circumference before tightening the screws.
Are there any tools specifically needed that I might not have?
No special tools are required. You only need a standard Philips-head screwdriver (size #2 is most common), a small flat-head screwdriver or plastic pry tool for separating clips, and needle-nose pliers for pin removal and cleaning. A silicone lubricant is highly recommended but not strictly necessary for the basic repair.