Is your Shark Lift Away vacuum refusing to start? This is a common issue often caused by simple power supply problems, a depleted or faulty battery, or a needed reset. Before assuming the worst, systematically check the wall outlet, ensure the battery is properly seated and charged, and perform the factory reset procedure. Regular maintenance, like cleaning filters and checking for blockages, is also crucial for preventing startup failures. Most problems are solvable at home with basic troubleshooting, saving you from costly repairs or replacements.
You’re ready to clean, you grab your trusty Shark Lift Away, press the power button, and… nothing. No hum, no light, just silence. That sinking feeling is all too familiar to many Shark owners. The good news? A Shark Lift Away vacuum not turning on is one of the most common and often most fixable problems you’ll encounter. It’s rarely a sign of a completely dead machine. More often, it’s a communication breakdown between the battery, the electronics, or the power source. This guide will walk you through every possible reason, from the incredibly simple to the more complex, in a clear, step-by-step manner. We’ll turn you into a DIY troubleshooter, armed with the knowledge to diagnose and likely solve the issue yourself, saving you time, money, and frustration.
Think of your Shark Lift Away as a team. The battery is the heart, the motor is the muscle, the electronics are the brain, and the filters and airways are the lungs. If one part isn’t sending or receiving signals correctly, the whole system seizes up. Our job is to check each connection. We’ll start with the absolute fundamentals—is it plugged in and is there power?—and progressively move to more nuanced checks like internal resets and component wear. By the end, you’ll know exactly what to do when your Shark vacuum acts like a brick.
Key Takeaways
- Always start with the basics: Confirm the wall outlet is working and the vacuum’s power switch is on. A tripped breaker or unplugged cord is the most frequent culprit.
- Battery health is critical: A completely drained, improperly seated, or aging lithium-ion battery is a primary reason a cordless Shark Lift Away won’t power on.
- The reset procedure is a key fix: Shark’s specific reset sequence (unplug, remove battery, hold trigger) can clear internal errors and revive a seemingly dead unit.
- Maintenance prevents most issues: Clogged filters, full dust cups, and blocked airways cause motors to overheat and shut down, preventing startup.
- Look for physical damage: Inspect the battery contacts, charging port, and power cord for corrosion, debris, or fraying that can interrupt power flow.
- Know when to seek help: If all troubleshooting fails, the issue may be a failed motor, internal wiring fault, or a battery beyond its lifespan, requiring professional service.
- Model-specific quirks exist: Always consult your specific Shark Lift Away model’s manual, as button layouts and reset steps can vary slightly between versions.
📑 Table of Contents
- 1. The Power Foundation: Is Electricity Actually Flowing?
- 2. Battery & Charging: The Heart of the Cordless System
- 3. The Essential Reset Procedure: Clearing the Electronic Glitch
- 4. Maintenance Matters: Clogs, Filters, and Overheat Protection
- 5. Advanced Troubleshooting: When the Basics Fail
- 6. When to Contact Shark Support or a Professional
- Conclusion: Empowerment Through Systematic Troubleshooting
1. The Power Foundation: Is Electricity Actually Flowing?
It seems absurdly simple, but the #1 reason any electric appliance won’t turn on is a lack of incoming power. For your Shark Lift Away, this applies to both the corded charging base and, indirectly, the battery’s ability to hold a charge. Never skip this foundational check.
Checking the Wall Outlet and Circuit Breaker
Begin your diagnosis at the source. Unplug your Shark’s charging cord from the wall and plug in a different, known-working device—a lamp, your phone charger, a hair dryer. Does that device power on? If not, the problem is your home’s electrical system. Check your home’s circuit breaker panel for a tripped breaker or a blown fuse. Reset the breaker or replace the fuse. If the outlet is on a GFCI (Ground Fault Circuit Interrupter) outlet (common in bathrooms and kitchens), press the “Reset” button on the outlet itself. A tripped GFCI will cut power without visibly tripping the breaker.
Inspecting the Charging Cord and Connection
Now, examine the Shark’s own power pathway. Look at the charging cord from plug to plug. Feel along its entire length for any kinks, cuts, or fraying in the insulation. A damaged internal wire can break the circuit. Next, inspect both ends. The wall plug should be intact. More importantly, look at the DC connector that plugs into the vacuum’s charging port. Are the metal pins bent, broken, or covered in a fuzzy white corrosion? Gently clean any debris with a dry, soft toothbrush. Ensure a firm, snug connection when you plug it in. A loose connection won’t transmit power.
The Charging Base Indicator Light: Your First Clue
When you plug the charging cord into a powered wall outlet and then connect it to your Shark Lift Away, what happens? Most models have an LED indicator light on the vacuum itself or on the charging cord. This light is your best friend for diagnosis. A solid green or blue light usually means “charging.” A blinking light might mean “charging” or “fully charged,” depending on the model (check your manual). If there is NO light at all when connected to power, the vacuum is not receiving any electricity. This points squarely to the outlet, cord, or the vacuum’s internal charging port/ circuitry. If the light comes on but the vacuum still won’t turn on when unplugged, the problem is likely the battery or a deeper internal issue.
2. Battery & Charging: The Heart of the Cordless System
The Shark Lift Away’s defining feature is its cordless, detachable pod. That freedom runs on a lithium-ion battery. When your vacuum won’t turn on, the battery is the prime suspect in about 70% of cases. Batteries degrade, connections get dirty, and charging can fail.
Visual guide about Shark Lift Away Vacuum Not Turning On
Image source: sharkvacuum.blog
Is the Battery Properly Seated?
This is the fastest fix you’ll ever make. The battery pod clicks into the main wand/handle assembly. Over time, with wear and tear or if the vacuum was bumped, the battery can become slightly dislodged. The electrical contacts won’t connect properly. Remove the battery pod by pressing the release button. Look at the metal contact points on both the battery and the vacuum’s battery bay. Are they clean? Now, reinsert the battery with firm, even pressure until you hear and feel a definitive click. Try to power it on. Often, this simple reseating solves the problem instantly.
The Deep Charge: When “Dead” Isn’t Really Dead
Lithium-ion batteries have a “protection circuit” that shuts them off if they are drained too far (below a certain voltage). If your vacuum sat unused for months, it might be in this “deep discharge” state. The charger’s light might not even come on. The fix is a “trickle charge” or “deep recovery.” Leave the vacuum plugged into the charger for a full 24-48 hours without interruption. The charger’s low amperage can sometimes gently revive a deeply discharged cell. After this extended period, check for any indicator light. If it appears, let it charge fully (usually 3-4 hours more) before trying to use it.
Battery Health and Lifespan
All batteries wear out. A typical Shark lithium-ion battery lasts 2-3 years with regular use, or about 300-500 charge cycles. As it ages, its capacity drops drastically. It might charge to 100% but die in 5 minutes. If your battery is over three years old and shows signs of rapid discharge, it likely needs replacement. Look for physical signs too: is the battery pod swollen or bulging? Does it feel unusually hot during charging? A swollen battery is a serious safety hazard—stop using it immediately and dispose of it properly at an e-waste facility. Replacement batteries are available from Shark and third-party retailers. Ensure you get the exact model number for your Lift Away (found on the vacuum’s label).
3. The Essential Reset Procedure: Clearing the Electronic Glitch
Your Shark Lift Away has a small computer (a motor control board) that manages power delivery, motor speed, and battery management. Like any computer, it can sometimes get a software glitch or a “stuck” state—often from a sudden jam, overheating, or battery voltage spike—that prevents it from sending the “start” signal to the motor. A factory reset clears this temporary memory and can bring a non-responsive vacuum back to life.
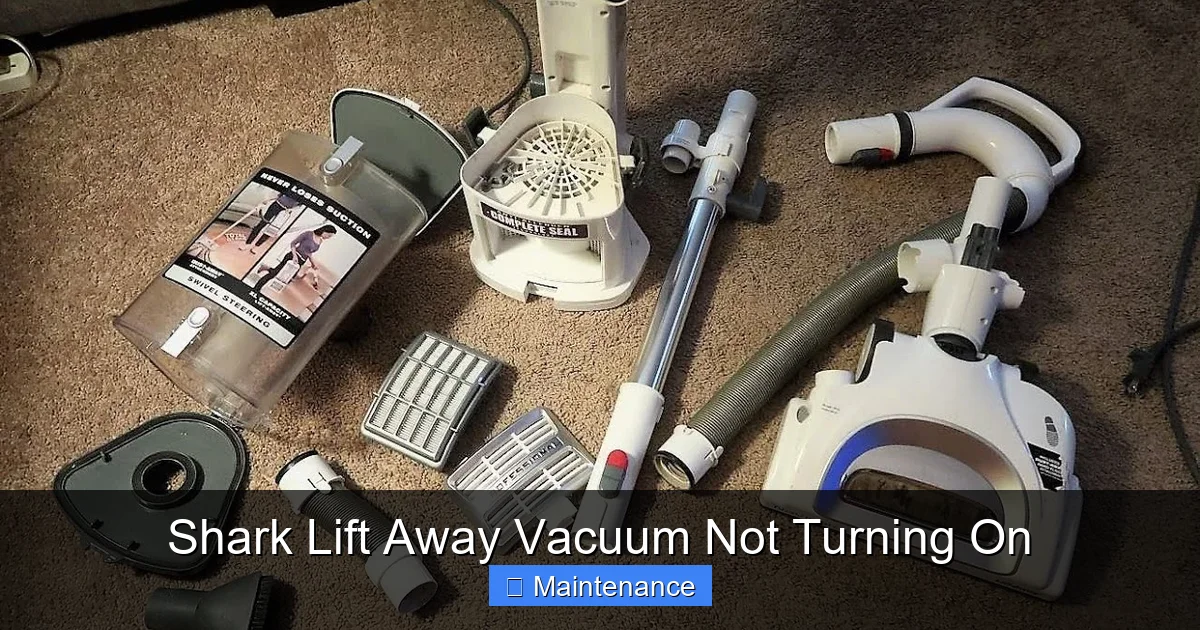
Visual guide about Shark Lift Away Vacuum Not Turning On
Image source: i.ytimg.com
Shark’s Official Reset Sequence (The Most Common Method)
This is the first thing Shark customer service will ask you to do. It’s specific and must be done in the correct order. For most Shark Lift Away models (Nv350, Nv356, Nv650, etc.):
- Unplug the vacuum from the wall charger.
- Remove the battery pod from the handle/wand assembly.
- Locate the power trigger/button on the handle. Press and hold it down for 10-15 seconds. This drains any residual power from the capacitors.
- While still holding the trigger, reinsert the battery pod firmly until it clicks.
- Continue holding the trigger for another 5 seconds, then release.
- Re-plug the vacuum into the wall charger. Look for the charging indicator light.
- After 5 minutes, try to power the vacuum on (with it still plugged in or after removing it from the charger).
If this works, let the battery charge fully. This reset solves a huge percentage of “no power” complaints.
Alternative Reset Methods & What They Mean
Some later models or specific series might have a tiny pinhole reset button on the body or near the charging port. You’d use a paperclip to press it for 10 seconds. If your manual mentions this, use it. The trigger-hold method is more universal. Why does this work? Holding the trigger with the battery removed forces the control board to fully power down and reset its internal state, clearing any error code that may have latched it into a safe “off” mode to prevent damage.
4. Maintenance Matters: Clogs, Filters, and Overheat Protection
Your vacuum has safety systems. If it detects a severe airflow blockage or if critical components overheat, it will automatically shut down and may lock out to prevent damage. This can present as a vacuum that won’t turn on at all, even with a charged battery.
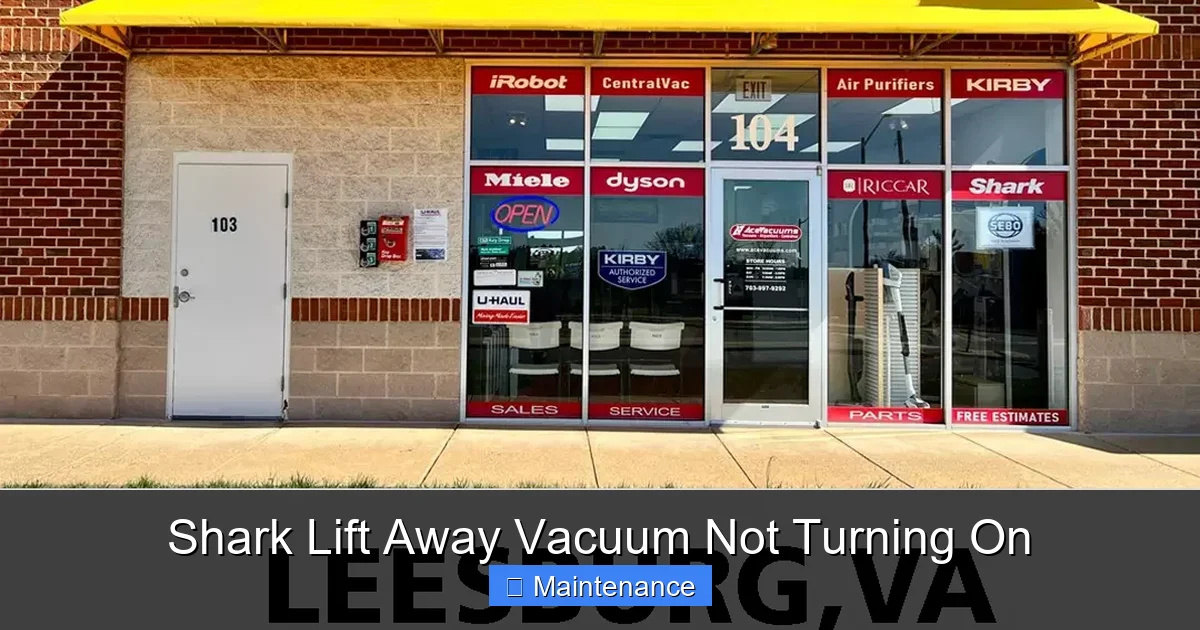
Visual guide about Shark Lift Away Vacuum Not Turning On
Image source: cdn.shopify.com
The Airflow Path: From Floor to Dust Cup
A clogged system strains the motor. Check every point:
- Brush Roll: Turn the vacuum over. Use scissors or a seam ripper to cut away any hair, string, or carpet fibers wrapped around the brush roll bearings. A jammed brush roll creates massive resistance.
- Suction Hose/Wand: Detach the wand from the main body and look through it. Shine a flashlight. Is there a obstruction? Use a long, flexible brush or a straightened coat hanger (gently!) to dislodge it.
- Dust Cup: Empty it completely. Look inside the top lid where the air enters. Is there a felt seal or filter covered in fine dust? Clean it.
- Post-Motor Filter: This is the exhaust filter, usually rectangular and located on the back or top. If it’s filthy, air can’t escape, causing backpressure. Tap it out over a trash can, wash it with cold water if it’s washable (let dry 24hrs), or replace it.
Restoring free airflow is essential. After clearing all clogs, wait 30 minutes for the motor to cool down (if it overheated) and try again.
Filter Hygiene: The Silent Power Killer
The pre-motor foam filter (inside the dust cup area) is the first line of defense. If it’s clogged, the motor works 10x harder, heats up, and the thermal fuse may trip. Shark recommends washing this foam filter every 3 months with cold water. Squeeze it dry—do not wring—and let it air dry completely for 24 hours before reinserting. A damp filter can cause electrical issues. A dirty filter is a leading cause of loss of suction and can contribute to power failures.
5. Advanced Troubleshooting: When the Basics Fail
You’ve checked the outlet, reseated the battery, done the reset, and cleaned every filter and hose. The vacuum is still a paperweight. Now we delve into more technical possibilities.
Diagnosing the Battery Contacts and Charging Port
Power transmission happens through metal pins. Corrosion or damage here is a silent killer.
- On the Battery: Look at the 3-4 gold-plated pins. Are they tarnished green or black? Gently clean them with a pencil eraser or a cotton swab dipped in a tiny bit of isopropyl alcohol. Let dry.
- On the Vacuum (Charging Port): Use a flashlight to look inside the slot where the battery and charger plug in. Use a dry, soft toothbrush to dislodge any lint, hair, or dust bunnies packed in there. Debris can prevent the charger’s pins from making contact.
- On the Charger Cord Tip: Clean these pins as well. Ensure they are not bent.
After cleaning, try charging again. If the charger light still doesn’t come on, the vacuum’s internal charging port might be faulty.
Internal Safety Fuses and Thermal Cut-Outs
Inside your Shark, there are small thermal fuses and resetable thermal cut-outs. If the motor overheated severely (from a long period of use with a clogged filter), these safety devices may have tripped. They are designed to break the circuit to prevent fire. Sometimes, allowing the vacuum to cool completely for several hours will allow a resetable cut-out to cool and re-close. However, a traditional one-time fuse will blow and require soldering skills to replace. This is where most homeowners stop and call for service. If you suspect this (vacuum was very hot before it died), the long cool-down is your only DIY test.
Motor Failure and Control Board Issues
This is the least common but most serious end of the spectrum.
- Motor Failure: The motor itself can burn out. You might smell a faint electrical burning odor. A failed motor will draw too much current or none at all, preventing startup.
- Control Board Failure: The brain is dead. No amount of resetting will work. Causes include power surges, water damage, or just component failure over time. You might see a burnt spot or swollen capacitor on the board if you open the casing (which voids warranty).
Diagnosing these requires a multimeter and electrical knowledge. At this stage, weighing the cost of a new vacuum versus a repair is practical. Shark offers a limited warranty; check if your model is still covered.
6. When to Contact Shark Support or a Professional
You’ve been methodical. You’ve tried:
- Multiple working outlets.
- A deep 48-hour charge.
- The official reset sequence.
- Completely cleaning all filters, hoses, and brush rolls.
- Cleaning all electrical contacts.
- Letting it cool for hours after a potential overheat.
And your Shark Lift Away vacuum is still not turning on. It’s time to escalate.
Utilizing Shark’s Customer Service and Warranty
Before you give up, contact Shark directly. Have your model number (on the label, usually on the back or bottom) ready. Their support can often provide model-specific advice or confirm if a known issue exists for your serial number range. If your vacuum is under the typical 5-year warranty (varies by model/purchase date), you may be eligible for a repair or replacement. They might ask you to perform additional steps or send you a new battery or charging cord to test with. Be polite, patient, and have your proof of purchase handy.
Finding a Reputable Appliance Repair Shop
If the warranty is expired, seek a small appliance repair shop that specifically mentions vacuums or motorized appliances. Not all general repair shops will touch vacuums. Call first and describe the problem: “I have a Shark Lift Away that won’t turn on. I’ve done all basic troubleshooting—battery, reset, cleaning. I suspect a motor or board issue.” Ask for a diagnostic fee. Sometimes, the cost of diagnosis plus repair approaches the price of a new mid-range vacuum. Get a quote first. For older models, replacement is often the more economical choice.
Conclusion: Empowerment Through Systematic Troubleshooting
A Shark Lift Away vacuum not turning on is a frustrating but usually solvable puzzle. The key is to avoid panic and follow a logical sequence, starting from the simplest, most likely causes. Power source first, then battery connection and charge, then the reset, then maintenance, and finally, internal components. This methodical approach ensures you don’t waste time and money on unnecessary parts. Remember, the vast majority of these issues stem from a loose battery connection, a deeply discharged cell, a tripped thermal fuse that just needs a cool-down, or a clogged filter causing an overheat shutdown. By becoming your own first-line technician, you extend the life of your appliance, maintain its powerful performance, and keep your home clean without unexpected downtime. Keep this guide bookmarked, and next time your Shark goes silent, you’ll know exactly what to do.
Frequently Asked Questions
How do I know if my Shark Lift Away battery is completely dead?
A dead battery often shows no light when plugged into the charger. Try the deep charge method: leave it plugged in for 48 hours straight. If no light appears after that, the battery is likely at the end of its life and needs replacement. A swollen battery is a definite sign of failure and must be replaced immediately.
I did the reset but my Shark still won’t turn on. What next?
If the official reset (unplug, remove battery, hold trigger 15 sec, reinsert battery, hold 5 sec) fails, ensure you held the trigger for the full time. Then, thoroughly clean all filters, empty the dust cup completely, and check for any blockages in the hose and brush roll. Overheating from a clog can lock the system. After cleaning, let the vacuum cool for several hours before trying again.
Can I use any Shark battery in my Lift Away?
No. Shark batteries are model-specific. The electrical connector shape, voltage, and communication protocol must match your exact vacuum model. Using an incompatible battery can damage the vacuum or simply not work. Always check your model number (on the vacuum’s label) and purchase the exact replacement battery Shark specifies or a reputable third-party equivalent listed for that model.
My vacuum charges but dies instantly. Is it the battery?
Yes, this is a classic sign of a worn-out lithium-ion battery. It can no longer hold a charge. It may show 100% on the indicator but has almost zero capacity. After 2-3 years of regular use, this is normal. The solution is to replace the battery pack. Before replacing, ensure the vacuum is clean, as a severely clogged filter can also cause rapid power drain.
Is there a fuse I can check or replace myself?
There are internal thermal fuses and resetable thermal cut-outs, but they are not designed for user replacement. They are soldered onto the motor or control board. A tripped thermal cut-out might reset after the vacuum cools completely for several hours. A blown fuse requires soldering skills and the correct part. For most users, this is considered an internal component failure that warrants a call to Shark support or a professional repair service.
What if the charging light comes on but it still won’t power on?
This indicates the battery is receiving a charge, so the outlet, cord, and internal charging circuit are likely working. The problem is then in the battery’s ability to deliver power to the motor, or the motor/control board itself. Ensure the battery is fully charged (light goes solid or turns off). Try the reset procedure again. If it still fails with a fully charged battery, the battery may be faulty, or there is an internal electronic failure requiring professional diagnosis.