Is your Shark Ion Robot R85 refusing to charge? This is a common but fixable issue. The problem usually stems from dirty charging contacts, a software glitch, or a depleted battery. Start by thoroughly cleaning the robot and dock contacts with a dry cloth. Perform a full reset by holding the CLEAN button for 10 seconds. If these steps fail, the issue may be a faulty battery or charging circuit, requiring professional repair or replacement under warranty.
You’ve come home, ready to let your trusty Shark Ion Robot R85 handle the daily dirt and dust. You press the CLEAN button, and… nothing. Or maybe it runs for five minutes and dies. You place it on its charging dock, the blue light doesn’t come on, and a sinking feeling hits. Your robot vacuum, your automated cleaning partner, has a critical problem: it’s not charging. Before you panic and start shopping for a replacement, take a deep breath. The “Shark Ion Robot R85 not charging” issue is one of the most common problems owners face, and in the vast majority of cases, it’s a problem you can diagnose and fix yourself. This guide will walk you through every possible cause, from the simplest wipe-down to more complex internal checks, getting your R85 back on its charging base and back to work.
Key Takeaways
- Dirty Contacts Are The #1 Culprit: Accumulated dust and debris on the robot’s and dock’s metal charging pins prevent a proper electrical connection, causing most charging failures.
- A Simple Reset Solves Many Glitches: Performing a factory reset clears temporary software errors that can disrupt the charging communication between the robot and its base.
- Proper Placement Is Critical: The robot must sit perfectly aligned and centered on the dock for the pins to connect. An uneven floor or a misplaced dock will stop charging.
- Battery Health Degrades Over Time: After 2-3 years of regular use, the original lithium-ion battery may no longer hold a charge effectively and will need replacement.
- Firmware Updates Can Fix Bugs: Outdated robot software can cause charging logic errors. Connecting to the Shark app to check for and install updates is an essential troubleshooting step.
- Power Source Issues Are Often Overlooked: Ensure the charging dock is plugged into a working wall outlet and that the adapter is firmly connected to both the dock and the wall.
- Warranty Should Be Your First Stop: For persistent charging problems, especially on newer units, contact Shark Support before attempting complex internal repairs to avoid voiding your warranty.
📑 Table of Contents
Understanding Your Shark Ion Robot R85 Charging System
To troubleshoot effectively, you need to understand how your R85 is supposed to charge. It’s a simple but elegant system of physical contact and digital communication. The robot has two metal charging pins on its underside. The charging dock has two corresponding metal spring-loaded contacts. When the robot docks correctly, these pins physically touch, completing an electrical circuit. Simultaneously, the robot and dock engage in a tiny “handshake” via small infrared or contact-based sensors. This communication tells the robot, “Hey, you’re home, start charging!” and tells the dock, “I’m here, send power.” If any part of this physical or digital connection fails, charging stops. Common failure points are dirty contacts, misalignment, software bugs, or a dead battery that can’t accept a charge anymore. Knowing this flow helps you pinpoint where the breakdown is happening.
The Physical Connection: Contacts and Alignment
The most frequent cause of a Shark Ion Robot R85 not charging is the simplest: grime. Think about where your robot travels. It gobbles up dust, hair, carpet fibers, and tiny debris. A significant portion of this ends up caked on the charging pins at the robot’s rear and inside the dock’s contact slot. This layer acts like an insulator, preventing metal-to-metal contact. Even a thin film of dust can stop the flow of electricity. Alignment is the other physical piece. The R85 uses a “bump-and-align” method. It drives onto the dock and slightly bumps back to settle. If your floor is uneven, the dock is on a thick rug, or the dock’s rubber feet are worn and it slides when bumped, the robot may not achieve the perfect, pressure-sealed connection needed. Always ensure the dock sits on a hard, flat surface against a wall, with no obstructions on either side.
The Digital Handshake: Software and Sensors
Modern robot vacuums are tiny computers on wheels. The charging process isn’t just about electricity; it’s a conversation. When the pins touch, small sensors confirm the connection. The robot’s internal software then commands the battery management system to begin charging. If the robot’s software is glitchy—perhaps from an interrupted update or a random bug—it might not recognize that it’s docked, even if the physical connection is perfect. It will just sit there, thinking it’s not on the charger. Similarly, the dock itself has a simple circuit board. If that board fails, it won’t send the power signal, even if it’s plugged into a live outlet. The blue LED on the dock is your first clue here—if it’s off when plugged in, the dock isn’t getting power or is faulty.
Step-by-Step Diagnostic & Troubleshooting Guide
Follow this methodical process. Start with the quickest, easiest fixes and work your way down. Most charging problems are solved in the first three steps.
Visual guide about Shark Ion Robot R85 Not Charging
Image source: m.media-amazon.com
Step 1: The Ultimate Clean – Contact Maintenance
This is non-negotiable and the solution 70% of the time. Unplug the charging dock from the wall. Use a dry, soft microfiber cloth. Gently but firmly wipe the two metal charging pins on your R85’s underside. You’ll likely see a gray or black film. For stubborn grime, slightly dampen the cloth with isopropyl alcohol (70% or less), wring it out until nearly dry, and clean the pins. Alcohol evaporates quickly and leaves no residue. Do the same for the spring-loaded contacts inside the dock’s slot. Use a cotton swab dipped in alcohol to get into the corners. Important: Never use water or household cleaners directly on the contacts, as they can cause corrosion. Let everything air dry for 2-3 minutes before proceeding.
Step 2: Reset and Reboot
After cleaning, place the robot on the dock. If it still doesn’t charge, it’s time for a software reset. Locate the CLEAN button on top of your R85. Press and hold it for 10-15 seconds until you hear a series of beeps (usually two or three) and see the indicator light pattern change. This performs a factory reset, clearing any temporary memory errors. Place the robot back on the dock. Next, power cycle the dock: unplug it from the wall for 30 seconds, then plug it back in. The dock’s LED should illuminate. Now, carefully place the robot on the dock again, ensuring it’s centered and sits flush. Listen for the audible dock confirmation tone and watch for the robot’s charging light (usually a solid or slowly pulsing blue/white light).
Step 3: Verify Power and Placement
Is the dock’s LED light on? If not, the problem is with the power. Try a different, known-good wall outlet. Check that the adapter’s cable isn’t frayed and that the connection to the dock is secure. If the dock’s light is on, but the robot’s light isn’t, focus on placement. The R85 must be perfectly centered. The front bumper should be just touching or very close to the dock’s ramp. The rear wheels should be aligned with the dock’s guide rails. Place a piece of painter’s tape on the floor marking the ideal dock position. Move the dock to a different, hard-surface location (like a kitchen or hallway) to rule out floor unevenness. Ensure nothing is leaning against the dock or the robot.
Step 4: Check for Software Updates
A bug in an old firmware version can disrupt charging logic. Ensure your R85 is connected to Wi-Fi and the Shark app. Open the app, go to your robot’s settings, and look for a “Firmware Update” or “Software Update” option. Install any available update. The robot may need to be on the dock to download and install, so you might need to do this after a successful temporary charge. Updates often include improvements to docking algorithms and battery management.
Advanced Troubleshooting: When Basics Fail
If you’ve meticulously cleaned, reset, verified power, and updated software with no success, the issue is likely hardware-related. This requires a bit more investigation.
Visual guide about Shark Ion Robot R85 Not Charging
Image source: i.ytimg.com
Inspecting the Battery
The lithium-ion battery in your R85 has a lifespan of roughly 2-3 years or 300-500 charge cycles. As it ages, its ability to hold a charge diminishes. A severely degraded battery might not have enough voltage to even initiate the charging conversation. One tell-tale sign is if the robot runs for a very short time (5-10 minutes) and dies, even after showing a full charge. Testing: If you’re comfortable, you can carefully remove the battery ( consult your user manual for instructions—it usually involves removing the bottom plate and disconnecting a plug). Visually inspect it for any swelling, leakage, or corrosion on the contacts. If it looks puffy or damaged, stop and do not attempt to charge it. Replace it with a genuine Shark Ion battery. If it looks normal, the issue could still be internal battery circuitry failure.
Examining the Charging Dock
Dock failures are less common but possible. With the dock unplugged, inspect the contact pins inside. Are they springy? Do they move freely and return to position? A pin that is stuck down or corroded will fail. Look for any obvious damage to the dock’s circuit board (if visible). A quick test: if you have a multimeter, you can check for continuity between the dock’s power input and the contact pins (this is advanced). More simply, if you have access to another compatible Shark Ion dock (from a friend or a refurbished unit), try docking your robot on that dock. If it charges, your original dock is faulty.
Internal Wiring and Connections
Less likely, but possible, is a loose or broken wire connection inside the robot, particularly where the charging pins connect to the mainboard. This usually happens after a hard impact or drop. This diagnosis requires opening the robot’s shell, which is not recommended for most users as it can void the warranty and risk damaging delicate components. If you suspect internal damage (e.g., the robot was recently bumped hard), this is a strong indicator to skip DIY and go straight to Shark Support or a certified repair center.
Preventive Maintenance for Long-Term Charging Health
An ounce of prevention is worth a pound of cure. Incorporating these habits will drastically reduce the chances of your R85 developing charging problems.
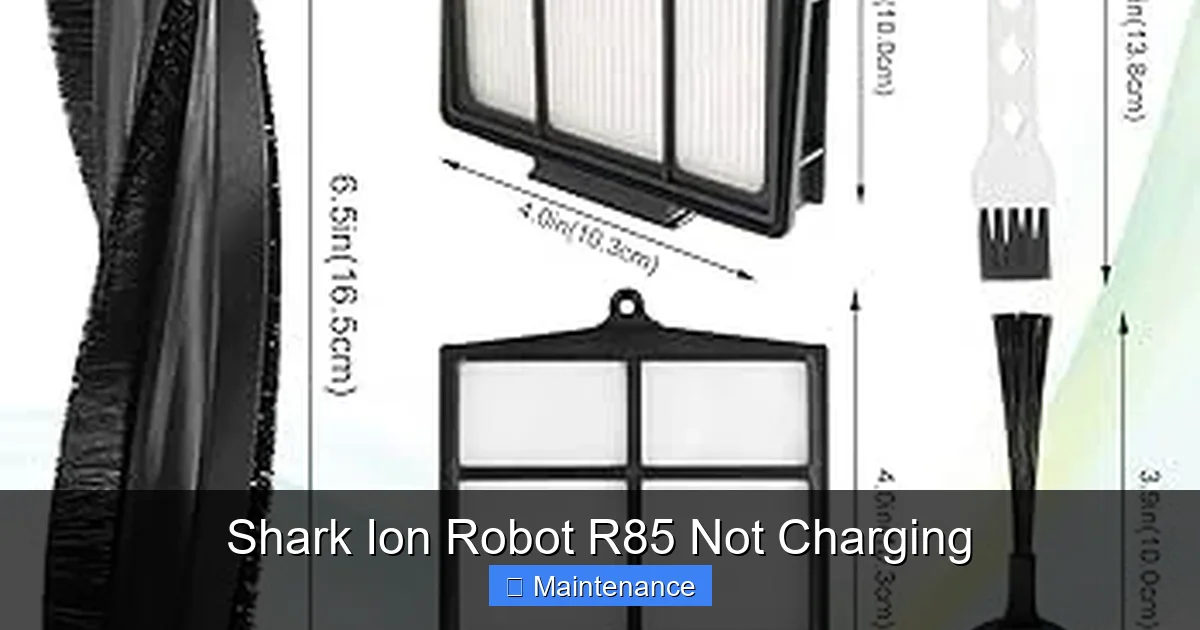
Visual guide about Shark Ion Robot R85 Not Charging
Image source: m.media-amazon.com
Make Contact Cleaning a Routine
Incorporate contact cleaning into your weekly or bi-weekly maintenance schedule. Every time you empty the dustbin, take 10 seconds to wipe the charging pins on the robot with a dry cloth. Once a month, do the same for the dock’s contacts. This simple habit prevents the insulating layer of dust from ever building up. Keep a microfiber cloth near your charging station as a visual reminder.
Optimal Dock Environment
Place your charging dock thoughtfully. Choose a location with a hard, non-carpeted floor. Ensure there is at least 1.5 feet of clear space on either side of the dock and 3 feet in front of it. This gives the R85 a clear, straight approach path. Avoid placing the dock near baseboards, furniture legs, or under overhangs that the robot might bump into, misaligning it. Keep the area around the dock relatively clean to minimize dust settling into the contact slot.
Battery Care Best Practices
To prolong your battery’s life, avoid constantly doing partial charges. It’s fine to dock it after a short clean, but try to let it complete a full cycle (run until low battery, then fully charge) at least once a month. If you won’t be using the robot for an extended period (over a month), store it with a ~50% charge in a cool, dry place. Avoid leaving it on the dock constantly at 100% for weeks on end, as this stresses lithium-ion batteries. The R85 is designed to stop charging when full, but periodic use is healthier for the battery chemistry.
When to Seek Professional Help or Consider Replacement
You’ve tried everything: deep cleaning, multiple resets, a different outlet, a firmware update. The robot still won’t charge, or it charges for a minute and stops. Now what?
Warranty is Your Best Friend
First, check your warranty status. Shark typically offers a 1-2 year limited warranty. If your R85 is still within this period, contact Shark Customer Support immediately. Do not attempt any invasive repairs that involve opening the main body, as this will almost certainly void the warranty. Explain the troubleshooting steps you’ve already taken. They may offer to ship a replacement unit or a refurbished one. They might also send you a prepaid box to return the defective unit. This is the fastest, cheapest, and safest path for a covered unit.
Out-of-Warranty Repair vs. Replacement
If the warranty has expired, you face a choice. A genuine Shark Ion battery replacement costs between $40 and $70. A charging dock replacement is around $50-$80. If the issue is the robot’s internal charging circuit or motherboard, repair costs can approach $100-$150 from a third-party shop. At that point, you must weigh the age of your R85. The R85 is a previous-generation model. Newer Shark models (like the IQ series) offer significant improvements in navigation, suction, and self-emptying. If your R85 is over 3 years old, investing in a new, more advanced model might be more cost-effective in the long run than repairing an aging machine. However, if it’s only 1-2 years old and you’re happy with its performance, a $60 battery fix is a great option.
Conclusion: Patience and Process Pay Off
A Shark Ion Robot R85 not charging is a frustrating but rarely fatal problem. The key is a systematic, calm approach. Always begin with the physical: clean those contacts. It’s the unsung hero of robot maintenance. Then move to the digital: reset and update. Most charging failures are resolved in these first two phases. Only when those fail should you suspect component failure—a worn battery or a faulty dock. Remember, your robot is a tool, and tools need care. By integrating simple contact cleaning into your routine and ensuring your dock is in an optimal location, you’ll prevent the vast majority of charging headaches. If you do hit a hardware wall, your warranty is your primary resource. With this guide, you’re now equipped not just to fix the problem, but to understand it, ensuring many more hours of hands-free cleaning from your faithful Shark Ion companion.
Frequently Asked Questions
How do I force a reset on my Shark Ion Robot R85?
To perform a factory reset, press and hold the CLEAN button on top of the robot for 10-15 seconds. You will hear a series of beeps, and the indicator light will change pattern. Release the button. The robot will reboot. This clears temporary software glitches that can interfere with charging.
How can I tell if my Shark Ion R85 battery is dead?
A dead battery often shows symptoms like running for only a few minutes, not turning on at all, or not charging even after a reset and contact cleaning. If the robot is over 2-3 years old, the battery is likely at the end of its life. A swollen battery case is a definite sign of failure and requires immediate, safe replacement.
Will my Shark Ion R85 work without the charging dock?
Yes, you can run the robot manually without the dock. However, for automatic recharging and scheduling, the dock is essential. If the robot’s battery is healthy, it will return to the dock on its own after cleaning. If it’s not charging on the dock, it will eventually deplete its battery and stop working until manually recharged via the dock (if possible) or with an external charger (not standard).
How long should a fully charged Shark Ion R85 run?
A healthy battery on a Shark Ion R85 typically provides about 60-90 minutes of runtime on a full charge, depending on floor type, suction mode, and debris load. If you’re getting significantly less time (e.g., 15-20 minutes), the battery is likely failing and needs replacement.
What do the lights on my Shark Ion R85 and dock mean?
A solid blue light on the robot usually means it’s charging. A pulsing blue light often indicates it’s connected to Wi-Fi. A red light typically means an error or low battery. The dock’s LED should be solid blue when powered and actively charging a robot. If the dock light is off, check the power source and adapter. Consult your specific model’s manual for exact light patterns, as they can vary slightly.
Can I use a third-party charger or battery for my Shark Ion R85?
While third-party batteries and chargers are available, it is strongly recommended to use genuine Shark Ion parts. Non-genuine components may not meet safety and performance specifications, potentially damaging your robot, creating a fire hazard, or voiding any remaining warranty. Always prioritize official Shark replacement parts for reliability and safety.