Is your Shark Ion Robot R75 suddenly refusing to start, charge, or navigate properly? This is a common but frustrating issue. Most problems stem from simple, fixable causes like clogged sensors, dirty wheels, battery depletion, or software glitches. This guide provides a structured, step-by-step approach to diagnose and resolve the “not working” symptom, from basic power checks to advanced reset procedures, saving you from costly service calls.
You’ve come to rely on your Shark Ion Robot R75. That little disc of convenience has been silently (or not-so-silently) keeping your floors tidy. Then, one day, it just… doesn’t. It won’t turn on. It won’t leave its dock. It beeps at you in a cryptic, annoying pattern. The frustration is real. Your trusty cleaning sidekick is suddenly a Shark Ion Robot R75 not working, and you’re left staring at a dirty floor and a confusing manual. Don’t panic. This isn’t necessarily a death sentence for your robot vacuum. In fact, the vast majority of “not working” complaints for this model stem from very specific, often easily-correctable issues. This guide is your systematic roadmap from panic to solution. We’ll walk through every potential problem, from the dead-simple to the more complex, arming you with the knowledge to diagnose and often fix the issue yourself. Think of it as a friendly chat with someone who’s seen this all before.
Before we dive into the technical weeds, let’s set the stage. The Shark Ion R75 is a workhorse. It uses a combination of sensors, a lithium-ion battery, and a navigation system (it’s not a true mapping robot, but uses “IQ Navigation” with a downward sensor) to clean. When it fails to work, the culprit is almost always within that core triad: Power, Sensors/Mechanics, or Software/Logic. We will attack the problem from these three angles. We’ll start with the absolute basics you might have overlooked and progressively move to more involved procedures. Grab your microfiber cloth, your Phillips-head screwdriver (if you’re brave), and let’s get your Shark Ion back in action.
Key Takeaways
- Power Issues First: Always begin with the simplest checks: ensure the unit is powered on, the battery is charged, and the charging contacts on both the robot and base are perfectly clean.
- Clean Sensors & Wheels: The #1 cause of navigation and “not working” errors is dirty cliff sensors, bumper switches, and wheels. A quick clean with a microfiber cloth resolves most issues.
- Software & Connectivity: A frozen system or outdated app can cause malfunctions. Performing a soft reset or updating the Shark Ion app often restores functionality.
- Battery Health is Key: After 2+ years, Lithium-ion batteries degrade. If the robot dies quickly or won’t hold a charge, battery replacement may be necessary.
- Listen for Error Beeps: The robot’s beep codes are a diagnostic language. Note the pattern (e.g., 2 beeps, pause, 2 beeps) and consult Shark’s guide to identify the specific fault.
- Physical Obstructions: Check for tangled hair in the main brush, debris in the side brush, and blocked exhaust vents. These cause motor overload and shutdowns.
- Know When to Seek Help: If all troubleshooting fails, the issue may be a failed motor, main circuit board, or internal wiring, requiring professional repair or replacement.
📑 Table of Contents
- 1. The Absolute Basics: Power & Charging Fundamentals
- 2. Mechanical & Sensor Blockages: The Physical Roadblocks
- 3. Decoding the Beeps: Understanding Error Codes
- 4. Software & System Resets: The Digital Reboot
- 5. Advanced Diagnostics & Component Failure
- 6. When to Call It: Professional Repair vs. Replacement
- Strong Conclusion
1. The Absolute Basics: Power & Charging Fundamentals
It’s easy to skip the simplest checks when you’re frustrated, but a shocking number of “not working” cases are solved right here. Power is the lifeblood of your robot. If it’s not getting or holding power, nothing else matters.
Is It Actually On? The Power Button Dance
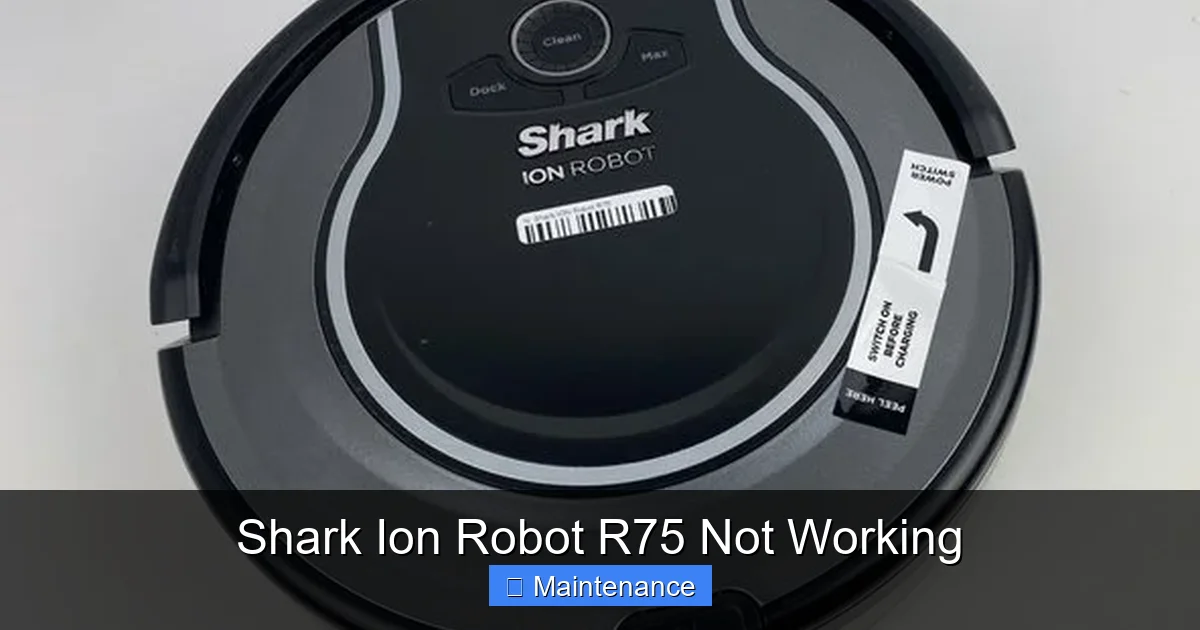
The Shark Ion R75 has a physical power button on its top surface. It’s small and can be accidentally pressed. First, ensure the robot is in the “On” position. The button should be flush or show a small indicator light (depending on model variant). Sometimes, especially after a bump or a deep clean, the button can get stuck in the “Off” position. Press it firmly but gently a few times to ensure it’s toggling correctly. Listen for the startup chime. If you hear nothing, move to the next step.
The Charging Dock: Your First Line of Investigation
The charging dock isn’t just a parking spot; it’s an active electrical interface. Problems here are prime suspects.
- Check the Dock’s Power: Is the adapter plugged securely into a working outlet? Test the outlet with another device. Ensure the dock’s power cord isn’t frayed or damaged.
- Clean the Charging Contacts: This is critical. On the dock, you’ll see two thin metal strips. On the bottom of the robot, there are two corresponding metal pads. Over time, dust, debris, and oxidation create a thin insulating layer. The robot can’t make a proper electrical connection. Use a clean, dry microfiber cloth to vigorously rub both the dock’s strips and the robot’s pads. For stubborn grime, a cloth lightly dabbed in isopropyl alcohol (let it dry completely) works wonders. This simple act resolves countless charging failures.
- Dock Placement: Is the dock against a wall with at least 3 feet of clear space on either side and 5 feet in front? Is it on a level surface? If the robot can’t easily align itself, it won’t charge. Ensure nothing is leaning against or blocking the front of the dock.
Battery Health: The Silent Killer
Lithium-ion batteries, like all rechargeables, have a finite lifespan. After 2-3 years of regular use, their capacity degrades significantly. A “not working” robot might just have a battery that can’t hold a charge anymore.
- The 30-Minute Test: Manually place the robot directly on the dock, ensuring good contact. Let it charge for a full 4-6 hours (the manual’s recommended initial charge time). After charging, press the power button and run it on a short, timed clean (use the app’s schedule or a manual spot clean). Does it die in under 30 minutes? If yes, the battery is likely at the end of its life. A sudden inability to complete a standard cleaning cycle is a classic symptom.
- Extreme Temperature Sensitivity: If the robot was stored in a cold garage or hot attic, the battery management system may prevent it from turning on for safety. Bring it to a room-temperature environment (70-77°F / 21-25°C) for several hours and try again.
2. Mechanical & Sensor Blockages: The Physical Roadblocks
Your Shark Ion R75 navigates using a combination of a downward optical sensor and a front bumper with contact sensors. It also has physical wheels and brushes. Anything impeding these physical components can trigger a fault state, causing the robot to stop, beep, and refuse to move.
The Essential Pre-Clean: Wheels, Brushes, and Vents
Before you even think about software, get your hands dirty (with a cloth, that is). Turn the robot over.
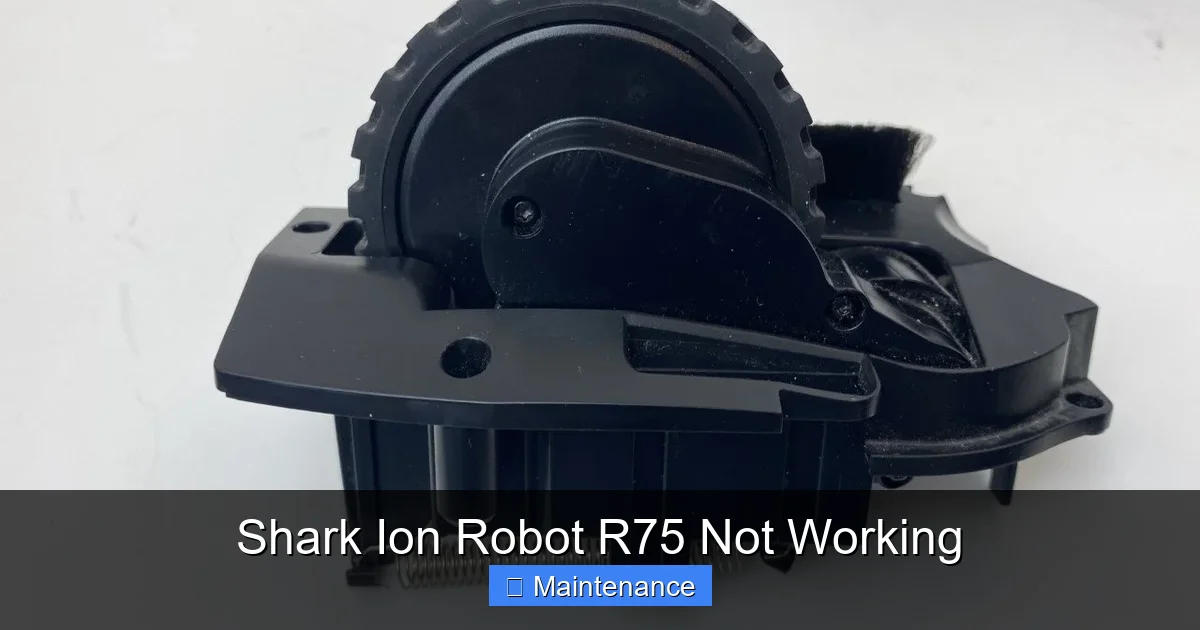
- Main Brush (Roller Brush): Hair, string, and carpet fibers wrap around the ends and axles. This creates immense drag on the motor. The robot senses this overload and shuts down. Use the provided cleaning tool or scissors to carefully cut and remove all debris from the brush and its bearings. Spin it by hand—it should rotate freely.
- Side Brush: Remove it (usually a twist-off mechanism). Check for hair tangled in the bristles and around the base. A stiff side brush also strains the motor.
- Wheels: Check both drive wheels. Remove any hair or rubber bands caught in the wheel wells or axles. The wheels should spin smoothly. Also, check the caster wheel (the small front wheel). It’s a common point of failure for hair jams.
- Exhaust Vents & Intake: Locate the exhaust vent (usually on the side or back) and the main air intake (underneath, around the main brush housing). Use a thin vacuum attachment or compressed air to blow out any accumulated dust and pet hair. A clogged system causes overheating and automatic shutdown.
Sensor Maintenance: The Eyes and Ears of Your Robot
This is, without question, the most common cause of navigation and “stuck” errors leading to a non-functional robot. The Shark Ion R75 relies on:
- Downward (Optical) Cliff Sensor: This is a clear, rectangular window on the underside of the robot, near the front. Its job is to detect drops (stairs, ledges). If it’s dirty, it thinks it’s constantly on the edge of a cliff and refuses to move. Clean this window meticulously with a microfiber cloth. Any smudge, dust, or sticky residue from cleaning solutions will blind it. Do not spray cleaner directly on it; spray on the cloth first.
- Bump Sensor (Front Bumper): The rubber bumper around the front edge houses physical contact switches. If debris gets behind the bumper or the switches are sticky, the robot thinks it’s constantly bumping into something. Press the bumper in several times around its entire circumference to ensure it clicks freely and isn’t jammed. Use a thin tool (like a plastic spatula) to gently lift the bumper edge and clear out any trapped dust or hair.
- Wall Sensor: A small infrared sensor on the side helps it follow walls. Wipe this clean as well.
3. Decoding the Beeps: Understanding Error Codes
Your Shark Ion R75 communicates its distress through a series of beeps. The manual contains a beep code chart, but here are the most common patterns for a unit that won’t work:
Visual guide about Shark Ion Robot R75 Not Working
Image source: guide-images.cdn.ifixit.com
- Two Beeps, Pause, Two Beeps (Repeated): This is almost always a wheel error or a main brush jam. The robot detects excessive resistance. Revisit the mechanical cleaning in Section 2. Focus on the main brush and both drive wheels.
- Three Beeps: Typically indicates a cliff sensor fault. Clean the downward optical sensor thoroughly. Ensure the robot is on a solid, non-reflective surface (some dark hardwoods or shiny tiles can sometimes confuse it).
- Four Beeps: Often a stuck bumper or side brush error. Manually push in the bumper around the entire ring. Remove and clean the side brush assembly.
- Five Beeps: Can signal a charging error or internal communication fault. Re-clean all charging contacts. Perform a full reset (see Section 4).
- Continuous Beeping: Usually means the battery is critically low and the robot cannot move. Place it directly on the dock for a long, uninterrupted charge (6+ hours).
Action: Listen carefully the next time the robot alerts you. Count the beeps and the pause. This beep code is your first clue to the specific subsystem that has failed.
4. Software & System Resets: The Digital Reboot
Sometimes, the robot’s internal computer (its “brain”) gets into a confused state, similar to your phone needing a restart. Before assuming hardware failure, we must perform software-level resets.
Visual guide about Shark Ion Robot R75 Not Working
Image source: guide-images.cdn.ifixit.com
The Soft Reset (Most Common)
This clears temporary memory and reboots the system without erasing your cleaning schedules (if synced to the app).
- Place the robot on its charging dock. Ensure the power button is ON (illuminated or showing a light).
- Press and hold the Clean/Power button on the top of the robot for 10-15 seconds. You’ll hear a series of beeps and see the indicator light change pattern (often flashing or turning off).
- Release the button. The robot will turn off completely.
- Wait 30 seconds. Press the power button once to turn it back on. The startup light sequence should be normal.
- Place it on the dock and see if it charges and responds normally.
The Hard Reset (Factory Reset)
Warning: This will erase all schedules, settings, and Wi-Fi connection information stored on the robot itself. You will need to re-set it up with the Shark Ion app afterward. Use this if a soft reset fails.
- Ensure the robot is powered ON and sitting on its charging dock.
- Open the Shark Ion app on your phone. Go to your robot’s settings.
- Look for an option like “Factory Reset” or “Reset Robot”. The exact wording varies by app version. Confirm the reset.
- Alternatively, some models require a button sequence on the robot: With the robot OFF, press and hold the Clean button while simultaneously pressing the Dock button (if present) for 10+ seconds until you hear a long beep. Release. Turn the robot on. It will be in factory default mode.
After a hard reset, go through the full setup process in the app: connect to Wi-Fi, name your robot, etc. This often resolves strange, intermittent “not working” behaviors caused by corrupted software.
App & Firmware Updates
An outdated app or robot firmware can cause compatibility issues.
- Check your phone’s app store (Google Play or Apple App Store) for an updated version of the “Shark Ion” app. Install any updates.
- In the app, with the robot connected, go to Settings > About > Check for Firmware Updates. If an update is available, ensure the robot is on its dock with a good charge and initiate the update. Do not interrupt this process.
5. Advanced Diagnostics & Component Failure
If you’ve meticulously followed Sections 1-4 and your Shark Ion R75 is still a paperweight, it’s time to consider internal hardware failures. These are less common but possible.
Motor Issues: The Heart of the Matter
The main brush motor and the drive wheel motors can burn out. Symptoms:
- The robot powers on, lights work, but won’t move at all, even on a flat surface. It might emit a faint, strained whirring sound.
- It moves but extremely slowly and weakly, as if dragging a weight.
- It beeps a motor error code (often the 2-beep pattern) even after you’ve confirmed the brush and wheels spin freely by hand.
Diagnosis: With the robot upside down, try to gently push it forward and backward. It should move smoothly. If it feels stiff or gritty, internal motor gear failure is likely. This is not a typical user-replaceable part and usually requires sending the unit to Shark or a qualified repair shop.
Main Circuit Board (PCB) Failure
This is the robot’s central nervous system. Failure symptoms are varied and mimic other problems:
- No lights, no power, no charging response, even with a known-good battery and clean contacts.
- Random, unexplained shutdowns during operation.
- Failure to communicate with the app, even after resets.
This can be caused by power surges, liquid damage, or general component aging. Diagnosis requires multimeter testing and visual inspection for burnt components or swollen capacitors—definitely a professional repair scenario.
Battery Connector & Internal Wiring
The battery connects to the main board via a plug. This connection can become loose, especially if the robot has been jostled. The wires from the battery to the board can also fray from repeated movement. Symptoms are similar to a dead battery: no power, sudden shutdowns. If you are comfortable, you can open the robot’s top cover (usually several screws) and visually inspect the battery connector to ensure it’s seated firmly. Look for any obvious wire damage. If unsure, stop and seek professional help.
6. When to Call It: Professional Repair vs. Replacement
We’ve covered user-serviceable items. Now, the tough decision. After exhausting all troubleshooting:
- Consider the Age & Cost: The Shark Ion R75 is an older model (discontinued). Replacement parts and official repair services may be limited or expensive. A new robot vacuum from a current Shark line (like the AI Ultra or Shark Matrix) might cost only slightly more than a professional repair estimate for an out-of-warranty R75.
- Warranty Status: If your unit is still under Shark’s limited warranty (typically 1-2 years), contact Shark Customer Support first. Do not attempt disassembly that would void the warranty. They may offer a replacement or authorized repair.
- Cost-Benefit Analysis: Get a repair quote. If it’s more than 50-60% of the cost of a comparable new robot, replacement is the more sensible long-term choice. Newer models offer better navigation, suction, and smart features.
- Environmental Consideration: E-waste is a concern. If the repair is simple (battery, maybe a wheel motor), fixing it extends the product’s life. If it’s a major board failure, recycling the old unit responsibly and buying a new, more efficient model might have a net positive environmental impact over the next 5 years.
Bottom Line: For sensor cleaning, brush maintenance, and resets, you are the expert. For suspected motor, board, or deep battery failure, weigh the repair cost against the value and features of a new machine.
Strong Conclusion
Facing a Shark Ion Robot R75 not working is a moment of truth for any owner. It tests your patience and your problem-solving skills. But as we’ve walked through, the solution is rarely as grim as a complete failure. In 80% of cases, the problem is a dirty sensor, a jammed brush, a loose connection, or a confused piece of software. The power of this guide lies in its methodical approach: start with power, clean everything, decode the beeps, reset the system. By following these steps in order, you empower yourself. You move from a frustrated user to an informed troubleshooter. You save money, reduce e-waste, and restore a valuable piece of convenience to your home. Remember, your robot is a simple machine with complex tasks. Treat it with regular, simple maintenance—a quick sensor wipe-down every month, a brush clean every few weeks—and you’ll prevent the vast majority of these “not working” scenarios. Now, armed with this knowledge, go forth, clean those sensors, and hear that familiar whirring sound again. Your floors are counting on you.
Frequently Asked Questions
My Shark Ion R75 won’t turn on at all. What should I check first?
First, ensure the physical power button on the robot is in the “On” position. Next, remove the robot from the dock and press the button to see if it powers on independently. If not, place it directly on the dock and clean both the robot’s charging pads and the dock’s metal strips with a dry microfiber cloth. Let it charge for 6+ hours on a known-good outlet before trying again.
The robot charges but won’t leave the dock. Why?
This is almost always a sensor issue. The downward cliff sensor is dirty, causing the robot to think it’s on a ledge. Clean the clear optical window on the underside of the robot thoroughly. Also, check that the front bumper isn’t jammed—press it in around the entire edge to free it. A soft reset (hold the Clean button for 10-15 seconds) after cleaning can also help.
My robot starts, moves a little, then stops and beeps. What do the beeps mean?
Listen to the pattern. Two beeps, pause, two beeps = main brush or wheel jam. Three beeps = cliff sensor error. Four beeps = bumper or side brush issue. Five beeps = charging/internal error. Clean the corresponding components (brushes, wheels, sensors, bumper) as described in the guide, then try again.
How do I perform a factory reset on my Shark Ion R75?
With the robot powered ON and on its charging dock, press and hold the Clean/Power button for 10-15 seconds until you hear beeps and the light changes. Release, wait 30 seconds, then press the power button once to turn it back on. Alternatively, use the Shark Ion app: go to your robot’s settings and select “Factory Reset.” You will need to re-set up Wi-Fi afterward.
Is it worth repairing an old Shark Ion R75?
Consider the robot’s age (typically 3+ years), the estimated repair cost, and the price of a new current-model Shark. If the repair is for a battery or simple sensor cleaning, it’s worth it. For a failed main circuit board or motor, the cost often exceeds the value of the used unit. Check warranty status first, then get a quote before deciding.
What regular maintenance prevents “not working” problems?
Clean the downward cliff sensor window with a microfiber cloth monthly. After every 2-3 runs, remove and clean the main brush and side brush of hair/debris. Monthly, clean the charging contacts on both robot and dock. Every 3-6 months, check and clean the drive wheels, caster wheel, and exhaust vents. This simple routine prevents 90% of failures.