Is your Shark cordless vacuum suddenly dead or making weird noises? Don’t panic and don’t toss it yet! A non-working motor is a common issue often caused by simple, fixable problems like battery glitches, clogs, or overheating. This guide walks you through a systematic troubleshooting process, from quick resets to checking internal components. We’ll help you diagnose whether it’s a DIY fix or time to call Shark Support, saving you money and frustration.
Key Takeaways
- Battery Issues Are Prime Suspects: A fully charged battery is step one. Check connections, clean contacts, and test with a known-good battery if possible.
- Overheating Triggers Auto-Shutoff: Shark vacuums have thermal protectors. A clogged filter, full bin, or blocked brush roll can cause the motor to shut down to prevent damage.
- Airway Clogs Kill Suction & Strain Motors: A complete blockage from the floor head to the exhaust can make the motor strain silently or not start at all.
- Brush Roll Jams Are Frequent Culprits: Hair, string, and carpet fibers wrapping the brush roll bearings create immense drag, preventing the motor from turning.
- Firmware/Software Glitches Happen: Some newer Shark models have digital displays and can require a hard reset or firmware update via the app.
- Internal Component Failure Is Last Resort: Worn motor brushes, a fried motor, or damaged wiring are less common but possible, often requiring professional repair.
- Warranty First: Always check your Shark’s warranty status before opening it up. An unauthorized repair can void coverage.
[FEATURED_IMAGE_PLACEHOLDER]
📑 Table of Contents
- The Dreaded Silence: When Your Shark Cordless Vacuum Goes Quiet
- Power Problems: It’s Not Always the Motor
- The Silent Strain: Blockages and Overheating
- Brush Roll Binding: The Mechanical Drag
- Digital Dilemmas: Software and Control Board Glitches
- When DIY Isn’t Enough: Internal Failures and Repair Paths
- Prevention: Keeping Your Shark’s Motor Happy for Years
- Conclusion: Empowerment Over Replacement
The Dreaded Silence: When Your Shark Cordless Vacuum Goes Quiet
You press the power button. The lights come on. Maybe you even hear a faint click. But the unmistakable whir of the motor? Nothing. That gut-dropping silence when your trusty Shark cordless vacuum refuses to start is a universal frustration. Before you resign yourself to a costly replacement or a frustrating call to customer service, take a deep breath. The phrase “Shark cordless motor not working” covers a wide spectrum of issues, and a shocking number of them are things you can diagnose and fix yourself in under ten minutes. This isn’t about complex electronics; it’s about understanding the basic systems that make your vacuum go: power, airflow, and motion. Let’s break it down, step-by-step, from the simplest solution to the more complex.
Power Problems: It’s Not Always the Motor
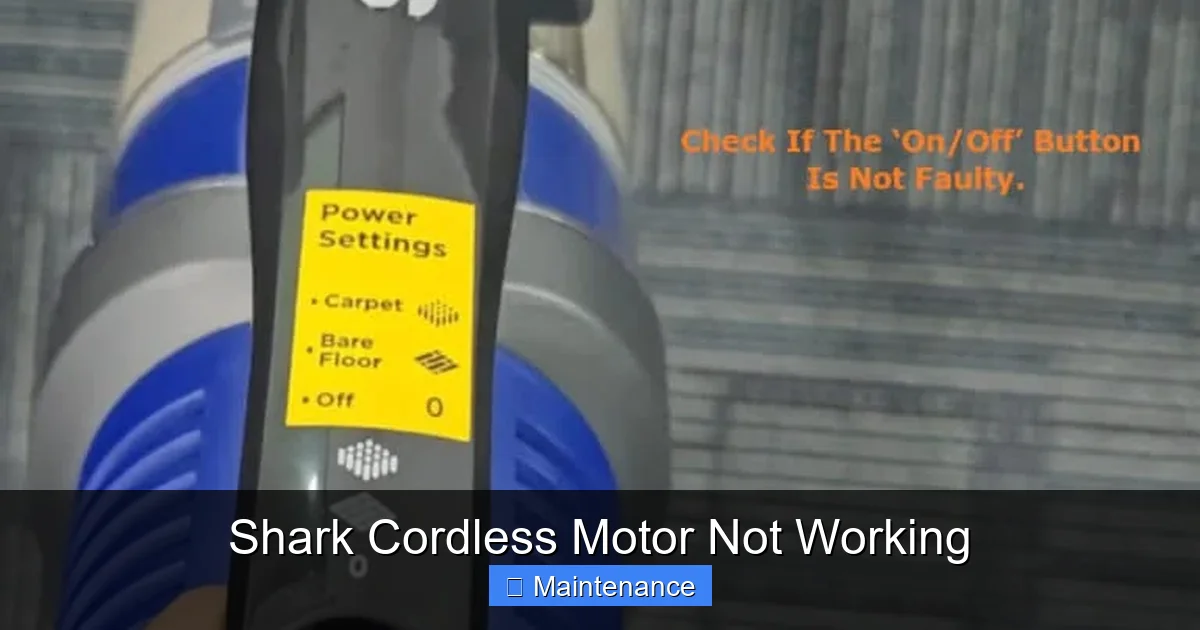
When we say “the motor isn’t working,” our brains jump to the motor itself being broken. But the motor is just a component. It needs clean, consistent power to run. The problem is often upstream from the motor. We need to confirm the motor is actually getting the juice it needs.
Visual guide about Shark Cordless Motor Not Working
Image source: sharkrobovacuum.com
The Battery: The Most Common Overlooked Culprit
Your Shark’s battery is its heart. Cordless vacuums use lithium-ion batteries, which have quirks. A battery that *shows* a full charge on the indicator might be physically unable to deliver the high current (amperage) the motor needs to start under load. This is especially true if the battery is more than 2-3 years old, as all lithium-ion batteries degrade over time.
- The Full Drain & Recharge: If your vacuum has sat on the charger for months or you’ve only ever used it for quick spot cleans, the battery’s “memory” can get confused. The definitive fix is to run the vacuum until it completely dies (you’ll notice a steep drop in suction, then it shuts off), and then charge it uninterrupted for a full 3-4 hours (or until the light indicates solid/complete). This recalibrates the battery’s charge cycle.
- Check the Physical Connection: Remove the battery from the vacuum. Look at the metal contacts on both the battery and the vacuum’s bay. Are they clean? Are they free of dust, lint, or oxidation? A dirty connection prevents proper power transfer. Use a dry cotton swab or a pencil eraser to gently clean the contacts. Re-seat the battery firmly until it clicks.
- The Temperature Factor: Lithium batteries hate extreme temperatures. If your vacuum was stored in a freezing garage or a hot car, the battery management system will prevent it from charging or discharging to protect itself. Bring the battery to room temperature for several hours before trying again.
- Battery Swap Test: This is the golden diagnostic step. If you have access to another compatible Shark battery (from a family member, a friend, or even a purchased replacement), simply swap it in. If the vacuum starts and runs normally with the new battery, your original battery is dead and needs replacement. No guesswork needed.
Charger and Electrical Glitches
Don’t assume the battery is bad if the vacuum won’t charge. The charger itself could be faulty, or the wall outlet could be on a switched circuit or a GFCI outlet that’s tripped.
- Charger Test: If possible, test your charger with another compatible Shark battery. Alternatively, use a multimeter (if you’re comfortable) to check if the charger is outputting voltage. A simple visual check: does the charger’s indicator light come on when plugged in? If it has a “charging” light, does it illuminate when the battery is connected?
- Outlet & Circuit Check: Plug something else you know works (a lamp, phone charger) into the same outlet. Try a different outlet in a different room. If your vacuum is plugged into a power strip, connect it directly to the wall.
The Silent Strain: Blockages and Overheating
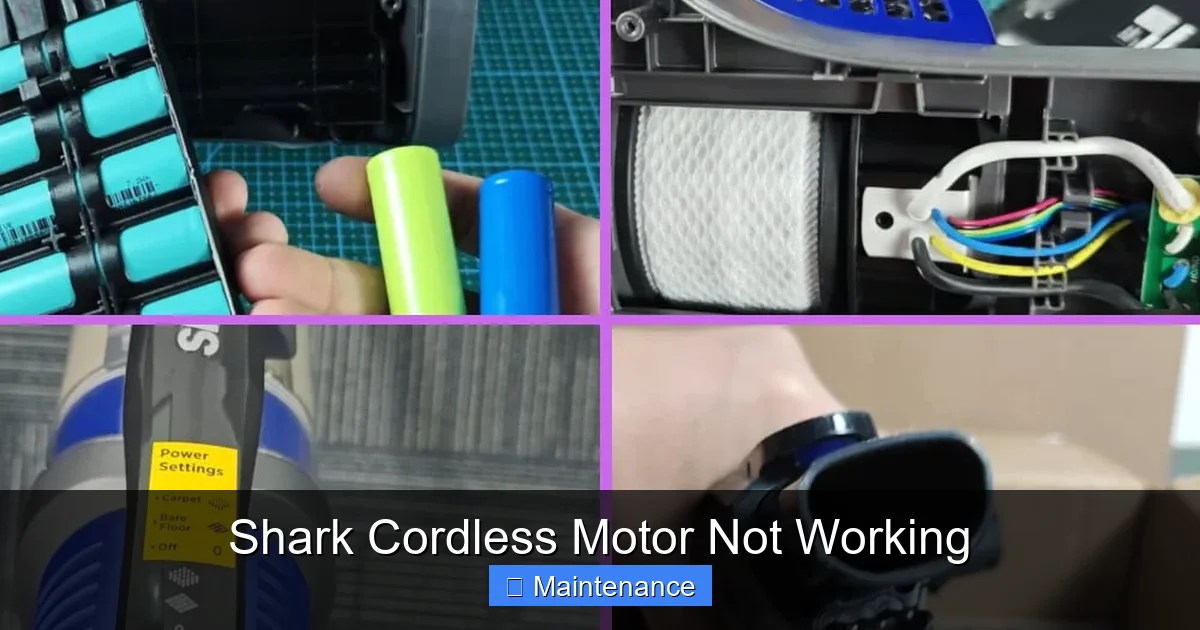
Let’s assume power is confirmed—the battery is good, the charger works. The motor still doesn’t start, or it starts and stops immediately. This points to two closely related mechanical issues: a severe blockage or an overheating safety cut-off.
Visual guide about Shark Cordless Motor Not Working
Image source: diysmarthomehub.com
Thermal Protector: Your Vacuum’s Safety Net
Every Shark cordless has a thermal fuse or thermostat near the motor. If the motor gets too hot, this safety device cuts power to prevent a fire or catastrophic motor failure. It’s a brilliant feature, but it means your vacuum will just shut down with no warning. The cause of the overheating must be addressed before the thermal protector will reset (some reset automatically after cooling, others are one-time use).
What causes overheating?
- A Clogged Filter: This is the #1 cause. The foam filter and the pleated felt filter (if your model has one) must be clean to allow air to flow freely. A blocked filter makes the motor work 10x harder, generating immense heat.
- A Full Dust Bin: The bin is part of the airflow path. If it’s packed to the brim, air can’t escape.
- Severe Airway Clog: From the floor head all the way to the motor fan and exhaust port. Hair, large debris, or even a small toy can create a total blockage.
- Blocked Brush Roll: If the brush roll is jammed solid, the motor is trying to turn a stationary object—instant strain and heat.
The Complete Airway Inspection: A Must-Do Procedure
You must perform a full “airway autopsy” to rule out clogs. This is non-negotiable troubleshooting. Use a flashlight.
- Detach Everything: Remove the dust bin and empty it completely. Tap it out. Take out the filters and set them aside for cleaning.
- Check the Floor Head: Flip the vacuum over. Look into the suction inlet where the brush roll is. Can you see through it to the other side? Shine a light from the inside of the dust bin cavity out towards the floor head. If light doesn’t pass, there’s a clog right there. Use long-nose pliers or a bent coat hanger (gently!) to dislodge it.
- Inspect the Hose/Tube: The flexible hose connecting the floor head to the main body is a common jam site. Detach it from both ends and look/lift through it.
- Check the Main Body Ports: Look into the suction port where the hose plugs in. Then, look at the exhaust port (usually on the back or top of the main body). You should be able to see the fan blades. If they’re covered in gunk or you can’t see them, it’s clogged.
Pro Tip: Use a leaf blower (on low) or a strong gust of air from your mouth to blow air backwards through the system (from exhaust port to floor head) to dislodge packed debris.
Brush Roll Binding: The Mechanical Drag
The brush roll (the cylindrical brush with bristles that agitates carpet) is driven by a small belt or directly by the motor. If it can’t spin freely, it creates a drag that the motor cannot overcome. This feels like a motor problem but is actually a brush roll problem.
Visual guide about Shark Cordless Motor Not Working
Image source: diysmarthomehub.com
Diagnosing a Jammed Brush Roll
After you’ve cleared visible clogs from the floor head housing, you must check the brush roll itself.
- Manual Spin Test: With the vacuum unplugged and battery removed, locate the brush roll. You should be able to spin it by hand with moderate resistance. If it doesn’t spin at all, or if it spins with a gritty, grinding feeling, it’s bound.
- The Hair Wrap: The #1 enemy. Long hair, pet fur, and synthetic fibers wrap tightly around the brush roll’s bearings (the plastic end caps). This is often invisible unless you remove the brush roll. On most Shark models, there are release buttons or screws to remove the brush roll from the floor head. Take it out.
- Cleaning the Brush Roll: Use a seam ripper, a dedicated brush roll cleaning tool, or a sharp utility knife (be extremely careful). Slice through the wrapped hair lengthwise along the brush roll core, then pull it off. Clean debris from the bearings and the housing. Spin the brush roll by its bearings—it should be silky smooth.
- Belt Check: If your model uses a belt (many direct-drive models do not), check if it’s broken, stretched, or slipped off the motor pulley. A broken belt means the motor spins but the brush roll does not. A stretched/slipping belt creates drag.
Digital Dilemmas: Software and Control Board Glitches
Modern Shark cordless vacuums (like the Vertex, Stratos, or some IZ series) have digital displays, app connectivity, and electronic control boards. Sometimes, the “motor not working” symptom is a software hiccup or a faulty sensor signal telling the control board to inhibit the motor.
Performing a Hard Reset
The equivalent of turning your computer off and on again. The process varies slightly by model, but the universal method is: Remove the battery. Press and hold the power button for 10-15 seconds. This drains residual power from the capacitor. Reinsert the battery and try again. For models with an app, disconnect from the app and reconnect. Check Shark’s website for your specific model number for any known issues or firmware update instructions.
Display Error Codes
If your vacuum has a screen and it’s showing an error code (like “E1,” “E2,” “E4”), do not ignore it. Look up that code in your user manual or on Shark’s support site. The code is the vacuum’s way of telling you exactly what’s wrong—often “blocked airway,” “brush roll jam,” or “motor error.” This diagnosis is more precise than our general guide.
When DIY Isn’t Enough: Internal Failures and Repair Paths
If you’ve exhausted the steps above—verified a strong battery, cleared every possible clog, cleaned the brush roll to perfection, performed a hard reset, and the motor still doesn’t turn or makes a terrible grinding/burning smell—the fault likely lies within the motor assembly or its wiring.
Motor Wear and Tear
Brushless motors (common in newer Sharks) are very reliable but can fail. Brushed motors (in some older or budget models) have carbon brushes that wear down over hundreds of hours. If the brushes are worn to less than 1/4 inch, they need replacement. Diagnosing this requires disassembly, which is not for the casual user.
Wiring and Switch Failures
Vibrations can cause internal wire connections to loosen or fray, especially at the hinge points (like where the wand connects). The power trigger switch itself can wear out. These are fixable with soldering skills and electronics knowledge.
Your Repair Decision Tree
At this stage, you face a choice:
- Warranty Claim: If your Shark is under the standard 5-year limited warranty (or an extended plan you purchased), stop immediately. Opening the vacuum will likely void the warranty. Contact Shark Support. They may offer to mail you a prepaid box for return or authorize a repair center. They will ask for your troubleshooting steps, so be ready to say “I’ve checked the battery, cleared all clogs, and cleaned the brush roll.”
- Professional Repair: Find an authorized Shark service center or a reputable small appliance repair shop. Get an estimate. For a vacuum that originally cost $300, a $120 motor repair might be worth it. For a $150 model, it’s probably not.
- The “Hail Mary” Part Swap: For popular models, you can often buy a replacement motor assembly or a whole lower body (with motor) on eBay, Amazon, or from parts suppliers like PartSelect. This is for the confident DIYer with screwdrivers and patience. Search for your exact model number (e.g., “Shark IZ682” or “Shark HV322”). Watch a YouTube teardown video first.
Prevention: Keeping Your Shark’s Motor Happy for Years
The best fix is the one you never need. A few minutes of maintenance after every few uses prevents 90% of motor-related failures.
The Post-Use Ritual (5 Minutes)
- Empty the Bin: Don’t let it sit full. Tap it out over the trash.
- Check the Brush Roll: Flip it over. Is hair wrapped around it? If yes, clean it now before it tightens and binds.
- Wipe the Filters: Tap the foam filter to dislodge dust. If it’s very dirty, rinse it with cool water, squeeze dry, and let it air dry completely for 24 hours before reinserting. Never wash the pleated felt filter with water. Just tap it out.
- Quick Airway Glance: Look into the suction inlet. Make sure nothing big is lodged there.
The Monthly Deep Clean
- Remove and thoroughly wash the foam filter (if washable).
- Use a damp cloth to wipe out the inside of the dust bin cavity and the intake ports.
- Remove the brush roll and give it a full de-hairing.
- Check the battery contacts on both the vacuum and the battery. Clean if needed.
By treating your Shark with this level of care, you ensure the motor spins freely, draws air easily, and runs cool. You’re not just cleaning your home; you’re performing essential maintenance on your most valuable cleaning tool.
Conclusion: Empowerment Over Replacement
Hearing “Shark cordless motor not working” can feel like a death sentence for your vacuum. But as we’ve seen, the motor is often the last link in a chain of simpler, more common failures. Your systematic approach should always be: Power Source (Battery/Charger) -> Airflow Path (Clogs/Filter) -> Mechanical Drag (Brush Roll) -> Electronics (Reset/Code) -> Internal Motor. By methodically checking each stage, you empower yourself. You move from a frustrated consumer to a capable troubleshooter. In most cases, you’ll find the culprit is a hair-wrapped brush roll or a filter caked with dust—a five-minute fix with a utility knife or a quick rinse. Save the warranty call and the repair estimates for when you’ve truly ruled out all the simple stuff. Your Shark is built to last. With a little knowledge and preventive care, you can keep that motor whirring happily for years to come, tackling every mess with cordless freedom.
Frequently Asked Questions
My Shark cordless vacuum charges but won’t turn on. What is it?
This almost always points to a battery that can no longer hold a charge or deliver sufficient power. Try the full drain/recharge cycle. If that fails, the battery is likely at the end of its life and needs replacement. A battery swap test is the definitive diagnosis.
How do I reset my Shark cordless vacuum?
For a full reset: Remove the battery. Press and hold the power button for 10-15 seconds to discharge residual power. Reinsert the battery firmly and try again. For models with an app, disconnect and reconnect via Bluetooth.
Is a non-working motor covered under the Shark warranty?
Yes, the motor is a covered component under Shark’s limited warranty, typically 5 years for the motor. However, the warranty is void if the failure is due to misuse, neglect (like not cleaning filters), or if you have opened the vacuum’s housing. Contact Shark Support with your model and serial number.
Can a clogged filter really stop the motor from starting?
Absolutely. A clogged filter creates immense back-pressure. The motor has to work impossibly hard to pull air through, which causes it to overheat instantly and trigger the thermal protector, shutting it down. A clean filter is non-negotiable for motor health.
My vacuum starts but stops after 5 seconds. Is it the motor?
Probably not. This is the classic sign of the thermal protector cutting power due to overheating. Immediately check for: a full dust bin, a clogged filter, a blocked exhaust port, or a jammed brush roll. Clear these issues, let the vacuum cool for 30 minutes, and try again.
When should I call a professional or Shark Support?
Call after you have: 1) Confirmed a known-good, fully charged battery is being used. 2) Completely cleared all airway clogs from floor head to exhaust. 3) Removed, cleaned, and manually verified the brush roll spins freely. 4) Performed a full reset. If the motor still does not run, makes grinding noises, or smells like burning, the internal motor or wiring has likely failed and requires professional assessment.