Replacing the brush roll on your Shark Navigator is a simple, essential maintenance task that restores suction power and carpet cleaning ability. This guide provides a clear, model-agnostic process, from identifying the correct part to installing it correctly. By following these steps, you can extend your vacuum’s life, save money on service calls, and ensure your home is truly clean.
Let’s be honest: your Shark Navigator vacuum is a workhorse. It tackles pet hair, crumbs, and deep-down carpet dirt with impressive gusto. But over time, you might notice it’s not pulling debris into the bin as effectively, especially on carpets. The brush roll—that rotating cylinder with bristles at the front—is likely the culprit. Hair, string, and fibers wrap around it, mat the bristles, and jam the bearings. The good news? Learning how to replace the brush on a Shark Navigator is a straightforward DIY task that takes less than 15 minutes and saves you a service fee. This complete guide will walk you through every step, ensuring your vacuum performs like new again.
We’ll cover how to identify your specific model, gather the right tools and part, execute the removal and installation perfectly, and perform essential concurrent maintenance. Whether you have an older Lift-Away, a newer Vertex, or any model in the iconic Navigator line, the core principles are the same. By the end, you’ll have the confidence and knowledge to tackle this job yourself, anytime. Let’s get your Shark Navigator’s floor-to-carpet cleaning power back to full strength.
Key Takeaways
- Safety First: Always unplug your Shark Navigator and disconnect the power head before attempting any repair to prevent injury.
- Identify Your Model: Your specific Shark Navigator model number (found on the back or underside) is crucial for ordering the exact replacement brush roll.
- Basic Tools Suffice: You typically only need a Phillips screwdriver and maybe a flathead for clips; no special tools are required for most models.
- Clean Thoroughly: Use the replacement opportunity to clean the brush roll housing, bearings, and belt (if applicable) of all hair and debris.
- Check the Belt: Many Navigator models use a belt to drive the brush; inspect it for wear, cracks, or stretching and replace it simultaneously for best results.
- Reversal is Key: Pay close attention to how the old brush roll and belt are oriented before removal; reinstallation is simply the reverse process.
- Test Before Reassembling: Manually spin the new brush roll and reattach the housing to ensure it rotates freely without obstruction before final screw tightening.
📑 Table of Contents
- Understanding the Heart of the Matter: The Brush Roll
- Gathering Your Tools and the Correct Replacement Part
- Step-by-Step Guide: Removing the Old Brush Roll
- Step-by-Step Guide: Installing the New Brush Roll & Reassembly
- Troubleshooting Common Post-Replacement Issues
- Beyond Replacement: Essential Maintenance for Longevity
- The Tangible Benefits: Why This Simple Repair Matters
Understanding the Heart of the Matter: The Brush Roll
Before we dive into tools and screws, let’s understand what we’re replacing. The brush roll, sometimes called an agitator or roller brush, is the primary mechanism for deep carpet cleaning. It agitates carpet fibers, loosening embedded dirt so the suction can lift it away. On hard floors, the bristles help sweep debris toward the suction inlet. When this component is compromised, your vacuum transitions from a powerful deep-cleaner to a weak surface sweeper.
The Anatomy of a Shark Navigator Brush Roll
A typical Shark Navigator brush roll consists of a hard plastic core with rows of stiff, tapered bristles. It sits in a housing at the front of the power head. In most models, a rubber drive belt connects the vacuum’s motor shaft to a pulley on the brush roll, causing it to spin. Some newer models may have a direct-drive system where the motor is integrated into the brush roll assembly, but the replacement process for the brush itself remains similar. The ends of the brush roll have plastic end caps that contain bearings. These bearings allow the roll to spin freely. When hair and grime work their way into these bearings, the roll binds, strains the belt, and reduces cleaning efficiency.
Signs It’s Time for a Replacement
How do you know cleaning isn’t enough and you need a new brush? Look for these clear indicators:
- Matting and Hardened Bristles: The bristles are clumped together with hair and debris that you cannot cut or pull out. They lose their flexibility.
- Burning Smell or Noise: A sharp, rubber-burning odor or a high-pitched squealing usually means the brush roll is jammed and the belt is slipping or overheating.
- Visible Damage: Check for cracked or broken bristles, a warped plastic core, or worn-down bearings that cause wobble.
- Poor Carpet Performance: Even after clearing obvious clogs, the vacuum seems to glide over carpet without agitating, leaving dirt behind.
If cleaning the brush roll (cutting away hair, removing the roll to wash it) doesn’t restore function, replacement is the next step. Don’t wait—a struggling brush roll puts extra strain on the motor and belt, leading to more costly repairs.
Gathering Your Tools and the Correct Replacement Part
Preparation is half the battle. Having everything you need within arm’s reach makes the job smooth and frustration-free. The most critical item is, of course, the correct replacement brush roll.
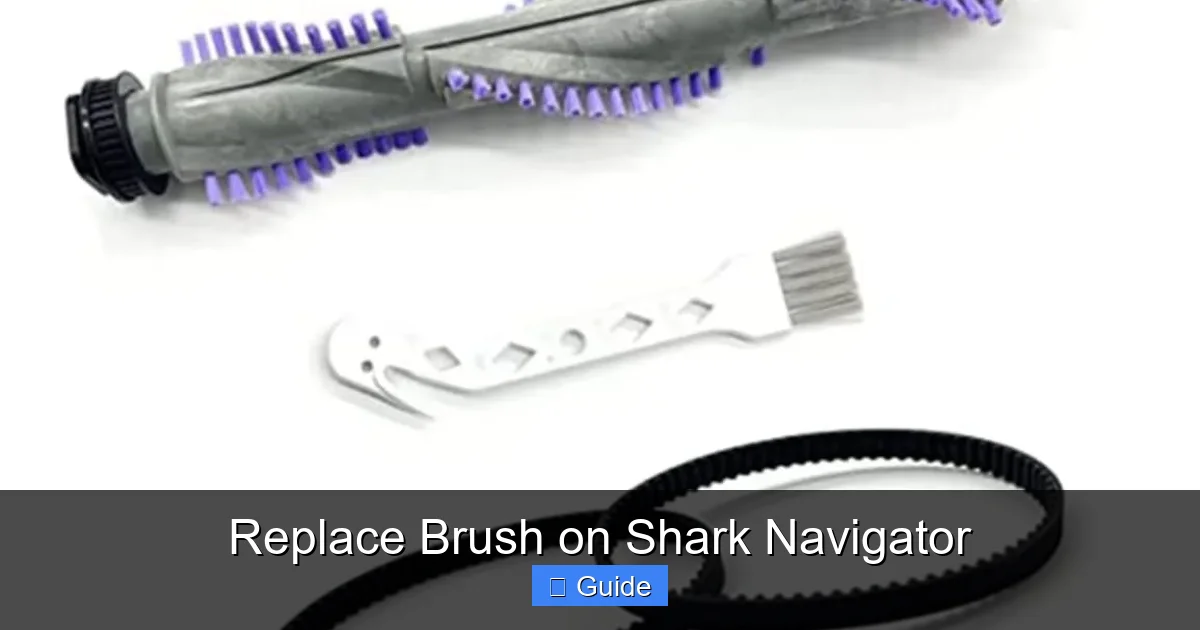
Visual guide about Replace Brush on Shark Navigator
Image source: m.media-amazon.com
Finding Your Shark Navigator Model Number
This is the most important step. Shark has released dozens of Navigator variants (e.g., NV350, NV356, NV501, NV752, etc.). The model number is your key to finding a perfect-fit replacement. Look for a sticker in one of these locations:
- On the back or bottom of the vacuum main body.
- On the underside of the power head (the part with the brush roll).
- Inside the dust cup compartment.
The model number is a combination of letters and numbers (e.g., “Shark Navigator Lift-Away Professional NV356”). Write it down exactly. You can also often find it on the original owner’s manual.
Sourcing the Replacement Brush Roll
With your model number in hand, you have several purchasing options:
- Official Shark Parts Website: The most reliable source. Go to sharkclean.com/support/parts, enter your model number, and you’ll see the official part number for the brush roll (often called “Brush Roll Assembly” or “Agitator”). This guarantees compatibility.
- Major Retailers: Amazon, Walmart, Best Buy, and Target often carry official Shark replacement parts. Search using your exact model number or the official Shark part number you found.
- Third-Party Sellers: Sites like eBay or smaller appliance parts stores may offer cheaper, “universal” or “compatible” brush rolls. Proceed with caution. Ensure the listing explicitly states compatibility with your exact model number. Universal parts often have poor fitment, incorrect bristle stiffness, or wrong bearing sizes, leading to premature failure.
Expected Cost: Official Shark brush rolls typically range from $15 to $35. Bundled kits that include a drive belt and sometimes end caps are a good value, as you should inspect and likely replace the belt at the same time.
Essential Tools You’ll Need
For the vast majority of Shark Navigator models, you need only:
- A Phillips-head screwdriver. This is the primary tool for removing the screws that hold the brush roll housing to the power head.
- A small flat-head screwdriver (optional). Useful for prying off plastic clips or releasing belt tension on some models.
- Needle-nose pliers (optional but helpful). Excellent for gripping and pulling out stubborn hair from bearings or the brush roll housing after removal.
- A pair of scissors. For cutting any wrapped hair or fibers before and after removal.
- A clean, damp cloth. For wiping out the housing and motor area.
That’s it! No special tools, no socket sets. The design is intentionally user-serviceable.
Step-by-Step Guide: Removing the Old Brush Roll
Now, let’s get our hands dirty—in a good way. This process is remarkably similar across the Navigator lineup. Always ensure the vacuum is unplugged from the wall outlet before beginning.
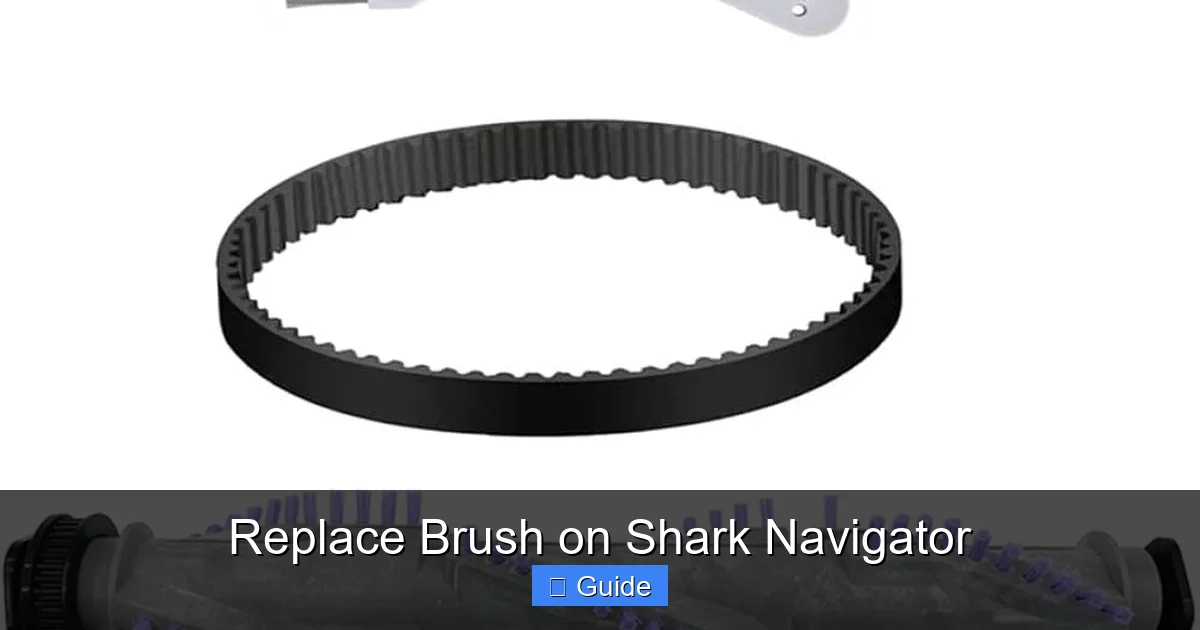
Visual guide about Replace Brush on Shark Navigator
Image source: m.media-amazon.com
Step 1: Access the Brush Roll Housing
Lay the vacuum on its side or front for better access. Locate the brush roll housing—the rectangular plastic casing at the very front of the power head. You’ll see either four screws (two on each side) holding it in place, or a combination of screws and release clips. Use your Phillips screwdriver to remove all screws. Keep them in a safe spot. If there are plastic clips, gently pry them open with the flat-head screwdriver. Once all fasteners are disengaged, the housing should lift off, exposing the brush roll and belt inside.
Step 2: Release the Drive Belt
You will now see the rubber drive belt looped around the brush roll pulley and the motor shaft (or a motor pulley). The belt provides tension. To remove the brush roll, you must first remove the belt from the brush roll’s pulley. You can usually do this by:
- Manually pushing the belt sideways off the pulley with your fingers.
- On some models, there is a small belt release lever or tab. Flip it to slacken the belt.
- Gently stretching the belt over the pulley if it’s a tight fit.
Do not remove the belt from the motor shaft yet. Just slip it off the brush roll side. This makes removing the brush roll much easier.
Step 3: Extract the Brush Roll Assembly
With the belt off one side, the brush roll should now be free to slide out of the housing. Grip it firmly and pull it straight out. It may have a little resistance from the bearing seals, but it should come out smoothly. If it’s stuck, check for any hidden screws or clips you missed. As you pull it out, note the orientation: which side faces up? Is there a specific notch or tab that aligns with the housing? This is critical for reinstallation. A good trick is to take a quick phone photo of the installed brush roll from above before removal.
Step-by-Step Guide: Installing the New Brush Roll & Reassembly
With the old, worn-out brush roll out, take a moment to clean the housing. Use your damp cloth and needle-nose pliers to remove all hair, string, and grit from the cavity, the motor shaft area, and the bearings where the brush roll ends sit. A clean environment ensures the new part spins freely and lasts longer.
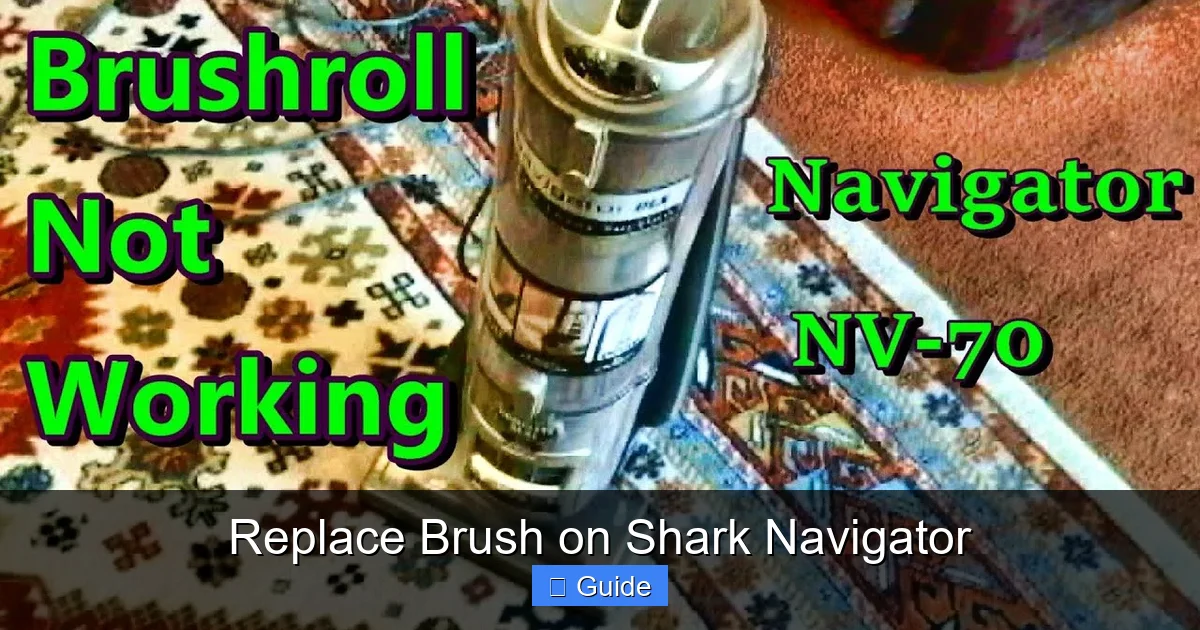
Visual guide about Replace Brush on Shark Navigator
Image source: i.ytimg.com
Step 1: Prepare the New Brush Roll
Unbox your new Shark Navigator brush roll. Compare it to the old one. It should be identical in length, diameter, and pulley shape. Before installing, manually rotate the new brush roll by hand. It should spin smoothly and silently in both directions. Any grinding or resistance indicates a defective part—contact the seller before proceeding.
Step 2: Insert the New Brush Roll
This is the reverse of removal. Align the new brush roll with the housing. Slide it into place, ensuring it sits fully into the bearing seats on both ends. The bristles should be pointing down (toward the floor) when the vacuum is in cleaning position. The pulley on the brush roll should be accessible to the belt. If your model has a specific tab or cutout, ensure it aligns with the housing.
Step 3: Re-engage the Drive Belt
Stretch the drive belt (which is still looped around the motor shaft) over the pulley on the new brush roll. You may need to twist the brush roll slightly to get the belt on. Ensure the belt is seated fully on the pulley’s groove and is not twisted. The belt should sit straight, not at an angle. If your model has a belt tensioner or release lever, flip it back into the locked position to apply proper tension.
Step 4: Reattach the Housing
Carefully lower the brush roll housing back over the brush roll and belt. Ensure the belt is not pinched between the housing and the power head. Align the screw holes and reinsert all screws. Tighten them securely, but do not over-tighten and crack the plastic. If your model uses clips, press the housing firmly until the clips snap back into place.
Step 5: The Critical Test Spin
Before you reattach the power head to the vacuum body (if you removed it), plug the vacuum in and turn it on for a brief 2-3 second test. You should hear the motor run and see the brush roll spin smoothly. Watch it from the side. It should rotate steadily without wobbling, grinding noises, or excessive belt slippage. If it doesn’t spin, unplug immediately and re-check the belt installation and brush roll seating. Once the test is successful, unplug, reattach the power head to the main body if separated, and you’re done!
Troubleshooting Common Post-Replacement Issues
Sometimes, even with a new part, things don’t go perfectly. Here’s how to diagnose the most common hiccups after a Shark Navigator brush replacement.
“The Brush Roll Isn’t Spinning!”
This is the most frequent concern. Don’t panic. First, unplug the vacuum. Then:
- Check the Belt: Is it on correctly? Is it broken, loose, or slipped off the motor pulley? A broken belt is obvious—it will be snapped or have a gap. A loose belt may have jumped off the motor shaft. Re-seat it.
- Check for Obstruction: Is the brush roll seated fully in its housings? A slightly misaligned brush can bind. Remove it and reinstall.
- Check the Motor: If the belt is on and the brush roll is free, but the motor doesn’t engage the brush, the issue may be with the motor’s clutch or drive system. This is rarer but may require professional service.
“It’s Making a Squealing or Burning Smell!”
This usually points to belt slippage due to excessive tension or a misaligned brush roll. The belt is rubbing against the housing instead of just turning the pulley. Unplug, remove the housing, and ensure:
- The belt is perfectly centered on both pulleys.
- The brush roll spins freely by hand without binding against the housing.
- The housing is screwed down evenly and securely.
“The Vacuum is Hard to Push on Carpet Now”
A new brush roll with stiff, pristine bristles can create more resistance on thick carpets initially. This is normal and should lessen as the bristles break in slightly. Ensure you have the correct model brush—a brush meant for a different model might have overly stiff bristles. Also, check that the brush roll height adjustment (if your model has one) is set correctly for your carpet pile.
Beyond Replacement: Essential Maintenance for Longevity
Replacing the brush roll is a fix, but preventing frequent replacements saves time and money. Incorporate these habits into your routine.
Clean After Every Few Uses
Get into the habit of checking the brush roll. With the vacuum unplugged, use scissors to cut away any hair or fibers wrapped around the bristles and bearings. A quick 30-second clean-out prevents deep-seated jams that damage bearings and belts. For pet owners, this is non-negotiable.
Monthly Deep Clean
Once a month, remove the brush roll entirely (as described in the removal section). Wash it with warm, soapy water to remove ground-in grit and oily residue from carpets. Dry it thoroughly (a hair dryer helps) before reinstalling. Also, wipe out the entire brush roll housing and the area where the belt sits. A clean system runs cooler and more efficiently.
Inspect the Drive Belt Annually
The belt is a wear item. At least once a year, or whenever you replace the brush roll, inspect it. Look for cracks, glazing (a shiny, hardened surface), stretching, or thinning. A worn belt slips, reduces brush roll speed, and can break. Replacing a $5 belt is cheaper than a new brush roll or motor repair. Always replace the belt with the official Shark part for your model.
Store Correctly
When not in use, store your Shark Navigator with the power head sitting on its base or hanging on a wall mount. Avoid leaving it resting on the brush roll itself for long periods, as this can compress and deform the bristles.
The Tangible Benefits: Why This Simple Repair Matters
You might wonder if all this effort is worth it for a $25 part. The answer is a resounding yes. Replacing the brush roll on your Shark Navigator delivers immediate and long-term rewards.
Restored Cleaning Power
This is the most obvious benefit. A new brush roll with flexible, unworn bristles will once again agitate carpet fibers effectively, lifting embedded pet hair, dirt, and allergens. You’ll see a visible difference in the amount of debris collected in the dust cup after cleaning the same area. Your hard floors will also be swept cleaner as the bristles guide debris into the suction path.
Protection of Other Components
A jammed or struggling brush roll creates immense drag on the drive belt and motor. The belt can overheat, stretch, or break prematurely. The motor works harder, generating more heat and wearing out faster. By replacing the brush roll when needed, you protect these more expensive components, extending the overall lifespan of your vacuum cleaner significantly. It’s a classic case of a small, inexpensive fix preventing a large, costly repair.
Cost Savings and Environmental Impact
Professional service calls for this issue can cost $75-$150+ in labor. A DIY brush roll replacement costs the price of the part alone. Furthermore, replacing a single component is far more environmentally friendly than discarding the entire vacuum and buying a new one. You’re practicing repair over replacement, reducing electronic waste.
Renewed Confidence in Your Clean
There’s a psychological benefit, too. When your vacuum works at its peak, you have confidence that your home is genuinely clean. You’re not just moving surface dirt around; you’re performing a deep clean that improves indoor air quality and creates a healthier living space, especially for allergy sufferers. This simple maintenance task empowers you to take control of your home’s cleanliness.
In conclusion, knowing how to replace the brush on a Shark Navigator is an essential skill for any owner. It’s a 15-minute investment that pays dividends in performance, longevity, and savings. By following this guide—identifying your model, gathering tools, executing the swap carefully, and implementing regular cleaning—you ensure your trusty Shark vacuum remains a powerful, efficient cleaning partner for years to come. Now, go grab that screwdriver and get your Navigator back in fighting shape!
Frequently Asked Questions
What tools do I need to replace the brush on a Shark Navigator?
For most models, you only need a Phillips-head screwdriver. A small flat-head screwdriver and needle-nose pliers can be helpful for prying clips and removing hair, but are not strictly necessary.
How often should I replace the brush roll on my Shark Navigator?
There’s no fixed timeline. It depends on usage and flooring. For a typical home with a mix of carpet and hard floors, inspect it every 3-6 months. Replace it when bristles are heavily matted, broken, or the roll no longer spins freely even after cleaning. For pet owners, expect to replace it more frequently.
Can I use a universal or third-party brush roll instead of the official Shark part?
While universal parts are cheaper, we strongly recommend using the official Shark part for your exact model number. Universal brushes often have incorrect dimensions, bristle stiffness, or bearing sizes, leading to poor fitment, noise, and premature failure that can damage other components.
My Shark Navigator brush roll spins but the vacuum still isn’t picking up carpet dirt. Why?
If the new brush roll spins freely, check the drive belt. A worn, loose, or broken belt will prevent the brush roll from turning with enough torque to agitate carpet. Also, ensure the brush roll height adjustment (if your model has one) is set correctly for your carpet pile.
Is it necessary to replace the drive belt at the same time as the brush roll?
It is highly recommended. The belt is a wear item that has been under stress from the old, jammed brush roll. Replacing it simultaneously ensures optimal power transfer and prevents a near-future belt failure. It’s a small additional cost for significant peace of mind.
Where is the model number located on my Shark Navigator?
Check for a sticker on the back or bottom of the main vacuum body, on the underside of the power head (the brush roll housing), or inside the dust cup compartment. The model number is a code like “NV356” or “AZ6002”.