Using a Shark Steam Mop is a straightforward, chemical-free way to clean and sanitize your hard floors. The key is proper preparation: always use distilled water, attach a clean pad, and allow the mop to heat up fully. Employ slow, overlapping passes to let the steam penetrate dirt, and never use it on unsealed surfaces. Regular maintenance, like emptying the tank and cleaning the pad after each use, ensures longevity and optimal performance. Following these simple steps transforms tedious mopping into an efficient, hygienic routine.
Key Takeaways
- Always Use Distilled Water: Tap water minerals cause scale buildup, damaging the heating element and reducing steam output. Distilled water is essential for performance and longevity.
- Start with a Clean Floor: Sweep or vacuum first. Steam mops are for sanitizing and light cleaning, not for removing large debris, which can clog the pad or scratch floors.
- Heat-Up is Crucial: Wait for the indicator light (usually takes 30-60 seconds) before mopping. Using it too early produces weak steam and ineffective cleaning.
- Use Slow, Overlapping Passes: Move the mop slowly (about 1 inch per second) with slight overlap. This allows steam to penetrate and lift dirt; rushing just pushes debris around.
- Maintain It After Every Use: Always empty the water tank, detach and wash the microfiber pad, and let the mop cool completely before storing. This prevents mold, odors, and mineral deposits.
- Know Your Floor Compatibility: Safe on sealed hardwoods, tile, laminate, linoleum, and stone. Never use on unsealed, waxed, or oiled surfaces, or on carpet unless specified by your model.
- Safety First: The mop head and steam are extremely hot. Keep away from children and pets, never leave it unattended while heating, and always store upright to prevent accidental activation.
📑 Table of Contents
- Introduction: The Power of Pure Steam
- Understanding Your Shark Steam Mop: Parts & Principles
- Pre-Cleaning Preparation: The Golden Rules
- Step-by-Step: From Setup to Shine
- Advanced Techniques for Tough Jobs
- Post-Cleaning Care and Maintenance
- Troubleshooting Common Issues
- Safety First: Essential Precautions
- Conclusion: Embrace the Steam Revolution
Introduction: The Power of Pure Steam
There’s a profound satisfaction in stepping onto a floor that doesn’t just look clean, but feels genuinely sanitized. That faint, clean scent of heated water, the absence of chemical residues, and the knowledge that you’ve tackled germs and grime with nothing but H₂O—that’s the promise of a Shark Steam Mop. But to unlock that promise, you need to move beyond just filling the tank and pushing it around. This guide will walk you through every step, from unboxing to expert-level techniques, transforming you from a hesitant user into a steam-cleaning pro. We’ll demystify the process, highlight common pitfalls, and give you the confidence to use this powerful tool safely and effectively on all your sealed hard floors.
Think of your Shark mop not as a traditional mop, but as a precision cleaning tool. It uses a small, controlled burst of pressurized steam to loosen and lift dirt, while the microfiber pad traps it. It’s a two-part system: the heat and moisture from the steam, and the absorbent, scrubbing action of the pad. Mastering their synergy is the key to stunning results. Whether you’re tackling sticky kitchen spills, tracked-in mud, or just doing routine maintenance, understanding the “why” behind each step will make your cleaning faster, better, and more efficient.
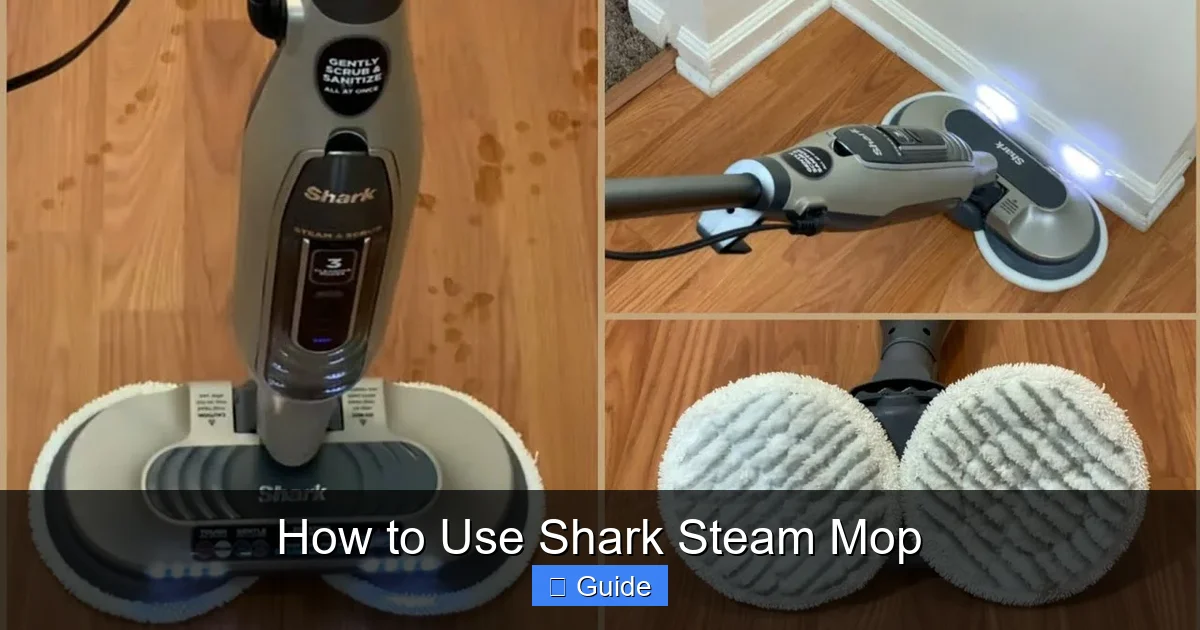
Understanding Your Shark Steam Mop: Parts & Principles
Core Components and Their Functions
Before you start, get familiar with your machine’s anatomy. A typical Shark Steam Mop consists of a handle with controls, a water tank, a heating element and boiler system, a steam release mechanism (often a trigger or automatic setting), and the mop head with its removable microfiber pad. The handle houses the power switch and steam trigger. The tank, usually located near the handle or on the body, is where you add water. Inside, a powerful heating element rapidly boils the water to create dry steam (vapor) under pressure. This steam travels through a hose to the mop head, where it’s released through small jets onto the floor. The microfiber pad, which must be attached securely, immediately absorbs the loosened dirt and excess moisture.
Visual guide about How to Use Shark Steam Mop
Image source: i.ytimg.com
How Steam Cleaning Actually Works
It’s not magic; it’s physics. The steam’s high temperature (often exceeding 200°F / 93°C) does two critical things. First, it instantaneously sanitizes by killing common household bacteria and dust mites on contact. Second, the heat and moisture penetrate and break down the molecular bonds in sticky residues, grease, and dried-on messes, making them easy to lift. The microfiber pad then acts like a magnet, pulling this now-loosened debris away from the surface. Because the steam is “dry” (it contains very little liquid water), floors dry remarkably fast—often in minutes—leaving no soggy mess behind. This is why prep is non-negotiable: the steam can’t effectively penetrate a layer of existing debris.
Pre-Cleaning Preparation: The Golden Rules
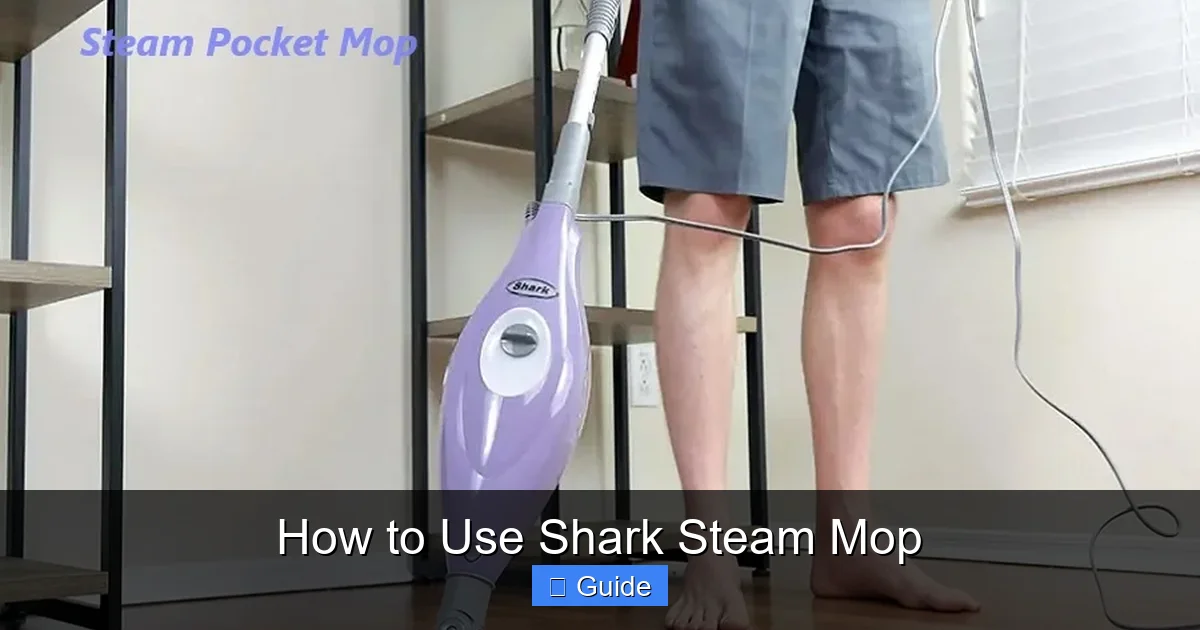
Rule #1: Sweep or Vacuum First, Always
This is the single most important rule. A steam mop is a finishing tool, not a first-resort cleaner. If you run it over a floor with loose dirt, hair, or crumbs, you’ll simply push that debris around, turning it into a muddy paste that the pad will spread. Worse, large particles can get trapped under the pad, potentially scratching your floor as you push the mop. Take 2-3 minutes to thoroughly sweep with a broom or, even better, use a vacuum cleaner on a hard-floor setting. Your floor should be visibly free of all loose debris before the steam mop even touches it.
Visual guide about How to Use Shark Steam Mop
Image source: freshouttatime.com
Rule #2: Water Matters – Distilled is Non-Negotiable
Shark, and all steam mop manufacturers, are unequivocal: use only distilled or demineralized water. Why? Tap water contains dissolved minerals (calcium and magnesium, known as “hard water”). When this water is heated to steam, those minerals don’t evaporate; they separate and accumulate as white, chalky scale inside the tiny boiler and steam pathways. This scale insulates the heating element, forcing it to work harder, eventually leading to overheating, reduced steam pressure, and ultimately, machine failure. It’s a slow, irreversible death by a thousand deposits. Distilled water is mineral-free. It costs a few dollars a gallon and will add years to your mop’s life. Never add cleaning solutions, vinegar, or essential oils unless your specific model说明书 explicitly states it’s safe. These can clog the system, void your warranty, and leave residues.
Rule #3: Pad Perfection – Clean and Correctly Attached
The microfiber pad is your mop’s workhorse. Always start with a pad that is brand new or freshly laundered (use only a mild detergent, no fabric softener). A dirty pad will simply redeposit old grime. Ensure the pad is perfectly aligned and fully attached to the mop head’s Velcro or clips. A loose or bunched pad will create uneven contact, reducing steam transfer and cleaning efficiency. Most Shark pads have a “right side up” indicated by a tag or a textured side—make sure it’s facing the floor. For heavily soiled areas, you can use the “scrub” side of dual-sided pads, but for general cleaning, the plush side is best for pickup.
Step-by-Step: From Setup to Shine
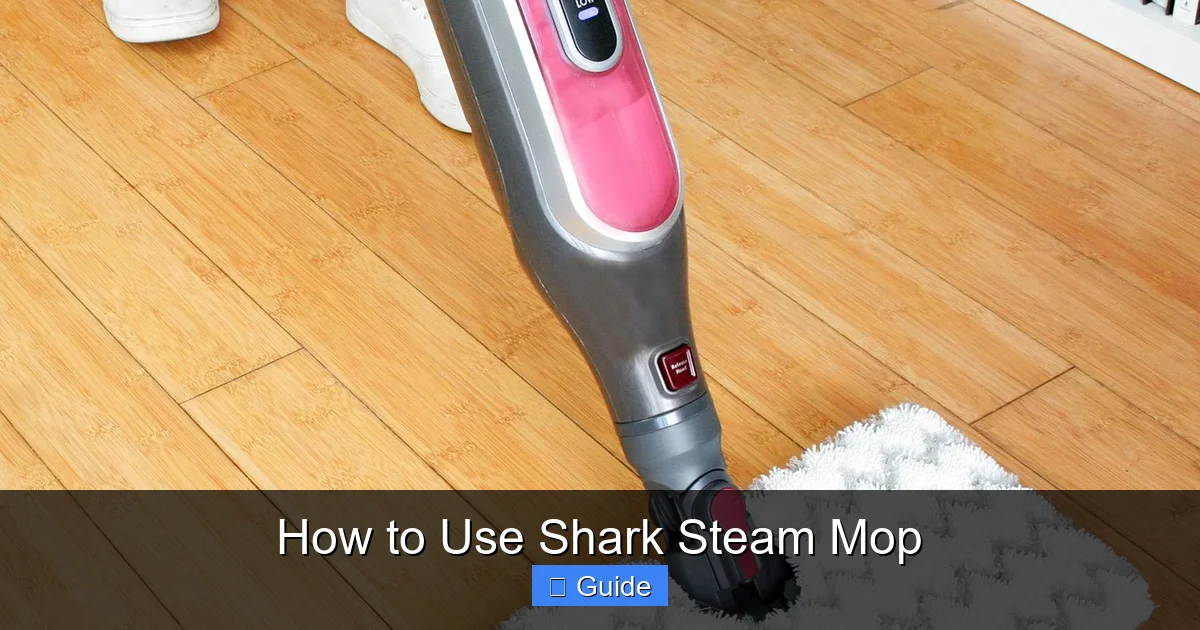
1. Assembly and Tank Filling
Unbox your Shark mop. Assembly is usually minimal—attaching the handle to the body (often a simple twist-and-lock or clip mechanism) and securing the mop head. Consult your quick-start guide. Once assembled, locate the water tank. It may have a removable cap or a sliding fill door. In a well-lit area, use a funnel (often included) to slowly pour distilled water into the tank, being careful not to overfill. There is almost always a “MAX” fill line. Do not exceed it. Wipe any spilled water from the tank and the mop body before proceeding.
Visual guide about How to Use Shark Steam Mop
Image source: thespruce.com
2. The Critical Heat-Up Phase
Plug the mop into a wall outlet. Most Shark models have a power button or switch. Press it. You will hear a low hum as the heating element activates. This is the boiler heating the water. **Do not attempt to mop yet.** Look for an indicator light—it’s usually red or orange while heating and turns green (or goes off) when ready. This process typically takes 30 to 60 seconds. This wait is not optional. If you start mopping before the boiler reaches full temperature, the steam will be weak, inconsistent, and mostly water droplets, not pressurized vapor. You’ll get a wet floor with little cleaning power. Patience here pays off.
3. Executing the Perfect Pass
With the indicator showing readiness, you’re set to mop. Hold the mop upright and engage the steam trigger (if your model has one) or set it to continuous steam mode. For most models, you must hold the trigger to release steam; releasing it stops the flow. Begin in a corner farthest from the exit. Lower the mop head to the floor. Now, the technique: move slowly. A good pace is about one inch per second. Push the mop forward, then pull it back over the same path with a slight overlap (about 1-2 inches). This overlapping “S” pattern or straight, slow passes ensure every square inch receives a consistent dose of steam. You should see the pad darken slightly as it picks up dirt. For sticky spills or built-up grime, pause for 2-3 seconds over the spot, allowing the steam to soak in, then make several slow passes. You’ll feel a slight resistance as the pad grips and lifts the mess.
4. Managing the Water Tank and Pad Saturation
A full tank typically lasts 10-15 minutes of continuous cleaning, depending on your model and steam setting. You’ll notice the steam output becoming less consistent or the mop head feeling drier. That’s your cue to refill. Unplug the mop (a safety habit), let it sit upright for 30 seconds for pressure to release, then carefully open the tank cap (it may be warm). Add more distilled water. For very large areas, you may need to swap pads mid-clean if the pad becomes completely saturated and starts leaving excess water. A dripping pad means you’re either moving too slowly or the pad is overly full. A dry pad means you need more steam or a fresher pad.
Advanced Techniques for Tough Jobs
Targeting Grout and Tile Crevices
The concentrated steam from the mop head jets is perfect for attacking dirty grout lines. Angle the mop so the front edge of the pad and the steam jets are directly over the grout. Make slow, deliberate passes along the grout line. The steam will penetrate the porous grout, lifting embedded dirt. For severely stained grout, you can use the Shark’s “burst” or “spot” steam mode if available, holding the mop still for a few seconds to deliver a concentrated dose. Follow up with a grout brush for stubborn stains if needed, but often the steam alone makes a dramatic difference.
Eliminating Sticky Residues
From spilled honey to dried-on juice, sticky messes are no match for targeted steam. First, scrape off any thick, solid residue with a plastic scraper. Then, place the mop head over the area. Engage the steam and hold the mop still for 5-7 seconds. You’ll see the sticky film soften and darken. Now, make several very slow, back-and-forth passes. The combination of prolonged heat and the scrubbing action of the microfiber will lift it effortlessly. For gum or wax, apply the steam for a longer duration (10-15 seconds) to soften it completely before wiping.
Sanitizing High-Touch Areas
One of the greatest benefits of steam is sanitization without chemicals. Focus on areas like around the toilet, under the sink, doorknobs (the floor beneath them!), and kitchen counters (if your floor is sealed). Use a clean, fresh pad for these areas to avoid cross-contamination. The high-temperature steam kills 99.9% of common household bacteria and dust mites on contact. Simply make a few slow passes over these zones. For a truly hygienic clean, consider using a dedicated pad just for bathroom areas.
Post-Cleaning Care and Maintenance
Immediate Post-Use Protocol
Your cleaning routine isn’t done when the floor is dry. The moment you unplug the mop, start the post-care process. First, allow the mop head to cool for a minute, then detach the microfiber pad. Do not let the pad sit on the hot mop head. Shake out any loose debris into a trash can, then immediately launder the pad according to the manufacturer’s instructions (usually machine wash warm, no fabric softener, tumble dry low). Leaving a dirty, damp pad on the mop is a recipe for mildew and odors. Next, with the mop upright, open the water tank cap and pour out any remaining water. Let the tank air dry completely with the cap off. This prevents stagnant water and potential mineral spotting.
Long-Term System Maintenance
Even with distilled water, occasional descaling might be recommended after many months of use (check your manual). Shark often recommends running a cycle with a mixture of distilled water and a small amount of white vinegar (e.g., 1 cup vinegar to 1 cup water) to dissolve minor scale, followed by several cycles with plain distilled water to flush the system. Never use commercial descaling agents unless approved. Every few months, inspect the steam jets on the mop head for mineral deposits. If you see white crust, gently clean the jets with a soft brush (like a clean toothbrush) dipped in distilled water. Periodically wipe down the entire mop with a damp cloth. Store the mop upright in a cool, dry place, with no pad attached and the tank empty.
Troubleshooting Common Issues
“My Steam is Weak or Spitting Water”
This is the most common complaint. The primary cause is scale buildup from using tap water. The solution is a thorough descaling cycle as described above. If that doesn’t work, the heating element may be failing. Secondary causes: the water tank is not seated properly, or the mop wasn’t given enough time to fully heat up before use. Always ensure a proper seal and wait for the ready indicator.
“My Floor is Streaky or Wet”
Streaks usually mean a dirty or over-saturated pad. A clean, barely damp pad is ideal. Change and wash your pad. Wet floors indicate you’re moving too slowly, allowing steam to condense into liquid water on the surface, or your pad is too saturated. Increase your pace slightly and ensure you’re wringing out excess water from a hand-wrung pad (if applicable) or using a fresh one. Also, check that you’re using the correct steam setting for your floor type; a lower setting may be sufficient.
“The Mop Head Won’t Stay Attached”
The Velcro or clip system can wear out or collect lint, reducing its grip. Clean the mop head’s attachment plate and the corresponding pad surface with a stiff brush to remove all lint and debris. If the Velcro loops are worn smooth, the pad may need replacing. Ensure you’re pressing the pad firmly onto the plate until you hear/feel it click into place all around.
Safety First: Essential Precautions
The steam generated is extremely hot and under pressure. Never disassemble the mop body or attempt to clean the boiler section yourself. Always unplug the mop when filling the water tank, changing pads, or performing any maintenance. Keep the mop upright when not in active use; never lay it on its side or front, as this can allow hot water to leak into the handle or trigger mechanism. Store it out of reach of children and pets. Be mindful of the cord to avoid tripping hazards. Never pull the mop by the cord. On waxed or unsealed floors, the steam can damage the finish or cause the wood to warp. When in doubt, test an inconspicuous area first. Finally, never use the steam mop as a clothes steamer or for any purpose other than its intended floor cleaning use.
Conclusion: Embrace the Steam Revolution
Mastering your Shark Steam Mop is about respecting its design and following its simple, non-negotiable rules: distilled water, a pre-swept floor, a clean pad, and a fully heated unit. When you do, you unlock a cleaning method that is not only powerfully effective against dirt and germs but also economical and eco-friendly. You eliminate the need for buckets, messy chemicals, and the back-breaking work of traditional mopping. The quick drying time means you can walk on your floors almost immediately. By incorporating the advanced techniques for tough jobs and committing to the post-use maintenance ritual, you protect your investment and ensure your Shark Steam Mop delivers peak performance for years to come. So fill that tank with distilled water, plug it in, and experience the transformative power of pure, pressurized steam on your hard floors. Your cleanest, healthiest home is just a slow, steady pass away.
Frequently Asked Questions
Can I use tap water in my Shark Steam Mop?
No, you should only use distilled or demineralized water. Tap water contains minerals that cause scale buildup inside the boiler and steam pathways, leading to reduced performance and permanent damage over time.
How often should I wash the microfiber pad?
The pad should be washed after every single use. A dirty pad will redeposit grime and reduce cleaning efficiency. Machine wash it warm with mild detergent, skip the fabric softener, and tumble dry low or air dry.
Is a Shark Steam Mop safe for all hard floors?
It is safe for sealed hardwoods, tile, laminate, linoleum, and sealed stone. It is not safe for unsealed, unfinished, waxed, or oiled floors, as the moisture can damage the wood or finish. Always check your floor manufacturer’s recommendations.
Why is my floor still wet after mopping?
A wet floor usually means you’re moving too slowly, allowing steam to condense into liquid water, or your pad is oversaturated. Move at a steady, moderate pace and use a fresh, clean pad that isn’t dripping. Also, ensure you’re using the appropriate steam setting for your floor type.
Can I add vinegar or essential oils to the water tank for smell?
No. Unless your specific model’s manual explicitly states it is safe, do not add any additives. Vinegar and oils can clog the internal system, void your warranty, and leave residues that are difficult to remove. The clean smell comes from the steam lifting old odors, not from added fragrances.
What do I do if my mop stops producing steam?
First, ensure it’s fully heated (wait for the indicator light). Second, check for scale buildup by performing a descaling cycle with a distilled water/vinegar mix. If that fails, the water tank may not be seated correctly. If the problem persists, the heating element may be faulty and require professional service or replacement.