Tired of pet hair taking over your home? The Shark Pet Tool is a powerful, specialized attachment designed to tackle stubborn fur on floors, furniture, and stairs. This guide walks you through everything from initial setup and optimal techniques to essential maintenance and troubleshooting, ensuring you get the most out of your investment and finally achieve a truly pet-hair-free home.
Let’s be honest: sharing your life with a dog, cat, or even a fluffy rabbit means waging a constant, losing battle against a universe of fur. It clings to every surface, defying your best efforts with a regular vacuum. Enter the Shark Pet Tool, a seemingly simple yet brilliantly engineered attachment that promises to be the secret weapon in your arsenal. But simply clicking it onto your vacuum isn’t enough to conquer the fluff. To truly harness its power and transform your cleaning routine, you need to understand how to use it correctly, maintain it, and apply it to the specific challenges your pets create. This comprehensive guide will take you from frustrated pet owner to confident fur-fighting expert, ensuring that your Shark Pet Tool becomes an indispensable part of your home care toolkit.
Key Takeaways
- Correct Attachment is Crucial: Always ensure the Shark Pet Tool is securely locked onto your compatible Shark vacuum’s wand or hose before use to prevent loss of suction and damage.
- Technique Matters: Use slow, deliberate strokes, allowing the rubber fingers and suction to agitate and capture embedded hair; rushing reduces effectiveness significantly.
- It’s Versatile: The tool excels on multiple surfaces—use it on carpets, rugs, upholstery, car interiors, and even stairs with the right vacuum angle.
- Regular Cleaning is Non-Negotiable: Hair wraps around the rubber fingers quickly; clean the tool after every few uses to maintain peak performance and prevent clogs.
- Know Your Pet’s Hair: Long, thick coats require more frequent tool cleaning and may need a pre-brushing step on furniture, while short hair is often captured more easily.
- Compatibility Check First: Not all Shark vacuums work with all Pet Tools; verify your model (like Vertex, Navigator, or IZ682) matches the tool’s connector type before purchasing.
- It’s a Supplement, Not a Replacement: For best results, use the Pet Tool as part of a regular cleaning routine that includes grooming your pet and using your vacuum’s main floor head for large debris.
📑 Table of Contents
- What Exactly Is the Shark Pet Tool? Understanding Your Weapon
- Step-by-Step: Setting Up for Success
- Mastering the Technique: How to Use the Shark Pet Tool Effectively
- Maintenance: Keeping Your Pet Tool in Peak Condition
- Troubleshooting Common Problems
- Pro Tips and Best Practices for the Ultimate Pet-Hair-Free Home
- Conclusion: Your Partner in a Cleaner Home
What Exactly Is the Shark Pet Tool? Understanding Your Weapon
Before diving into technique, it helps to understand the design philosophy behind the Shark Pet Tool. Unlike your vacuum’s standard motorized brush roll, which can sometimes tangle long hair, the Pet Tool is a passive, non-rotating attachment. Its power comes from a combination of focused, high-suction airflow and a unique rubberized head covered in dozens of small, pliable rubber fingers or nubs.
The Science of the Rubber Fingers
These rubber fingers are the star of the show. As you push the tool across a surface, two things happen simultaneously. First, the strong suction creates a downward and forward pull, drawing loose hair and debris into the tool’s intake. Second, and more critically, the rubber fingers flex and vibrate against the fabric or carpet pile. This action has a two-fold benefit: it agitates and loosens hair that’s deeply embedded in fibers, and the slight static charge generated by the rubber helps attract and cling to pet fur, preventing it from being blown away. This makes it exceptionally effective on upholstery and carpets where hair mats down.
Compatibility: Does It Fit Your Shark?
This is the first and most important question. Shark has produced several generations of vacuums (Navigator, Rotator, Vertex, IZ series, etc.), and the Pet Tool connector must match your vacuum’s wand or hose end. There are primarily two connector types: the older, larger “Shark” proprietary clip and the newer, slimmer “Shark IQ” or “Shark Stratos” style. Check your vacuum’s wand end. Does it have a round, push-button release or a lever clip? The tool you buy must match. Many third-party compatible tools exist, but for guaranteed performance and warranty safety, purchasing the official Shark-branded Pet Tool designed for your series is recommended. Your vacuum’s model number (usually on the back or underside) is your best friend here—search “Shark Pet Tool for [Your Model]” online.
Step-by-Step: Setting Up for Success
Proper assembly is the foundation of effective cleaning. A loosely attached tool will kill suction and make the job 10 times harder.
Visual guide about How to Use Shark Pet Tool
Image source: sharkvacuum.blog
Connecting to Your Vacuum
Start with your Shark vacuum turned off and unplugged. Locate the wand or hose you typically use for above-floor cleaning (this is usually the smaller, lightweight wand that attaches to the main vacuum body). On the Pet Tool, you’ll find a connector port. Align the tool’s connector with the end of your wand. You should feel a distinct click as it locks into place. For models with a push-button release, press the button, insert the connector, and release. For lever-clip models, pull the lever back, insert the connector, and push the lever forward until it snaps. Always give it a firm tug after connecting to ensure it’s secure. A wobbly connection means air is escaping, and you’re wasting battery power (on cordless models) and time.
Preparing the Area: A Quick Once-Over
Before you attack with the Pet Tool, do a quick scan of the area. Remove any large debris like toys, sticks, or blankets. If there are significant clumps of hair already matted on a sofa, use your hands or a pet brush to break them up first; the Pet Tool works best on loose and lightly embedded hair. This prep step prevents the tool from getting immediately clogged and allows the suction to work efficiently from the first stroke.
Mastering the Technique: How to Use the Shark Pet Tool Effectively
Now for the core of it all. The way you move the tool is 80% of the battle. Forget the quick back-and-forth you might use with a regular nozzle.
Visual guide about How to Use Shark Pet Tool
Image source: sharkvacuum.blog
The Golden Rule: Slow and Steady Wins the Fur
Your mantra should be slow, overlapping strokes. Push the tool forward deliberately, letting the rubber fingers make full contact with the surface. The suction should be pulling the fabric or carpet slightly into the tool’s mouth. Then, pull it back slowly to the starting position. This single, slow pass is more effective than three fast ones. Why? The slow motion allows the rubber fingers time to vibrate, agitate, and grab the hair, while the sustained suction has time to lift it away. On carpets, slightly overlap each stroke by about an inch to ensure you don’t miss strips.
Angle of Attack: Finding the Sweet Spot
Do not use the tool completely flat against a surface, especially on upholstery. Hold it at a slight angle, with the front edge (the part with the intake holes) leading. This angle allows the rubber fingers to sweep ahead of the suction, dislodging hair before it’s pulled in. It also prevents the tool from sticking to soft fabrics and makes gliding easier. On stairs, sit on the step above the one you’re cleaning. This lets you use your body weight to press the tool gently into the stair tread, getting maximum agitation on the often-neglected corners and edges where hair loves to accumulate.
Surface-Specific Strategies
Carpet & Rugs: Go with the pile direction, then against it. The first pass lifts surface hair, the second (against the grain) agitates deeper fibers. For high-pile rugs, you may need to press a bit more firmly to ensure the fingers reach the base of the pile.
Upholstery (Sofas, Chairs, Pet Beds): Use the angled technique described above. For tight weaves or leather, use lighter pressure. For plush fabrics, don’t be afraid to press in a bit more. Pay special attention to seams, cushions, and the backs of furniture where hair settles.
Car Interiors: This is a killer application. Use the Pet Tool on seats (fabric and leather, with care), floor mats, and the trunk. The confined space helps contain the suction. Remove floor mats and clean them separately on a flat surface for best results. The tool is perfect for getting into the crevices between seats.
Hard Floors (with caution): While designed for fabric, it can pick up large piles of hair on hard floors. However, it’s not ideal for fine dust or debris. Use it only for a final hair sweep after your main vacuum with the floor head has done its job. Be aware it won’t pick up small particles effectively.
Maintenance: Keeping Your Pet Tool in Peak Condition
A dirty Pet Tool is a useless Pet Tool. Hair wraps around the rubber fingers and can clog the intake port, drastically reducing suction and performance.
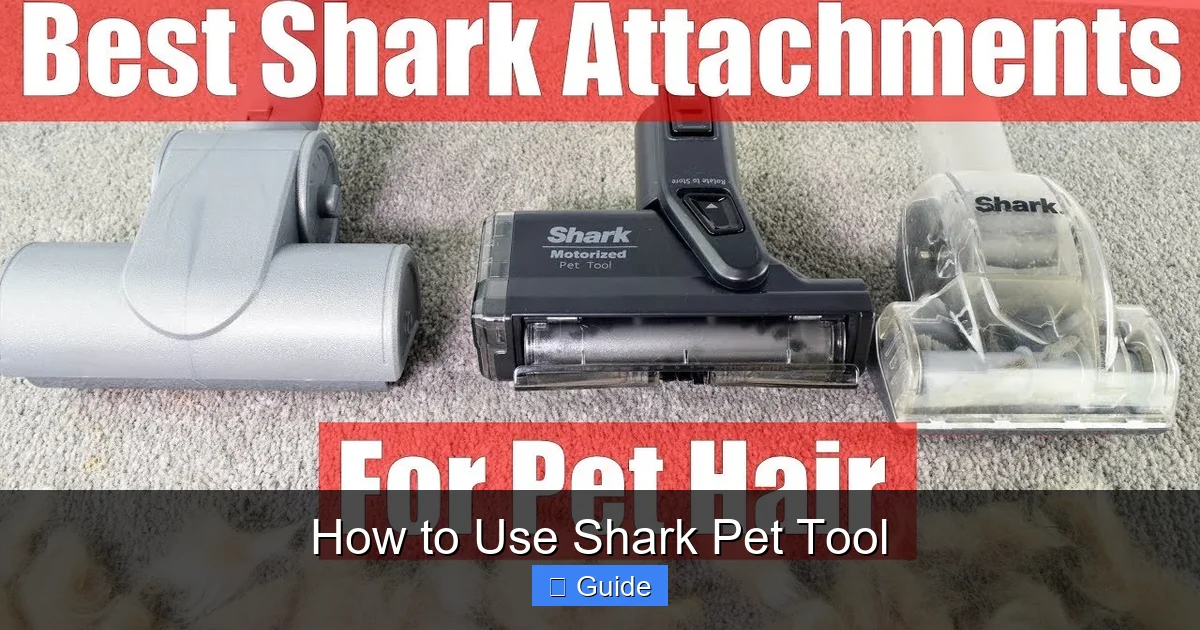
Visual guide about How to Use Shark Pet Tool
Image source: i.ytimg.com
After-Every-Use Quick Clean
Immediately after each cleaning session, use your fingers or a seam ripper to pull off any visible hair wraps from the rubber fingers. Don’t wait until it’s a solid mat—it’s much easier to remove when it’s fresh. Turn the tool over and check the intake holes on the underside. Clear any obstructions with a pointy tool like a toothpick or the corner of a credit card.
Deep Cleaning Monthly (or More Often for Heavy Shedders)
For a thorough clean, you’ll need mild soap, warm water, and a soft brush (an old toothbrush works perfectly).
1. Detach: Remove the tool from the vacuum.
2. Wash: Submerge the rubber head in warm, soapy water. Gently scrub the rubber fingers and the plastic housing with the soft brush, paying attention to the areas where hair embeds. The soap breaks down oils from pet skin that can make hair stick more.
3. Rinse: Rinse thoroughly under running water, ensuring all soap residue is gone. Shake off excess water.
4. Dry COMPLETELY: This is critical. Air-dry the tool upright in a well-ventilated area for at least 24 hours. Do not use a hairdryer or heat source, as it can warp the rubber. Never reassemble or use the tool while it’s wet, as moisture can travel back into your vacuum’s hose and motor, causing damage.
Troubleshooting Common Problems
Even with perfect technique, issues can arise. Here’s how to diagnose and fix them.
“My suction feels weak when using the Pet Tool.”
This is the most common complaint. The cause is almost always one of three things: 1) A clog: Hair is packed in the intake holes or inside the tool’s internal channel. Perform a deep clean. 2) A poor connection: Detach and reattach the tool firmly until you hear the click. 3) A full vacuum dust cup/bag or clogged filter: The Pet Tool’s high-suction design is sensitive to any restriction in the vacuum system. Empty the dust cup and clean all filters (pre-motor and post-motor) according to your manual.
“Hair is just pushing around, not getting sucked up.”
You’re likely moving too fast. Remember: slow strokes. Also, check your vacuum’s suction setting. If it has a variable power dial, ensure it’s on the highest setting for carpets/upholstery. Finally, inspect the rubber fingers; if they are worn down, smooth, or cracked (common after 1-2 years of heavy use), they lose their gripping ability. A worn tool needs replacement.
“The tool is scratching my delicate antique sofa!”
While generally safe, the rubber fingers can sometimes catch on very loose weaves or delicate silk. Always test on an inconspicuous area first. If it catches, do not use it on that piece. For such delicate items, a handheld lint roller or a specialized fabric-safe pet hair remover is a better choice. Use the lowest possible suction setting on your vacuum if you must proceed with extreme caution.
Pro Tips and Best Practices for the Ultimate Pet-Hair-Free Home
Go beyond the basics with these expert strategies to integrate the Shark Pet Tool into a holistic pet-hair management system.
Combine with Regular Grooming
The best defense is a good offense. Brushing your pet outside (or on a washable mat) 2-3 times a week with a de-shedding tool (like a Furminator) removes the undercoat *before* it hits your furniture. This drastically reduces the volume of hair you need to vacuum. The Shark Pet Tool is for cleanup, not prevention.
The “Two-Pass” Method for Heavy Shedders
For areas with extreme hair accumulation (like a dog bed or a cat’s favorite chair), use a two-step process. First, use the Pet Tool with slow, aggressive strokes to lift and remove the bulk of the hair. Then, go over the same area with your vacuum’s standard upholstery tool (the one with the rotating brush roll). This second pass will pick up any remaining fine hairs and dander that the first pass might have loosened but not captured, leaving the surface immaculate.
Storage and Longevity
Store your Pet Tool in a dry place, hanging it or laying it flat. Avoid storing it under heavy objects that could deform the rubber fingers. Keep an eye on the rubber; it will harden and lose effectiveness over time (typically 1-2 years with daily use). When performance drops despite a clean tool, it’s time for a replacement. Having a spare on hand is a smart move for serious pet owners.
Conclusion: Your Partner in a Cleaner Home
The Shark Pet Tool isn’t magic, but it’s the closest thing to it for pet owners. It’s a simple, brilliantly focused piece of engineering that solves a very specific, very frustrating problem. By understanding its design, mastering the slow-and-steady technique, committing to regular maintenance, and incorporating it into a broader cleaning strategy that includes pet grooming, you unlock its full potential. You’ll spend less time wrestling with tangled hair in your vacuum’s main brush roll and more time enjoying a home that truly feels clean and inviting—for both you and your furry family members. Now, armed with this knowledge, go forth and conquer the fur. Your furniture will thank you.
Frequently Asked Questions
Is the Shark Pet Tool compatible with all Shark vacuum models?
No, compatibility varies by model series and generation. The connector must match your vacuum’s wand or hose end (e.g., older proprietary clip vs. newer push-button styles). Always check your specific vacuum model number against the Pet Tool’s listed compatibility before purchasing.
Can I use the Shark Pet Tool on hard floors like tile or hardwood?
You can, but it’s not ideal. It will pick up large piles of hair but is ineffective at grabbing fine dust and small debris. Use it for a final hair sweep after your main floor head has cleaned the surface. Be cautious, as it may scatter light debris if used alone.
How often should I clean my Shark Pet Tool?
You should do a quick hair removal after every single use. A deep clean with soap and water (followed by complete drying) is needed every 1-4 weeks depending on your pet’s shedding volume. Heavy shedders may need monthly deep cleans.
Will the Shark Pet Tool damage my delicate upholstery or furniture?
Generally, no—it’s designed for fabrics. However, always perform a spot test on an inconspicuous area first. It can catch on very loose weaves, antique silks, or extremely delicate materials. Use light pressure and the lowest suction setting on such surfaces, or avoid using it altogether.
What should I do if my Shark Pet Tool isn’t picking up hair effectively?
First, ensure it’s securely attached. Then, clean it thoroughly, as clogs are the most common issue. Check that your vacuum’s dust cup is empty and filters are clean, as overall suction power affects the tool’s performance. Finally, slow down your strokes and ensure you’re using proper technique.
Where can I buy a replacement Shark Pet Tool if mine wears out?
Official Shark Pet Tools are available directly from the Shark website, authorized retailers like Amazon, Best Buy, and Target, and many vacuum specialty stores. Ensure you select the version compatible with your Shark vacuum model series.