The Shark Lift-Away system transforms your vacuum into a versatile cleaning powerhouse by detaching the pod for handheld use. This guide walks you through every attachment, showing exactly when and how to use each one for spotless results on floors, furniture, and tight spaces. Proper attachment selection, secure connection, and regular maintenance are the keys to maximizing suction power and extending your vacuum’s lifespan.
You’ve unboxed your new Shark vacuum with the innovative Lift-Away® system, and the promise of versatile, whole-home cleaning is exciting. That detachable pod isn’t just a neat party trick—it’s your ticket to tackling stairs, car interiors, ceiling fans, and upholstery without lugging the entire upright machine. But to unlock that true potential, you need to become best friends with the array of Shark Lift Away attachments that came with it. Many users stick to the main floor nozzle and miss out on the specialized power of each tool. This comprehensive guide will demystify every attachment, show you exactly how and when to use it, and share pro tips for keeping them in top shape. Let’s transform you from a casual vacuum owner into a Shark attachment expert.
Key Takeaways
- The Lift-Away Pod: The core feature is the detachable canister pod, which converts your upright vacuum into a lightweight, portable handheld unit for above-floor cleaning.
- Tool-Specific Design: Each Shark Lift Away attachment is engineered for a distinct surface or task—using the correct one is crucial for effective cleaning and protecting delicate materials.
- Secure Connection is Critical: Always ensure attachments and the hose click firmly into place on both the pod and the wand to prevent catastrophic suction loss.
- Maintenance Equals Performance: Regularly clear debris from brush rolls, barbs, and hose connections, and wash reusable filters to maintain peak suction and airflow.
- Safety First: Always power off and unplug the vacuum before attaching, detaching, or cleaning any components to avoid injury or damage.
- Know Your Tools: Key attachments include the Crevice Tool for tight spaces, Dusting Brush for delicate surfaces, Upholstery Tool for fabrics, and the Motorized Pet Tool for embedded pet hair.
- Troubleshooting Starts with Attachments: A sudden drop in suction often points to a clogged attachment, a hair-wrapped brush roll, or a poor seal at a connection point.
📑 Table of Contents
- Understanding the Shark Lift-Away System: More Than Just a Detachable Canister
- Your Complete Guide to Shark Lift Away Attachments: Names, Looks, and Jobs
- Step-by-Step: How to Attach and Detach Tools Correctly and Safely
- Mastering Different Cleaning Tasks: Pairing the Right Tool with the Job
- Essential Maintenance: Keeping Your Shark Lift Away Attachments in Peak Condition
- Troubleshooting: Why Your Suction Might Drop When Using an Attachment
- Conclusion: Unleash the Full Power of Your Shark
Understanding the Shark Lift-Away System: More Than Just a Detachable Canister
Before diving into the attachments, it’s vital to understand the genius of the Lift-Away system itself. In traditional upright vacuums, the suction head, hose, and handle are one rigid unit. The Shark Lift-Away design features a main vacuum pod (the “canister”) that houses the motor and dirt cup. This pod locks onto a floor-cleaning wand and brush roll head for standard vacuuming. The magic happens with a simple release mechanism—usually a large, colored button on the back of the pod—that allows you to lift the entire pod away from the wand. This leaves you with a compact, balanced, and incredibly lightweight handheld vacuum.
The Two Modes of Operation
Your Shark operates in two distinct modes, and understanding this is key to proper attachment use:
- Upright Mode: The pod is locked onto the main cleaning wand and floor head. This is for large, open floor areas. The attachments are not used in this configuration.
- Lift-Away (Handheld) Mode: The pod is detached. You now have a portable vacuum with a short handle. You must attach one of the dedicated handheld tools to the suction port on the front of the pod. This is where the specialized attachments come into play.
This system means every attachment is designed for handheld use only. Trying to clip a crevice tool onto the main upright wand is not possible and not intended. The handheld mode gives you unparalleled control and reach for above-floor tasks, which is precisely what the attachments are built for.
Your Complete Guide to Shark Lift Away Attachments: Names, Looks, and Jobs
Shark includes a core set of attachments with most Lift-Away models, though specific bundles can vary. Let’s identify the most common tools you’ll find in the box and understand their unique designs. Each attachment has a specific shape, bristle type, or opening size tailored to a cleaning challenge.
Visual guide about How to Use Shark Lift Away Attachments
Image source: vacext.com
The Crevice Tool: Your Tight-Space Warrior
This is the long, thin, flat tool, often angled. Its narrow profile is designed for one thing: getting into spaces nothing else can. You’ll use it between couch cushions, along baseboards, in the tight gap between the refrigerator and the wall, and inside the grooves of your car’s dashboard. The angled tip helps you direct suction precisely. Pro Tip: When vacuuming between cushions, first use the crevice tool to loosen debris with a scraping motion, then suction it away.
The Dusting Brush: For Delicate and Dusty Surfaces
Recognize it by its oval or round head densely packed with soft, long bristles. This is not a scrubbing tool. Its purpose is to gently agitate and capture dust from surfaces that could be scratched by hard plastic. Use it on:
- Blinds and window shades
- Ceiling fan blades and light fixtures
- Picture frames, mantels, and shelves
- Electronics (monitors, consoles—keep a safe distance)
- Lampshades and fabric-covered headboards
The soft bristles trap dust and cobwebs without scattering them. Always use a gentle sweeping motion. For thick dust layers, a quick pass with the dusting brush followed by the crevice tool for corners works wonders.
The Upholstery Tool: The Fabric Specialist
This tool has a flat, wide suction head with a strip of rubber fins or nubs along the front edge. Some models have a small motorized brush roll inside (like the “Pet Upholstery Tool”). Its design is for cleaning fabric surfaces. The rubber fins help grip and lift debris from woven textiles. Use it on:
- Sofas, armchairs, and dining chair cushions
- Mattresses (great for dust mites!)
- Car seats and trunks
- Stair risers and treads
For pet hair on furniture, the motorized version is a game-changer, actively agitating hair from the weave. Without the motorized brush, the standard upholstery tool still excels at lifting surface lint and crumbs.
The Motorized Pet Tool: The Hair Annihilator
This is often a separate, more robust tool with its own mini motor and rotating brush roll. It’s specifically engineered for the toughest pet hair jobs on carpets and rugs. The brush roll has anti-wrap technology to prevent hair from binding it up. Use it on:
- Area rugs and carpeted stairs
- Pet beds and blankets
- Any low-to-medium pile carpet where hair is embedded
It connects to the Lift-Away pod just like other tools. You’ll hear a distinct whirring sound when it’s powered on. This is your go-to for shedding season. Do not use it on delicate fabrics or hard floors, as the brush can damage surfaces or scatter debris.
The Dust-Away Squeegee (or Hard Floor Tool): For Smooth Surfaces
Not all kits include this, but it’s a brilliant addition if you have hard floors. It looks like a small, rubber-bladed window squeegee. Its job is to collect fine dust, hair, and debris from hardwood, tile, laminate, and linoleum without scattering it. The rubber blade makes direct contact with the floor, sweeping debris into the suction path. It’s far more effective than a regular floor head for quick pick-ups of pet hair or dust bunnies on smooth surfaces. Use short, overlapping strokes.
The Caddy and Extension Wand: The Mobility Kit
Many Shark Lift-Away bundles include a small, foldable caddy that the pod snaps into. This gives you a stable, wheeled base to move the pod around while you’re in handheld mode, perfect for cleaning a large staircase or multiple rooms without repeatedly carrying the pod. An extension wand (a shorter, rigid tube) can also be included to increase your reach for high dusting when using the dusting brush.
Step-by-Step: How to Attach and Detach Tools Correctly and Safely
Using the wrong technique here is the #1 cause of lost suction and frustration. Follow these steps every single time to ensure a perfect seal.
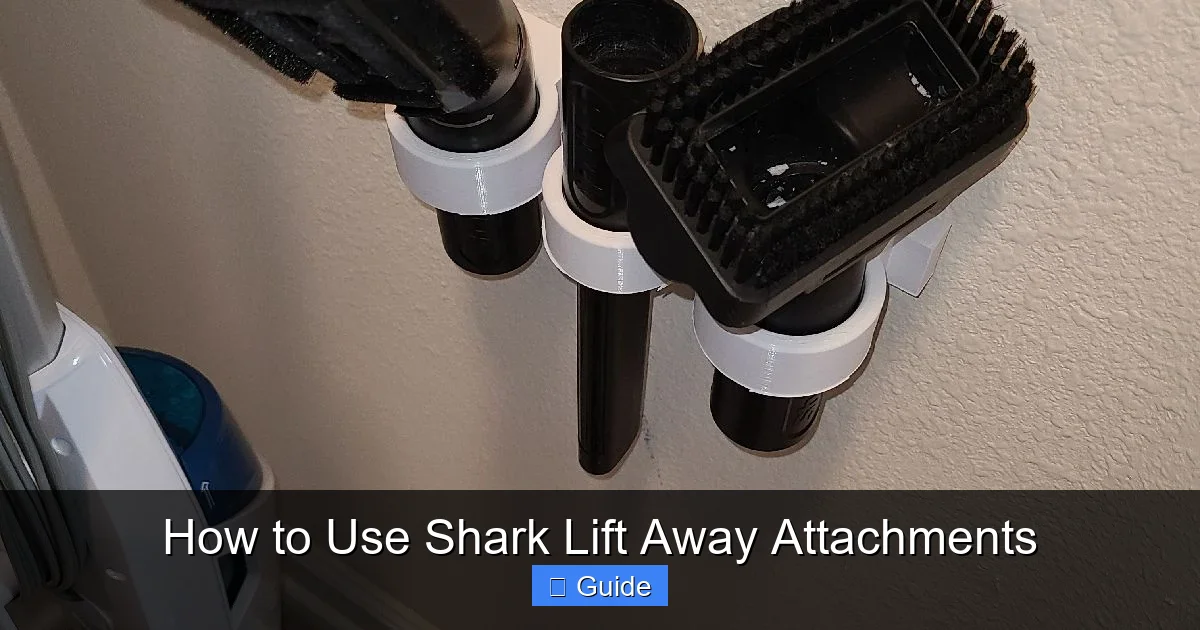
Visual guide about How to Use Shark Lift Away Attachments
Image source: media.printables.com
Attaching an Attachment to the Lift-Away Pod
1. Power Down and Unplug: This is non-negotiable for safety. Never try to attach or detach tools while the vacuum is powered on or plugged in.
2. Locate the Suction Port: On the front of the detached pod, you’ll see a round, rubber-gasketed opening. This is where all handheld tools connect.
3. Align and Push: Take your chosen attachment (e.g., the dusting brush). Align the connector end straight with the pod’s suction port. You’ll feel a slight resistance as the internal tabs engage.
4. Listen for the Click: Push firmly and evenly until you hear or feel a distinct click. This indicates the locking mechanism is fully engaged. Give it a gentle tug to confirm it’s secure. A properly attached tool will not come off without pressing the release button.
Detaching an Attachment from the Pod
1. Power Down and Unplug: Again, always start here.
2. Locate the Release Button: On the connector end of the attachment (the part that goes into the pod), there is a small, usually colored (red, black, or gray) button.
3. Press and Pull: Firmly press this button inward. While holding the button, pull the attachment straight out of the pod’s suction port. Do not twist or yank at an angle, as this can damage the connector.
4. Store Properly: Once detached, store the attachment on a wall-mounted rack, in the included caddy, or a dedicated bin to prevent loss and damage.
Critical Warning: Never attempt to use the vacuum in upright mode with a handheld tool attached to the main wand. The tools are only for the pod’s handheld suction port. Forcing a connection where it doesn’t belong will break components and void your warranty.
Mastering Different Cleaning Tasks: Pairing the Right Tool with the Job
This is where the magic happens. Knowing which tool to grab for each scenario saves time and delivers superior results. Think of your Shark Lift-Away pod as a surgeon’s hand, and the attachments as its specialized instruments.
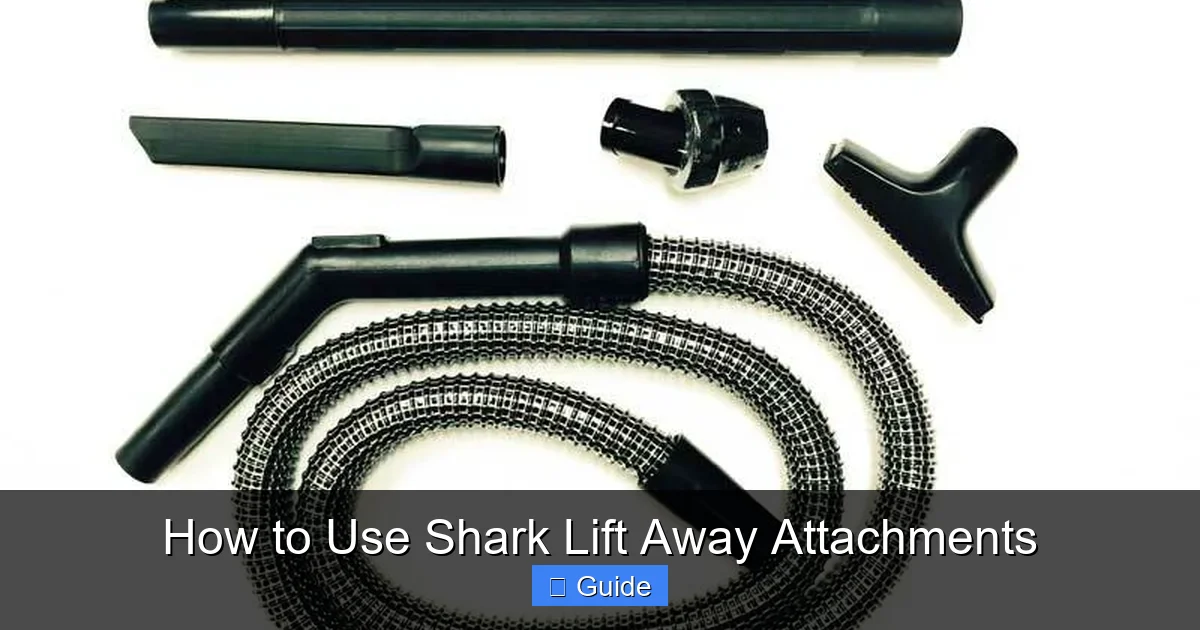
Visual guide about How to Use Shark Lift Away Attachments
Image source: i.ebayimg.com
Conquering Stairs and Carpeted Runners
Stairs are the classic Lift-Away challenge. The main upright is bulky and awkward. Here’s your weaponized approach:
- For the treads (flat part): Use the Motorized Pet Tool if you have pets and carpeted stairs. Its rotating brush will deep-clean embedded dirt and hair. For non-pet hair, the standard Upholstery Tool works well.
- For the risers (vertical part) and corners: Switch to the Crevice Tool. Its narrow profile gets right into the corner where the tread meets the riser, dislodging dust bunnies that accumulate there.
- For the spindles and banisters: The Dusting Brush is perfect for wrapping around wooden spindles and dusting the top of the banister.
Workflow: Start at the top of the stairs. Begin with the dusting brush on the banister and spindles. Move to the risers with the crevice tool. Finally, deep-clean each tread with your chosen carpet tool. The lightweight pod makes this entire process a one-handed, balanced operation.
Detailing Your Vehicle Interior
Your car is a treasure trove of crumbs, dust, and pet hair. The Lift-Away system is arguably the best tool for the job.
- Seats and Floor Mats: Use the Upholstery Tool or Motorized Pet Tool on cloth seats and rubber mats. For leather or vinyl seats, use the Dusting Brush first to remove loose dust, then a dry microfiber cloth with the suction port (no tool) for final wipe-down.
- Cup Holders, Dash Vents, Console Gaps: The Crevice Tool is your best friend here. Its skinny profile reaches into every nook. You can even wrap a microfiber cloth around the tip to wipe surfaces as you suction.
- Trunk and Cargo Area: Use the Upholstery Tool for fabric liners or the main floor head (if you brought the upright wand) for large, flat carpeted areas.
Pro Tip: Before you start, remove all large items and floor mats. Use the crevice tool to clean out the seams of the seats where coins and pens hide. A small, soft brush (like a clean makeup brush) can loosen debris from vents before you vacuum it away.
Above-Floor Dusting Without the Mess
Dusting with a dry cloth just moves dust around; it often sends it flying onto the floor you just cleaned. The Shark Dusting Brush contains it.
- Ceiling Fans: Place a step stool safely. Use the Dusting Brush on the tops of the blades first (the leading edge where dust accumulates). The suction will pull the dust into the vacuum. No more clouds of dust raining down on you.
- Window Treatments: For horizontal blinds, close them slat-side up. Run the Dusting Brush along the length of the slats. Then close them slat-side down and repeat. The bristles get into the crevices.
- Bookshelves and Display Cabinets: Use the Dusting Brush on book tops, decorative items, and shelf edges. For very small figurines, switch to the Crevice Tool with its tip wrapped in a microfiber cloth for gentle precision cleaning.
Key: Always use a gentle, sweeping motion. Let the bristles do the work; don’t scrub.
Refreshing Upholstery and Mattresses
Your sofa and bed harbor dust, skin cells, and allergens. A regular once-over with the right tool makes a huge difference.
- Standard Fabric Sofa: Use the Upholstery Tool. Work in a grid pattern, overlapping strokes. For deep stains or odors, sprinkle baking soda, let sit for 15 minutes, then vacuum thoroughly with this tool.
- Mattress: Strip the bedding. Use the Upholstery Tool to vacuum the entire surface, paying special attention to seams and the area where you sleep. This reduces dust mites. For a deeper clean, follow with a handheld steamer (not your Shark!).
- Pet Beds and Blankets: The Motorized Pet Tool is essential here. The brush roll will pull out hair that’s woven into the fabric. Go slowly to allow the brush to agitate the fibers.
Note: If your upholstery tool has a small clear window, check it periodically to see if it’s filling with debris. Tap it out over a trash can.
Quick Clean-Ups on Hard Floors
While your main floor head is great for large areas, the handheld tools excel at quick spot clean-ups and detailing.
- Kitchen Crumbs: Use the Crevice Tool to sweep crumbs from between stove and counter, under the fridge, and into corners.
- Pet Hair on Hard Floors: The Dust-Away Squeegee is revolutionary. A few sweeps will gather hair into a neat pile that the suction can capture. It’s faster than a broom and dustpan.
- Baseboards: The Crevice Tool or a microfiber cloth wrapped around the suction port (no tool) will clean the tops of baseboards where dust settles.
For a full hard floor room, reattach the main pod to the wand and floor head. Use the handheld tools only for the finishing touches in edges and obstacles.
Essential Maintenance: Keeping Your Shark Lift Away Attachments in Peak Condition
Attachments are simple tools, but neglect can turn them into suction-killing liabilities. A clogged tool or a hair-wrapped brush roll reduces airflow and makes your vacuum work harder, losing power. Follow this simple routine.
After Every Use: The 60-Second Blow-Out
Get in the habit of this quick check immediately after vacuuming.
1. Detach the Tool: With the pod powered off and unplugged, remove the attachment you just used.
2. Inspect the Opening: Look into the suction port of the tool. Check for any large debris (hair, string, carpet fibers) caught at the entrance or around the internal fan blades if visible.
3. Clear the Barb: Many attachments, especially the upholstery tool, have small rubber “barbs” or fingers inside. These can trap hair. Use your fingers or a small tool (like a crochet hook) to pull out any wrapped material.
4. Check the Brush Roll (if motorized): For the Motorized Pet Tool, remove the brush roll (usually a slide-out cover). Cut any hair or fibers wrapped around the bristles with scissors. Never pull, as this can damage the bristles.
5. Give it a Tap: Firmly tap the tool over a trash can to dislodge any fine dust that’s settled inside.
Monthly Deep Clean
Once a month, or if you notice a drop in performance, give your attachments a more thorough cleaning.
- Wash Bristled Brushes: The Dusting Brush and non-motorized upholstery tool can have their bristles washed. Use warm, mild dish soap and water. Gently scrub with an old toothbrush. Rinse thoroughly and allow to air dry completely for 24 hours before reattaching. Never use the tool while wet.
- Soak Hard Tools: The Crevice Tool, Dust-Away Squeegee, and the body of motorized tools can be washed with soapy water. Use a bottle brush to clean the internal suction channel. Rinse well and dry completely.
- Never Submerge the Pod: Never, under any circumstances, wash or submerge the Lift-Away pod itself or the main electrical components. Only the detachable tools and filters (if washable) should get wet.
Storage: Store all attachments in a cool, dry place. Many Sharks come with a wall-mountable bracket or a caddy that attaches to the pod. Using this keeps tools organized, prevents loss, and protects the bristles from being bent or crushed.
Troubleshooting: Why Your Suction Might Drop When Using an Attachment
You snap on your crevice tool and suddenly the vacuum sounds weaker. Don’t panic—the solution is often simple and right at your fingertips.
Step 1: Check the Attachment Itself
The most common culprit is a clog in the tool you just attached.
- Visual Inspection: Look straight through the tool from end to end. Can you see light? If not, it’s blocked.
- The Paper Test: Unplug the vacuum. With the pod in handheld mode, place a small piece of tissue paper against the suction port of the attachment. Turn the vacuum on briefly. If the paper is sucked in and held firmly, airflow is good. If it flutters or isn’t held, there’s a significant blockage.
- Clearing the Clog: Use a long, flexible brush (like a bottle brush) or a straightened wire coat hanger (wrapped in tape to avoid scratching) to gently dislodge debris from the tool’s interior. Always work from the suction end inward.
Step 2: Inspect the Hose and Pod Connection
If the tool is clear, the blockage might be in the short hose that runs from the pod’s suction port to the tool.
- Detach the tool. Look into the pod’s suction port. Is it clear?
- Check the connector on the tool. Does it have a rubber gasket? Is the gasket intact, clean, and seated properly? A missing or damaged gasket creates an air leak and kills suction.
- Reattach the tool firmly, listening for the click. A partially seated attachment will leak air.
Step 3: Examine the Main System
If suction is poor with all attachments, the issue is in the main vacuum.
- Dirt Cup: Is it full? Empty it immediately.
- Filters: Are the pre-motor and post-motor filters dirty or clogged? Wash or replace them according to your manual’s schedule. A clogged filter restricts airflow dramatically.
- Brush Roll (Upright Mode): If you were just in upright mode and switched to handheld, a jammed brush roll or a clogged floor head can cause backup. Clear the brush roll and hose connecting to the floor head.
Rule of Thumb: Always troubleshoot starting with the most recently added component—the attachment—before moving to the main vacuum body.
Conclusion: Unleash the Full Power of Your Shark
Your Shark Lift-Away vacuum is more than a floor cleaner; it’s a complete home cleaning system. The attachments are the specialized tools that unlock its true potential for every surface and corner of your home and car. By understanding the unique purpose of each tool—the crevice tool for tight spots, the dusting brush for delicate items, the upholstery tool for fabrics, and the motorized pet tool for stubborn hair—you can clean faster, more thoroughly, and with less effort. Remember the golden rules: always attach and detach with the unit powered off and unplugged, ensure every connection clicks firmly, and incorporate a quick maintenance routine after each use. A clean attachment is a high-performing attachment. Invest a few minutes in getting to know these tools, and you’ll wonder how you ever cleaned without them. Now, grab your Lift-Away pod, choose your weapon, and enjoy the satisfying, spotless results of a perfectly executed clean.
Frequently Asked Questions
Are Shark Lift Away attachments compatible with all Shark models?
No, compatibility varies by model series and generation. Attachments from newer Navigator, Vertex, or Stratos models may not fit older Lift-Away systems. Always check your specific model number in the manual or on Shark’s website to confirm attachment compatibility before purchasing replacements.
How often should I clean my Shark Lift Away attachments?
You should perform a quick visual inspection and tap-out after every use. A deeper cleaning with soap and water (for washable tools) should be done monthly for average use, or more frequently if you have pets, allergies, or vacuum up a lot of fine dust and hair.
Can I use the Shark Lift Away attachments on wet surfaces or for liquid spills?
Absolutely not. Shark Lift-Away vacuums and all their attachments are designed for dry debris only. Using them on wet surfaces can cause severe electrical damage to the motor and create a safety hazard. For liquid spills, use a mop or a wet/dry vacuum specifically designed for that purpose.
Why does my suction feel weaker when I use a specific attachment, like the crevice tool?
This is often due to a clog inside that specific attachment. The narrow internal通道 of the crevice tool is prone to collecting compacted debris. Detach it, inspect it thoroughly, and use a bottle brush to clear any blockage from the inside. Also, ensure the rubber gasket on the connector is clean and undamaged to maintain a proper seal.
What’s the best way to store my Shark Lift Away attachments to prevent damage?
The ideal method is to use the wall-mount bracket or caddy that came with your vacuum. This keeps attachments organized, prevents the bristles of the dusting brush from being bent, and stops tools from getting lost or crushed. If storing in a bin, keep them separate and avoid stacking heavy items on top of them.
Can I use the Lift-Away pod without any attachment for general cleaning?
Yes, you can. The pod’s main suction port can be used directly for very large, open areas or for sucking up debris from a countertop. However, for best results and to prevent debris from flying around, it’s generally recommended to use an appropriate attachment. The direct port is most useful for quickly cleaning out a car’s trunk or a large, empty closet floor.