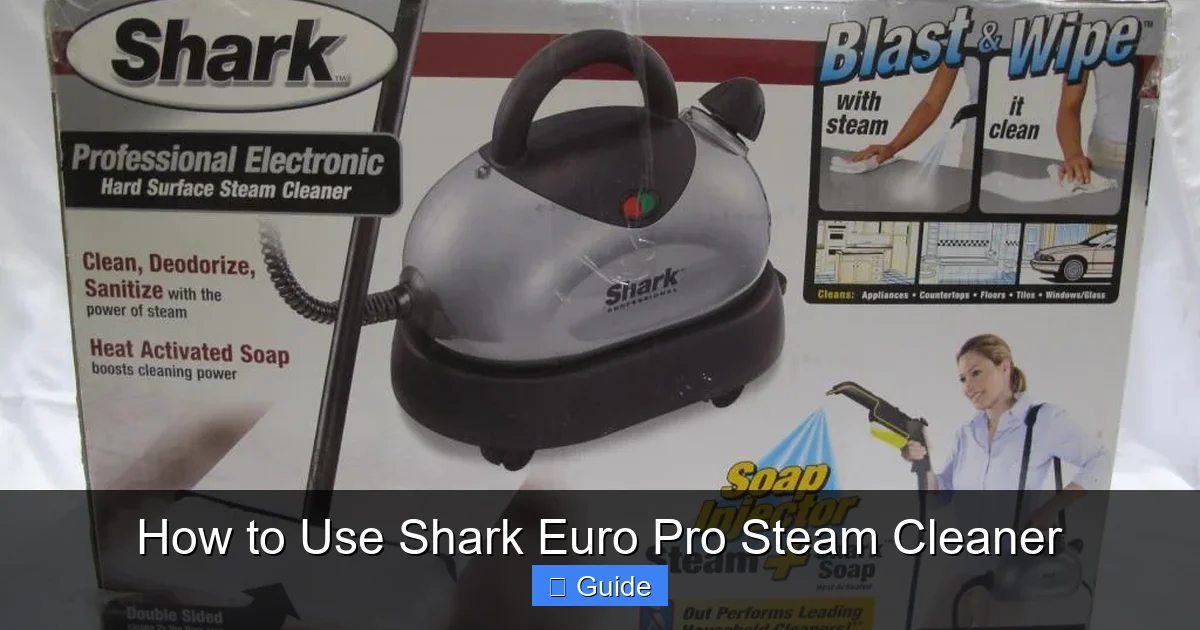
Unlock the power of chemical-free cleaning with the Shark Euro Pro Steam Cleaner. This versatile tool uses only water to sanitize and deep clean countless surfaces, from floors and countertops to grout and upholstery. This guide walks you through every step, from essential safety prep and machine setup to advanced techniques for stubborn dirt, ensuring you get professional results safely and effectively. Learn how to maintain your machine for years of reliable service.
Key Takeaways
- Safety is Paramount: Always wear the included gloves, test on an inconspicuous area first, and never use chemicals or additives in the tank.
- Preparation is Key: Clear the area of debris, vacuum or sweep first, and ensure surfaces are suitable for steam (avoid waxed, unsealed, or delicate surfaces).
- Technique Matters: Use slow, overlapping passes; let the steam dwell for 5-10 seconds on tough grime; and always wipe with a clean microfiber cloth afterward.
- Maintenance Ensures Longevity: After each use, flush the system with clean water, empty all tanks, and descale regularly if you have hard water.
- It’s Incredibly Versatile: Beyond floors, use it on kitchen appliances, bathroom tile/grout, car interiors, upholstery, and even to refresh mattresses and curtains.
- Use the Right Accessory: Attach the appropriate tool (floor head, grout brush, detail nozzle) for the job to maximize cleaning power and protect surfaces.
- Water Quality is Important: Always use clean, cool distilled or soft water to prevent mineral buildup inside the machine, which can damage it.
📑 Table of Contents
- Introduction: Welcome to Chemical-Free Cleaning Power
- Section 1: The Golden Rules of Safety & Preparation
- Section 2: Unpacking, Setup, and Understanding Your Machine
- Section 3: Basic Cleaning Techniques: The Foundation
- Section 4: Advanced Tips & Troubleshooting Common Issues
- Section 5: Maintenance & Care for Longevity
- Section 6: Beyond Floors: Creative & Practical Uses
- Conclusion: Embrace the Steam Revolution
Introduction: Welcome to Chemical-Free Cleaning Power
Have you ever stared at a greasy stovetop, discolored grout, or a musty car interior and wished for a magic wand? Something that could cut through months, even years, of built-up grime without a single harsh chemical? That magic wand exists, and it’s probably sitting in your cleaning closet: the Shark Euro Pro Steam Cleaner. This isn’t just another mop or a weak handheld gadget. It’s a professional-grade, pressurized steam cleaning system designed to harness the incredible natural cleaning power of high-temperature steam. But owning one and truly using it effectively are two different things. Many people unpack their Shark Euro Pro, get confused by the attachments, or use incorrect techniques and end up disappointed. This guide is here to change that. We’re going from unboxing to expert, covering every detail you need to transform your cleaning routine. Forget about fumes, sticky residue, and endless bottles under the sink. Get ready to discover the satisfying, sanitizing, and surprisingly simple world of steam cleaning with your Shark Euro Pro.
Section 1: The Golden Rules of Safety & Preparation
Before we even plug in the machine, we need to lay the foundation for safe and successful cleaning. Steam is powerful. It’s hot—often reaching temperatures over 200°F (93°C)—and it’s under pressure. Respecting that power is the first step to a great result. Rushing into cleaning without proper prep can damage your surfaces, your machine, and worst of all, cause injury.

Visual guide about How to Use Shark Euro Pro Steam Cleaner
Image source: c.shld.net
The Non-Negotiable Safety Checklist
Let’s start with the absolute must-dos. These aren’t suggestions; they are rules for safe operation.
- Protect Your Hands: The Shark Euro Pro comes with a pair of heat-resistant gloves for a reason. Always wear them when handling the machine, especially when attaching/detaching tools or wiping the head. The metal parts and the mop pad will become scalding hot almost instantly.
- No Chemicals, Ever: This is the most critical rule. The Shark Euro Pro is designed to use 100% clean water only. Never, under any circumstances, add soap, detergent, vinegar, essential oils, or any commercial cleaning solution to the water tank. Doing so can clog the internal system, void your warranty, and create dangerous fumes when heated. The machine’s job is to produce pure, hot steam. Let the steam’s heat and pressure do the work.
- Check Your Surfaces: Steam is fantastic for most sealed surfaces (ceramic tile, sealed stone, stainless steel, laminate, sealed hardwood) but it is destroying to others. Never use steam on unsealed wood or bamboo, waxed floors, delicate antique furniture, silk, wool, or suede. It can also damage some plastics and painted surfaces. When in doubt, test first! Choose a small, hidden area (like behind a appliance or in a closet corner) and steam it. Let it dry completely and check for any warping, discoloration, or finish damage over the next 24 hours.
- Mind the Cord and Steam: Always be aware of the power cord. Don’t let it sit in water or wet areas. Also, never point the steam nozzle at people, pets, or yourself. The steam jet can cause serious burns.
Room-by-Room Preparation: Sweep Before You Steam
Steam cleaning is a deep cleaning process, not a preliminary one. Think of it like washing your car without rinsing off the mud first—it just spreads the dirt around. You must remove all loose debris before applying steam.
- Floors: Thoroughly vacuum or sweep the entire area. Pay special attention to corners and under furniture. Any hair, dust, or crumbs will turn into a muddy paste when hit with steam.
- Countertops & Surfaces: Wipe down with a dry or slightly damp cloth to remove crumbs and loose dust.
- Grout & Tile: A quick vacuum with a brush attachment can lift a lot of surface mildew and soap scum before you attack it with the grout brush.
- Upholstery & Carpets: Vacuum meticulously. For carpets, consider a pre-treatment for heavy stains if needed, but ensure it’s fully dry before steaming.
This prep step might seem like extra work, but it’s what separates a mediocre clean from a transformative one. It ensures the steam can penetrate the actual dirt, not just push loose particles around.
Section 2: Unpacking, Setup, and Understanding Your Machine
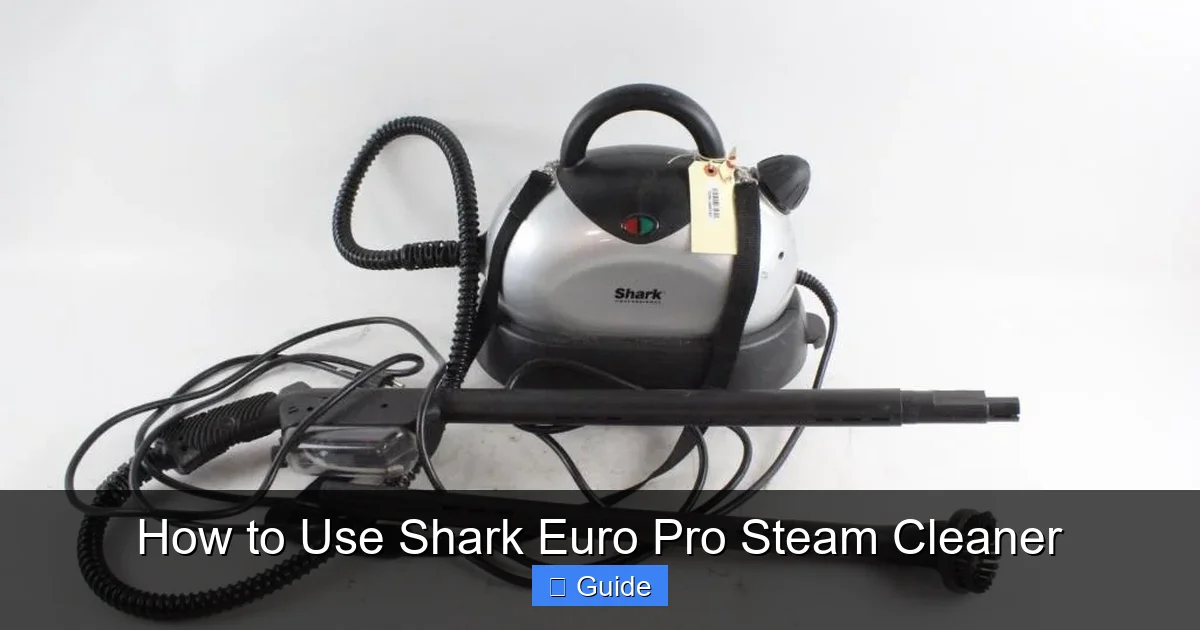
Let’s get familiar with your new cleaning powerhouse. The Shark Euro Pro typically comes with a main unit, a water tank, a set of attachments (floor mop pad, grout brush, detail nozzle, squeegee, etc.), and microfiber cloths. Take a moment to lay everything out. The manual is your friend here—keep it handy for reference on specific attachment names.
Visual guide about How to Use Shark Euro Pro Steam Cleaner
Image source: content.propertyroom.com
Filling the Tank: Water Quality Matters
This is a huge factor in your machine’s lifespan. The Shark Euro Pro has a removable water tank, usually with a clear fill line.
- Use Distilled or Soft Water: This is the single best thing you can do for your machine. Tap water, especially hard water, contains minerals (calcium, magnesium). When heated, these minerals solidify into limescale, which clogs the internal heating element and nozzles. This reduces steam pressure, causes sputtering, and eventually leads to machine failure. Always use distilled water (from the grocery store) or water from a home softener system. If you must use tap water, be prepared to descale much more frequently.
- How to Fill: Remove the tank from the unit. Open the cap (it usually unscrews or flips open). Use a funnel or pour slowly to avoid spills. Fill to the MAX line—do not overfill. Screw the cap on tightly to create a seal. Reattach the tank to the unit until it clicks into place.
Assembly: Attaching the Right Tool for the Job
The Shark Euro Pro’s versatility is in its attachments. They click or screw onto the front of the steam wand.
- The Mop Pad System: For floors and large flat surfaces. Slide the clean microfiber pad onto the rectangular mop head, ensuring it’s snug. The pad will get very hot and dirty, so have several on hand.
- The Grout Brush: A small, stiff-bristled brush that fits into grout lines perfectly. It often has a rubber squeegee edge on the back for wiping tiles after.
- The Detail Nozzle: A narrow, pointed tip for getting into tight spots—around faucets, along baseboards, inside oven hinges.
- The Squeegee: A rubber blade attachment perfect for cleaning glass, mirrors, and windows without streaks.
- The Scrub Pad: A textured, sometimes slightly abrasive pad for tougher stuck-on messes on countertops or appliances.
Practice attaching and detaching these while the machine is off and cool. A secure attachment is crucial to prevent hot steam and water from leaking back at you.
Section 3: Basic Cleaning Techniques: The Foundation
Now for the fun part. But before we tackle tough jobs, we must master the fundamentals. The core technique is the same for all attachments, but the pace and pressure vary.
Visual guide about How to Use Shark Euro Pro Steam Cleaner
Image source: content.propertyroom.com
The General Rule: Slow, Steady, and Overlapping
Your instinct might be to zip across the floor like a vacuum cleaner. Resist that urge. Steam cleaning is a deliberate process.
- Go Slow: Push the mop head forward at a walking pace, about 1-2 feet per second. This allows the high-pressure steam to fully saturate the surface and penetrate the dirt.
- Let it Dwell: Once you’ve made a pass, pause for 5-10 seconds. You’ll see the steam dissipate and the surface start to glisten. This “dwell time” is where the heat kills bacteria and loosens grime.
- Wipe Immediately: After the dwell time, use a clean, dry microfiber cloth (different from the mop pad) to wipe the area. You’ll see the dirt transfer to the cloth. This step is essential. Steam loosens dirt; the cloth removes it. If you don’t wipe, the dirt just dries back onto the surface, often in a new, streaky pattern.
- Overlap Passes: Your next slow pass should overlap the previous one by about 50%. This ensures no strip of surface is missed and creates an even, streak-free clean.
Floor Cleaning: The Bread and Butter
Whether it’s tile, laminate, or sealed hardwood, the process is similar.
- Start in the Farthest Corner: Work your way toward the exit so you don’t walk over cleaned, wet floors.
- Use the Flat Mop Pad: Ensure it’s clean and slightly damp (you can wet it under the tap and wring it out before starting). A dry pad won’t glide well.
- Follow the Slow/Overlap/Wipe Method: Make your slow pass, dwell, then wipe with a separate dry cloth. For large areas, you may need to work in sections, wiping each section before moving on.
- For Hardwood: Keep the mop moving constantly. Do not let it sit stationary on any spot, as prolonged heat and moisture can damage the wood finish. Your “dwell” is more of a slight pause within the continuous motion.
- Change Pads Frequently: As soon as a pad looks visibly dirty or gray, switch to a clean one. A dirty pad just smears dirt around.
Grout & Tile: The Satisfaction of White Lines
This is where the Shark Euro Pro truly shines. The grout brush is your best friend.
- Attach the Grout Brush: The stiff bristles are designed to fit right into the grout channel.
- Apply Direct Pressure: Press the brush firmly into the grout line. You want the bristles to scrub as the steam blasts out.
- Short, Focused Bursts: Move the brush along the grout line in 6-inch increments. Hold for 2-3 seconds in each spot, then move slightly. The steam and bristle action will lift years of mildew and soap scum.
- Wipe Clean: After doing a section of grout (e.g., one tile width), flip the brush to use the rubber squeegee side or grab a clean microfiber cloth. Wipe the excess dirt and moisture from the tile surface. You’ll be amazed at the dirty water that comes off.
- For Heavy Build-Up: You may need to make two or three passes over the worst areas. Patience pays off.
Section 4: Advanced Tips & Troubleshooting Common Issues
Once you’ve mastered the basics, you can unlock even more cleaning power and solve minor hiccups.
Mastering Tough Jobs: Sticky, Greasy, and Stained
For baked-on grease on stovetops, oven interiors, or barbecue grills:
- Pre-Treat if Needed: For thick, carbonized grease, spray a tiny amount of a dedicated oven cleaner or a paste of baking soda and water on the cool surface. Let it sit for 10-15 minutes. Rinse thoroughly with a damp cloth before using the steam cleaner. You must remove all chemical residue before applying steam.
- Use the Scrub Pad or Detail Nozzle: The scrub pad’s texture provides extra abrasion. For tight corners, the detail nozzle’s focused jet can blast grease out of crevices.
- Heat is Your Friend: Ensure the machine is fully heated (the ready light is on). The hotter the steam, the better it cuts grease.
- Multiple Passes: Don’t expect one pass to clean a decade of grease. Work in small sections, letting the steam dwell a bit longer (10-15 seconds), then wipe. Repeat until the cloth comes away clean.
For Upholstery, Mattresses, and Carpets
The Shark Euro Pro can refresh these, but caution is key.
- Do a Patch Test: This is non-negotiable. Test on a hidden seam or corner. Check for colorfastness and fabric shrinkage.
- Use Low Moisture: You don’t want to soak these materials. Use short bursts of steam and immediately blot with a dry, absorbent microfiber cloth. Make multiple light passes rather than one heavy, wet one.
- For Mattresses: Strip the bedding. Lightly steam the surface in a grid pattern, immediately blotting. This helps kill dust mites and remove odors. Let the mattress dry completely (use a fan) before remaking the bed.
- For Carpets: For spot cleaning stains, use the detail nozzle from a few inches away. For overall refreshing, use the floor mop head, going very slowly and blotting immediately after each pass. Do not use on wet carpet or over padding.
Troubleshooting: Low Pressure, Sputtering, or No Steam
If your machine loses its power, here’s what to check, in order:
- Water Level: Is the tank empty or below the MIN line? Refill.
- Water Quality: This is the #1 culprit. If you used tap water, you likely have mineral buildup. You need to descale. Shark recommends using a 50/50 solution of white vinegar and water in the tank (run it through, then rinse 2-3 times with fresh distilled water). For severe clogs, a commercial descaling solution may be needed.
- Clogged Nozzle: The tiny steam jet holes can get blocked. With the machine off and cool, use a fine needle or pin to gently poke through any debris in the nozzle holes. Be very gentle to avoid damaging the orifice.
- Attachment Connection: Ensure the tool is clicked/screwed on securely. A poor seal causes pressure loss.
- Machine Needs to Cool: If you’ve been using it continuously for 15+ minutes, it may have activated a thermal safety switch. Turn it off, unplug it, and let it cool for 30-45 minutes.
Section 5: Maintenance & Care for Longevity
Your Shark Euro Pro is an investment. A little regular care will keep it performing like new for years.
The Post-Cleaning Routine (5 Minutes)
Do this every single time you finish a cleaning session:
- Unplug and Cool: Turn off and unplug the machine. Let it cool completely for at least 10-15 minutes before touching hot parts or emptying tanks.
- Empty All Tanks: Pour out any remaining water from the main water tank and the solution tank (if your model has one). Leave the caps off and the tank lid open to air dry completely. Stagnant water breeds mold and mildew.
- Flush the System: Fill the tank with fresh distilled water only. Turn the machine on and let it steam for 30-60 seconds into a sink or outside. This flushes out any residual loose minerals or debris from the heating chamber and hose. Then empty and dry the tank again.
- Clean the Tools: Wash the microfiber mop pads in the washing machine (no fabric softener!). Rinse the grout brush, detail nozzle, and other plastic tools under running water. Use an old toothbrush to dislodge any debris from bristles or nozzle holes. Let all accessories air dry completely before storing.
- Wipe Down the Unit: Use a damp cloth to wipe the exterior of the machine. Never immerse it in water.
Deep Maintenance: Descaling (Monthly to Quarterly)
Even with distilled water, a little scale can build up. If you notice reduced steam output or sputtering, it’s time to descale.
- Use White Vinegar: Fill the tank with a 50/50 mixture of white vinegar and distilled water. (Some models have a specific descaling mode—check your manual).
- Run the Cycle: Attach the floor mop head. Turn the machine on and let it run in a well-ventilated area (like a garage or with windows open) until the tank is empty. You’ll smell vinegar; that’s normal.
- Rinse, Rinse, Rinse: This is critical. Fill the tank with fresh distilled water and run it through the system. Repeat this rinsing process at least 2-3 times until you no longer smell vinegar when the machine steams. Any vinegar left will corrode internal parts.
- Final Flush: Do one final flush with just distilled water, then empty and dry the tank thoroughly.
Section 6: Beyond Floors: Creative & Practical Uses
You’ve mastered the kitchen and bathroom. Now let’s explore the true potential of your Shark Euro Pro around the whole house and even your car.
The Kitchen Powerhouse
- Stainless Steel Appliances: Use the detail nozzle or a clean microfiber cloth on the mop head to remove fingerprints and smudges. Wipe with the grain. The steam cuts through grease without chemicals.
- Inside the Microwave & Oven: Place a bowl of water inside, microwave on high for 2 minutes to create steam. Then wipe. For ovens, use the grout brush on the walls and floor (after a chemical pre-clean if needed). The steam loosens baked-on food.
- Sinks & Faucets: The detail nozzle blasts away soap scum and hard water deposits from around the faucet base and drain. Follow with a wipe.
- Cutting Boards: Sanitize wooden or plastic cutting boards by steaming the surface, then wiping. The heat kills bacteria.
Bathroom & Tile Revitalization
- Shower Doors & Tiles: The squeegee attachment is magic here. After steaming the glass, use the squeegee to pull the water and loosened soap scum down. You’ll get a streak-free shine.
- Toilet Exterior & Base: Use the detail nozzle to clean around the tank, bolts, and base where grime accumulates. Never put the nozzle inside the toilet bowl.
- Showerheads & Faucets: Remove mineral buildup by steaming the aerator and showerhead, then wiping.
Car & Garage Deep Clean
- Interior Surfaces: Use the detail nozzle on the dashboard, console, and door panels. The steam lifts grease from fingerprints and sun-damaged surfaces. Wipe immediately with a microfiber cloth.
- Seats & Carpets: Test first! Use the mop head on floor mats. For cloth seats, use light passes and blot immediately. Great for refreshing and removing light stains or odors.
- Wheels & Hubcaps: The grout brush works wonders on Brake dust that’s caked on wheels. The steam and bristles lift it without scratching.
- Garage Floor: Perfect for cleaning concrete garage floors of oil stains (pre-treat with a degreaser, rinse, then steam) and winter salt residue.
Surprising Household Uses
- Mattress Refreshing: As mentioned, strip the bed and lightly steam the surface to kill dust mites and remove odors. Let dry completely.
- Curtains & Draperies: Test for colorfastness! A quick once-over with the steam mop (held a few inches away) can remove dust and odors without taking them down.
- Toys: Sanitize plastic children’s toys without chemicals. Great for teething toys.
- Refrigerator Seals: Use the detail nozzle to clean the gunk out of the rubber door seal crevices.
- Outdoor Furniture: Clean canvas, plastic, or metal patio furniture before storing for the season.
Conclusion: Embrace the Steam Revolution
You now hold the knowledge to unlock the full, incredible potential of your Shark Euro Pro Steam Cleaner. It’s more than a mop; it’s a chemical-free sanitizing system, a grout-reviving wizard, and a detail-cleaning ninja rolled into one. The key has always been in the technique: the slow, deliberate passes, the immediate wiping, the discipline of using only water, and the commitment to regular maintenance. By following the safety rules, prepping your surfaces, choosing the right tool, and mastering the wipe, you’ll achieve levels of clean you thought only professional cleaners could achieve. You’ll breathe easier knowing you’ve sanitized your home without a single toxic fume. You’ll marvel at the sight of formerly gray grout lines turning white. You’ll save money on countless cleaning products. Most importantly, you’ll have a reliable, satisfying, and incredibly effective tool in your cleaning arsenal for years to come. So go ahead—fill that tank with distilled water, put on your gloves, and start steaming. Your cleanest, healthiest home is waiting.
Frequently Asked Questions
Can I use my Shark Euro Pro on my sealed hardwood floors?
Yes, but with extreme caution. Only use it on fully sealed, finished hardwood floors. Never use on unsealed, waxed, or oiled wood. Keep the mop constantly moving, never letting it pool or sit in one spot. Use a clean, dry microfiber cloth to wipe immediately after each pass to remove moisture.
What’s the difference between using the mop pad and just a cloth?
The mop pad is designed to be slightly absorbent and hold the loosened dirt as you steam. A separate dry cloth is for the crucial wiping step. The pad gets dirty; the dry cloth removes the dirt the pad brought to the surface. Using a dry cloth alone won’t lift deeply embedded grime effectively.
My steam output is weak and sputtering. What’s wrong?
The most common cause is mineral buildup from using tap water. You need to descale the machine using a 50/50 white vinegar and water solution, followed by 2-3 thorough rinses with distilled water. Also, check for a clogged nozzle and ensure the water tank is properly seated and filled.
Can I clean my car’s leather seats with the steam cleaner?
No, avoid steam on leather. The heat and moisture can dry out, crack, and discolor leather upholstery. For leather, use dedicated leather cleaners and conditioners. The steam cleaner is safe for your car’s plastic dash, vinyl seats, and carpeted floor mats (with a patch test).
How often should I descale my Shark Euro Pro?
If you always use distilled water, once or twice a year is sufficient. If you use tap water (not recommended), you should descale monthly or whenever you notice a drop in steam performance. Regular descaling is the #1 way to extend your machine’s life.
Where should I never use the steam cleaner?
Avoid: unsealed wood/bamboo, waxed floors, silk/wool/suede fabrics, painted walls, electronics (TVs, computers), laminate flooring with gaps, and any surface that is sensitive to moisture or heat. When in doubt, perform the hidden area test first.