A clogged Shark vacuum is a common but frustrating problem that almost always has a simple, DIY solution. By systematically checking and clearing blockages from the suction path—starting with the hose, then the wand, and finally the brush roll housing—you can restore full power without tools or cost. Regular maintenance and mindful vacuuming habits are the ultimate keys to preventing future clogs and keeping your Shark performing optimally for years.
Key Takeaways
- Safety First: Always unplug your Shark vacuum before attempting any inspection or cleaning to prevent accidental startup and injury.
- Systematic Approach: Work backwards from the floor head to the vacuum body, checking each connection point (hose, wand, brush roll) for obstructions.
- Common Culprits: Hair, carpet fibers, string, small toys, and paper are the most frequent causes of clogs in Shark vacuums.
- Simple Tools Suffice: You rarely need special tools; a long, flexible object like a coat hanger, a straightened wire hanger, or even a broom handle can dislodge most blockages.
- Preventative Maintenance: Empty the dust cup after every use, regularly clean the filters, and inspect the brush roll for tangled hair to prevent clogs from forming.
- Know Your Model: Familiarize yourself with your specific Shark model’s release latches and removable parts (like the brush roll) for faster, easier access.
- When to Seek Help: If you’ve thoroughly cleared the entire suction path and the vacuum still has weak suction, the issue may be a worn motor or a damaged hose, requiring Shark customer support or a professional.
📑 Table of Contents
- Why Your Trusty Shark Vacuum Loses Its Suction
- Essential Tools and Preparation: Your Unclogging Kit
- Step-by-Step: Unclogging the Hose and Wand
- Step-by-Step: Unclogging the Brush Roll Housing
- Unclogging Inside the Main Body (The Cyclone Chamber)
- Preventative Maintenance: Stop Clogs Before They Start
- When to Contact Shark Support or a Professional
- Conclusion: Your Shark’s Longevity is in Your Hands
Why Your Trusty Shark Vacuum Loses Its Suction
There’s nothing quite as satisfying as watching your Shark vacuum effortlessly lift dirt and debris from your carpets and hard floors. That powerful suction is its superpower. But over time, you might notice it struggling, pushing harder, or leaving behind a trail of dust it would normally devour. The culprit is almost always a clog. It’s the vacuum’s way of telling you its internal airways are blocked, restricting airflow and killing its performance. Understanding that a clog is a symptom, not a death sentence, is the first step to fixing it yourself. This guide will walk you through every possible clog point, from the floor head to the motor, with clear, safe steps to restore your Shark’s mighty suction. We’ll cover all major series, including the Navigator, Rotator, Vertex, and IZ series, so you can confidently tackle the problem regardless of your specific model.
The Anatomy of a Clog: Understanding Airflow
Think of your Shark vacuum as a simple system: air enters at the floor head, travels through the hose and wand, into the main body, through the filters, and is finally expelled by the motor fan. A clog anywhere in that path creates a traffic jam. The most common bottlenecks are in the flexible hose (where it bends and collects debris), the rotating brush roll housing (where hair and fibers wrap around the roller and bearings), and the narrow passages inside the main unit itself. Suction loss at the hose end usually means a clog before that point (in the hose or brush roll), while poor suction with the hose detached points to a clog inside the main body or a filter issue. We’ll use this logic to diagnose.
Essential Tools and Preparation: Your Unclogging Kit
Before you start, gather a few household items. You likely already have everything you need, making this a truly cost-effective fix.
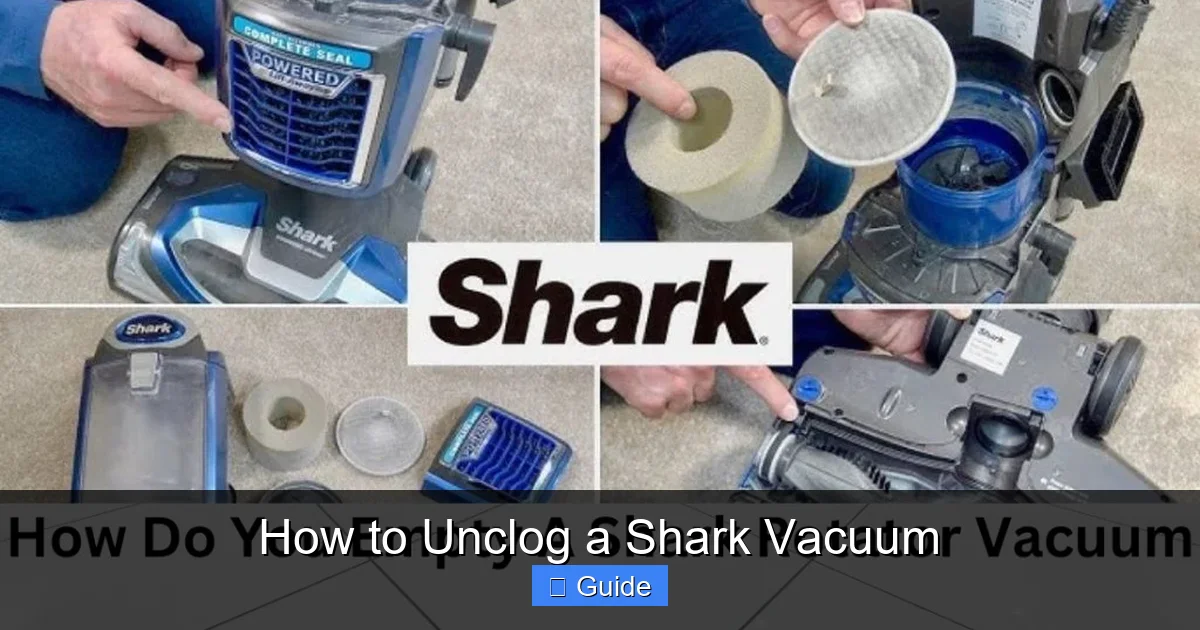
Visual guide about How to Unclog a Shark Vacuum
Image source: sharkvacuum.blog
- A Long, Flexible Probe: The star of the show. A straightened wire coat hanger is perfect. For tighter spaces, a long, flexible plumbing snake or even a sturdy, straight plastic yardstick can work. Avoid using anything sharp or that could puncture the hose.
- Flashlight: A bright light is crucial for seeing deep into hoses and housings.
- Screwdriver: Most Shark models use Phillips-head screws to secure the brush roll housing cover. Keep the correct size handy.
- Scissors or Seam Ripper: For cutting away tightly wound hair and carpet fibers from the brush roll bearings.
- Gloves: To protect your hands from dirt, debris, and any sharp objects you might encounter.
- Trash Bag: For immediately disposing of the gunk you pull out.
- Your Shark’s Manual: If you have it, it’s invaluable for model-specific disassembly instructions.
Critical First Step: UNPLUG THE VACUUM. This cannot be stressed enough. With the vacuum powered off and unplugged, you eliminate the risk of the brush roll suddenly spinning or the motor activating while your fingers are inside.
Diagnosing the Clog Location: A Simple Test
Before dismantling everything, perform this quick test to narrow down the clog’s location. With the vacuum unplugged, detach the hose from the main body (usually a twist-lock or button release). Now, plug the vacuum in and turn it on. Place your hand over the open vacuum intake port. Do you feel strong suction? If YES, the motor and internal filters are likely fine, and the clog is in the hose or brush roll assembly. If NO or the suction is very weak, the clog is inside the main body (possibly in the cyclone chamber or a filter) or the motor itself has an issue. We’ll address both scenarios.
Step-by-Step: Unclogging the Hose and Wand
The flexible hose is the most frequent site of clogs, especially if you’ve vacuumed up larger debris or if the hose has developed a kink. Here’s how to clear it.
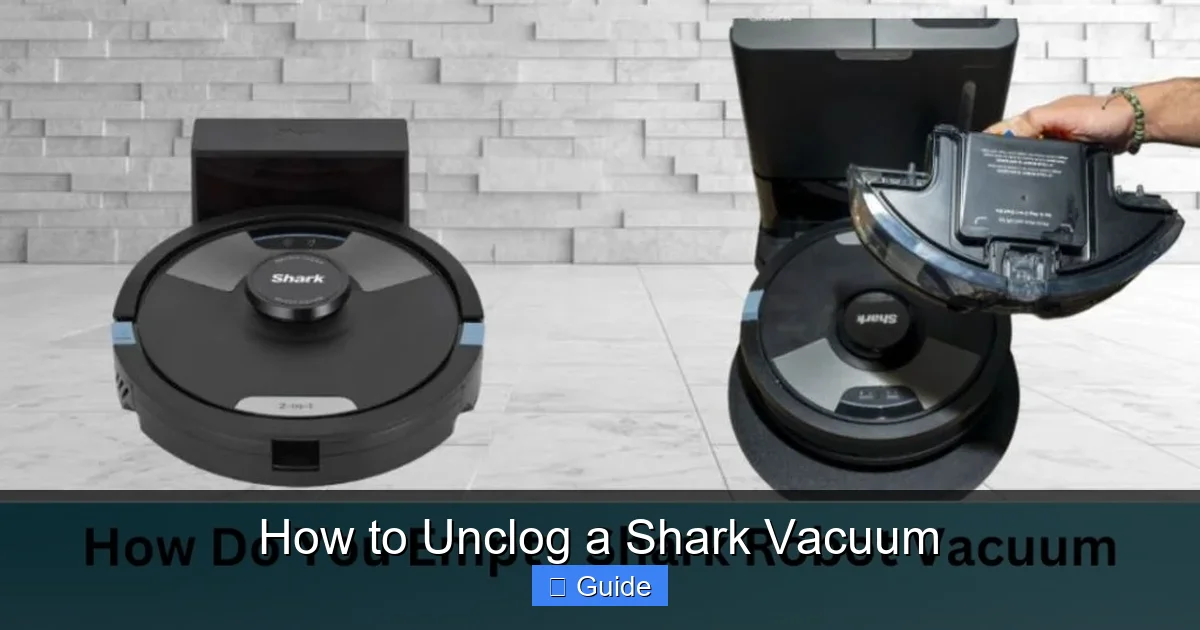
Visual guide about How to Unclog a Shark Vacuum
Image source: sharkvacuum.blog
1. Detach and Visually Inspect
Fully detach the hose from both the main vacuum body and the wand/handle. Stretch it out in a bright area. Shine your flashlight down one end and look through the other. Often, you can see the obstruction—a sock, a wad of paper, or a dense hairball. If you see it and can reach it with your fingers, carefully pull it out.
2. The Reverse Suction Method (The Easiest First Try)
Sometimes, the clog is just loosely packed. Reattach the hose only to the main vacuum body. Now, take the open end of the wand/handle and press it firmly against a solid wall or your leg (to create a seal). Turn the vacuum on for 3-5 seconds. The sudden blast of air in reverse can often dislodge the blockage and blow it out the other end. Caution: Be prepared for debris to shoot out the wand end. Wear gloves and point it away from you and delicate items.
3. The Manual Push/Pull with a Probe
If reverse suction fails, it’s time for manual labor. Feed your flexible probe (the coat hanger) into one end of the detached hose. Gently push and twist it to break up or hook the debris. You may feel a “give” as the clog loosens. Pull the probe out and shake the hose. Often, the debris will now fall out. You can also use the probe from the other end. If the clog is stubborn, try hooking it with the bent end of the coat hanger and pulling it out.
4. Checking the Wand and Connectors
Don’t forget the metal or plastic wand sections and the connectors where the hose meets the wand. These small passages can trap hair and fibers. Detach all wand pieces and look through them. Use your probe or a long, thin brush (like a bottle brush) to clean them out. Reassemble them once clear.
Step-by-Step: Unclogging the Brush Roll Housing
This is the #1 spot for clogs, especially in homes with pets or long hair. The rotating brush roll (beater bar) agitates carpet fibers, but in doing so, it collects hair and string that can wind tightly around the roller and its bearings, stopping it cold and blocking the suction path right at the source.
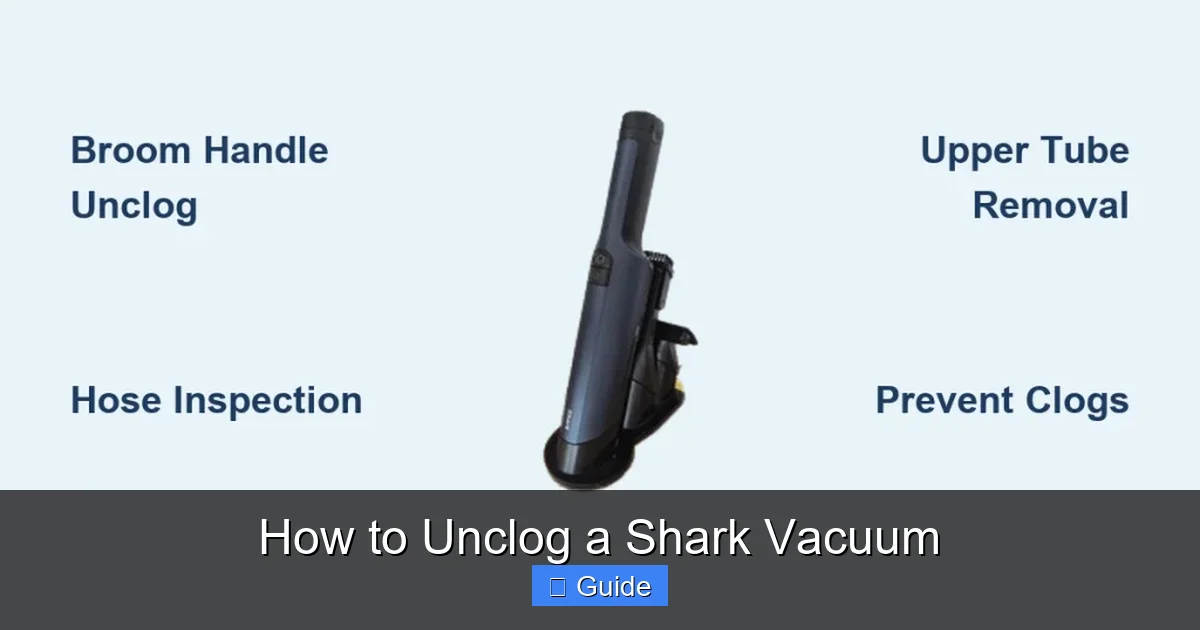
Visual guide about How to Unclog a Shark Vacuum
Image source: sharkvacuum.blog
1. Accessing the Brush Roll
Lay the vacuum on its side for stability. On most Shark models (Navigator, Rotator, Vertex), you’ll find a release lever or latch on the underside of the floor head. Step on the release lever (often a red or gray tab) and the entire brush roll housing will pop up or swing open. On some stick vacuums (IZ series), you may need to remove a few screws from the bottom plate. Consult your manual if unsure. Once open, you’ll see the cylindrical brush roll.
3. Removing and Cleaning the Brush Roll
Most Shark brush rolls slide out easily once the housing is open. There may be a clip or a small screw holding one end. Gently pull the brush roll straight out. This is where you’ll see the damage. Hair and fibers will be wrapped around the roller itself and, more critically, around the plastic end caps and the bearings inside them. This is what causes the burning smell and stops the roller from spinning.
Use your scissors or seam ripper to cut the hair and fibers lengthwise along the roller. Do not try to unwind it; it’s nearly impossible and you’ll just make it tighter. Cutting it allows you to pull the chunks off. Then, meticulously pick and cut any debris from the bearings on each end cap. A toothpick or the pointed end of your seam ripper is great for this. Ensure both ends spin freely when you rotate the roller by hand.
4. Clearing the Housing Channel
With the brush roll out, look into the empty housing. You’ll see a wide, curved channel that leads to the hose connection. This channel is often packed with hair, carpet lint, and small objects that were too big to be sucked through. Use your flashlight and your hand (with a glove!) to pull out all the accumulated gunk. A damp cloth can help wipe it clean. This step alone can dramatically improve suction.
5. Reassembly and Test
Slide the clean brush roll back into the housing, ensuring it seats properly and any locking clip is engaged. Close the housing cover until it clicks. Reattach the hose/wand. Plug in the vacuum and turn it on. You should immediately hear a difference in sound—a higher-pitched, more powerful whine instead of a strained growl. Test it on the floor. The brush roll should spin freely and the vacuum should “glide” more easily and pick up debris it previously left behind.
Unclogging Inside the Main Body (The Cyclone Chamber)
If your suction test with the hose detached showed weak suction at the main body intake, the clog is deeper. Shark vacuums use “cyclonic” technology, where dirt and air are spun at high speed in a circular chamber. The debris is thrown to the outside and drops into the dust cup, while the air is sucked out through the center post and through the filters. A clog here usually means the center post or the filters are blocked.
1. Empty and Inspect the Dust Cup
Remove the dust cup according to your model’s instructions (usually a release button on top or front). Empty it completely over a trash can. Now, inspect the interior. Look up into the cone-shaped cyclone chamber. You may see a column of packed dirt and debris clinging to the walls, especially if the cup was very full. Use a stick or your gloved hand to knock loose any caked-on dirt from the walls. Pay special attention to the small opening at the bottom of the cyclone where the air exits—this is a prime clog spot. A cotton swab or a flexible bottle brush can help clean this narrow passage.
2. Deep Clean the Filters
Shark vacuums typically have at least two filters: a foam pre-motor filter (near the dust cup) and one or more post-motor filters (often a pleated paper filter). Clogged filters are a leading cause of perceived suction loss. Remove them. The foam filter is usually washable with cool water (no soap!). Squeeze it dry and let it air dry completely for 24 hours before reinserting. The paper filter is not washable; tap it gently over a trash can to dislodge dust, or replace it if it’s very dirty. A clogged filter restricts airflow just like a physical blockage in a hose. Cleaning or replacing filters should be part of regular maintenance every 3-6 months.
3. Checking the Exhaust Port
Finally, check the exhaust port where air leaves the vacuum (usually on the back or top). Make sure it’s not blocked by dust or lint. A quick vacuum with a handheld vac or a careful use of your probe can clear it.
Preventative Maintenance: Stop Clogs Before They Start
Clearing a clog is a fix. Changing your habits is the permanent solution. Incorporate these simple practices into your routine to keep your Shark vacuum running at peak performance.
Mindful Vacuuming Habits
The biggest cause of clogs is vacuuming up the wrong things. Never vacuum up:
- Large, hard objects (coins, screws, Legos, pet toys)
- Wet materials or large amounts of liquid
- Fine powders like flour or baby powder in large quantities (they can clog filters)
- Hair directly from brushes or combs—collect it first.
Go slower over high-pile rugs and areas with lots of pet hair. This gives the suction more time to pull debris into the cup rather than packing it into the hose. Overlap your strokes slightly.
Post-Use Ritual (2 Minutes)
After each vacuuming session, take 60 seconds to:
- Empty the dust cup. Don’t wait until the “full” line. A nearly full cup reduces suction immediately.
- Check the brush roll. Look for hair wrapped around it. If you see any, cut it off right then before it winds tighter. A quick weekly check of the brush roll bearings is a game-changer.
- Wipe the exterior with a dry cloth to prevent dust buildup in vents and around the hose connections.
Monthly/Seasonal Deep Clean
Once a month, do a more thorough inspection. Remove the hose and wand and check them thoroughly. Wash the foam filter if your model has one. Use a vacuum’s crevice tool or a soft brush to clean the vents and exhaust ports. Every 6-12 months, replace the post-motor filter(s) as per the manufacturer’s schedule. This ensures optimal airflow and protects the motor from dust damage.
When to Contact Shark Support or a Professional
While 95% of suction loss issues are user-serviceable clogs or dirty filters, there are rare cases where the problem is internal and beyond DIY repair.
- Persistent Weak Suction After Full Clearance: You’ve cleared every hose, the brush roll housing is spotless, the dust cup cyclone is clean, and both filters are new. Suction is still poor. This points to a possible leak in the hose (a crack or hole you can’t see) or, more seriously, a worn motor that can no longer generate adequate airflow.
- Burning Smell with No Clog: A distinct electrical burning odor, especially if accompanied by extreme motor heat, indicates a failing motor or a severely clogged filter that the motor is straining against. Unplug immediately and discontinue use.
- Strange Noises: Grinding, screeching, or rattling noises that persist after clearing the brush roll could mean a broken brush roll bearing or a foreign object jammed in the motor fan. This requires professional disassembly.
- Warranty Considerations: If your Shark is still under warranty (typically 5-7 years for the motor), contact Shark Customer Support first. They can provide model-specific advice and, if needed, authorize warranty service. Do not attempt to open the main sealed motor housing, as this will void the warranty.
For issues beyond basic clog clearing, the safest and most cost-effective route is to call Shark’s support line. They can often diagnose over the phone and may ship you a replacement part (like a hose) if it’s a known defect. For older, out-of-warranty units with motor failure, the cost of professional repair may approach the price of a new vacuum, at which point replacement is the logical choice.
Conclusion: Your Shark’s Longevity is in Your Hands
Unclogging your Shark vacuum isn’t a daunting task; it’s a straightforward process of detective work and simple cleaning. By arming yourself with a coat hanger, a flashlight, and a systematic approach—starting from the floor head and working your way back to the motor—you can solve the vast majority of suction problems in under 15 minutes. The real secret, however, lies not in the unclogging, but in the prevention. A few seconds of post-use maintenance, a mindful eye on what you’re picking up, and regular filter care will keep your Shark vacuum performing at its legendary best for years. It’s a small investment of time that saves you from frustration, maintains your home’s cleanliness, and protects your appliance investment. So the next time your Shark seems to lose its bite, don’t panic. Roll up your sleeves, follow this guide, and you’ll have that powerful suction roaring back in no time.
Frequently Asked Questions
Is it safe to use a metal coat hanger to clean the hose?
Yes, but with caution. Use a smooth wire coat hanger, straightened and with any sharp ends bent over or covered with tape. Gently feed it through the hose to avoid puncturing the plastic. A plastic snake or flexible brush is a safer alternative for very narrow or delicate hoses.
How often should I clean my Shark vacuum’s filters?
The washable foam pre-motor filter should be rinsed with cool water every 1-3 months, depending on use, and air-dried for 24 hours. The post-motor paper filter should be tapped clean monthly and replaced every 6-12 months, or as indicated by the filter’s condition or your manual’s schedule.
My brush roll isn’t spinning even after I cleared all the hair. What now?
First, ensure the brush roll is properly re-seated in its housing and the housing cover is fully closed and locked. Many Shark models have a safety switch that stops the brush roll if the housing is ajar. If it still doesn’t spin, the clutch or belt (if your model has one) may be worn out, requiring a replacement part.
Will unclogging my vacuum void the warranty?
No. Clearing obvious clogs from the hose, wand, brush roll housing, and dust cup is considered user maintenance and does not void the warranty. However, opening the sealed main motor housing or attempting repairs on internal electrical components would void it. When in doubt, contact Shark Support first.
What’s the most common mistake people make when unclogging a Shark?
The most common mistake is not unplugging the vacuum first. This is a serious safety hazard. The second most common mistake is trying to unwind hair from the brush roll instead of cutting it, which tightens the knot and makes the problem worse. Always cut hair lengthwise.
Can I prevent hose clogs by using a different attachment?
Yes. The main suction hose is prone to clogs with larger debris. For picking up larger items like cereal or pet kibble, use the “upholstery” or “crevice” tool directly. These have wider mouths and shorter, straighter paths, reducing the chance of a jam before debris reaches the dust cup. For general floor cleaning, ensure the main hose is fully extended and not kinked.