Resetting your Shark Ion Robot RV750 is a powerful troubleshooting step for issues like Wi-Fi disconnection, charging errors, or unresponsive behavior. This guide details the exact soft reset (reboot) and hard reset (factory restore) procedures, explains when to use each, and provides critical post-reset steps to get your robot vacuum fully operational again. Always start with a soft reset before attempting a full factory reset, which erases all schedules and settings.
Has your trusty Shark Ion Robot RV750 suddenly stopped responding to commands? Is it refusing to connect to your Wi-Fi network, spinning in circles, or simply not charging in its dock? Before you panic or call customer support, there’s a powerful tool at your disposal that often resolves these very issues: a system reset. But what does “resetting” actually mean for your robotic vacuum, and more importantly, how do you do it correctly without causing more headaches? This comprehensive guide will walk you through everything you need to know about resetting your Shark Ion Robot RV750, from the gentle soft reboot to the nuclear factory reset option. We’ll break down exactly when to use each method, provide foolproof step-by-step instructions, and arm you with the essential knowledge to get your automated cleaning partner back on track.
Think of your RV750 as a small, mobile computer with wheels and brushes. Over time, just like your smartphone or laptop, it can accumulate temporary software glitches, memory cache issues, or communication hiccups with its charging dock or your home Wi-Fi network. A reset essentially tells the robot’s brain to start fresh. The key is using the right type of reset for the problem at hand. Using a sledgehammer (factory reset) to fix a minor glitch (like a lost Wi-Fi signal) is overkill and creates extra work for you, while using a light tap (soft reset) on a deeply corrupted software issue won’t solve the problem. Let’s demystify the process.
Key Takeaways
- Two Reset Types Exist: A soft reset (reboot) refreshes the system without deleting data, while a hard reset (factory restore) returns the RV750 to original settings, erasing all schedules and Wi-Fi credentials.
- Soft Reset First Rule: Always attempt the simple 10-second power cycle soft reset before a hard reset, as it resolves most temporary glitches safely.
- Hard Reset Consequences: A factory reset requires you to completely re-set up the robot, including reconnecting to Wi-Fi, re-mapping your home (if applicable), and reprogramming all cleaning schedules from scratch.
- Physical Reset Button Location: The hard reset button is a small, recessed pinhole on the underside of the robot, near the charging contacts, requiring a paperclip to press.
- Post-Reset Calibration is Key: After any reset, allow the robot to complete a full, uninterrupted Explore Run to rebuild its internal map and understand your home’s layout.
- Reset Won’t Fix Hardware: Resets address software and electronic communication faults. They will not fix physical problems like broken wheels, clogged brushes, or a dead battery.
- App Reconnection Required: Following a reset, the Shark Ion app will no longer recognize the robot. You must delete the old device from the app and go through the full “Add New Robot” pairing process again.
📑 Table of Contents
- Understanding the Two Types of Resets for Your Shark Ion RV750
- Step-by-Step: How to Perform a Soft Reset on Your Shark Ion Robot RV750
- Step-by-Step: How to Perform a Hard Reset (Factory Reset) on Your Shark Ion Robot RV750
- What to Do Immediately After a Reset: The Critical Post-Reset Setup
- Troubleshooting: What to Do If a Reset Doesn’t Fix the Problem
- Proactive Maintenance: Preventing the Need for Frequent Resets
- Conclusion: Reset with Confidence
Understanding the Two Types of Resets for Your Shark Ion RV750
Shark designed the Ion Robot series with two primary reset functions, each serving a distinct purpose. Understanding the difference is the first step to effective troubleshooting.
The Soft Reset (System Reboot)
A soft reset is the equivalent of restarting your computer. It’s a simple power cycle that clears the robot’s volatile memory (RAM), halts all running processes, and reboots the core operating system. This process does not delete your saved maps, cleaning schedules, or Wi-Fi settings. It’s the first and safest line of defense for common issues like:
- The robot becomes unresponsive to button presses or app commands.
- Wi-Fi connectivity drops and won’t automatically reconnect.
- The robot is stuck in an error loop or displays a persistent error code on its LED display.
- Charging seems intermittent or the robot isn’t recognized by the dock.
Performing a soft reset is incredibly quick and should be your go-to initial step for any unexplained behavioral change.
The Hard Reset (Factory Data Reset)
A hard reset, also called a factory reset or factory restore, is a more drastic measure. This process wipes the robot’s internal storage, returning it to the exact state it was in when you first unboxed it. All user data is permanently erased: this includes your home’s floor plan map (if your RV750 model has mapping), all scheduled cleaning times, preferred cleaning modes, and the stored Wi-Fi network credentials. After a hard reset, your RV750 will need to be set up as a completely new device from the very beginning.
You should reserve a hard reset for more serious, persistent problems that a soft reset failed to fix, such as:
- Chronic, unsolvable Wi-Fi pairing failures.
- The robot is “bricked” or completely frozen and won’t power on/off normally.
- You are planning to sell or gift the robot and need to remove all personal data.
- After a major firmware update that went wrong, causing consistent malfunctions.
Because of the significant setup work involved afterward, a hard reset is always a last-resort troubleshooting step.
Step-by-Step: How to Perform a Soft Reset on Your Shark Ion Robot RV750
The soft reset procedure is beautifully simple and takes mere seconds. You can perform it whether the robot is on its dock or sitting on the floor.
Visual guide about How to Reset Shark Ion Robot Rv750
Image source: images-na.ssl-images-amazon.com
Method 1: The Power Button Method (Most Common)
This is the standard method recommended by Shark and works for virtually all RV750 units.
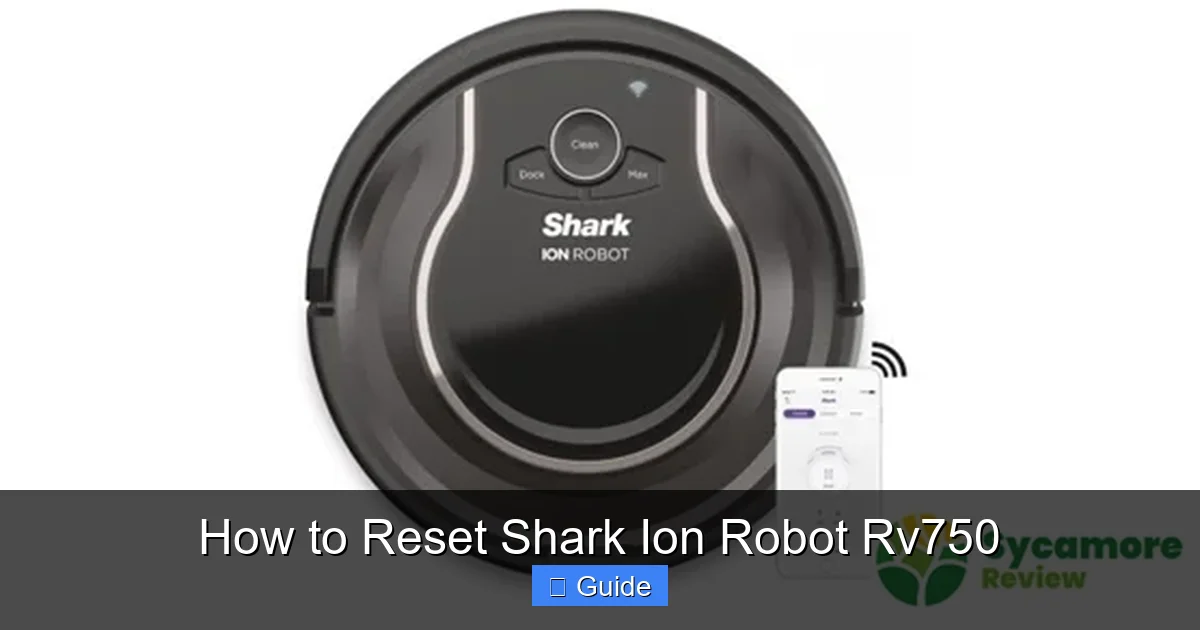
- Locate the Power Button: Find the circular power button on the top surface of your robot, near the center or the Shark logo.
- Press and Hold: Press and hold this power button down for approximately 10 seconds. You will see the LED indicator lights on the robot begin to pulse or flash in a sequence, and you may hear a startup chime.
- Release and Wait: After 10 seconds, release the button. The robot will power off completely. Wait about 5-10 seconds.
- Power On: Press the power button once briefly to turn the robot back on. The LED lights will illuminate, and the robot will initiate its startup sequence, often performing a brief self-check and possibly a small rotation to orient itself.
That’s it. The soft reset is complete. If your issue was a minor software hiccup, the robot should now be responsive. Test it by trying to start a cleaning cycle via the button or the app.
Method 2: The Dock Power Cycle (If Unresponsive)
If the robot is completely frozen and the power button does nothing, you can sometimes force a reboot by manipulating its power source.
- Remove from Dock: Gently lift the robot off its charging dock.
- Remove the Battery (if possible): The RV750 has a user-accessible battery compartment on the underside. Turn the robot over, locate the battery cover (usually held by a screw or clip), and remove it. Carefully disconnect the battery connector and lift the battery out. Note: If you are uncomfortable with this, skip to the next step.
- Wait and Reconnect: Let the robot sit without power for 60 seconds. This drains any residual current from the capacitors. Reconnect the battery, replace the cover, and place the robot back on its dock. It should now power on and begin charging, effectively performing a cold boot.
This method is more invasive but can break a deep freeze when the normal power button sequence is ignored by the frozen system.
Step-by-Step: How to Perform a Hard Reset (Factory Reset) on Your Shark Ion Robot RV750
Because a hard reset is permanent and erases all your custom settings, Shark hides the reset button to prevent accidental presses. You will need a small, thin object like a paperclip or a SIM ejection tool.
Visual guide about How to Reset Shark Ion Robot Rv750
Image source: thekinglive.com
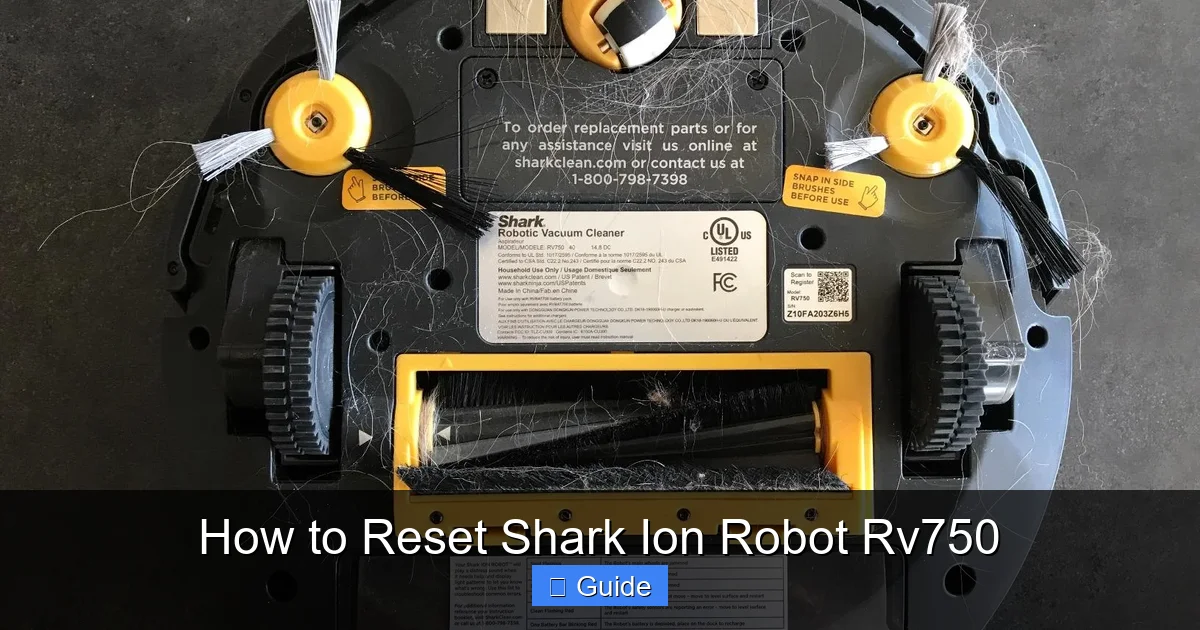
Locating the Reset Button
Turn your Shark Ion Robot RV750 upside down. Look closely at the underside, specifically around the area of the charging metal contact pins. You are looking for a tiny, circular hole labeled “RESET” or simply “R”. It is often situated between the two charging contacts or just to the side of them. This is a pinhole-style button that requires a tool to depress.
The Factory Reset Procedure
- Power On: Ensure your robot is powered ON. The LED lights should be illuminated.
- Insert the Tool: Straighten one end of a paperclip. Gently but firmly insert the tip into the reset pinhole until you feel a slight click as you press the internal button.
- Hold and Observe: Continue holding the button down for about 5-8 seconds. You will see all the LED indicator lights on the robot begin to flash or pulse in unison, often in a rotating pattern. This signals the reset process has begun.
- Release and Wait: Release the paperclip. The robot will continue flashing for a moment and then will likely power off completely. Wait 30 seconds.
- Power On: Press the main power button to turn the robot back on. It will boot up with a completely fresh system. The LED behavior will likely be different from your usual startup—expect a series of test flashes and sounds as it initializes its factory-default software.
Critical Reminder: At this point, your RV750 is a “new” robot. It has no memory of your home, your Wi-Fi network, or your cleaning schedule. The next step is not to test cleaning but to go directly to the Shark Ion app to begin the re-pairing process.
What to Do Immediately After a Reset: The Critical Post-Reset Setup
Resetting is only half the battle. What you do immediately afterward determines whether your robot will function optimally or continue to cause frustration. The steps differ slightly based on the type of reset you performed.
Visual guide about How to Reset Shark Ion Robot Rv750
Image source: images-na.ssl-images-amazon.com
After a Soft Reset
Since your settings are intact, the robot should automatically reconnect to your Wi-Fi network within a minute or two if it’s within range of your router. Open the Shark Ion app. You should see your robot listed as “Online” or “Ready.” If it shows as “Offline,” try these steps:
- Ensure the robot is on its charging dock and the dock is powered.
- Check that your home Wi-Fi network is functioning on the 2.4GHz band (the RV750 does not support 5GHz).
- Force close and reopen the Shark Ion app.
- If disconnection persists, you may need to manually re-pair the robot to Wi-Fi, which is found in the app’s device settings.
Once connected, run a test cleaning cycle to confirm normal operation.
After a Hard Reset (The Full Re-Onboarding Process)
This is a multi-step process you must follow meticulously.
- Delete the Old Device from Your App: Open the Shark Ion app. Go to your account/device list. You will see your old RV750 listed, but it will show as “Offline.” Tap on it and select “Remove Device” or “Delete.” Confirm the deletion. This clears the old, invalid pairing from Shark’s servers.
- Start Fresh: On the app’s main screen, tap the “+” icon or “Add Robot” button.
- Put Robot in Pairing Mode: On your physically reset RV750, press and hold the Wi-Fi button (usually a small button with a Wi-Fi symbol, often near the power button or on the side) until you hear a chime and see the Wi-Fi LED start to blink rapidly (usually blue or white). This indicates the robot is broadcasting its own temporary Wi-Fi network.
- Connect Your Phone: On your smartphone, go to your Wi-Fi settings. You should see a new network name that starts with “Shark” or “Ion” followed by a series of numbers/letters (e.g., Shark-XXXX). Connect your phone to this robot’s network.
- Complete App Setup: Return to the Shark Ion app. It should now detect that you are connected to the robot’s network. Follow the on-screen prompts:
- Select your home’s actual Wi-Fi network from the list.
- Enter your home Wi-Fi password.
- Name your robot (e.g., “Living Room Vacuum”).
- Grant any necessary location permissions (for mapping features).
- Wait for Connection: The app will now send your Wi-Fi credentials to the robot. This can take 1-2 minutes. The robot’s Wi-Fi LED will stop blinking and become solid once successfully connected to your home network. The app will confirm the setup is complete.
Recreating Your Cleaning Routine
With the robot now connected, you have a blank slate:
- Run an Explore Map: Before setting schedules, initiate a “Explore” or “Map” cleaning cycle from the app. Let the robot run uninterrupted until it docks itself. This allows it to create a new map of your home’s layout (if your model supports mapping). Do not interrupt this process.
- Set Up No-Go Zones & Virtual Walls: Once the map is generated, use the app to define no-go zones (like pet bowls, charger areas) and set up virtual wall barriers if you have the accessory.
- Recreate Schedules: Go to the scheduling section of the app. Re-add all your preferred cleaning days, times, and specific rooms/zones you want cleaned.
- Re-select Preferences: Re-choose your default cleaning mode (Auto, Edge, Spot), suction power, and any other preferences like water tank settings (if you have the mop module).
- Check Your Network: Confirm your router is broadcasting a 2.4GHz network. The RV750 is incompatible with 5GHz-only networks. Some dual-band routers have the 2.4GHz band disabled or set to “smart connect” that can cause issues. Temporarily disable 5GHz or create a separate 2.4GHz SSID for testing.
- Check Signal Strength: Is the charging dock placed in a basement or far from the router? Weak signal can cause instability. Try moving the dock to a more central location temporarily.
- Router Settings: Ensure MAC address filtering is off, and that your router isn’t set to “AP isolation” or “client isolation.” These security features prevent devices from talking to each other.
- Firmware Update: Once connected, check for a firmware update in the app. An outdated firmware can have bugs that cause connectivity problems.
- Clean the Contacts: This is the #1 cause. Turn the robot and dock upside down. Use a dry microfiber cloth to thoroughly clean the metal charging pins on both the robot and the dock. Remove any dust, hair, or oxidation. A cotton swab lightly dabbed in isopropyl alcohol can help, then let dry completely.
- Check Dock Alignment: Ensure the dock is placed against a wall, on a level surface, with at least 1.5 feet of clearance on either side and 3 feet in front. Nothing should be on top of the dock.
- Inspect the Robot’s Battery: If the robot is several years old, the lithium-ion battery may be at the end of its life (typical lifespan is 1-2 years with regular use). A failing battery won’t hold a charge and may cause the robot to return to the dock prematurely but not actually charge. A hard reset won’t fix this.
- Clean the Sensors and Wheels: Use a dry, soft brush (like a clean paintbrush) to gently clean the drop sensors (the black windows on the underside) and the cliff sensors (the small circular sensors on the bottom edge). Dirty sensors can cause navigation failures. Also, remove any hair or debris wrapped around the wheels and axles.
- Check the Brushes: A tangled main brush or full side brush can create drag and confuse the robot’s navigation. Clean them thoroughly.
- Run a Bare Floor Test: Take the robot to a small, clear, hard-floored room with no rugs, furniture, or obstacles. Run a cleaning cycle. If it works perfectly here but not in your main home, the issue is likely environmental clutter, reflective surfaces (like dark mirrors), or very dark/black carpets that the cliff sensors misread as a drop.
- After Every 3-4 Runs: Empty the dustbin. Tap it out over a trash can and use the cleaning tool to scrape out any fine dust from the filter mesh.
- Weekly: Remove the main brush and clear any hair or fibers from the bristles and rubber flaps. Check the side brush. Wipe the charging contacts on both the robot and dock with a dry cloth.
- Monthly: Wash the filter with cool water (let it dry for 24 hours before reinserting). Clean all sensors with a dry microfiber cloth. Inspect wheels for embedded debris.
- Place your router and the charging dock in reasonable proximity if possible. The robot’s Wi-Fi antenna is not as powerful as a laptop’s.
- If you have a large home, consider a Wi-Fi extender or mesh system to ensure strong, consistent coverage where the dock is located.
- Periodically reboot your home router. A router with stale connections or memory issues can cause device drop-offs.
- Against a wall, on a hard, level surface (not carpet).
- Away from direct sunlight, heaters, or vents.
- With clear approach paths—at least 3 feet of open space in front and 1.5 feet on each side.
- In an area with a strong Wi-Fi signal.
Completing this post-reset ritual ensures your RV750 is not just connected, but also optimized for your specific home environment.
Troubleshooting: What to Do If a Reset Doesn’t Fix the Problem
Sometimes, a reset—even a factory one—doesn’t solve the underlying issue. This indicates a problem that lies deeper than software. Here is your systematic troubleshooting path after resetting.
Problem: The Robot Still Won’t Connect to Wi-Fi
After a reset and full re-pairing, if the robot consistently fails to connect or drops the connection immediately:
Problem: The Robot Still Won’t Charge or Dock Properly
If after a reset the robot ignores its dock or doesn’t charge:
Problem: The Robot Acts Erratically (Spinning, Stuck, Bumping)
If cleaning behavior is still abnormal post-reset:
Proactive Maintenance: Preventing the Need for Frequent Resets
The best reset is the one you never have to do. Incorporate these simple habits into your routine to keep your RV750 running smoothly and minimize software and operational glitches.
Keep It Clean, Inside and Out
This is non-negotiable. A dirty robot is an unhappy robot.
Maintain Your Wi-Fi Environment
Manage Firmware Updates
When the Shark Ion app notifies you of a firmware update, install it promptly. These updates often contain bug fixes for known connectivity or navigation issues. Ensure the robot is on its dock with a good charge before starting the update, and do not interrupt the process.
Optimal Dock Placement
The docking station is the robot’s home base and lifeline. Place it:
Conclusion: Reset with Confidence
Your Shark Ion Robot RV750 is a marvel of modern cleaning technology, but like any sophisticated device, it occasionally needs a digital “time-out.” By understanding the clear distinction between a soft reboot and a hard factory reset, you are equipped to handle the vast majority of performance hiccups yourself. Always remember the golden rule: start with the gentle soft reset. It’s fast, safe, and solves most common issues. Only escalate to the factory reset when absolutely necessary, and be prepared to spend 15-20 minutes meticulously re-pairing the robot and rebuilding your cleaning schedules. Combine this knowledge with a commitment to regular physical maintenance—cleaning brushes, emptying bins, and wiping contacts—and you’ll extend the effective life of your RV750 significantly. A well-maintained robot with a stable connection is a joy to own, silently and efficiently keeping your floors spotless with minimal intervention. Now, go forth and reset with confidence!
Frequently Asked Questions
What’s the difference between a reset and just turning my Shark RV750 off and on?
Simply turning the robot off and on using the power button is actually a form of soft reset. The key difference is that a proper soft reset involves holding the button for 10 seconds to ensure a complete power cycle that clears the system memory, whereas a quick tap may not fully reboot all processes if the system is frozen.
My robot was working fine, but now it won’t connect to Wi-Fi. Should I immediately do a factory reset?
No. First, try a soft reset (hold power button for 10 seconds). Then, check your router, ensure you’re on a 2.4GHz network, and try re-pairing the robot via the app without resetting. A factory reset is a last resort for Wi-Fi issues, as it requires full re-setup.
Will a factory reset fix a battery that won’t hold a charge?
No. A factory reset only addresses software and electronic communication issues. A battery that drains quickly or won’t charge is a hardware failure. Resets cannot restore lithium-ion battery cells. If your robot is 2+ years old with heavy use, battery replacement may be necessary.
After a hard reset, my robot won’t pair with the app. What am I doing wrong?
The most common mistake is not putting the robot into pairing mode. After the reset, you must press and hold the dedicated Wi-Fi button (not the power button) until you hear a chime and the Wi-Fi LED blinks rapidly. Then, connect your phone to the robot’s temporary Wi-Fi network (Shark-XXXX) before proceeding in the app.
I did a factory reset and lost my cleaning map/schedules. Is there any way to get them back?
Unfortunately, no. A factory reset permanently erases all user data, including maps and schedules, from the robot’s internal memory. You must recreate them by running a new Explore Map cycle and manually setting up your schedules again in the app. There is no cloud backup for this data.
Will performing a reset void my Shark Ion Robot RV750’s warranty?
No. Both soft and hard resets are standard, user-level troubleshooting procedures explicitly described in the Shark user manual. Performing them will not void your manufacturer’s warranty. Warranty concerns arise only from unauthorized physical modifications or damage.