Replacing the lower duct hose on your Shark Rocket vacuum is a straightforward DIY repair that restores lost suction and prevents motor damage. With basic screwdrivers and a genuine replacement hose, most users can finish the job in 30-60 minutes. This guide provides detailed, model-agnostic steps, troubleshooting tips, and maintenance advice to ensure a successful fix.
Let’s be honest: there’s nothing more frustrating than pulling out your Shark Rocket vacuum, ready to tackle a mess, only to find it’s lost its legendary suction power. You might hear a high-pitched whistle, notice it’s struggling on bare floors, or see that it’s pushing dirt around instead of picking it up. Before you panic and start shopping for a new vacuum, take a deep breath. The culprit is often a single, surprisingly vulnerable component: the lower duct hose. This flexible tube is the critical link between your vacuum’s powerful motor and the cleaning head. When it cracks, tears, or detaches, your vacuum’s performance nosedives. The fantastic news? Replacing the Shark Rocket lower duct hose is a classic do-it-yourself repair that saves you money, avoids a service center trip, and gives you a real sense of accomplishment. This guide will walk you through every single step, from diagnosis to final test, in plain, friendly language. No prior repair experience needed—just a willingness to get your hands a little dusty.
Key Takeaways
- Recognize the symptoms: A cracked, torn, or disconnected lower duct hose causes severe suction loss, loud whistling noises, and can overwork the motor.
- Always use genuine Shark parts: Aftermarket hoses often have incorrect dimensions or flimsy connectors, leading to leaks and poor performance.
- Document before you disassemble: Take clear photos of hose routing and clamp positions to avoid reassembly errors.
- Clean the pathway: Remove all debris and hair from the hose channel and connectors before installing the new hose to prevent clogs.
- Test before full reassembly: Run the vacuum briefly with the new hose connected but the outer panels off to check for air leaks.
- Inspect monthly: Regularly check the hose for cracks, especially if you have pets, thick carpets, or frequently vacuum large debris.
- Warranty may be affected: Using non-OEM parts or improper installation can void your Shark warranty—check your terms first.
📑 Table of Contents
- Understanding the Shark Rocket Lower Duct Hose: The Unsung Hero of Suction
- Gathering Your Tools and the Correct Replacement Part
- Step-by-Step: Replacing the Lower Duct Hose on Your Shark Rocket
- Troubleshooting: What If My Vacuum Still Isn’t Working Right?
- Maintenance and Prevention: Keeping Your New Hose Healthy
- Conclusion: Your DIY Victory and a Revitalized Vacuum
Understanding the Shark Rocket Lower Duct Hose: The Unsung Hero of Suction
Before we grab a screwdriver, let’s get on the same page about what we’re fixing. The lower duct hose isn’t just a random tube; it’s a precision-engineered part of your vacuum’s airflow system.
What Is the Lower Duct Hose, Exactly?
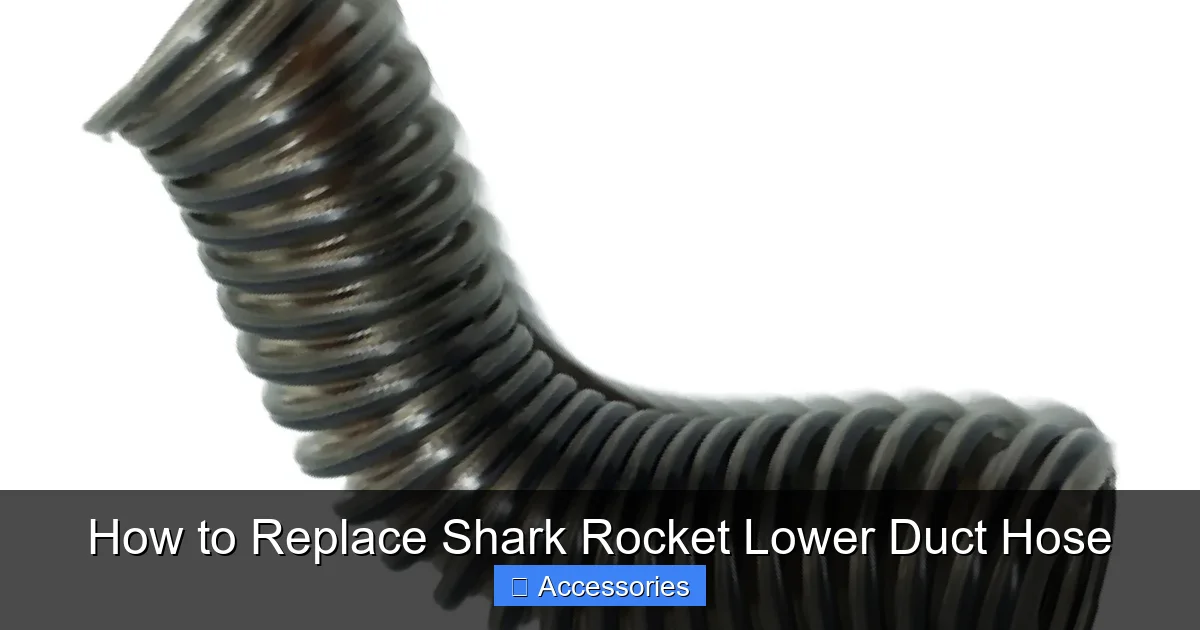
In your Shark Rocket (which includes models like the HV322, HV321, and earlier Rocket variants), the lower duct hose is the reinforced, flexible connector that runs from the main vacuum body—specifically from the motor/fan housing—down to the brush roll housing or cleaning head. It’s typically located on the underside of the vacuum, often protected by a plastic cover or shield. Its job is to create an airtight seal that channels a massive volume of air and debris from the floor, through the brush roll, and up into the motor to be filtered and exhausted. Think of it as the main artery in your vacuum’s circulatory system. If it’s compromised, everything else suffers.
Why Does This Hose Fail? The Usual Suspects
This hose takes a beating. It’s constantly flexing as you pivot the vacuum, getting tugged when the vacuum is pulled by the wand, and is exposed to heat from the motor and abrasive debris. Here are the top reasons it gives out:
- Age and Material Fatigue: Over time (usually 2-5 years with regular use), the rubber or plastic compound loses its elasticity and develops hairline cracks, especially at the ribbed sections where it bends the most.
- Physical Trauma: This is the big one. Yanking the vacuum by the wand instead of the handle, running over the hose with the vacuum’s own wheels, or catching it on furniture legs can cause immediate splits or disconnect it from its clamps.
- Heat Degradation: The motor generates significant heat. If the hose is pressed against the motor housing or a hot exhaust port during use or storage, it can soften, warp, and eventually melt or crack.
- Debris Abrasion: Sharp objects like pine needles, small gravel, or even hardened pet hair can act like sandpaper from the inside, wearing through the hose wall.
- Chemical Damage: Using harsh cleaning sprays inside the hose or storing it near solvents can break down the material.
How to Identify a Failing Lower Duct Hose (The Diagnostic Checklist)
Don’t guess. Perform this quick check to confirm the hose is the problem:
- Listen: A distinct whistling, screaming, or loud roaring sound (much louder than normal) is the classic sign of an air leak. The air is being sucked through a crack or gap at high speed.
- Feel: Place your hand around the hose’s mid-section and lower connectors while the vacuum is running. Do you feel strong pulsing suction? Or is it weak and fluttery? Also, feel for air blowing *out* of a crack—that’s a clear leak.
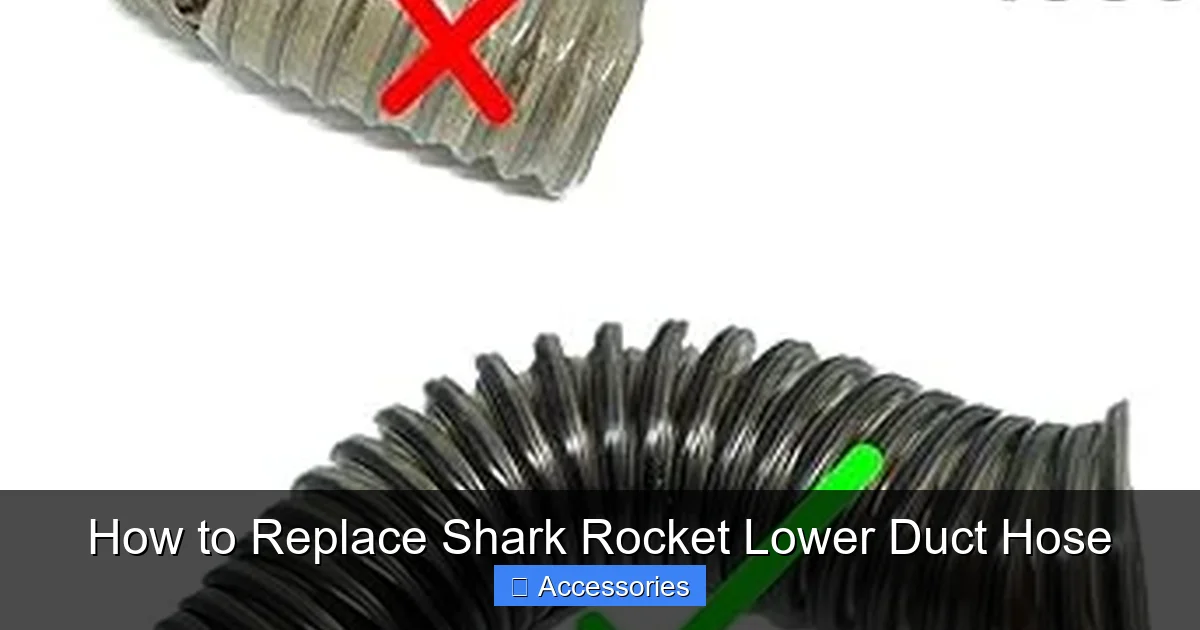
- Look: Visually inspect the entire length of the hose. Look for:
- Visible cracks, splits, or holes.
- Areas that are brittle, cracked, or discolored (often white or chalky).
- Hose that is permanently kinked or collapsed.
- Loose or missing clamps at either end.
- Connectors that are cracked or don’t snap securely into place.
- Test: A simple tape test. With the vacuum off, tightly seal the end of the hose that connects to the motor with your hand or a piece of tape. Turn the vacuum on. If suction at the floor head seems to improve dramatically, you’ve isolated the leak to that hose path.
Gathering Your Tools and the Correct Replacement Part
Preparation is 90% of a smooth repair. Rushing to the store mid-job is no fun. Let’s get everything lined up.
Visual guide about How to Replace Shark Rocket Lower Duct Hose
Image source: i5.walmartimages.com
The Essential Toolkit (You Probably Have This)
You don’t need a garage full of tools. For this job, a basic household toolkit will suffice:
- Phillips Head Screwdriver (#1 or #2): This is your primary tool for removing the plastic shield/cover that protects the hose. Some models might also use Torx bits (T10-T15), so having a small Torx set is wise if you have a newer Shark model.
- Flat Head Screwdriver (small): Useful for prying open stubborn plastic clips or gently lifting connectors. Wrap the tip with tape to avoid scratching.
- Needle-Nose Pliers: Perfect for gripping and sliding small plastic clamps or retaining rings off the hose connectors.
- Flashlight or Headlamp: The hose compartment is often dark. A dedicated light source is crucial.
- Gloves: Optional but recommended. They protect your hands from sharp plastic edges and keep them clean.
- Small Container or Magnetic Tray: To catch the tiny screws and clips you’ll remove. Losing one in the vacuum’s innards is a real headache.
Sourcing the Correct Replacement Hose: Why “Genuine Shark” Matters
This is the most critical step. The Shark Rocket lower duct hose is not a generic part. It has specific lengths, inner/outer diameters, and proprietary connector shapes at each end. Using an incorrect or cheap aftermarket hose is the #1 reason for failed DIY replacements.
How to Find the Exact Part:
- Find Your Model Number: Look for the silver sticker on the back or underside of your Shark Rocket vacuum. It will say something like “Shark Rocket HV322” or “Shark IZ682.” The exact alphanumeric code is vital.
- Use Shark’s Official Website: Navigate to the “Parts & Accessories” or “Replacement Parts” section. Enter your model number. You should see an exploded parts diagram. The lower duct hose is usually listed as “Lower Hose Assembly,” “Duct Hose,” or “Suction Hose.” The official part number often starts with “XHF” or “XH” (e.g., XHF01, XHF02).
- Authorized Retailers: Purchase from Shark’s website, Amazon’s “Shark Official Store,” or big-box stores like Target/Walmart that carry genuine Shark parts. Be wary of third-party sellers on eBay or Amazon listing “fits Shark Rocket” hoses at half the price—they are almost always incorrect.
- What to Look For: The genuine part will have the Shark logo molded into the plastic connectors. The hose material will be thick, ribbed, and feel substantial. The connectors will have precise, tight-fitting locking tabs.
Preparing Your Workspace: Safety and Organization
Find a clean, well-lit area with a soft blanket or large towel to lay the vacuum on. This protects your floors and prevents the vacuum from rolling. Have your tools, the new hose, and your phone (for photos) within arm’s reach. Most importantly, ensure the vacuum is completely unplugged from the wall outlet. This isn’t just a suggestion; it’s a safety must to prevent accidental startup.
Step-by-Step: Replacing the Lower Duct Hose on Your Shark Rocket
Now for the main event. While exact screw locations vary slightly by model year (HV300 series vs. IZ series), the core process is universal. We’ll use a common HV322 as our reference. Always refer to your model’s specific parts diagram if possible.
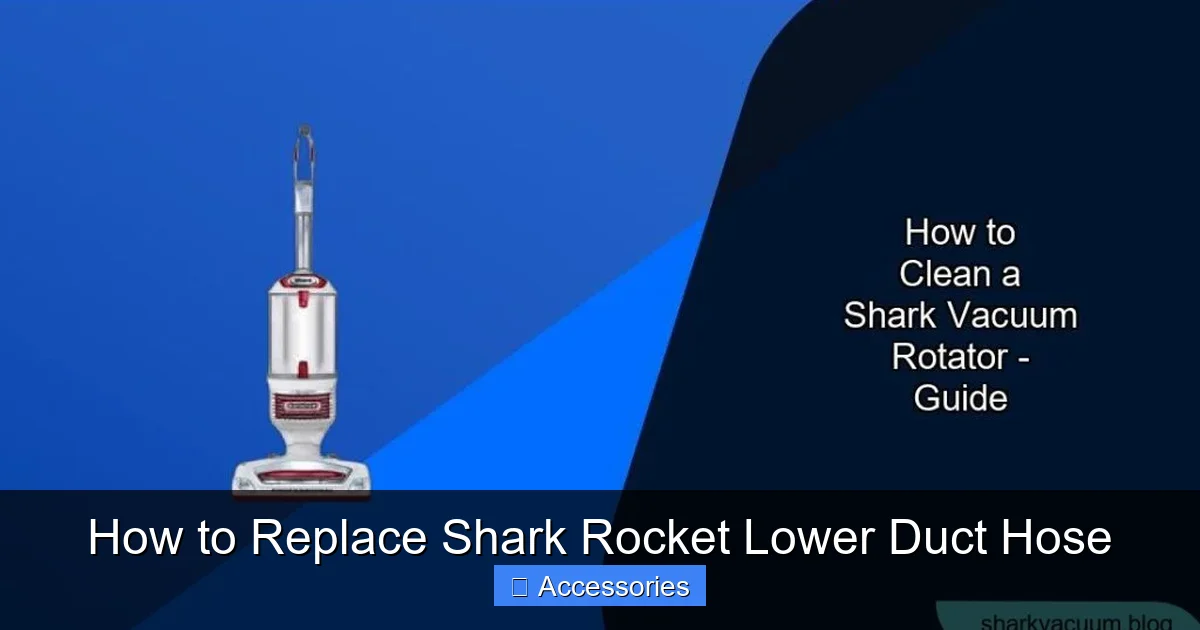
Visual guide about How to Replace Shark Rocket Lower Duct Hose
Image source: sharkvacuum.blog
Step 1: Accessing the Lower Duct Hose Compartment
The hose is hidden under a protective plastic shield on the underside of the vacuum.
- Flip the vacuum over. Place it on your prepared towel, brush roll side up.
- Locate the large, usually gray or black, plastic cover. It’s the biggest panel on the bottom, covering the brush roll and the hose entrance. It’s held in place by multiple screws and often several plastic snap clips around the perimeter.
- Remove all screws. Using your Phillips screwdriver, unscrew every screw you see. Keep them in your container. Note: Some screws may have washers; keep those with their matching screw.
- Release the plastic clips. Gently work your flathead screwdriver (or even a plastic pry tool from a phone repair kit) into the seam between the cover and the vacuum body. Gently pry upwards to release the snap clips. Work your way around the edge. Listen for the *click* as each clip releases. Be patient—forcing it can break the plastic.
- Remove the cover. Once all screws and clips are free, lift the cover straight off. You’ll now see the brush roll, the motor fan, and the lower duct hose connecting them.
Step 2: Removing the Old, Faulty Hose
This is the delicate part. The hose connectors are plastic and can become brittle.
- Locate both ends of the hose. One end connects to the metal motor/fan housing (upper connection). The other connects to the plastic brush roll housing (lower connection).
- Release the upper connector: This is usually the trickier one. It often has a large plastic ring or clamp with tabs. Use your needle-nose pliers to squeeze the tabs inward (or sometimes you twist and pull). Gently pull the hose off the motor port. It might be stuck due to age or heat. Twist slightly as you pull. Do NOT use excessive force that could break the plastic port on the motor housing.
- Release the lower connector: This connection to the brush roll housing is often simpler. It may have a single large plastic clip you press down, or a twist-lock mechanism. Depress the clip or twist counter-clockwise while pulling the hose off.
- Free the hose. Once both ends are detached, carefully pull the old hose out. Note its exact routing. Does it bend sharply? Is it tucked under a wire tie? Take a photo now if you haven’t already.
- Inspect the connectors. Look at the ports on the motor and brush roll housings. Are they clean? Remove any built-up gunk, hair, or old rubber gasket debris with a dry cloth or cotton swab. This ensures a perfect seal with the new hose.
Step 3: Installing the New Genuine Shark Hose
Time for the new part. Handle it with care—don’t kink it sharply.
- Compare the old and new hoses. Ensure the new hose is identical in length and has the same connector shapes at both ends. The upper connector (to motor) is usually larger and more robust.
- Attach the upper end first. Align the new hose’s upper connector with the motor housing port. You should feel it seat fully with a firm push. You should hear/feel a definite click or snap as the locking tabs engage. Give it a gentle tug to confirm it’s locked. Do not skip this—a loose upper connection causes the worst whistling.
- Route the hose correctly. Mimic the path of the old hose. It should have a smooth, gradual bend, not a sharp kink. Often, it tucks neatly into a channel or alongside a wiring harness. Ensure it isn’t pinched between the vacuum body and the brush roll housing.
- Attach the lower end. Align the hose’s lower connector with the brush roll housing port. Push it on firmly until it clicks or locks into place. Again, give it a gentle tug to verify security. Some models have a small plastic “fin” or tab on the hose connector that must align with a slot on the housing—ensure it’s properly seated.
Step 4: The Critical Test Before Reassembly
Do NOT put the bottom cover back on yet! This is your chance to catch a mistake.
- Plug the vacuum in and stand it upright. Do not place it on the floor yet.
- Turn it on. Press the power button. You should hear the familiar, strong whoosh of air. There should be no whistling, screaming, or sputtering sounds.
- Check for leaks. While it’s running, carefully (keep hair and clothing away!) feel around both connection points. Do you feel air escaping? Listen closely at each joint. A tiny leak will sound like a faint hiss.
- If there’s a leak: Turn the vacuum off, unplug it, and re-seat the connector. Sometimes the hose just needs to be pushed in 1/8th of an inch further until it locks completely.
- If the sound is good and strong: You’re ready for the final step.
Step 5: Reassembling the Vacuum
You’re almost done.
- Position the bottom cover. Align it carefully over the brush roll and hose. Ensure the hose isn’t pinched under the edge of the cover.
- Reinsert all screws. Start all screws loosely first to align the cover, then tighten them in a star pattern (like tightening a car wheel) to ensure even pressure. Don’t overtighten—plastic can crack. Snug is sufficient.
- Re-engage all plastic clips. Press firmly around the perimeter until you hear all the clips snap into place.
- Final check: Give the cover a gentle wiggle. It should be secure with no gaps.
Troubleshooting: What If My Vacuum Still Isn’t Working Right?
So you followed all the steps, but the suction is still weak or the noise persists. Don’t despair. Here’s your diagnostic path.
Visual guide about How to Replace Shark Rocket Lower Duct Hose
Image source: m.media-amazon.com
Persistent Suction Loss After a Perfect Hose Install
The new hose is sealed, but performance is poor. The issue is likely elsewhere in the airflow path. Check these in order:
- The Upper Duct Hose: Your Shark Rocket has a second, smaller hose that runs from the wand/handle assembly to the main motor. This one is also prone to cracks. Detach it (usually a simple clip at the motor end) and inspect it thoroughly. Blockages here are common.
- The Filters: A clogged pre-motor foam filter or post-motor HEPA filter will strangle airflow. Remove both and inspect. If they are gray and covered in fine dust, they need a wash (foam) or replacement (HEPA). A clogged filter can mimic a hose leak.
- The Brush Roll Housing: Is the brush roll itself jammed with hair? A frozen brush roll creates immense drag. Remove the brush roll (usually by pressing two tabs) and clean all hair and debris from the bearings and housing.
- The Wand and Handle: Disconnect the wand from the main body. Look down into the handle’s suction port. Is there a toy, sock, or compacted debris blocking it?
Unusual Noises or Vibrations After Replacement
A new hose shouldn’t cause new sounds. If you hear rattling, grinding, or a deep vibration:
- Hose Interference: Is the new hose touching the motor housing or another component while the vacuum runs? It can vibrate against the plastic. Gently reposition it so it has a tiny bit of clearance.
- Loose Internal Component: Something else may have been jostled during the repair. Re-check that all internal wiring is secured and not touching the fan. A loose wire can slap against the fan blades.
- Debris in the Motor Fan: A small piece of the old hose or other debris could have fallen into the fan housing. This is rare but serious. You’d need to disassemble further to inspect the fan—consider professional help if you suspect this.
The New Hose Keeps Disconnecting
If the new hose pops off during use, the connector isn’t locked.
- User Error: Double-check that you pushed the connector on until it clicked. The locking mechanism needs to be fully engaged. Don’t just push it on halfway.
- Defective Connector: Extremely rarely, a new Shark part can have a broken locking tab. Visually inspect the connector on the new hose. Are all the little plastic wings or tabs present and springy? If one is missing or broken, the part may be defective—contact Shark support.
- Damaged Port: The plastic port on the vacuum body itself might be cracked or worn from the old hose. Inspect it closely. If it’s damaged, the repair becomes more complex and may require a new motor housing or brush roll housing, which is often not cost-effective.
Maintenance and Prevention: Keeping Your New Hose Healthy
You’ve invested the time to fix it. Let’s make that new hose last as long as possible.
Monthly Visual and Tactile Inspection
Once a month, during your regular filter cleaning, pull the vacuum out and do a quick 60-second hose check:
- Run your fingers along the entire length, feeling for soft spots, cracks, or areas that feel thinner than others.
- Flex the hose gently at its most bent point. Does it crackle or show stress marks?
- Look at the connectors. Are the locking tabs intact and springy?
- Check the area where the hose meets the main body. Is there any rubbing or abrasion from movement?
Smart Usage Habits to Avoid Trauma
Your daily habits have a huge impact.
- Never carry or pull the vacuum by the hose or wand alone. Always use the main handle on the vacuum body. The hose connectors are not designed to bear the vacuum’s full weight.
- Be mindful of thresholds and edges. When moving from carpet to hard floor, don’t let the hose get pinched in the door jamb or dragged over sharp metal threshold strips.
- Store it properly. Don’t store your Shark Rocket with the hose kinked sharply or under heavy objects. Store it in its normal, relaxed position.
- Clean the pathway. Before vacuuming a messy area (like after a renovation or gardening), do a quick sweep to remove large, sharp debris that could be sucked into the hose.
When to Consider Professional Help (And When Not To)
This repair is firmly in the DIY zone for most owners. However, seek professional help if:
- You discover the plastic port on the motor housing or brush roll housing is cracked or broken. This requires more advanced disassembly and potentially part replacement.
- You’re uncomfortable working with electronics or small plastic parts.
- The vacuum is still under warranty and you want to avoid any risk of voiding it (though a simple hose swap usually doesn’t, check your terms).
- After replacing the hose and all filters, suction is still poor. There could be an internal motor issue.
Conclusion: Your DIY Victory and a Revitalized Vacuum
Congratulations! If you’ve made it through this guide, you now possess the knowledge and confidence to tackle one of the most common—and frustrating—Shark Rocket failures. Replacing the lower duct hose isn’t just about fixing a part; it’s about restoring the core function of your vacuum. That powerful, confident suction you loved when you first unboxed it is now back. You’ve saved yourself the $80-$120 service fee and the inconvenience of being without your cleaning workhorse. More importantly, you’ve gained a deeper understanding of your appliance. You’re no longer just a user; you’re a caretaker. By performing this simple maintenance and adopting the protective habits we discussed, you can easily add 2-3 more years of peak performance to your Shark Rocket. So plug it in, hear that strong, whistle-free roar, and enjoy the perfectly clean floors you’ve earned. You’ve got this.
Frequently Asked Questions
How often should the lower duct hose be replaced on a Shark Rocket vacuum?
There’s no set schedule, as it depends on usage. With normal use (a few times per week), expect to replace it every 2-4 years. Inspect it monthly and replace it immediately at the first sign of cracks, tears, or loss of suction to prevent debris from entering the motor.
Can I use a generic or third-party lower duct hose to save money?
We strongly advise against it. Generic hoses rarely match the exact specifications of Shark’s OEM part. They often have incorrect diameters, poor-quality connectors that don’t lock securely, or thin walls that collapse under suction. This leads to persistent leaks, reduced performance, and you’ll likely be replacing it again soon—spending more in the long run.
What are the absolute essential tools needed for this replacement?
You only need two: a Phillips head screwdriver (size #1 or #2) and a small pair of needle-nose pliers. A flathead screwdriver is helpful for prying clips, and a flashlight makes the dark compartment visible, but the repair can be done with just the two primary tools.
How long should the entire replacement process take a first-time DIYer?
For someone following this guide carefully, budget 45-75 minutes. The actual removal and installation of the hose takes about 15 minutes. The majority of the time is spent carefully removing the bottom cover (releasing all clips) and then the critical diagnosis and test phase to ensure the repair is successful.
What are the definitive signs that the lower duct hose is damaged and needs replacement?
Look for these three clear indicators: 1) A loud, high-pitched whistling or screaming noise during operation, 2) A significant, sudden drop in suction power, especially on bare floors, and 3) Visible physical damage like cracks, splits, or areas where the hose has become brittle or collapsed. If you see any of these, replace the hose immediately.
Will replacing the lower duct hose myself void my Shark vacuum’s warranty?
Typically, no. Warranties cover defects in materials and workmanship. Replacing a wear-and-tear part like a hose with a genuine Shark component does not void coverage. However, if your vacuum is still under warranty and you cause damage during the repair (e.g., breaking a port), that specific damage would not be covered. When in doubt, contact Shark customer support before starting if your vacuum is under a limited warranty.