Replacing the power cord on your Shark vacuum is a common and manageable DIY repair that can save you significant money. The process involves unplugging the vacuum, removing the outer shell to access the internal connections, disconnecting the old cord, installing a new OEM replacement cord, and carefully reassembling the unit. Success depends on identifying your exact Shark model, using the correct replacement part, and following precise safety precautions to avoid electrical hazards.
Key Takeaways
- Safety First: Always unplug the vacuum and work in a dry area. Capacitors in some motors can hold a charge even when unplugged.
- Model Identification is Crucial: The exact Shark model number (e.g., NV350, NV356, AZ1002) determines the correct replacement cord and disassembly procedure. Locate it on the vacuum’s body or manual.
- Use Genuine Shark Replacement Cords: Aftermarket cords often have incorrect gauge wire or poor-quality plugs, posing fire risks and potentially voiding warranties. Purchase OEM parts from Shark or authorized dealers.
- Document Your Disassembly: Take photos at each step as you remove screws and disconnect wires. This invaluable reference prevents confusion during reassembly.
- Check for Secondary Damage: A frayed cord is often the symptom, not the cause. Inspect the strain relief, motor brushes, and internal wiring for heat damage or wear before final assembly.
- Test Before Full Reassembly: Temporarily reconnect the new cord to the motor and plug it in (away from debris) to ensure the vacuum powers on and the brush roll spins correctly.
- Know When to Seek Help: If you find extensive internal damage, burnt components, or are uncomfortable with electrical work, a certified appliance repair technician is the safer, more cost-effective choice.
📑 Table of Contents
- The Frustration of a Dead Vacuum and the Hope of a DIY Fix
- Understanding Your Shark: Model Identification and Cord Basics
- Essential Tools and Safety Precautions: Don’t Skip This Step
- Step-by-Step Disassembly: Gaining Access to the Motor Housing
- The Heart of the Repair: Disconnecting the Old Cord and Installing the New
- Reassembly, Testing, and Final Checks
- Troubleshooting: What If It Still Doesn’t Work?
- When to Consider Professional Repair or Replacement
- Conclusion: The Satisfaction of a Job Well Done
The Frustration of a Dead Vacuum and the Hope of a DIY Fix
You’re in the middle of cleaning, and your trusty Shark vacuum suddenly sputters and dies. You check the outlet—it’s fine. You wiggle the cord near the plug or along its length, and the vacuum flickers back to life. This classic symptom points to a damaged power cord. The outer plastic sheathing is cracked, the wires are exposed, or the plug itself is broken. Your immediate thought might be to buy a new vacuum, but that’s an expensive solution for a single, often-fixable component. Replacing the cord on a Shark vacuum is one of the most common and rewarding DIY appliance repairs you can undertake. It requires patience, the right part, and a methodical approach, but it’s well within the skill set of a careful homeowner. This guide will walk you through every step, from diagnosing the problem to safely completing the repair and getting your Shark back to its powerful, efficient self. We’ll cover different Shark series, from the popular Navigator and Rotator lines to the newer Vertex and IZ models, highlighting the key similarities and differences in their construction.
Understanding Your Shark: Model Identification and Cord Basics
Before you buy a single part or touch a screwdriver, you must know exactly which Shark vacuum you own. The model number is your golden ticket to finding the correct replacement cord and instructions. Shark models are typically labeled on a sticker on the back or bottom of the vacuum canister or upright body. Look for codes like NV350, NV356, NV752, AZ1002, IZ320, HV322, or SV780. The format can vary, but it’s usually a combination of letters and numbers. Write this down. You can then search online for “Shark [Your Model Number] replacement cord” or contact Shark customer support. Using an incorrect cord is not just an inconvenience; it can be a serious safety hazard due to mismatched wire gauge or plug design.
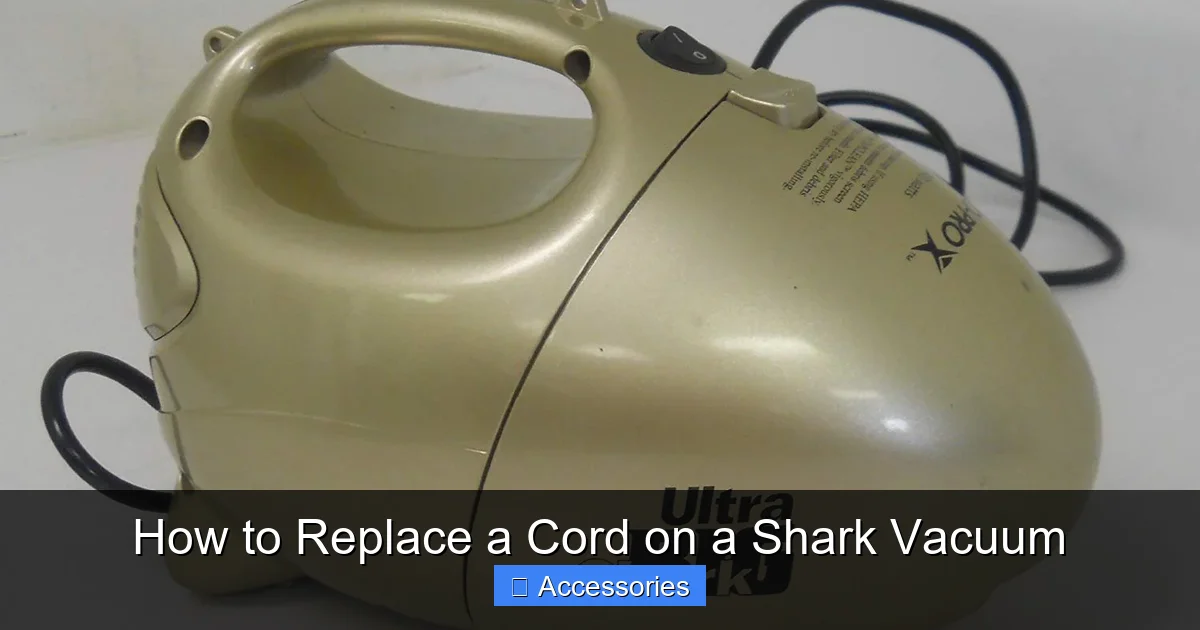
Visual guide about How to Replace a Cord on a Shark Vacuum
Image source: images-na.ssl-images-amazon.com
The Anatomy of a Shark Vacuum Cord
A Shark vacuum power cord is more than just a wire with a plug. It’s a specifically engineered component. The cord itself is typically a 16-gauge or 18-gauge 3-conductor wire (hot, neutral, ground) rated for the vacuum’s amperage draw, usually around 10-12 amps. One end terminates in a standard three-prong grounded plug for your wall outlet. The other end connects inside the vacuum’s motor housing to a terminal block or directly to the motor’s wiring harness. Crucially, the cord passes through a strain relief—a rubber or plastic grommet/clamp at the point where it enters the vacuum body. This component prevents tugging on the cord from pulling on the delicate internal solder joints or wire connections. When replacing the cord, you must ensure the new one includes the correct strain relief for your model or that you can reuse the old one if it’s in good condition.
Essential Tools and Safety Precautions: Don’t Skip This Step
Gathering your tools and understanding safety protocols is the non-negotiable foundation of this repair. Rushing this stage leads to stripped screws, damaged components, or, worst of all, electrical shock.
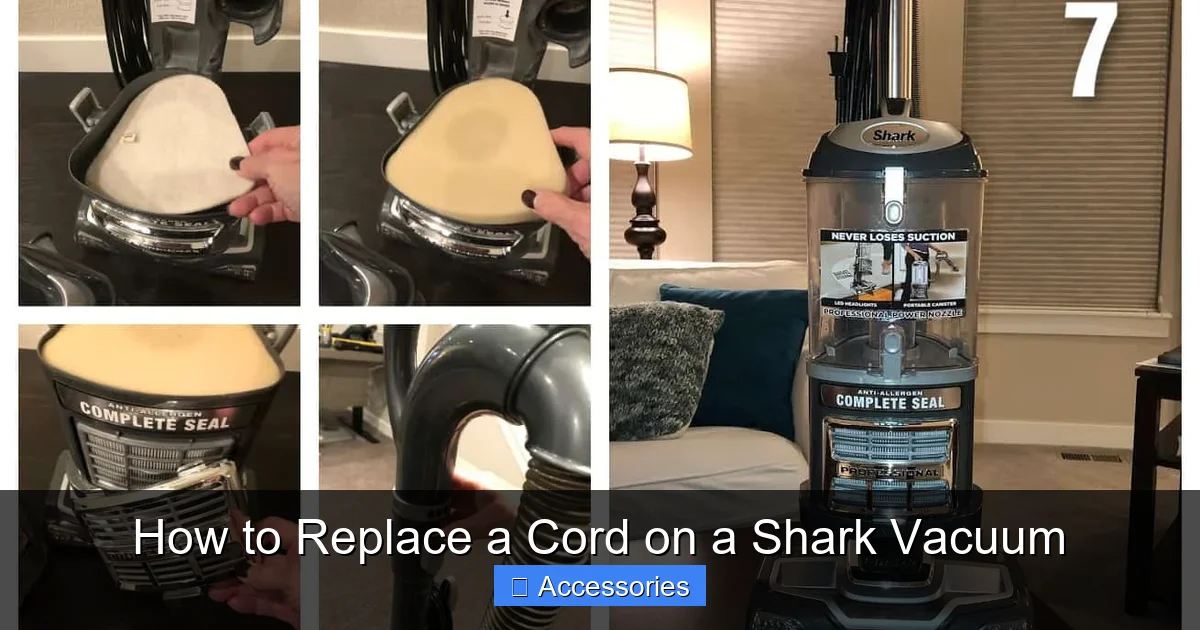
Visual guide about How to Replace a Cord on a Shark Vacuum
Image source: everydaycheapskate.com
Your Toolkit for the Job
- Screwdrivers: A set of precision Phillips-head and flat-head screwdrivers. Shark vacuums often use security Torx screws (T10, T15, T20). Having a Torx security bit set is highly recommended.
- Needle-Nose Pliers: For gripping small terminals, bending wire ends, and maneuvering in tight spaces.
- Wire Strippers/ Cutters: A quality tool to cleanly strip about 1/4 inch of insulation from wire ends if you need to splice (though ideally, the new cord will have pre-stripped, tinned ends).
- Voltage Tester or Multimeter: To safely confirm power is off and later test connections. A non-contact voltage tester is excellent for checking outlet and cord continuity.
- Flashlight or Work Light: The interior of a vacuum is dark. A flexible-neck LED light is perfect.
- Camera (Smartphone): Your best friend for documentation. Take pictures of every screw location and wire connection before disconnecting anything.
- Replacement Shark Power Cord: Sourced using your exact model number. Ensure it’s the genuine Shark OEM part.
- Optional but Helpful: A small container for screws, a plastic pry tool (like a guitar pick) for clip-based assemblies, and a soft cloth for protecting surfaces.
Non-Negotiable Safety Rules
1. Unplug, Unplug, Unplug. This is not a suggestion. Physically verify the vacuum is disconnected from any power source. Do not rely on an off-switch.
2. Work in a Dry Environment. Never attempt this repair on a damp floor or with wet hands. Water and electricity are a lethal combination.
3. Discharge Capacitors. Some Shark upright and canister models have a small start/run capacitor in the motor housing. While rare for cord issues, if you’ve ever had a motor problem, it’s wise to discharge it. Use an insulated screwdriver to short the capacitor’s terminals (only if you know how and are comfortable). If unsure, simply avoid touching any large cylindrical components with metal parts.
4. Mind the Strain. The cord damage is often at the point of maximum flex: near the plug or where it enters the vacuum. When disconnecting the old cord, do not yank on the wires. Support the connection point inside the vacuum and gently work the wire free.
5. No Power Cords Around Water. During testing, ensure the vacuum’s intake is clear of debris and water. Never run a vacuum with its cord submerged or while standing on a wet surface.
Step-by-Step Disassembly: Gaining Access to the Motor Housing
This is where model variations become most apparent. Shark has evolved its designs over the years, but the general principle remains: you must remove the outer plastic shell to reach the motor and the cord’s terminal connections. The following is a generalized procedure that applies to most Shark uprights (Navigator, Rotator, Vertex) and stick vacs. Always defer to your model-specific service manual if available.
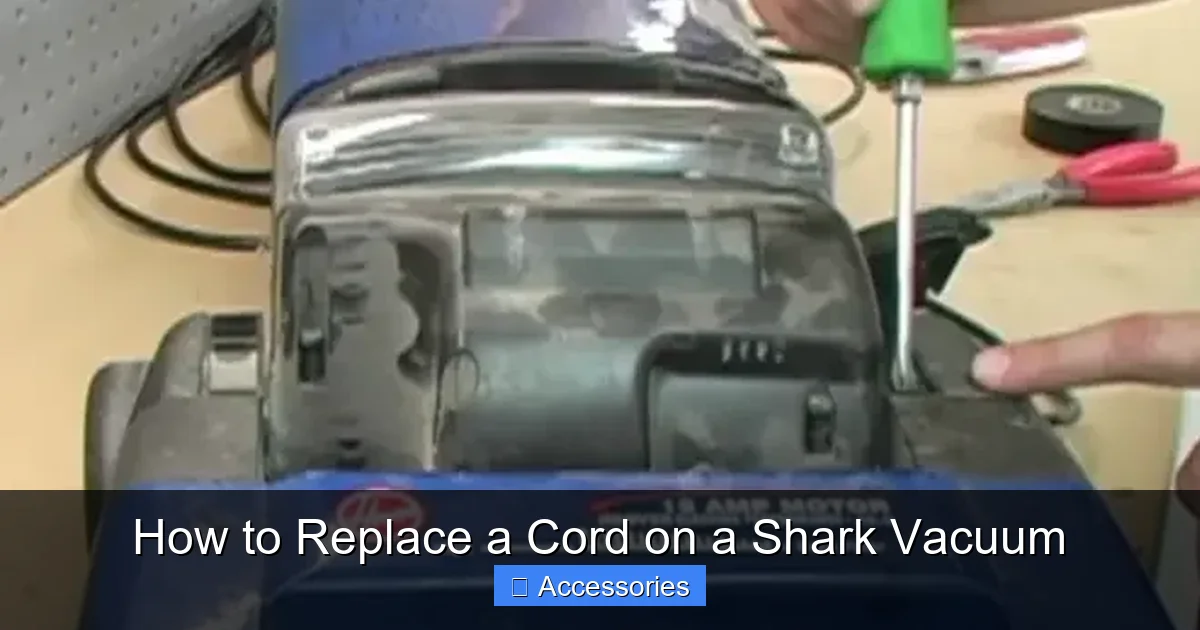
Visual guide about How to Replace a Cord on a Shark Vacuum
Image source: cleaningbeasts.com
Upright and Canister Models (e.g., NV Series, AZ Series)
Step 1: Prepare the Vacuum. Empty the dust cup and clean the filter. Lay the vacuum on its back on a soft blanket or towel to protect the finish and keep it from rolling. Ensure the brush roll is clear.
Step 2: Remove the Bottom Plate / Brush Roll Housing. This is often the first major access point. On many models, you’ll find clips or screws around the perimeter of the circular or rectangular bottom plate. Release the clips with a flat-head screwdriver or remove the screws (often security Torx). Tilt the plate away to expose the brush roll and motor belt. You may need to slide the brush roll out of its bearings to fully remove the plate. Set the brush roll aside.
Step 3: Access the Main Body. With the bottom plate off, look up into the main body. You’ll typically see more screws securing the upper and lower halves of the plastic shell. These are often hidden under the dust cup release latch, behind the handle, or beneath sticker labels. Carefully peel back any stickers (you can reapply them) to find screws. Remove all visible screws. Critical: Some models use hidden clips along the seam between the upper and lower housings. Once screws are out, gently work a plastic pry tool along this seam to release the clips. Start at the front or back and work your way around. Do not use excessive force, as the plastic can crack.
Step 4: Separate the Housings. Once all screws and clips are free, carefully lift the upper housing (which contains the handle, controls, and motor) away from the lower housing (which contains the wheels and dust cup). You will see a maze of wires, the motor, and the power cord’s connection point. Support the motor; it is usually mounted to the upper housing. You may need to disconnect a wire harness for the brush roll motor or suction motor. These connectors often have locking tabs—press the tab and pull firmly but gently. Take a picture now.
Stick and Handheld Models (e.g., IZ, HV, SV Series)
Disassembly for smaller models is often simpler but requires different steps. The power cord connection is usually at the base of the stick, behind the motorized floor head or in the main body.
- For models like the Shark IZ, remove the floor head by pressing the release buttons. The motor housing is in the stick. Remove any screws from the stick’s body (often at the rear or under a rubber flap). The shell may split lengthwise.
- For handhelds like the Shark SV, remove the battery (if removable). Look for screws around the motor housing’s perimeter, often hidden under the filter cover or dust cup. Release the clips to separate the two halves.
The principle is identical: methodically remove all fasteners, document, and gently pry apart plastic clips.
The Heart of the Repair: Disconnecting the Old Cord and Installing the New
With the motor housing exposed, you can now see the power cord’s journey. It enters the housing through a strain relief, and its three wires (black, white, green) are connected to a terminal block or the motor’s wiring harness.
Disconnecting the Faulty Cord
Locate where the cord wires terminate. You will likely see a small plastic terminal block with three screws or push-in connectors (spade terminals). Take a close-up picture.
- For Screw-Terminals: Loosen each screw and note which colored wire was under which screw. Gently pull the wire out. It’s helpful to bend the stripped end of the wire into a hook shape to hold it on the screw terminal.
- For Push-In Connectors (Spade Terminals): These are common. Press the release tab (usually a small plastic lever) and pull the wire out. Note the orientation.
- For Direct Motor Connections: Some models have the cord wires soldered directly to the motor terminals or soldered to short leads that then plug in. If soldered, you will need a soldering iron to desolder each connection. Be careful not to overheat the motor terminals.
Once the wires are free, you must remove the cord itself from the housing. It is held by the strain relief. This is often a two-part plastic clamp that screws together or a single piece that the cord is pushed through. You usually need to unscrew or carefully pry apart the strain relief to slide the old cord out. Do not cut the cord yet. See if you can free the entire assembly. If the strain relief is damaged, you must replace it. Genuine Shark replacement cords come with the correct strain relief pre-attached.
Installing the New OEM Shark Cord
This is the reverse process, but with attention to detail.
- Prepare the New Cord: If your new cord did not come with a strain relief, you must reuse the old one in good condition. If it’s brittle or cracked, order a new one separately using your model number.
- Feed the New Cord: Thread the plug end of the new cord through the hole in the vacuum’s body where the old cord emerged. From the inside, feed the cord through the strain relief assembly. Tighten the strain relief screws or clamps to create a secure, waterproof seal around the cord. This prevents debris and moisture from entering the motor housing.
- Make the Electrical Connections: This is the most critical step. Refer to your photos.
- Connect each wire (Green/ground, White/neutral, Black/hot) to its corresponding terminal. On a terminal block, the green wire usually goes to the green screw (or the one marked “G”), white to “N” or silver, and black to “H” or brass. If using spade connectors, ensure they are fully seated.
- If the connections are soldered, strip about 1/4″ of insulation from each wire, twist the strands, tin them with solder, and carefully solder each wire to its designated terminal. Use just enough solder for a strong joint. Avoid creating solder bridges (solder connecting two adjacent terminals).
Tip: A tiny drop of Loctite gel on the screw threads of terminal blocks can prevent them from vibrating loose over time.
Reassembly, Testing, and Final Checks
Do not rush to put the shell back on. A successful repair hinges on a thorough test before final closure.
Pre-Closure Electrical Test
Before reattaching the upper and lower housings, perform a live test. This is safer than finding a problem after everything is screwed back together.
- Ensure the new cord’s wires are securely connected and the strain relief is tight.
- Do not yet reattach the brush roll or bottom plate.
- Plug the vacuum into a known-good outlet. Keep your hands clear of all internal components.
- Turn the vacuum on. You should hear the suction motor run immediately. For an upright, you may also need to reattach the brush roll belt or engage the brush roll to see it spin.
- Use a multimeter or voltage tester to check for power at the terminal block (with the vacuum on). This confirms power is flowing through your new connections.
- If the vacuum does not start, immediately unplug it and re-check your wire connections. Ensure no wires are pinched and the plug is fully inserted into the wall.
Careful Reassembly
If the test is successful, unplug the vacuum and proceed.
- If you disconnected any other wire harnesses (for the brush roll motor, LED lights, etc.), reconnect them firmly. Listen for a click.
- Carefully lower the upper motor housing onto the lower body. Ensure no wires are pinched between the plastic halves. This is the most common reassembly mistake. Gently move wires aside as you close the shell.
- Start by hand-screwing all the screws you removed. This prevents cross-threading. Then, use your screwdriver to tighten them snugly, but do not overtighten and strip the plastic threads.
- Re-engage any plastic clips by pressing the housings together firmly along the seam.
- Reinstall the brush roll and bottom plate. Ensure the brush roll spins freely and the belt is properly aligned on the motor shaft and brush roll pulley.
- Reattach any accessories, hose, and wand connections.
Final Operational Test
Plug the fully reassembled vacuum in. Turn it on. Listen for normal motor sound. Feel for strong suction at the wand/hose. If your model has a brush roll, engage it and ensure it spins smoothly on a hard floor (do this briefly, away from carpet to avoid debris throw). Check that all buttons and controls function. If anything seems amiss—odd noises, weak suction, overheating—unplug immediately and re-inspect your work.
Troubleshooting: What If It Still Doesn’t Work?
If your Shark vacuum is still dead after a seemingly perfect cord replacement, don’t panic. Diagnose systematically.
Check the Obvious First
- Wall Outlet: Test the outlet with another device.
- Circuit Breaker/Fuse: Check your home’s electrical panel.
- Vacuum Reset Button: Some Shark models have a thermal reset button on the motor housing (often a small red button). Press it.
- Battery (for Cordless): If you’re working on a cordless Shark and thought it was a cord issue, the problem is almost certainly the battery or charger.
Internal Diagnostics
If the outlet is good, the issue is internal.
- Loose Connection: Re-open the vacuum and re-check every wire terminal. A wire can work loose during reassembly or from vibration.
- Blown Fuse or Thermal Fuse: Some Shark vacuums have an internal thermal fuse or a fuse on the motor PCB. If the motor overheated due to a clog or the old cord shorting, this fuse may have blown. It looks like a small cylindrical or rectangular component on the wiring harness. Test it for continuity with a multimeter.
- Damaged Motor: The original cord damage may have been caused by a failing motor that drew excessive current, burning the cord. If the motor windings are burnt or the brushes are completely worn, the motor may need replacement. Smell for a burnt odor near the motor.
- Faulty Switch: The power switch itself could be broken. You can test it for continuity with a multimeter (with the vacuum unplugged).
If you’ve checked all of the above and the vacuum is still unresponsive, the fault likely lies with the motor or a main control board. At this point, comparing the cost of a new motor/board plus your time versus the price of a new Shark vacuum is a sensible calculation.
When to Consider Professional Repair or Replacement
DIY is empowering and cost-effective, but it has limits. Knowing when to stop and call an expert is a sign of wisdom, not failure.
Scenarios for Professional Intervention
- Extensive Internal Damage: If you opened the vacuum and found melted wiring, charred plastic, or a burnt-smelling motor, the problem has progressed beyond a simple cord swap. A technician can properly diagnose and replace damaged components.
- Lack of Confidence: If at any point you feel unsure about electrical connections, identifying wires, or using tools, stop. The risk of a shock or fire is not worth the savings.
- Warranty Considerations: If your Shark is still under the limited manufacturer’s warranty (typically 5-7 years for the motor, 1-3 years for other parts), opening it will likely void the warranty. Contact Shark first. They may replace the entire vacuum or authorized service center repair at no cost if the defect is covered.
- Complex Electronics: Newer Shark models with advanced cyclonic technology, digital displays, or sensor-driven suction control may have complex motherboards. A short in the cord could have damaged these sensitive electronics, requiring professional-level diagnostics.
The Cost-Benefit Analysis
A genuine Shark power cord typically costs between $25 and $50. A new Shark vacuum ranges from $150 for a basic stick vac to over $500 for a high-end upright with premium attachments. If your vacuum is older, has had multiple repairs, or is a base model, investing $30 and a few hours of your time is a no-brainer. However, if it’s a 7-year-old unit with worn bearings, a failing motor, and a cracked housing, spending $300 on a new motor might not be worthwhile. Be honest about the vacuum’s overall condition. Sometimes, the cord replacement is the final repair that breathes new life into a beloved appliance for years to come. Other times, it’s the catalyst for an upgrade to a newer, more efficient model.
Conclusion: The Satisfaction of a Job Well Done
Replacing the power cord on your Shark vacuum is more than a repair; it’s an act of sustainability and a lesson in how your everyday tools work. By following this guide—identifying your model, gathering the genuine OEM part, adhering to safety protocols, documenting disassembly, making precise connections, and testing thoroughly—you can confidently restore your vacuum to full power. You’ll save money, reduce electronic waste, and gain the invaluable skill of appliance repair. Remember, the key ingredients are patience and precision. If you encounter a snag, pause, consult your photos, and re-read the relevant section. The satisfying whir of your Shark vacuum roaring back to life, with a brand-new cord, is a reward well-earned. Now, grab your toolbox, locate that model number, and get started on bringing your trusted cleaning companion back from the brink.
Frequently Asked Questions
Is replacing a Shark vacuum cord a difficult DIY project?
For someone comfortable with basic tools and following instructions, it is a moderate DIY task rated around 3/5 in difficulty. The main challenges are finding all the hidden screws and managing small electrical connectors. Patience and organization are more important than advanced technical skill.
Can I use a generic power cord instead of a genuine Shark part?
While generic cords are cheaper, we strongly advise against it. Generic cords often use thinner wire gauge (18-gauge instead of 16-gauge), which can overheat under the vacuum’s load. Their plugs may not fit securely in your wall outlet or the vacuum’s strain relief. Using a non-OEM cord poses a fire risk and may void your warranty. Always purchase the specific Shark part for your model number.
How long does a Shark vacuum cord replacement typically take?
For an average upright model like a Navigator or Rotator, a first-timer should allocate 1 to 2 hours. With experience or for simpler stick models, it can take as little as 30-45 minutes. The time is mostly spent on careful disassembly and reassembly, not the actual wiring.
What is the most common mistake people make when replacing a vacuum cord?
The most frequent errors are: 1) Pinching the new cord’s wires between plastic housings during reassembly, causing an immediate short. 2) Connecting the wires to the wrong terminals (e.g., hot to neutral). 3) Forgetting to properly secure the strain relief, allowing the cord to pull on the connections. 4) Cross-threading or overtightening plastic screws, cracking the housing.
How can I tell if my vacuum’s problem is just the cord or a deeper motor issue?
A cord issue typically shows intermittent power when wiggling the cord. A motor issue often presents as a grinding noise, a burning smell, or the vacuum not starting at all even with a new cord. After replacing the cord, if the vacuum still doesn’t work or smells burnt immediately, the motor or its internal fuse is likely the culprit.
If my Shark vacuum is still under warranty, should I attempt this repair myself?
No. Opening the vacuum will almost certainly void the manufacturer’s warranty. If your vacuum is under warranty, contact Shark customer support. They will troubleshoot over the phone and, if necessary, provide a prepaid shipping label to send it to an authorized service center for free repair. This is the safest and most cost-effective path for a warrantied unit.