Remapping your Shark robot vacuum is the key to fixing navigation errors, updating your home’s layout after furniture moves, and unlocking advanced cleaning features. This guide provides clear, model-specific instructions for every Shark series, from the app-controlled IQ models to button-based ION robots. You’ll learn the exact steps to create a fresh, accurate map, set no-go zones, and maintain your robot’s spatial memory for reliable, efficient cleaning every time.
Key Takeaways
- Remapping ≠ Resetting: Remapping creates a new floor plan while preserving settings and schedules; a full factory reset erases everything and should be a last resort.
- Model Matters: The remapping process differs significantly between app-based Shark IQ/Robot models and button-based Shark ION/older models—know your series first.
- Preparation is Crucial: A successful remap requires a fully charged robot, clear floors, good lighting, and a stable Wi-Fi connection for app-based models.
- You Control the Map: After remapping, use the Shark app to draw virtual no-go zones, set cleaning zones, and edit the map for perfect customization.
- Troubleshoot Methodically: Common issues like “cannot find home” or incomplete maps usually have simple fixes—check for obstacles, sensor dirt, or low battery before repeating.
- Remap Proactively: Don’t wait for problems. Remap after major furniture rearrangements, seasonal changes, or if you notice consistent navigation errors.
📑 Table of Contents
- Understanding Robot Vacuum Remapping: It’s Not Magic, It’s Memory
- Preparing Your Shark for a Successful Remap: The Golden Rules
- Step-by-Step: How to Remap Your Shark Robot (By Model Series)
- Customizing Your New Map: No-Go Zones, Walls, and Cleaning Zones
- Troubleshooting: When Remapping Doesn’t Go as Planned
- Keeping Your Map Fresh: Maintenance and Best Practices
- Conclusion: You’re the Master of Your Domain
Understanding Robot Vacuum Remapping: It’s Not Magic, It’s Memory
So, your Shark robot vacuum is acting a little lost. Maybe it’s bumping into things it used to avoid, getting stuck in the same spot, or simply missing entire sections of your living room. The culprit is often its internal map—the digital floor plan it uses to navigate efficiently. The solution is to remap your Shark robot. But what does that actually mean?
Think of your robot as a very diligent, but sometimes forgetful, housekeeper. Its first few cleaning runs are its “learning walks.” It uses its sensors and camera (depending on the model) to build a mental map of your home’s layout, noting walls, furniture legs, and the location of its charging base. This map is stored in its memory. Over time, if you move a couch, add a new rug, or even just change the lighting significantly, that original map can become outdated. Remapping is the process of telling your Shark, “Forget the old plan. Let’s create a fresh, accurate one from scratch.” It’s a powerful troubleshooting and optimization tool that puts the control back in your hands.
What “Remapping” Actually Means (vs. Resetting)
This is a critical distinction every Shark owner must understand. Remapping initiates a new exploration and mapping cycle. Your robot will leave its base, methodically tour your home, and build a new floor plan. Your saved cleaning schedules, preferences, and virtual boundaries (no-go zones) are typically preserved and will automatically apply to the new map once it’s complete. It’s like giving your robot a new set of directions without wiping its entire address book.
A Factory Reset, on the other hand, is the nuclear option. It erases all stored data: maps, schedules, Wi-Fi settings, and user preferences. The robot reverts to its out-of-box state. You should only perform a factory reset if you’re selling the robot, experiencing persistent software glitches that remapping didn’t fix, or if you’ve changed your home’s Wi-Fi network and can’t reconnect. For 95% of navigation problems, how to remap my shark robot is the answer, not how to reset it.
Why Your Shark Might Need a New Map
You don’t need to be a tech expert to know when a remap is necessary. Here are the most common, tell-tale signs:
- The “Stuck in a Loop” Syndrome: Your robot repeatedly gets trapped under a chair, behind a toilet, or in a specific corner it used to navigate around effortlessly.
- The “Missing Room” Problem: You notice a consistent pattern where a particular bedroom, office, or hallway is rarely cleaned or is skipped entirely during scheduled runs.
- Post-Renovation or Rearrangement: You moved a large bookshelf, got a new coffee table, or changed the layout of an open-concept space. The old map is now obsolete.
- The “Bump and Grind” Increase: You hear more physical collisions than usual. This suggests the robot’s perceived boundaries no longer match the physical reality.
- After a Major Cleaning: If you did a deep clean and moved everything, a remap helps the robot re-learn the new, clutter-free environment.
- Virtual Boundary Failure: Your virtual no-go zones (set via the app or physical virtual wall pods) are being ignored by the robot.
If you’re experiencing any of these, learning how to remap my shark robot is your first and most effective line of defense.
Preparing Your Shark for a Successful Remap: The Golden Rules
Rushing into the remapping process is the number one reason it fails. A botched remap can leave you with a more confusing map than before. Think of this as prepping a room for a painter—you clear the decks first. Following these preparation steps will ensure your Shark creates a clean, accurate, and usable floor plan on its first try.
Visual guide about How to Remap My Shark Robot
Image source: sharkvacuum.blog
The Golden Rules Before You Start
These are non-negotiable for a smooth remapping experience:
- Charge It Up: Ensure your Shark robot is 100% charged before beginning. A low battery during mapping can cause the robot to cut its exploration short, return to base prematurely, and create a fragmented, incomplete map. Plug it in and let it charge fully. For best results, start with a freshly charged robot from its dock.
- Clear the Path: This is the most important step. Pick up all small objects: socks, toys, charging cables, pet bowls, and loose rugs. While Shark robots can handle some clutter, excessive obstacles will confuse the mapping process and can lead to the robot getting stuck or creating inaccurate boundaries around items. For the mapping run, you want a clear, representative “default” state of your home.
- Light the Way (For Camera-Based Models): Shark’s advanced navigation models (like the Shark IQ and many ION series) use a camera and visual sensors. They work best in consistent, moderate lighting. Avoid mapping in total darkness or with bright, direct sunlight glaring on floors. Turn on lights in dim rooms. This helps the optical sensors identify features on your floor.
- Secure the Base: Place your Shark’s charging base on a flat, hard surface against a wall, with at least 1.5 feet of open space on either side and 5 feet in front. Ensure it’s plugged in and the contacts are clean. The robot must be able to dock and undock seamlessly during its exploration.
- Close Interior Doors (Strategically): Decide which rooms you want in a single map. If you want your entire first floor mapped as one unit, leave all interior doors on that level open. If you want separate maps for different wings, you can close doors to create natural boundaries. However, be consistent—don’t map with a door open one time and closed the next.
- Stable Wi-Fi (For App Models): If you’re using the SharkClean app to initiate the remap, ensure your home Wi-Fi is stable and the robot is connected. A dropped connection mid-map can interrupt the process.
Gathering Your Tools
You likely already have everything you need:
- Your Shark robot vacuum and its charging base.
- The SharkClean app downloaded on your smartphone (for IQ/App-based models).
- A fully charged smartphone or tablet.
- Your Shark robot’s physical power button (for button-based models).
- Optional but helpful: A small brush to clean the robot’s sensors and brushes before starting.
Once your environment is prepped and your tools are ready, you’re set to proceed. The next section will dive into the specific, step-by-step instructions for your Shark model.
Step-by-Step: How to Remap Your Shark Robot (By Model Series)
Here’s where we get specific. Shark has several product lines with different interfaces. The method for how to remap my shark robot depends entirely on whether it’s controlled primarily by an app or by physical buttons on the robot itself. Don’t worry, we’ve got you covered for all major series.
Visual guide about How to Remap My Shark Robot
Image source: sharkvacuum.blog
For Shark IQ/Robot Series (App-Based Navigation Models)
This includes models like the Shark IQ Robot (RV1001, etc.), Shark AI Ultra, Shark Matrix, and most newer Shark robots with self-emptying bases that rely on the SharkClean app for mapping. The process is elegant and controlled from your phone.
Step 1: Prepare & Launch the App
Ensure your robot is on its dock, powered on, and connected to Wi-Fi. Open the SharkClean app and select your robot from the dashboard.
Step 2: Access the Map Settings
Tap the “Map” or “Maps” icon (it looks like a floor plan) in the bottom navigation bar. You should see your current map. Look for a settings gear icon, a “+” button, or an option that says “Create New Map,” “Remap Home,” or “Re-map.” Tap it.
Step 3: Initiate the Mapping Run
The app will guide you through final checks (battery, clear floors). Confirm and select “Start Mapping” or “Begin Exploration.” The robot will undock and begin its systematic exploration. You can watch a live, low-resolution preview on your phone as it moves.
Step 4: Let It Complete
THIS IS THE MOST IMPORTANT PART. Do NOT interrupt the robot. Do NOT pick it up. Do NOT press any buttons on it. Let it explore until it automatically returns to its base and the app indicates “Mapping Complete” or “Map Saved.” This can take anywhere from 30 minutes to over an hour for larger homes. The robot may make multiple trips out and back to the base to recharge if needed, but let it finish its entire cycle.
Step 5: Review and Name Your Map
Once complete, the app will display the new, detailed map. You can often rotate it or label it (e.g., “First Floor,” “Main Level”). This is your new master map. All your existing no-go zones and cleaning zones should automatically appear on it. If they don’t, you may need to re-apply them, which we’ll cover later.
Pro Tip: Do this when you’re home but not actively moving around much. Avoid running the mapping process when you have guests or are doing other activities that could create temporary obstacles.
For Shark ION Series (Button-Based Models with Navigation)
This includes popular models like the Shark ION Robot (AV750, AV853, etc.) and some earlier ION series robots that have a “Clean” button and a “Home” button but no full app control for mapping initiation. The process is manual but straightforward.
Step 1: Prepare the Robot
Place the fully charged robot on its charging base and ensure it’s powered on (the power button light should be on).
Step 2: Initiate a “Clean” Cycle
Press the large “Clean” button on the robot. It will begin a normal cleaning cycle.
Step 3: Interrupt and Send Home (The Key Step)
After the robot has been cleaning for approximately 5-10 minutes (this gives it time to start building its initial map), gently press the “Home” button. The robot will stop cleaning and immediately begin its return-to-dock sequence. Do not let it complete a full cleaning cycle before sending it home. The act of interrupting a cleaning run and sending it home is the trigger that tells the robot, “The exploration phase is complete. Save the map you’ve built so far.”
Step 4: Let It Dock and Wait
Allow it to dock completely. Once it’s on the base and powered down (or in idle mode), the new map is saved. The process is done. You’ve successfully completed how to remap my shark robot for a button-based model.
Why This Works: These models build their map incrementally during cleaning runs. By interrupting after a short period, you capture the initial exploration phase without letting it go into a deep, repetitive clean that might not expand the map further. The “Home” command finalizes the mapping data.
Important Note: For some very old Shark navigational models (pre-ION series), the process might be slightly different, often involving a specific button sequence (like holding “Clean” and “Home” simultaneously). Always consult your specific model’s manual, but the “Clean for 5-10 min, then Home” method is the standard for the majority of button-based Shark navigational robots.
A Special Case: Shark’s “Re-Mapping” via Physical Reset Button
Some Shark models, particularly certain ION series, have a small, recessed “Reset” button on the underside or side. If you’ve tried the methods above and the map remains corrupted or unusable, a physical reset might be necessary. This is closer to a factory reset but can sometimes be used just to clear map data.
- Locate the reset button (use a paperclip).
- With the robot powered OFF and OFF the dock, press and hold the reset button for 10-15 seconds.
- Release, power the robot on, and place it on the dock.
- For many models, this will clear all maps and force a new mapping process on the next clean. You may then need to initiate a clean run (via app or button) and let it complete fully to build a new map from scratch.
Warning: This method often erases schedules and other settings. Check your manual. It’s a troubleshooting step, not the primary remapping method.
Customizing Your New Map: No-Go Zones, Walls, and Cleaning Zones
Congratulations! You’ve got a shiny new, accurate map of your home. But the real power of Shark’s navigation system lies in what you do with that map. This is where you truly customize your robot’s behavior, telling it exactly where to go and, more importantly, where not to go. This level of control is the main reason users seek out how to remap my shark robot—to finally stop it from eating cords or getting stuck.
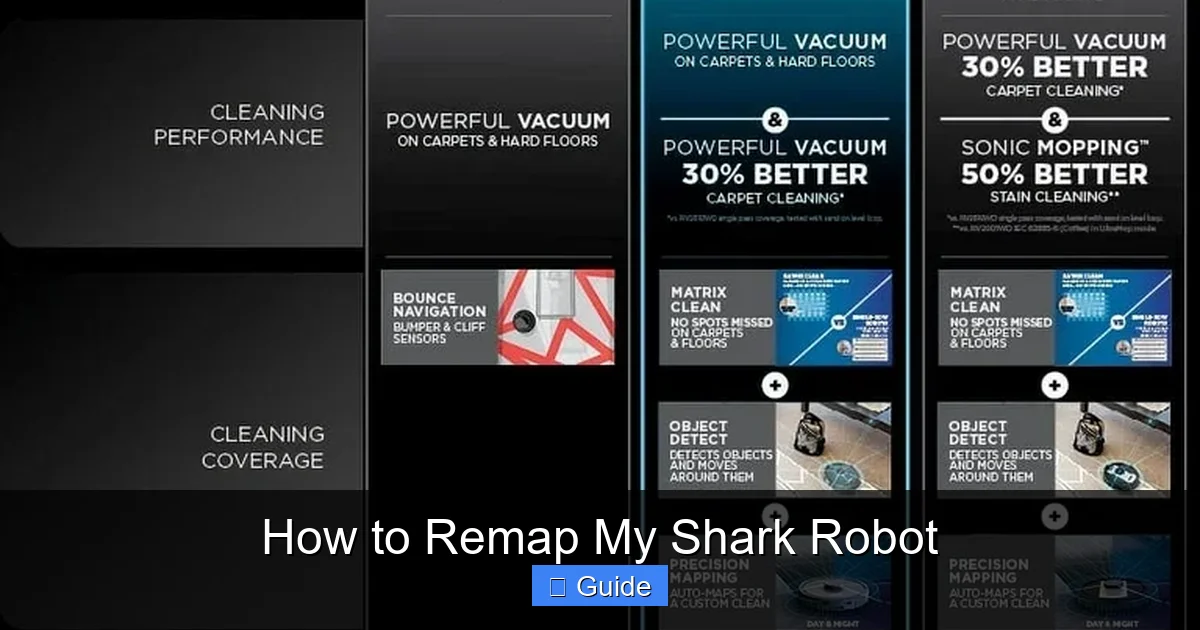
Visual guide about How to Remap My Shark Robot
Image source: i5.walmartimages.com
Setting Up Virtual No-Go Boundaries (The Digital Fence)
No-go zones are invisible barriers you draw on the map in the SharkClean app. The robot will completely avoid these areas.
- How to Set (App Models): In the app’s map view, look for a “No-Go Zones” or “Boundaries” icon (often a red line or exclamation mark). Tap it. You’ll enter an edit mode. Pinch to zoom, then draw lines or polygons around areas you want blocked—like around pet food bowls, under a crib, near a fish tank, or in front of a fireplace. You can often set them as “Keep Out” (strict barrier) or “Slow Down” (the robot approaches cautiously). Save the zones.
- For Button-Based ION Models: These models typically do not support app-based no-go zones. Your only option for creating barriers is the Shark Virtual Wall Pod (sold separately). This is a physical device that emits a boundary signal. Place it in front of the area you want to protect. You cannot draw custom shapes on a map for these models.
- Pro Tip: Draw your no-go zones slightly larger than the physical obstacle. This gives the robot a safety buffer. Also, remember that no-go zones are tied to the specific map they were created on. If you remap again, you will likely need to re-draw them on the new map.
Creating Cleaning Zones (Targeted Cleaning)
Cleaning zones let you tell your Shark to clean a specific room or area on-demand, without running a whole-house clean.
- How to Set (App Models): In the map view, look for a “Zones” or “Clean Zones” feature. You can often draw a box or freeform shape around a room (e.g., “Kitchen,” “Entryway”). Name the zone. Then, from your robot’s main control screen, you can select “Clean Zone” and choose that named area. The robot will navigate directly to that zone and clean just that section.
- Best For: Quick cleanups after cooking in the kitchen, spot-cleaning the mudroom after kids come in from play, or focusing on a high-traffic area without running a full cycle.
The Power of “Clean Zones” vs. “No-Go Zones”
It’s easy to confuse these. Think of it this way:
- No-Go Zones = RESTRICTION. “You may NEVER enter this box.” (Use for hazards, delicate items).
- Clean Zones = DIRECTION. “When I ask, you MUST clean ONLY this box.” (Use for targeted cleaning of specific rooms).
You can use both on the same map. For example, you could have a “Clean Zone” for your living room, but within that living room map, you’ve drawn a “No-Go Zone” around your expensive rug or a pile of cables on the floor. This layered customization is what makes a Shark robot with a good map so effective and reliable.
Troubleshooting: When Remapping Doesn’t Go as Planned
Even with perfect preparation, remapping can hit a snag. Don’t panic. Most mapping failures have simple, fixable causes. Here’s how to diagnose and solve the most common problems people encounter when learning how to remap my shark robot.
“My Shark Can’t Find Its Base!” or “Docking Failed”
Symptom: During the mapping run, the robot leaves the base, explores, but then circles or beeps, unable to return and dock. The map might be incomplete.
Likely Causes & Fixes:
- Base Placement: Is the base against a wall with clear space in front? Is it on a thick, shaggy rug? Move it to a hard floor, flat against a wall, with nothing in the 5-foot “landing zone” in front.
- Dirty Contacts: The metal charging contacts on both the base and the robot can get gunked up with dust and hair. Wipe them gently with a dry microfiber cloth.
- Interference: Is the base near a large metal object, a refrigerator, or a TV with a strong electromagnetic field? Move it slightly.
- Battery: A weak battery may not have enough power to navigate back. Ensure it was fully charged before starting.
“The Map Looks Wrong or Incomplete”
Symptom: The saved map shows only a few rooms, has strange shapes, or looks like a fragmented puzzle.
Likely Causes & Fixes:
- Interrupted Process: This is the #1 cause. Did you pick up the robot? Press a button? Let a pet or child interrupt it? You must let the robot complete its entire exploration cycle and dock on its own. If you interrupted it, you must start over.
- Obstacles During Mapping: Did someone walk through rooms, were doors closed/opened during the run, or were there moving obstacles (a rolling chair)? The robot’s perception of the environment was inconsistent. Clear the area and try again.
- Poor Lighting (Camera Models): If it’s very dark or the lighting changed dramatically during the run (e.g., clouds passing over skylights), the optical navigation can fail. Ensure consistent, moderate lighting.
- Extremely Large/Open Home: For very large homes (3000+ sq ft), the robot may need to recharge mid-map. Ensure it has a clear path back to the base. It will resume mapping after charging, but this can sometimes lead to less precise maps. Consider mapping one floor level at a time.
“Virtual Walls/No-Go Zones Aren’t Working”
Symptom: You set a no-go zone in the app, but the robot still enters that area.
Likely Causes & Fixes:
- Old Map: This is the most common reason. You remapped, creating a new map, but your no-go zones are still saved on the old map. You must apply your no-go zones to the new, active map. Open the map in the app and re-draw your boundaries.
- Zone Drawn Incorrectly: Make sure the no-go zone polygon is closed and actually overlaps the area you want to block. Zoom in and check the edges.
- Physical Virtual Wall (Pods): If you’re using a physical Shark Virtual Wall pod, ensure it’s turned on (blue light), has fresh batteries, and is placed correctly (pointing toward the area to block, not away).
- Software Glitch: Try power-cycling the robot (turn it off, wait 30 seconds, on) and your phone. Sometimes the map data needs a refresh.
General Troubleshooting Flow: If a remap fails, don’t repeat it immediately. First: 1) Clean all sensors and brushes. 2) Check base placement. 3) Ensure a full charge. 4) Verify environment is clear and lighting is good. Then, try the remap process again from the beginning.
Keeping Your Map Fresh: Maintenance and Best Practices
Your Shark’s map isn’t a “set it and forget it” deal. To maintain peak performance, you need to treat your map as a living document. A little proactive map management will save you from countless headaches and ensure your robot remains a helpful, autonomous cleaner rather than a confused nuisance.
When to Remap (And When Not To)
You now know how to remap my shark robot, but how often should you do it? Here’s a practical schedule:
- Remap Immediately When: You rearrange major furniture (sofas, beds, large tables), install or remove a wall or permanent barrier, change the layout of a room significantly, or after the robot has consistently demonstrated navigation errors in a specific area.
- Remap Seasonally (Proactive): This is a great habit. Do a full remap in the spring and fall. Seasonal changes can affect your home’s layout (e.g., holiday decorations, summer patio furniture brought inside, different rug placements) and lighting conditions.
- Do NOT Remap For: Temporary clutter (a suitcase on the floor, toys out). Just clean up. The robot will navigate around temporary items. Remapping for temporary changes is overkill and will create a map that’s only accurate for that brief period.
- After a Remap, Re-Apply Boundaries: Always remember that a new map wipes the slate clean for virtual boundaries. After every successful remap, open your app and re-draw your no-go zones and re-name/define your cleaning zones. This should become an automatic post-remap step.
The Importance of a Clean Robot for an Accurate Map
Your Shark’s navigation system—whether it’s a camera, LIDAR, or bumper sensors—relies on being unobstructed. A dirty robot makes for a bad map.
- Clean the Sensors Weekly: Use a dry, soft microfiber cloth to gently wipe the camera lens (usually on top or front), the cliff sensors (on the underside), and the bumper sensors. Dust and hair can blind these critical components.
- Maintain the Brushes and Wheels: Hair and debris tangled in the main brush or side brush can throw off the robot’s movement and odometry (its sense of how far it’s traveled), leading to map distortions. Clean these according to your manual’s schedule.
- Clean the Charging Contacts: As mentioned, dirty contacts on the base and robot prevent reliable docking, which is essential during the mapping process.
A clean robot is a smart robot. Incorporate sensor and brush cleaning into your regular maintenance routine (e.g., every time you empty the dustbin).
Protecting Your Map Data
Your map is stored on the robot itself and synced to the SharkClean app/cloud (for app models).
- For App Models: Ensure your robot stays connected to your Wi-Fi. If you change your home Wi-Fi network or password, you’ll need to reconnect the robot in the app. Your maps should sync from the cloud once reconnected.
- For Button Models: The map is stored solely on the robot’s internal memory. A complete battery drain (if left off the dock for months) could potentially corrupt this memory. If you’re storing the robot long-term, charge it fully first and power it off.
- Backup Mentally: While you can’t export the map file, take a screenshot of your app’s map view after a good remap and boundary setup. This gives you a visual reference of where you placed no-go zones if you ever need to recreate them after a future remap or reset.
By following these best practices, you move from just knowing how to remap my shark robot to becoming a true power user who maintains a perfectly optimized cleaning system year-round.
Conclusion: You’re the Master of Your Domain
Remapping your Shark robot vacuum is one of the most empowering things you can do as an owner. It transforms your robot from a sometimes-frustrating gadget into a predictable, reliable, and highly efficient member of your cleaning team. The core message of how to remap my shark robot is simple: understand your model, prepare your environment, follow the precise steps for your series, and then take the time to customize the resulting map with virtual boundaries and zones.
Don’t be afraid of the mapping process. See it as a periodic tune-up, much like you’d rearrange furniture or deep-clean a room. A fresh map after a big change or with the seasons ensures your robot operates at its peak intelligence. Remember the golden rules: full charge, clear floors, and let it finish. Then, invest a few minutes in drawing those no-go zones—it’s the step that provides the greatest return on your time, preventing the vast majority of common robot mishaps.
Your Shark has the capability to navigate your home with remarkable precision. It just needs an accurate, up-to-date blueprint. Now you have the complete guide to provide it. Go forth, remap with confidence, and enjoy the satisfaction of a spotless home cleaned by a robot that truly knows its way around.
Frequently Asked Questions
What’s the difference between remapping and resetting my Shark robot?
Remapping creates a new floor plan while keeping your schedules and virtual boundaries (which you may need to re-apply). A factory reset erases all data, including maps, schedules, and Wi-Fi settings, returning the robot to its original factory state. Remapping is for navigation fixes; resetting is for major software issues or preparing the robot for a new owner.
How often should I remap my Shark robot?
Remap immediately after major furniture rearrangements or if you notice consistent navigation errors. As a proactive best practice, remap seasonally (e.g., spring and fall) to account for layout and lighting changes. Avoid remapping for temporary clutter.
Can I remap my Shark if I have multiple floors?
Yes, but with a key limitation. Most Shark robots store only one map at a time in their memory. To clean multiple floors, you must carry the robot and its base to each floor and perform a separate remap for each level. After remapping on the second floor, the first floor’s map will be replaced. You’ll need to re-apply no-go zones each time you switch floors.
Why aren’t my virtual walls working after I remapped?
Virtual walls and no-go zones are tied to a specific map. When you remap and create a new map, all previously drawn boundaries are disconnected from it. You must go into the SharkClean app (for app models) and redraw your no-go zones on the new, active map. For models using physical Virtual Wall pods, ensure the pods are turned on and placed correctly for the new layout.
My Shark started mapping but got stuck. What do I do?
If the robot gets stuck during the mapping run, first, carefully free it from the obstacle. Then, check if the map was saved. If the app or robot indicates the mapping was interrupted or incomplete, you must start the entire remapping process over from the beginning. Use the incident to identify and remove the cause of the stuck (e.g., a loose rug, a chair leg).
Will remapping delete my cleaning schedules?
For app-based Shark models (IQ, AI Ultra, Matrix), remapping does not delete your scheduled cleanings. Your schedules remain in the app and will run on the new map once it’s complete. For button-based Shark ION models, schedules are stored on the robot and should also survive a remap. However, it’s always wise to double-check your schedules in the app or on the robot’s interface after a remap is finished.