Maintaining your Shark vacuum’s brush roll is crucial for optimal performance. This guide provides clear, model-specific instructions to safely open, clean, and reassemble the brush roll. You’ll learn the necessary tools, how to identify your Shark series, and common troubleshooting tips to fix issues like tangled hair or a non-spinning roller. Regular brush roll maintenance prevents suction loss and extends your vacuum’s lifespan.
Have you ever noticed your Shark vacuum suddenly struggling to pick up debris, making strange noises, or leaving trails of uncleaned carpet? The culprit is often a tangled, clogged brush roll. That spinning cylinder of bristles is your vacuum’s workhorse for deep carpet cleaning, but it’s also a magnet for hair, string, and carpet fibers. When it gets jammed, performance plummets, and the motor works harder, potentially leading to costly repairs. The solution? Regular, thorough cleaning. And the first step is knowing how to open brush roll on Shark vacuums correctly. This isn’t a one-size-fits-all task—Shark has numerous series with different mechanisms. But don’t worry. This comprehensive guide will walk you through the process for all major Shark models, turning a daunting task into a simple, five-minute maintenance routine you can master.
Key Takeaways
- Safety First: Always unplug your Shark vacuum and turn it off before attempting any maintenance to avoid injury or damage.
- Model Identification is Key: The exact release mechanism varies by Shark series (Navigator, Rotator, Vertex, etc.). Locate your model number to follow precise instructions.
- Common Tools Suffice: You typically only need a Phillips-head screwdriver and maybe a flathead for certain clips. No special tools are required.
- Cleaning is the Primary Goal: Opening the brush roll is mainly to remove entangled hair, carpet fibers, and debris that jam the roller and strain the motor.
- Reassembly Must Be Secure: Ensure the brush roll is properly seated and the cover clicks or screws back in place correctly to operate safely and efficiently.
- Check the Belt: While the brush roll is out, inspect the drive belt (if your model has one) for wear, cracks, or misalignment.
- Consult Your Manual: If instructions are unclear, the official Shark user manual for your specific model number is the definitive resource.
📑 Table of Contents
- Why Opening and Cleaning Your Brush Roll is Non-Negotiable
- Essential Tools and Preparation Before You Begin
- How to Open Brush Roll on Shark: The Bottom-Access Plate Method
- How to Open Brush Roll on Shark: The Side/Top Access Method
- The Deep Cleaning Process: What to Do Once It’s Open
- Reassembly and Testing: Getting It Right the First Time
- Troubleshooting: What If It Still Doesn’t Work?
Why Opening and Cleaning Your Brush Roll is Non-Negotiable
Before we dive into the “how,” let’s solidify the “why.” The brush roll, also called a roller brush or agitator, is the component that physically agitates carpet fibers to dislodge dirt and debris. It works in tandem with the vacuum’s suction. When the brush roll is obstructed, it can’t spin freely. This has a cascading negative effect:
- Loss of Deep Cleaning Power: Your vacuum will only be picking up surface dirt, not the ground-in grime in your carpet pile.
- Suction Reduction: A jammed brush roll creates immense drag on the motor, which can reduce overall suction power coming through the hose and wand.
- Premature Wear and Tear: The motor strains to turn the stuck brush roll, generating excess heat and wear. This can burn out belts (on belt-driven models) or damage the motor itself over time.
- Strange Noises: A grinding, squealing, or straining sound is your vacuum’s cry for help, almost always pointing to a brush roll issue.
- Belt Breakage: On models that use a drive belt, a jammed brush roll will often snap the belt, rendering the roller completely useless until replaced.
By making brush roll cleaning a part of your routine—especially if you have pets or long-haired family members—you protect your investment and ensure your Shark vacuum performs at its peak every single time. Cleaning it requires you to open the brush roll housing, which is what we’re focusing on.
The Two Primary Brush Roll Designs in Shark Vacuums
Shark primarily uses two different brush roll access designs across its upright and stick vacuum lineup. Identifying which one you have is the first practical step. The two types are:
- Bottom-Access Plate (Upright Models): This is the most common design for full-size Shark upright vacuums like the Navigator, Rotator, and Vertex series. A large, usually rectangular or square plastic plate on the bottom of the vacuum head secures the brush roll. This plate is held in place by either clips, screws, or a combination of both. You open it from the bottom.
- Side or Top Access (Stick & Some Uprights): Many Shark stick vacuums (like the IZ, Stratos, orVertex Sleeper series) and some newer uprights have a brush roll you access from the side or top of the vacuum head. This often involves a release lever, button, or a single screw on the side of the housing. There is no large bottom plate.
We will cover both in detail. First, let’s gather your tools.
Essential Tools and Preparation Before You Begin
You don’t need a toolbox. In fact, the simplicity of Shark’s design means you likely have everything you need already. Being prepared makes the job faster and prevents frustration.
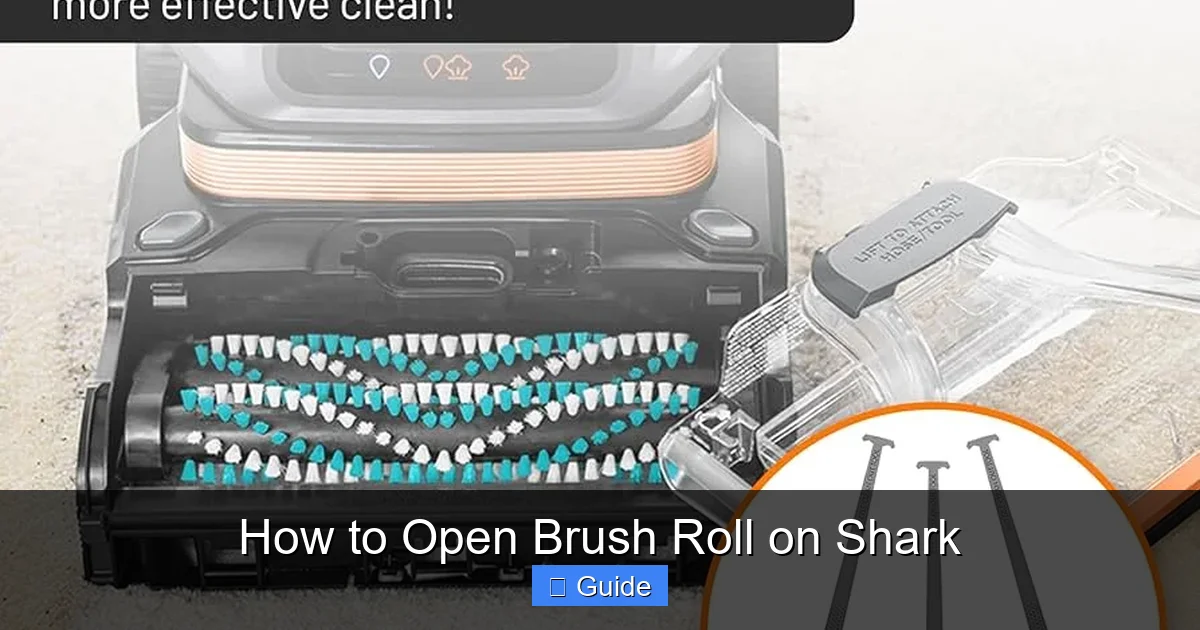
Visual guide about How to Open Brush Roll on Shark
Image source: m.media-amazon.com
What You’ll Need:
- A Phillips-Head Screwdriver: This is the most common tool required. A small, precision-style screwdriver (like for eyeglasses) is often perfect for the tiny screws holding the access plate. A standard #1 or #2 Phillips will also work on larger screws.
- A Flathead Screwdriver (Optional): Useful for prying open stubborn plastic clips without damaging them. A butter knife can work in a pinch, but be gentle.
- A Pair of Needle-Nose Pliers (Optional): Excellent for pulling out stubborn, tangled hair and fibers from the brush roll bristles and end caps.
- A Scissors or Seam Ripper: For cutting through dense mats of hair and carpet fibers wrapped around the roller. A seam ripper is ideal as it slides under the wrap without risking cutting the bristles.
- A Damp Microfiber Cloth: For wiping down the brush roll, its end caps, and the inside of the housing after you remove the debris.
- Good Lighting: A flashlight or your phone’s light can be invaluable to see hair wrapped deep inside the brush roll ends.
Critical Safety & Prep Steps:
1. Unplug the Vacuum: This is the absolute, number-one rule. Never, under any circumstances, attempt to service the brush roll with the vacuum plugged in or powered on. The motor could accidentally engage.
2. Position the Vacuum: Lay the vacuum flat on its side or back, depending on the access point. For bottom-access models, you’ll need good clearance underneath. For stick vacuums, placing it on a table or counter can make side access easier.
3. Check for Obvious Jams: Sometimes, you can see a big wad of hair or a sock stuck in the brush roll from the outside. If it’s easily reachable, try pulling it out gently with your fingers before opening anything.
4. Have a Trash Bag Ready: The debris you pull out will be a disgusting mix of hair, dust, and carpet fibers. Have a bag or bin right next to you to dispose of it immediately.
How to Open Brush Roll on Shark: The Bottom-Access Plate Method
This method applies to the vast majority of Shark upright vacuums, including the popular Navigator Lift-Away, Rotator, and Vertex models. The principle is always: release the bottom plate, remove the brush roll, clean, and reinstall.
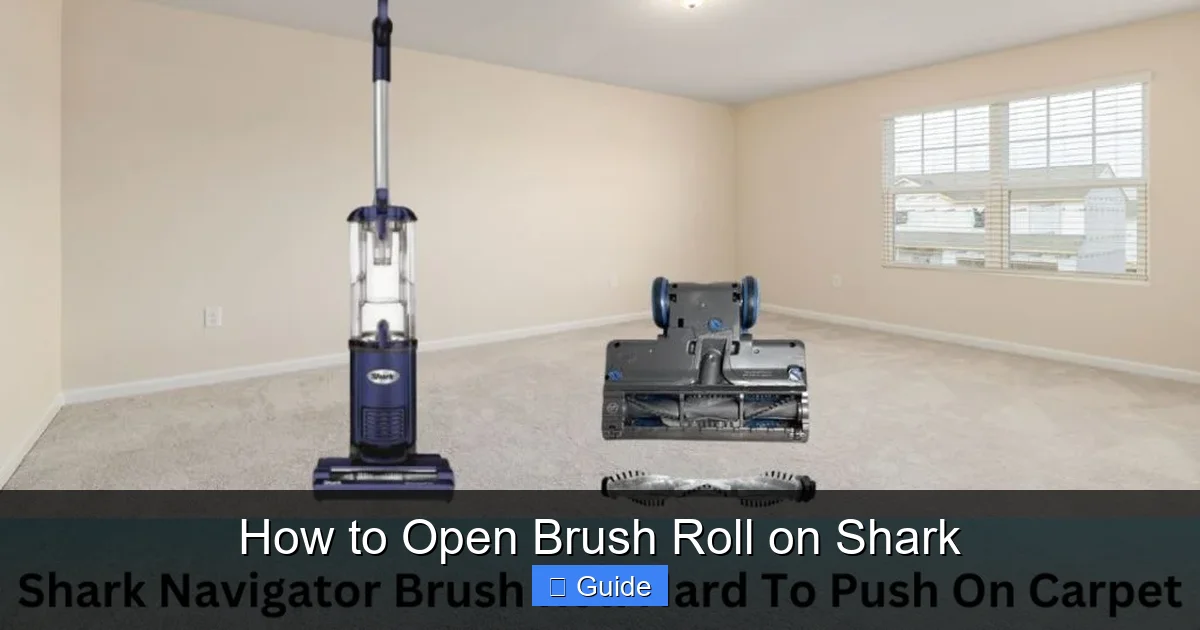
Visual guide about How to Open Brush Roll on Shark
Image source: sharkvacuum.blog
Step 1: Locate and Release the Bottom Plate
Flip your vacuum onto its back so the brush roll housing is facing up. You’ll see a large plastic cover on the bottom. Look closely at its edges. There are two common release mechanisms:
- Twist-Lock Lugs: Many models have two or four plastic lugs (like small knobs) on the plate. You turn these 90 degrees (a quarter-turn) to unlock them. They will often have an arrow or “unlock/lock” icon molded into the plastic. Turn them until they align with the “unlock” position or feel loose.
- Screw-On Plate: Some models, particularly older ones or certain Rotator versions, use one or two Phillips-head screws to secure the plate. Simply unscrew them and set them aside in a safe spot.
- Clip-Secured Plate: A few models use plastic clips around the perimeter. These require prying. Insert your flathead screwdriver into a small gap (often near a lug or corner) and gently twist to pop the clip free. Work your way around the plate. Be patient here—aggressive prying can crack the plastic.
Once the locks are released or screws removed, the plate should drop down or swing open on a hinge. Some plates are completely separate; just lift it off.
Step 2: Remove the Brush Roll Assembly
With the plate off, the brush roll is exposed. It’s a long cylinder with bristles, sitting in a housing with a small rubber drive belt (on belt-driven models) or a direct motor connection (on newer models). Gently pull the brush roll straight out toward you. It may have plastic end caps that slide off or may come out as one unit.
- Note the Orientation: Before you fully remove it, notice which end faces which direction. The brush roll is not symmetrical; one end may have a different shape or a gear. This is critical for proper reinstallation. You can take a quick photo with your phone.
- Belt-Driven Models: You will see a small, black rubber belt looped around the brush roll gear and a motor shaft. You must slip this belt off the brush roll end before removing the roller completely. Stretch it gently; it will come off the plastic gear.
- Direct-Drive Models: There is no belt. The brush roll has a gear that meshes directly with a motor gear. You just pull it straight out.
Lay the brush roll on a cloth or paper towel. You’re now ready for the most satisfying part: cleaning.
How to Open Brush Roll on Shark: The Side/Top Access Method
This design is prevalent in Shark’s stick vacuums (IZ, Stratos, Vertex Sleeper) and some newer uprights like the Vertex Sleeper. Access is simpler but sometimes less obvious.
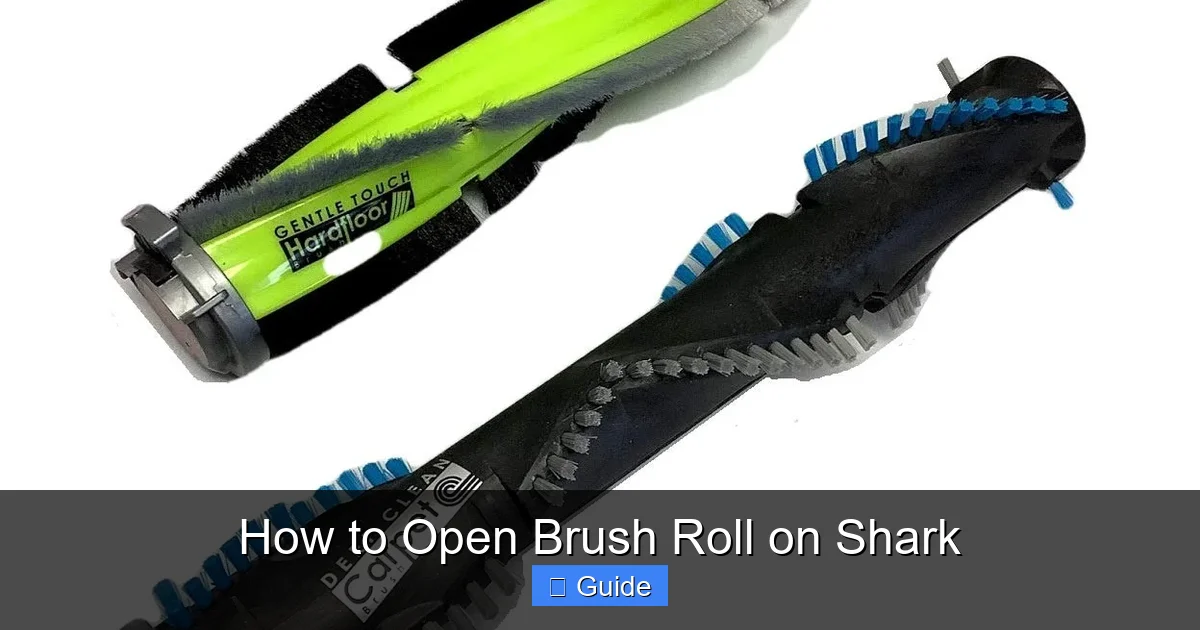
Visual guide about How to Open Brush Roll on Shark
Image source: images-na.ssl-images-amazon.com
Step 1: Find the Release Mechanism
On these models, you don’t remove a large plate. Instead, look on the side or top of the vacuum head—the part that contacts the floor. You’re searching for:
- A Release Lever or Tab: Often a large, colored (usually red or gray) plastic piece you press or slide. It might be labeled with an icon of a brush roll.
- A Single Screw: Sometimes hidden under a decorative cap or near the wheel. A small Phillips screw holds a small access door or the entire brush roll housing together.
- A Button: A push-button release that pops the brush roll housing open like a clamshell.
On Shark IZ vacuums, for example, you press two small release buttons on either side of the head simultaneously and pull the entire brush roll housing out from the main body. The brush roll is then accessible inside that housing.
Step 2: Extract the Brush Roll
Once the housing is open or released, the brush roll should slide or pop out easily. On some models, you may need to tilt it slightly to disengage it from a gear or clip. Again, note its orientation. There is almost never a belt to deal with on these modern stick vacs; they use a direct-drive system. Simply pull the brush roll free.
The Deep Cleaning Process: What to Do Once It’s Open
Now you have the brush roll in hand. This is where you restore its effectiveness. A clean brush roll spins freely and agitates carpet effectively.
1. The Big Hair Removal
Start with the bulk debris. Use your fingers to pull off large clumps of hair and carpet fiber. Then, use the scissors or seam ripper. Slide the tip under the wrapped hair/fiber mat, parallel to the brush roll, and carefully cut it. Never cut into the bristles themselves. Cut the wrap into sections and pull them off. For hair wound tightly around the axle between bristles, use needle-nose pliers to grip and pull it out strand by strand.
2. Clean the End Caps and Housing
Don’t ignore the ends. Hair and dust love to pack into the bearings inside the plastic end caps. Use a damp cloth to wipe the outside of the end caps. For the inside, use a cotton swab or the corner of your cloth. If debris is packed in, you can gently use a toothpick to dislodge it, but be careful not to scratch the bearing surface. Wipe out the entire brush roll housing on the vacuum—this is where a lot of dust and small debris collects.
3. Inspect the Bristles
Look at the bristles. Are they melted, bent, or missing? This can happen from excessive heat (from a jammed motor) or contact with a hot surface. If many bristles are damaged, the brush roll’s effectiveness is reduced. While you can use a brush roll with some wear, severely damaged bristles mean it’s time for a replacement brush roll. Shark sells official replacements for every model.
4. The Belt Check (If Applicable)
For bottom-access, belt-driven models, inspect the rubber drive belt. Look for cracks, glazing (a shiny, hardened surface), or stretching. If it feels loose when you stretch it gently, or shows any damage, replace it. A new belt is inexpensive and crucial for proper function. Ensure it’s seated correctly on both the motor shaft and brush roll gear when reassembling.
Reassembly and Testing: Getting It Right the First Time
Reassembly is just as important as disassembly. A poorly reassembled brush roll will either not work or cause immediate damage.
Step 1: Reinstall the Brush Roll
Take your clean brush roll. Remember the orientation you noted? Slide it back into the housing exactly as it came out. The gear end must engage with the motor drive (either the belt pulley or the direct motor gear). You should feel it click or seat fully.
- For Belt-Driven: Stretch the belt over the brush roll gear first. Then, while holding the brush roll in place, stretch the other side of the belt over the motor shaft pulley. It can be tricky. Rotate the brush roll by hand to help guide the belt onto the pulley.
- For Direct-Drive: Ensure the gear teeth mesh properly with the motor gear. Push until it’s flush.
Spin the brush roll by hand. It should rotate smoothly and freely, with no grating or binding. If it doesn’t, you’ve likely misaligned it or something is jammed. Pull it out and try again.
Step 2: Secure the Access Plate or Housing
Now, put the bottom access plate or side housing back.
- For Twist-Lock Plates: Align the plate and turn the lugs 90 degrees to the “lock” position. They should be tight and not wiggle.
- For Screw-On Plates: Start the screws by hand to avoid cross-threading, then tighten them securely, but do not overtighten and crack the plastic.
- For Clip-On Plates: Align the plate and press firmly around the edges until you hear/feel all the clips snap into place.
- For Stick Vac Housings: Align the clamshell housing and press until it clicks shut. Reinsert any release tabs or screws.
Give the entire head a gentle shake. Nothing should be loose or rattling.
Step 3: The All-Important Test
Before you put the vacuum away, plug it in and do a quick test on a small, clear area of carpet.
- Turn the vacuum on.
- Listen. The sound should be the normal, steady vacuum hum. No grinding, squealing, or straining.
- Look. Place the vacuum on the carpet. The brush roll should be spinning. You can usually see the bristles moving from the side.
- Feel. Gently lift the vacuum slightly off the carpet. The brush roll should continue spinning for a second or two before stopping. If it stops immediately, there may be too much drag from misalignment.
If it sounds and spins correctly, you’ve successfully completed the maintenance! If not, unplug it and double-check your reassembly.
Troubleshooting: What If It Still Doesn’t Work?
Even after a thorough cleaning, you might encounter issues. Here’s how to diagnose common problems.
Issue: Brush Roll Won’t Spin After Reassembly
Possible Causes: The brush roll is not seated correctly and is binding; the belt (if present) is not on correctly or is broken; there is still debris jammed in the housing preventing rotation.
Solution: Unplug. Remove the brush roll again. Spin it by hand in the housing—does it turn freely? If not, find and clear the jam. Reinstall the brush roll, ensuring it’s fully inserted. For belt-driven models, remove the belt and spin the motor shaft pulley by hand. If it doesn’t spin, the motor or clutch may be faulty—a more serious issue. If the motor shaft spins freely, the problem is with the brush roll installation or a broken belt.
Issue: Strange Noises Return Immediately
Possible Causes: A broken belt flapping around; a piece of debris (like a coin or toy) still trapped in the housing; a damaged brush roll bearing.
Solution: Unplug and open it again. Visually and manually inspect everything. Listen for the noise source. A rattling noise often means foreign object. A high-pitched squeal can indicate a bearing is dry or damaged. If the brush roll end caps don’t spin smoothly when you rotate them by hand, the bearing inside may be worn out, requiring a new brush roll assembly.
Issue: Loss of Suction Persists After Cleaning
Possible Causes: The brush roll issue was a symptom, not the cause. The main problem could be a clogged hose, a full dust cup/bag, or a dirty filter.
Solution: Check the entire airflow path. Empty the dust cup. Clean or replace the pre-motor and post-motor filters. Inspect the hose and wand for blockages. The brush roll is just one part of the system.
Frequently Asked Questions
Do all Shark vacuums have the same process to open the brush roll?
No. The process varies by model series. Uprights like the Navigator and Rotator typically have a bottom-access plate secured by clips or screws. Stick vacuums like the IZ often have a side-release button or a single screw. Always identify your specific model number first.
What if my brush roll is completely jammed and won’t come out?
First, ensure all release mechanisms (screws, clips, levers) are fully disengaged. Then, gently wiggle the brush roll while pulling. Sometimes debris packed in the housing can create a suction seal. If it’s stuck due to tangled hair binding it to the housing, you may need to cut away as much of the external wrap as possible to create wiggle room.
How often should I open and clean my Shark brush roll?
For most households, every 1-2 months is a good rule. If you have pets that shed or people with long hair, clean it monthly. A visual check is easy: flip the vacuum over and look at the brush roll. If you see hair wrapped around it, it’s time to clean it.
Can I use water to clean my Shark brush roll?
It’s not recommended. The brush roll has bearings inside its end caps that can be damaged by water. Use a damp cloth to wipe the plastic parts and bristles, but do not soak or submerge the brush roll. Always let it dry completely (at least 24 hours) before reinstalling.
My Shark has a belt. Do I need to replace it every time I open the brush roll?
No. The belt should last for a long time if the brush roll is kept clean and free of jams. Only replace it if you see visible damage (cracks, stretching, melting) or if it breaks. However, it’s a good practice to inspect it every time you clean the brush roll.
Where can I find the exact instructions for my Shark model?
The best source is the official user manual for your specific model number (found on a label on the vacuum). You can download a free PDF copy from the Shark website’s support section. Their website also has model-specific tutorial videos which are extremely helpful for visual learners.