A Shark robot vacuum drive wheel error means the bot can’t move properly, usually due to obstructions, debris, or mechanical wear. Fix it by power cycling, thoroughly cleaning the drive wheels and their assemblies, checking for software glitches, and inspecting for physical damage. Most issues are resolved with diligent cleaning and resetting, but persistent problems may indicate a faulty motor or wheel assembly requiring part replacement or professional service.
There you are, your Shark robot vacuum—your trusty little cleaning companion—has decided to take an unscheduled nap right in the middle of your living room. You check the app, and there it is: the dreaded “Drive Wheel Error” or “Wheel Fault” notification. Your heart sinks a little. It means your bot has detected a problem with its movement system and has shut down to prevent damage. Before you panic and start shopping for a new vacuum, take a deep breath. In the vast majority of cases, this is a fixable issue that you can handle yourself with some patience, a few simple tools, and a systematic approach. This guide will walk you through every step, from the simplest 30-second reboot to a full mechanical teardown, to diagnose and fix your Shark robot vacuum drive wheel error.
Key Takeaways
- Safety First: Always power off and unplug your Shark vacuum before inspecting or cleaning any internal components to avoid electrical hazards.
- Debris is the Prime Culprit: Over 80% of drive wheel errors are caused by hair, string, carpet fibers, or grit wrapped around the wheel axles or jammed in the wheel well.
- Cleaning is Multi-Layered: You must clean not just the visible rubber tread, but the internal axle, the plastic wheel housing, and the gear motor’s drive shaft.
- Software Glitches Happen: A full reboot (power cycle) and a factory reset can clear temporary sensor or navigation errors that falsely trigger a wheel fault.
- Know Your Limits: If cleaning and resetting fail, the issue is likely a worn drive motor, broken gear, or damaged wheel assembly, which may require a part replacement.
- Prevention is Key: Regular maintenance, like weekly wheel inspections and keeping the vacuum’s environment clear of loose wires and long hair, drastically reduces error occurrences.
📑 Table of Contents
- Understanding the “Drive Wheel Error”: What Your Shark Is Trying to Tell You
- Safety First: Essential Precautions Before You Begin
- The Step-by-Step Diagnostic & Fix Protocol
- Advanced Troubleshooting: When the Simple Fixes Fail
- Preventive Maintenance: Keeping the Error Away for Good
- When to Call It Quits and Seek Professional Help
- Conclusion: Getting Back to Clean Floors
Understanding the “Drive Wheel Error”: What Your Shark Is Trying to Tell You
Your Shark robot vacuum, whether it’s an ION, AI Ultra, or another model, is a sophisticated piece of engineering. It combines sensors, software, and mechanics to navigate your home. The “Drive Wheel Error” is a specific fault code triggered by the vacuum’s internal diagnostic system. Essentially, the bot’s brain (main logic board) is sending a signal to the drive motor to rotate the wheel, but it’s not getting the expected feedback—either from a sensor or because the motor is physically stalled. It’s a safety mechanism to stop the motor from burning out while trying to spin a jammed wheel.
The Most Common Root Causes
While the error message is the same, the underlying causes range from trivially simple to mechanically complex. Identifying the likely culprit is the first step to the right fix.
- External Obstruction: The #1 cause. Hair, string, carpet fibers, or even a small toy piece gets wrapped tightly around the drive wheel axle. This creates immense resistance, preventing the wheel from turning freely. The vacuum senses this stall and throws the error.
- Internal Debris Jam: Even if the outside of the wheel looks clean, debris can work its way into the plastic wheel housing (the “well” the wheel sits in). Grit, dust bunnies, and pet hair can pack in between the wheel and its housing, binding it.
- Wheel Assembly Damage: The rubber tread can wear smooth, crack, or separate from the plastic hub. The plastic wheel itself can crack or become misshapen. A broken gear inside the wheel assembly (some models have a small gear on the wheel) will also cause a fault.
- Drive Motor Failure: The small DC motor that spins the wheel can burn out, lose its magnets, or have a broken gear on its output shaft. This is less common but becomes the prime suspect after all cleaning is done.
- Sensor or Wiring Issue: A hall effect sensor (which detects wheel rotation) or its wiring connector can become loose, dirty, or damaged. The main board might not be receiving the “wheel is spinning” signal.
- Software/Calibration Glitch: Rarely, a temporary software bug or a failed wheel calibration (the process where the bot learns its wheel circumference) can cause a false positive error.
Safety First: Essential Precautions Before You Begin
Your Shark robot vacuum contains sensitive electronics and powerful (for its size) motors. Rushing into a repair without precautions can lead to electric shock, damage to the circuit board, or personal injury from small, sharp parts. Follow these rules every time.
Visual guide about How to Fix Shark Robot Vacuum Drive Wheel Error
Image source: sharkvacuum.blog
Power Down Completely
This is non-negotiable. Do not just press the “OFF” button on the bot. You must:
- Place the robot on its charging base and let it dock if possible.
- Press the power button on the side or bottom to turn it off.
- Unplug the charging base from the wall outlet. This cuts all AC power to the system.
- If your model has a removable battery (some older IONs), remove the battery as well.
Only when you are certain no power is flowing to any part of the vacuum should you begin handling screws and internal components.
Prepare Your Workspace
Work on a clean, well-lit, flat surface like a kitchen table or a large towel on the floor. Have the following tools and supplies ready:
- Screwdrivers: Typically, a small Phillips head (#1 or #0) and a flathead for prying clips.
- Compressed Air: A can of air is invaluable for blowing out debris from tight crevices.
- Flashlight: A bright LED light is essential for seeing into the dark wheel wells.
- Magnifying Glass: Helpful for inspecting small gears and sensor gaps.
- Small Container: For screws. Label it “Shark Bottom” so you don’t mix them with other household screws.
- Cotton Swabs & Isopropyl Alcohol (90%+): For cleaning electrical contacts and sensors.
- Tweezers & Needle-Nose Pliers: For pulling out stubborn hair and fibers.
- Lubricant (Optional): A tiny dab of white lithium grease or silicone-based grease on the axle (NOT the rubber tread) after cleaning can help, but use sparingly.
The Step-by-Step Diagnostic & Fix Protocol
We will proceed from the least invasive, highest-success-rate methods to the more involved. Do not skip steps. Often, the simple fix you overlooked is the solution.
Visual guide about How to Fix Shark Robot Vacuum Drive Wheel Error
Image source: sharkvacuum.blog
Step 1: The Quick Power Cycle (The 30-Second Fix)
Before touching a screw, perform a full reboot. This clears any temporary software glitch that might be causing a false sensor reading.
- Ensure the robot is OFF and the charging base is unplugged.
- Locate the main battery (if removable) and take it out for 60 seconds.
- If the battery is internal, simply leave the vacuum unpowered for 2-3 minutes.
- Reinsert the battery (if removed) or plug the base back in.
- Place the robot on the base and let it charge for a few minutes.
- Power it on and try to start a cleaning cycle.
If the error returns immediately or after a few minutes of movement, proceed to Step 2.
Step 2: External Inspection & Basic Cleaning (The 5-Minute Fix)
Flip the robot over. You will see two large drive wheels on the sides and often a smaller caster wheel in the front or rear. The error is for one of the two main drive wheels, so you’ll need to check both.
- Visual Scan: Use your flashlight. Look for any hair, string, or plastic wrap caught in the grooves of the rubber tread or, more critically, where the axle meets the plastic wheel hub. Look for any visible cracks in the rubber or plastic.
- The “Spin Test”: With the robot still OFF, try to rotate each drive wheel by hand. They should spin freely with minimal resistance. Listen for grinding or clicking. Note if one wheel is significantly stiffer than the other.
- Basic Debris Removal: Use your fingers, tweezers, or a blunt tool (like a plastic dental pick) to pick away any visible hair wrapped around the axle. Be meticulous. A single strand of hair wound tightly can be enough to trigger the error.
If the wheel spins freely after this and the error is gone, you’ve solved it! If not, or if the wheel is still stiff, move to the deep clean.
Step 3: The Deep Clean Disassembly
This is where you get into the wheel well. The process varies slightly by model, but the principles are the same.
Removing the Drive Wheel Assembly
- Remove the Bottom Cover: Lay the robot on its back. Locate all the screws on the bottom plate. They are often hidden under circular rubber plugs or stickers. Carefully pry these out with a flathead screwdriver and keep them safe. Remove all screws and gently pry the bottom plastic cover off. There may be clips; work your way around slowly.
- Locate the Drive Wheel: Once the bottom is off, you’ll see the motors and wheels from the inside. The drive wheel is attached to a small gear motor. You will see a plastic clip or a screw holding the wheel assembly in place.
- Release the Wheel: Some Shark models have a simple plastic retaining clip that you can pry up with a flathead screwdriver. Others have a small screw. Gently release it. The wheel should now be able to be pulled outward from the motor shaft.
- Extract the Wheel: Pull the wheel straight out. It may be tight due to the rubber seal. Wiggle it gently. You should now have the wheel assembly in your hand, separated from the robot’s body.
Cleaning the Wheel, Axle, and Well (The Critical Part)
Now you have full access. This is where you find the hidden debris.
- The Axle: Look at the metal axle protruding from the motor. It will almost certainly have a mat of hair and lint packed around it, sometimes a full centimeter thick. Use tweezers and your fingers to pull this off. Then, use a cotton swab dipped in a tiny amount of isopropyl alcohol to clean the axle shaft. Let it dry.
- The Inside of the Wheel: Look into the hole of the plastic wheel hub. Clean any debris from inside. Check the small gear (if your model has one) on the inside of the wheel that meshes with the motor gear. Make sure all its teeth are intact and clean.
- The Wheel Well (Housing): This is the plastic cavity in the robot’s side that the wheel sits in. Shine your flashlight in here. You will likely see a disaster of packed dust, hair, and grit. Use compressed air to blow it out from the back. Use a cotton swab or a brush to scrape the sides clean. Pay special attention to the area where the wheel’s rubber seal sits against the housing; debris here can cause drag.
- The Motor Gear: While you’re here, look at the small gear on the motor shaft itself. Clean any debris off its teeth with a swab.
Reassembly: Once everything is spotless, carefully push the wheel back onto the motor shaft, ensuring it seats fully. Re-engage the retaining clip or screw. Do not overtighten. Snap the bottom cover back on, reinsert all screws, and plug the base in.
Step 4: Software Reset & Recalibration
With the physical cleaning done, we need to ensure the bot’s software is in a clean state.
- Factory Reset: Consult your Shark manual for the exact reset procedure, as it varies. It often involves pressing and holding a combination of buttons (e.g., “Clean” and “Dock”) for 10-15 seconds until you hear a tone or see lights flash. This clears all map data and custom settings.
- Re-run Setup: After the reset, place the bot on a clear, open floor on its base. Open the Shark app and go through the full setup process again, including the “Follow Me” or mapping run if your model has one. This recalibrates the wheel odometry (the system that counts wheel rotations to measure distance).
- Test Run: Start a “Spot Clean” or a short “Room Clean” in a clear area. Watch the bot closely. Does it move? Does it still announce an error?
Advanced Troubleshooting: When the Simple Fixes Fail
If you’ve meticulously cleaned everything, reset the software, and the error persists, the problem is likely mechanical or electrical within the wheel drive system itself.
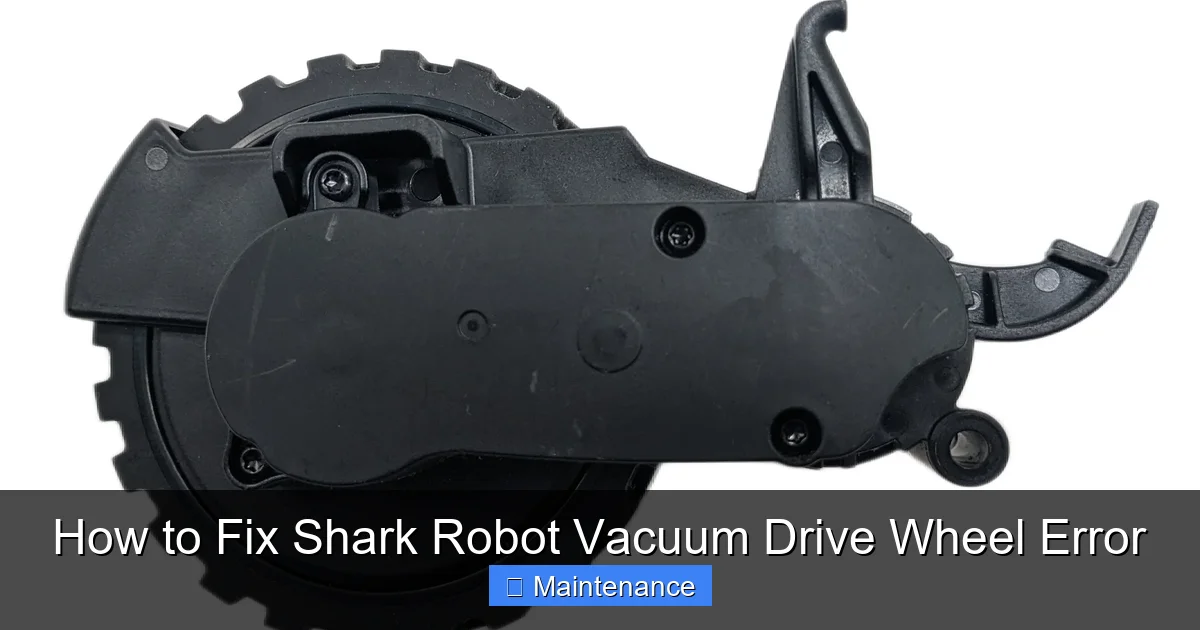
Visual guide about How to Fix Shark Robot Vacuum Drive Wheel Error
Image source: i5.walmartimages.com
Diagnosing a Faulty Drive Motor
The drive motor is a small, sealed unit. You can test it with the bottom cover off (after ensuring the vacuum is powered off and unplugged).
- Locate the two thin wires (usually white and black) that connect the motor to the main logic board.
- Carefully disconnect the plug from the board.
- Manually rotate the wheel (with the wheel assembly still on the motor). You should feel a slight, smooth resistance from the motor’s internal magnets. If it feels gritty, has dead spots, or makes grinding noises, the motor is bad.
- For a more definitive test (if you’re comfortable), you can apply 12V DC power (from an appropriate power supply) directly to the motor’s wires (observe polarity: + to one, – to the other). The motor should spin smoothly. This is for advanced users only.
A faulty motor will need to be replaced. You can find replacement motor assemblies for your specific Shark model on sites like Shark’s official parts page, eBay, or Amazon. Installation usually involves unscrewing the motor from the chassis and swapping it.
Checking the Hall Effect Sensor
Many Shark models use a hall effect sensor (a small electronic component) mounted near the motor gear to detect its rotation. A loose connector or dirty sensor can cause the “wheel not spinning” error.
- Find the small sensor (it’s a black or brown plastic rectangle with 2-3 wires) positioned so its tip is very close to the teeth of the motor gear.
- Check that its connecting plug is firmly seated on the main board.
- Inspect the sensor tip. If it’s covered in black dust or grease, gently clean it with a cotton swab and alcohol.
- Visually inspect the tiny gap between the sensor and the gear. There should be about 1-2mm of clearance. A bent sensor or a gear that has shifted can make contact, causing a fault.
Inspecting for Physical Damage
Examine the plastic wheel housing for cracks. A crack can allow the wheel to flex excessively under load, tripping a sensor or causing binding. Also, inspect the rubber tread. If it’s hardened, cracked, or separating, it can create drag. A damaged wheel assembly should be replaced as a unit.
Preventive Maintenance: Keeping the Error Away for Good
An ounce of prevention is worth a pound of cure. Incorporate these habits into your routine to minimize future drive wheel errors.
Weekly & Monthly Routines
- Post-Cleaning Blow-Out: After every 2-3 cleaning cycles, use compressed air to blow out the wheel wells from the outside. Aim the nozzle into the gap between the wheel and the body.
- Wheel Wipe-Down: Wipe the rubber drive wheels with a slightly damp microfiber cloth. This removes grit that can be ground into the axle seal.
- Monthly Deep Inspection: Once a month, perform the basic external inspection and hand-spin test from Step 2. Catching a hair wrap early prevents it from packing in.
- Environment Management: Keep floors clear of things that love to wrap around axles: electrical cords, blind pulls, long-haired rugs, and of course, human hair. If you have pets, consider a “shaggy rug” policy—either secure such rugs or avoid running the bot on them.
Long-Term Care
Every 6-12 months, depending on use, consider a more thorough internal cleaning as described in Step 3. This is especially important if you have shedding pets or a particularly dusty home. Keeping the wheel well pristine is the single most effective thing you can do for the longevity of your drive system.
When to Call It Quits and Seek Professional Help
Not every problem is a DIY victory. Knowing when to stop is crucial to avoid causing more damage.
Signs It’s Time for the Pros
- Persistent Error After Full Service: You’ve done the complete deep clean, reset, and the error returns within minutes of operation.
- Visible Motor Damage: You see burnt marks, smell ozone (a sharp, electrical smell), or the motor casing is cracked.
- Main Board Suspected: If the error is intermittent and affects different wheels, or if other unrelated errors appear (like cliff sensor faults), the main logic board’s motor driver circuit could be failing.
- Lack of Tools/Confidence: If the thought of handling tiny connectors or applying 12V power makes you nervous, it’s smarter and safer to seek help.
Your Options
For out-of-warranty vacuums, your best bet is a local appliance or small appliance repair shop that advertises “robot vacuum repair.” They often have experience with common Shark failures and can source parts. For under-warranty units, contact Shark Customer Support directly. They will troubleshoot with you and, if necessary, arrange for a repair or replacement. Do not attempt to open a vacuum that is still under warranty if it voids the seal—check your warranty terms first.
Conclusion: Getting Back to Clean Floors
Facing a Shark robot vacuum drive wheel error is frustrating, but it’s rarely a death sentence for your appliance. The path to a fix is a logical progression: start with the simple power cycle and external clean. Move to the thorough internal disassembly and cleaning of the wheel well and axle—this solves the vast majority of cases. Then, address the software with a factory reset. Only when these steps fail should you suspect and replace the motor or other internal components. By understanding what causes the error and following this structured diagnostic process, you empower yourself to be the first line of defense for your robotic helper. Remember, regular, proactive maintenance is your greatest ally. A clean wheel well is a happy wheel, and a happy wheel means a happy you, with clean floors and a fully functional robot vacuum. Now, go grab your screwdriver and flashlight—your Shark is waiting for its spa day.
Frequently Asked Questions
What is the most common cause of a Shark robot vacuum drive wheel error?
The most common cause is debris, specifically hair, string, or carpet fibers, tightly wrapped around the drive wheel’s axle or packed into the wheel well housing. This creates physical resistance that the motor cannot overcome, triggering the safety error.
Can I fix the drive wheel error myself, or do I need a professional?
Yes, you can fix it yourself in most cases. Over 80% of these errors are resolved by thoroughly cleaning the wheel axles and internal wheel wells, as described in this guide. You only need a professional if the drive motor itself is burned out or if you are uncomfortable performing the disassembly.
How often should I clean my Shark robot’s drive wheels to prevent errors?
For best results, perform a quick external inspection and blown-out with compressed air after every 2-3 cleaning cycles. Do a more thorough internal cleaning (removing the wheel assembly) every 3-6 months, or more frequently if you have pets or long hair in your home.
Will a factory reset fix a drive wheel error?
A factory reset can fix the error if it’s caused by a software glitch or a failed wheel calibration. However, it will not fix a physically jammed wheel or a broken motor. Always perform physical cleaning and inspection before relying on a reset.
My wheel spins freely by hand, but the error still appears. What now?
If the wheel spins freely, the issue is likely internal to the wheel assembly or motor. Check for a broken gear on the inside of the wheel or on the motor shaft. You may also have a faulty Hall effect sensor or a wiring issue. In this case, part replacement (wheel assembly or motor) is the next step.
Is it safe to use my Shark if I ignore the drive wheel error?
No. The vacuum has shut down to prevent damage. If you force it to run (e.g., by manually moving it), you risk burning out the drive motor, stripping gears, or causing further damage that will make the repair more expensive. Always address the error before attempting to use the vacuum again.