Is your Shark Robot Mop refusing to spray water? Don’t panic. The issue is almost always a simple blockage or an empty tank, not a broken machine. Start by checking the water level and ensuring the tank is properly seated. Next, inspect and clean the spray nozzles and the small water delivery tubes. If those steps fail, examine the pump system and perform a full reset. Following this structured approach will solve the problem 90% of the time without needing a professional.
Key Takeaways
- Always start with the basics: Confirm the water tank is full, correctly inserted, and the mop pad is damp before assuming a complex fault.
- Nozzle clogs are the #1 culprit: Mineral deposits from hard water or debris frequently block the tiny spray holes. Regular cleaning with a paperclip and vinegar solution is essential maintenance.
- Check the water delivery system: A kinked, disconnected, or clogged internal tube between the tank and nozzles will stop all spray function.
- The pump can fail or get airlocked: Listen for a faint humming sound. Priming the pump by manually filling the tubes can resolve airlock issues.
- Software and sensors can be at fault: A simple reboot or factory reset can clear error states. Ensure the mop’s “eyes” are clean for proper navigation and function.
- Preventative maintenance is key: Use distilled water, clean the mop thoroughly after each use, and descale monthly to avoid future spraying problems.
- Know when to seek help: If all DIY steps fail and the mop is under warranty, contact Shark Support. If out of warranty, a pump replacement may be the final fix.
📑 Table of Contents
- The Dreaded Dry Mop: Why Your Shark Robot Has Stopped Spraying
- Step 1: The Immediate & Obvious Checks (Don’t Skip These!)
- Step 2: The Water Tank, Cap, and Filter Deep Dive
- Step 3: Nozzle and Spray Tip Surgery
- Step 4: Investigating the Pump and Internal Tubing
- Step 5: Software Glitches and Sensor Issues
- Step 6: When All Else Fails – Advanced Considerations and Support
- The Golden Rule: Preventative Maintenance for a Long-Lasting Spray System
- Conclusion: Your Mop Can Be Fixed
The Dreaded Dry Mop: Why Your Shark Robot Has Stopped Spraying
You’ve set up your Shark Robot Mop, filled the clean water tank, and hit the start button. The little machine whirs to life, navigating across your kitchen floor with purpose. But something’s wrong. Instead of a nice, even mist, the pad is just… dry. It’s pushing dirt around instead of lifting it. Frustration sets in. Before you resign yourself to mopping by hand or calling for an expensive service, take a deep breath. The problem is almost always fixable. This guide will walk you through every possible reason your Shark Robot Mop is not spraying water, from the simplest oversight to more complex internal issues. We’ll use plain language, common household tools, and a logical, step-by-step approach to get your automatic cleaner back to doing its job.
The core of any spray-mopping system is beautifully simple: a water tank, a pump, small tubes, and tiny nozzles. A failure anywhere in that chain results in a dry mop. Our job is to methodically check each link. We will begin with the absolute first things you should check—things so easy they’re often overlooked—and progressively move to more involved troubleshooting. By the end, you’ll be an expert on your Shark mop’s spray system.
Step 1: The Immediate & Obvious Checks (Don’t Skip These!)
Before you grab a screwdriver, you must eliminate the most common, user-error causes. These are the checks that solve the problem for a huge percentage of users, often in under 60 seconds.
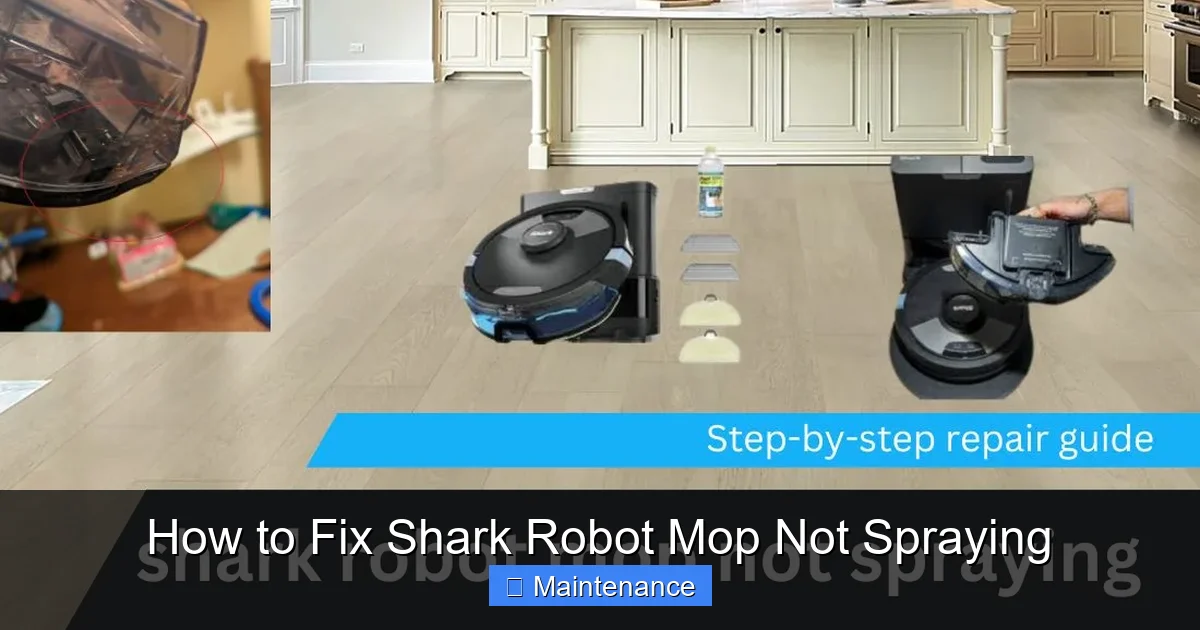
Visual guide about How to Fix Shark Robot Mop Not Spraying
Image source: sharkvacuum.blog
Is the Water Tank Actually Full and Properly Seated?
This sounds too simple to be the issue, but it’s the leading cause. First, remove the water tank. Is it actually filled with water? It’s easy to think you filled it when you only added a small amount. Fill it with clean water up to the “Max Fill” line. Second, inspect the rubber seal around the tank’s opening. Is it dirty, cracked, or missing? A compromised seal prevents the vacuum needed to draw water into the system. Wipe the seal and the tank’s opening with a clean, damp cloth. Finally, reinsert the tank. You should hear and feel a definitive click as it locks into place. If it’s wobbly or doesn’t click, it’s not seated correctly. The machine won’t recognize the tank, and no water will flow.
Is the Mop Pad Damp and Properly Attached?
The Shark system uses a “wetness sensor” or simply relies on the pad’s conductivity. If the pad is bone dry when you start, the mop may not trigger the spray cycle. Before starting, moisten the pad slightly by hand with clean water and wring it out so it’s damp, not soaking. Then, firmly attach it to the mop’s base plate, ensuring all Velcro strips are engaged. This simple step tells the robot the pad is ready for moisture.
Check for Error Messages on the App or Robot
Open your Shark app. Does it show any specific error code (e.g., E1, E2, “Tank Empty,” “Clean Pad”)? The robot’s LED lights might also be blinking in a pattern. Consult your user manual’s error code section. A “Tank Empty” light might mean the sensor is dirty or the tank isn’t clicked in. A “Clean Pad” message means the pad sensor isn’t detecting the pad’s moisture or presence. Resolving the specific error is crucial before the spray function will re-engage.
Step 2: The Water Tank, Cap, and Filter Deep Dive
If the immediate checks didn’t solve it, the problem is likely inside the water delivery system starting at the tank. We need to inspect the components that directly interface with the water source.
Visual guide about How to Fix Shark Robot Mop Not Spraying
Image source: sharkvacuum.blog
Inspecting and Cleaning the Tank Cap & Vent
The tank cap is more than just a lid. It has a one-way air valve (a small rubber flapper) and often a small mesh filter. As the pump draws water out, air must enter the tank through this valve to replace the volume. If the valve is stuck shut by debris or mineral deposits, a vacuum lock forms, and no water can leave the tank.
- Remove the cap. Look for the tiny valve—it’s usually a black or gray rubber circle.
- Gently pry it open with a toothpick to ensure it moves freely.
- Rinse the cap thoroughly under warm water. Use a cotton swab dipped in white vinegar to dissolve any white, chalky limescale around the valve seat.
- Check the small air vent hole on the side of the cap. Poke a straightened paperclip through it to clear any obstruction.
Reassemble and test.
The Internal Tank Filter: A Hidden Clog
Most Shark robot mops have a small, mesh filter inside the tank’s water outlet. Its job is to catch debris before it enters the tiny tubes. This filter can become completely clogged with sediment or algae.
- Disassemble the tank as per your manual (usually by twisting or pressing a lock).
- Locate the filter—it’s a small, cylindrical or disc-shaped piece where the water exits the tank.
- Remove it and hold it up to the light. Can you see through it? If it’s dark or caked with debris, it needs cleaning.
- Soak it in a cup of white vinegar for 15-20 minutes. Vinegar dissolves mineral deposits. Gently scrub it with a soft toothbrush.
- Rinse thoroughly under running water until all vinegar smell is gone. Let it air dry completely before reinserting.
A clogged internal filter is a classic reason for a Shark robot mop not spraying.
Step 3: Nozzle and Spray Tip Surgery
If water is leaving the tank but not reaching the floor, the blockage is almost certainly at the very end of the system: the spray nozzles. These are the smallest, most vulnerable parts.
Locating and Accessing the Nozzles
Flip your Shark robot mop over. You’ll see the mop pad plate. Underneath it, near the front, are one or two tiny brass or plastic nozzles. They are about the size of a pencil lead. They protrude slightly or are flush in a hole. This is where the spray emerges. They are extremely easy to clog.
The Paperclip Unclogging Method
This is the most effective DIY technique.
- Ensure the mop is powered OFF and the tank is removed.
- Take a standard metal paperclip. Straighten it out completely.
- Gently insert the pointed end into the nozzle hole. You will feel slight resistance. Do not force it aggressively. The goal is to break up the mineral crust, not drill a hole.
- Wiggle the paperclip very gently back and forth for 10-15 seconds.
- Now, pour a small amount of white vinegar directly into the nozzle hole. Let it sit for 5 minutes. The vinegar will dissolve the remaining scale.
- Finally, use a bulb syringe (like for cleaning ears or baby medicine) filled with clean water. Squirt water forcefully into the nozzle hole to flush out the dissolved debris and vinegar.
- Repeat for the second nozzle if your model has one.
You should see a fine mist come out when you blow air through it or use the syringe.
Cleaning the Entire Spray Manifold
Some models have a small plastic “manifold” or bar that the nozzles are attached to, with channels running to each nozzle. Debris can clog this internal channel. After cleaning the nozzles, use a cotton swab dipped in vinegar to clean the opening of the manifold where it connects to the internal tube. You can also carefully use a thin, flexible tube brush (like for cleaning straws) to gently probe the channel if you suspect a deeper clog.
Step 4: Investigating the Pump and Internal Tubing
If you have confirmed water is flowing freely from the tank (by removing the internal tube from the tank outlet and seeing water drip), but nothing is coming from the nozzles, the blockage or failure is between the tank and the nozzles. This involves the internal pump and the clear plastic tubing.
Listening for the Pump
With the tank full and the mop on a flat surface, start a cleaning cycle. Get your ear close to the robot’s body, near the water tank area. Do you hear a faint, high-pitched humming or whirring sound? This is the pump motor activating.
- If you hear the pump: The pump is likely working, but there is a physical blockage (kinked tube, clogged nozzle) or an airlock preventing water from moving.
- If you hear NOTHING: The pump is not engaging. This could be a electrical fault, a disconnected wire, or a failed pump motor. It could also be a software issue telling the pump not to run due to a sensor error.
Checking for Kinks, Clogs, and Disconnections
This step requires a bit of disassembly. Always unplug the mop and remove the battery if possible (consult your manual) before opening the casing.
- Carefully remove the bottom mop pad plate. You’ll see a clear plastic tube running from the tank area to the spray nozzles.
- Inspect the entire length of this tube. Is it pinched, kinked, or crushed anywhere? Gently straighten any kinks.
- Check both ends. Is the tube securely pushed onto the small barbs on the tank outlet and on the nozzle manifold? It can sometimes work itself loose. Re-seat it firmly.
- To check for a clog inside the tube, disconnect it from both ends. Blow air through it from one end. Does air pass freely? If not, the tube is clogged. Soak it in vinegar, then flush with water. A flexible pipe cleaner can help.
Reassemble carefully, ensuring no wires are pinched.
Priming the Pump to Clear an Airlock
Sometimes, especially after a refill, air gets trapped in the pump chamber, preventing it from creating suction. You can manually prime it.
- Remove the water tank.
- Locate the small nipple where the internal tube connects to the tank outlet.
- Using a syringe (without a needle) or a small squeeze bottle, draw up some clean water.
- Firmly attach the syringe to the nipple (you may need to create a tight seal with your finger or a small piece of rubber).
- Slowly push water into the tube. You should feel resistance and see water begin to appear at the nozzles.
- This forces water through the system, pushing out the air bubble. Reattach the full tank and test.
Step 5: Software Glitches and Sensor Issues
Your Shark robot is a computer on wheels. Sometimes, the problem isn’t physical but digital.
Visual guide about How to Fix Shark Robot Mop Not Spraying
Image source: sharkvacuum.blog
Performing a Full Power Cycle and Factory Reset
A simple reboot can clear temporary software faults.
- Power off the robot completely. If it has a removable battery, take it out for 60 seconds.
- Power it back on. Let it boot fully.
- Open the Shark app. Go to Settings and look for a “Factory Reset” or “Reset Robot” option. This will erase saved maps and schedules but often resolves stubborn communication errors between the robot and its components, including the pump command. Note: You will need to remap your home after a factory reset.
After the reset, run a test cycle with the tank full and pad damp.
Cleaning the Navigation Sensors (“Eyes”)
The robot’s front-facing sensors and cliff sensors are critical for operation. If they are dirty, the robot may stop mid-cycle or refuse to start certain functions, including spraying, as a safety measure.
- Use a microfiber cloth slightly dampened with water (no cleaners).
- Gently wipe the clear plastic covers over the sensors on the front, sides, and bottom.
- Check for hair or debris tangled in the wheels or brush roll, which can also trigger error states.
A clean robot is a happy, functional robot.
Step 6: When All Else Fails – Advanced Considerations and Support
You’ve checked the tank, cleaned the nozzles, inspected the tubes, primed the pump, and reset the software. The mop still isn’t spraying. Now it’s time to consider less common issues or seek external help.
Is the Pump Motor Physically Failed?
Pump motors can burn out. The humming sound might be absent, or you might hear a faint click but no vibration. Diagnosing a failed pump requires multimeter testing of the motor’s continuity, which is beyond most users. If your mop is older (2+ years) and heavily used, a pump failure is plausible. Replacement pumps are available from Shark or third-party suppliers, but installation requires soldering skills or professional help.
Control Board or Wiring Failure
The signal to spray comes from the main circuit board. A loose connection, corroded contact, or damaged wire between the board and the pump can break the circuit. Inspect the wiring harnesses inside the mop, especially where they connect to the pump and tank sensors. Look for any pins that are bent, broken, or corroded. This is delicate work.
Contacting Shark Support and Warranty Claims
Before giving up, contact Shark.
- Have your model number (on a sticker under the mop or on the packaging) and serial number ready.
- Explain all troubleshooting steps you’ve already taken. This shows you’re serious and helps them diagnose faster.
- If the mop is under the limited warranty (typically 1-2 years), they may offer a repair or replacement. They might also have a known issue with your specific model and a free fix.
- Be prepared to ship the unit at your expense, depending on their policy.
The Golden Rule: Preventative Maintenance for a Long-Lasting Spray System
The best fix is the one you never need. Incorporating these habits into your routine will drastically reduce the chance of your Shark Robot Mop not spraying in the future.
Use Distilled or Filtered Water
This is the single most important tip. Tap water contains minerals (calcium, magnesium). When the water evaporates from the pad or inside the system, these minerals are left behind as hard, chalky scale. This scale clogs nozzles, coats the internal filter, and gums up the pump. Using distilled water, which has no minerals, eliminates this problem entirely. It’s a cheap investment for a complex appliance.
Flush the System Monthly
Once a month, run a cleaning cycle with a tank full of a 50/50 solution of white vinegar and warm water. Do not use the cleaning pad for this. Let the robot run on a hard surface (like tile in a bathroom) to expel the vinegar solution. Then, run two more cycles with a tank of clean distilled water to rinse all vinegar residue from the tubes and pump. This monthly descaling ritual keeps the entire water pathway clean and free-flowing.
Always Empty and Dry the Tank After Use
Never leave standing water in the tank. Empty any leftover water after every mopping job. Remove the tank and place it upside down on a drying rack or towel to air dry completely. This prevents mold, mildew, and algae from growing inside the tank and vent, which can cause clogs and foul odors.
Clean the Nozzles After Every 3-5 Uses
Make it a habit. After you empty and dry the tank, use your paperclip method on the nozzles. A quick 15-second pass with a vinegar-dampened cotton swab followed by a water flush will prevent minor buildup from becoming a major clog. It takes less than a minute and saves hours of frustration later.
Conclusion: Your Mop Can Be Fixed
A Shark Robot Mop not spraying is a common but almost always solvable problem. The journey from a dry pad to a sparkling floor is a logical path of elimination. You now have that map. Start with the simple: water level, tank seal, and pad dampness. Progress to the likely: nozzle clogs and tank filter cleaning. Then move to the more complex: internal tubes, pump priming, and software resets. Armed with a paperclip, some vinegar, and this guide, you have the power to diagnose and fix the issue yourself. Remember, consistent, simple maintenance—using distilled water and regular nozzle cleaning—is the secret weapon that will keep your Shark robot mop spraying perfectly for years to come. Don’t give up on your smart home helper; give it the care it needs.
Frequently Asked Questions
Can I use CLR or harsh chemical descalers instead of vinegar to clean the nozzles?
No. Avoid harsh chemicals like CLR, bleach, or commercial descalers. They can damage the sensitive plastic and metal components inside the water system, especially the rubber seals and valves. White vinegar is a safe, effective, and food-grade acid that dissolves mineral deposits without harming the mop’s internals. Always rinse thoroughly with clean water after any vinegar cleaning.
My Shark mop is under warranty. Will opening it to check tubes void the warranty?
It depends on your warranty terms and the policy of the service center. Generally, simple external maintenance like cleaning nozzles, the tank, and the filter will not void the warranty. However, if you remove screws and open the main housing, you risk voiding it if you cause damage. For warranty service, it’s best to contact Shark Support first, describe the symptoms, and follow their instructions. They may ask you to perform basic external checks before authorizing a repair.
I have very hard water. Is there any permanent solution besides using distilled water?
Using distilled or reverse osmosis (RO) filtered water is the only permanent, reliable solution for hard water areas. You can install an inline water softener for your entire home, but that’s costly. For the mop specifically, you must use mineral-free water. The alternative is an extremely rigorous maintenance schedule: flushing with vinegar after every single use and possibly weekly nozzle cleaning, which is time-consuming and still not as effective as prevention.
The pump hums, but no water comes out even after cleaning everything. What now?
If the pump hums (indicating it has power) but no water flows, you have a severe blockage or an airlock deep in the system. First, prime the pump manually using a syringe as described in Step 4. If that fails, the internal clear tubing may have a clog that vinegar soaking won’t clear, or the pump’s internal diaphragm/valve may be failed. At this point, the likely culprits are a faulty pump motor or a broken seal inside the pump assembly, which requires part replacement.
Should I empty the clean water tank and the dirty water tank after every use?
Yes, absolutely. Always empty both tanks after every single mopping cycle. Leaving water in the clean tank promotes bacterial and mold growth inside the tank and on the vent valve. Leaving dirty water in the recovery tank is even worse, as it contains all the grime you just mopped up. Rinse both tanks with clean water, wipe them dry, and leave their caps off to air dry completely before the next use.
How often should I completely descale my Shark robot mop with vinegar?
A full system flush with a 50/50 vinegar-water solution should be done monthly if you use tap water. If you use distilled water, you can extend this to every 3-4 months as a precaution. Additionally, you should perform the quick nozzle cleaning with a paperclip and vinegar-dampened swab after every 3-5 uses to prevent minor buildup. Consistency is key to preventing spray failure.