A vacuum cleaner with no suction is usually caused by a simple, fixable issue like a clogged filter, full dustbin, or blocked hose. Start by checking the basics: empty the bin, clean or replace the filter, and inspect the hose and brush roll for obstructions. Most problems can be solved in minutes with basic tools, saving you a costly repair or replacement.
Key Takeaways
- Check the Obvious First: Always start by emptying the dustbin/bag and cleaning or replacing the filter. This is the cause of 50% of suction loss issues.
- Inspect for Blockages: A clogged hose, wand, or brush roll is the second most common culprit. Visually inspect and use a long tool to dislodge hidden jams.
- Ensure Airtight Seals: Leaks in the hose, worn gaskets, or a poorly attached dustbin break the vacuum’s seal and destroy suction power.
- Maintain Regularly: A consistent maintenance schedule—cleaning filters monthly and checking for blockages—prevents most suction problems.
- Know When to Seek Help: If you’ve checked all common issues and the motor runs but produces no suction, the internal fan or motor may be faulty, requiring professional repair.
📑 Table of Contents
- Introduction: The Dreaded Suction Failure
- 1. The First and Easiest Checks: Dustbin, Bag, and Filters
- 2. Hunting Down Blockages in the Airflow Path
- 3. The Importance of Seals and Gaskets
- 4. Brush Roll and Belt Issues: Not Just a Suction Problem
- 5. Advanced Troubleshooting: When the Basics Fail
- 6. Prevention: Your Best Offense
- Conclusion: You’ve Got This
Introduction: The Dreaded Suction Failure
You’re in the middle of cleaning, and you notice it. Your vacuum cleaner is pushing debris around instead of picking it up. That powerful whoosh of air has turned into a weak sigh. A vacuum with no suction is one of the most frustrating household problems because it turns a simple chore into an impossible task. Before you panic, call a repair shop, or start shopping for a new machine, take a deep breath. The good news is that in the vast majority of cases, you can diagnose and fix a vacuum cleaner with no suction yourself, quickly and inexpensively.
Suction is created by a simple scientific principle: a fan inside the motor pulls air (and dirt) into the machine. Anything that restricts that airflow—a clog, a leak, or a full filter—will drastically reduce or eliminate suction. This guide will walk you through every possible cause, from the simplest to the more complex, with clear, actionable steps. We’ll use plain language and logical troubleshooting so you can get your vacuum working at full power again.
1. The First and Easiest Checks: Dustbin, Bag, and Filters
When your vacuum cleaner loses suction, the solution is often staring you in the face. The airflow path is a straight line from the floor to the exhaust. The first components in that path are the dust collection system and the filters. If they are full or dirty, they act like a cork in a bottle, stopping air (and suction) dead in its tracks.
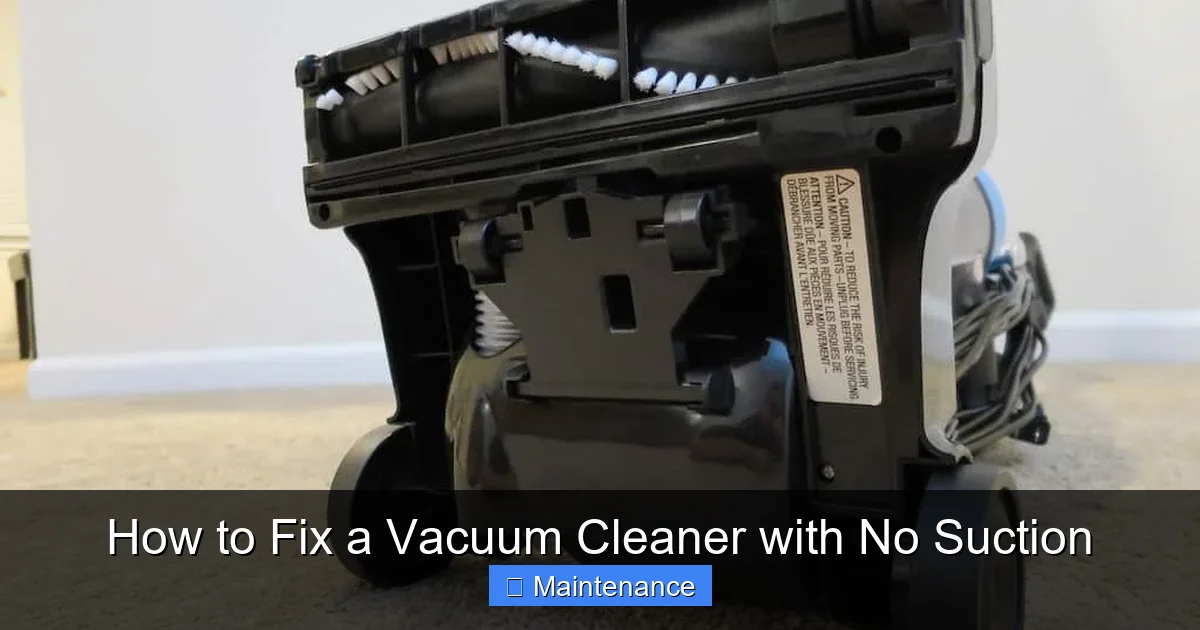
Visual guide about How to Fix a Vacuum Cleaner with No Suction
Image source: themvacuums.com
1.1. Empty the Dustbin or Replace the Bag
This is the absolute first step, and it’s astonishing how often it’s overlooked. For bagless vacuums, the dustbin must be emptied. But don’t just tap it out. Hair, dust, and fine debris can cake onto the sides and the filter inside the bin, creating a solid barrier. Take the bin to the trash, tap it firmly, and use a old toothbrush or a cleaning tool to scrape the interior clean. For bagged vacuums, a bag that’s even 80% full can severely restrict airflow. Replace it with a new, high-quality bag. Never try to reuse a disposable bag.
1.2. Clean or Replace the Filters
Vacuums have at least two filters: a pre-motor filter (protects the motor) and an exhaust filter (cleans the air before it blows back out). Many also have a primary filter on the air inlet. These filters are made of foam, paper, or pleated material. When they become clogged with dust and dirt, they choke the machine.
- Locate Your Filters: Consult your owner’s manual. They are typically behind a panel on the body of the vacuum or inside the dustbin.
- Cleaning: Foam filters can often be rinsed with cool water (never hot! Squeeze dry—do not wring). Paper and pleated filters are usually not washable; tap them gently over a trash can to remove loose debris. If they are discolored and stiff, replace them.
- Frequency: Clean foam filters monthly and replace all filters every 3-6 months, or as directed in your manual. Using the vacuum with dirty filters is the #1 cause of premature motor failure.
2. Hunting Down Blockages in the Airflow Path
If the collection system is clean but suction is still gone, the next most likely cause is a physical obstruction. The air has to travel from the brush head, up the hose, through the wand, and into the machine. A clog anywhere in this path will stop it cold.

Visual guide about How to Fix a Vacuum Cleaner with No Suction
Image source: mycentralvacuum.com
2.1. Checking the Brush Roll and Head
The brush roll (beater bar) on carpet-cleaning heads is a notorious jam site. Hair, string, carpet fibers, and small objects wrap around the axle and bearings, stopping the brush from spinning and often creating a solid plug right at the intake.
- Power Off and Unplug: Always disconnect the vacuum from the wall before inspecting.
- Remove the Brush Roll: Most heads have a release plate or screws. Flip the vacuum over and remove the brush roll assembly.
- Clear the Debris: Use scissors or a seam ripper to carefully cut away wrapped hair and fibers. Clean out the intake holes on either side of the brush roll housing. Check that the brush roll spins freely by hand.
2.2. Inspecting and Clearing the Hose and Wand
Hose clogs are common, especially if you’ve vacuumed up small, hard objects or a lot of pet hair. A partial clog can create a whistling sound; a full clog means zero suction.
- Detach the Hose: Remove it from both the vacuum body and the wand/head.
- Visual Inspection: Shine a flashlight through one end. Look for a visible obstruction.
- The “Coat Hanger” Method: Straighten a wire coat hanger, leaving a small hook on one end. Gently feed it through the hose from each end to dislodge and hook out compacted debris. Be gentle to avoid puncturing the hose.
- The “Leaf Blower” Trick: For tough clogs, disconnect the hose, take it outside, and use a leaf blower to force air backward through it. This often blasts the clog out the other end. Wear safety glasses.
3. The Importance of Seals and Gaskets
Your vacuum is a sealed system. It works by creating a negative pressure (suction) inside a closed chamber. If there’s an air leak anywhere—a crack in the hose, a missing gasket, or a loose connection—the vacuum pulls in outside air through that leak instead of through the brush head. This drastically reduces the suction power at the floor.

Visual guide about How to Fix a Vacuum Cleaner with No Suction
Image source: smartvacuumguide.com
3.1. Common Seal Failure Points
- Hose Connections: Check where the hose plugs into the vacuum body and the wand. The plastic locking rings should click securely. Look for cracks in the hose plastic itself, especially near the ends.
- Dustbin/Dust Cup Seal: On bagless models, the bin must lock into place with a perfect seal. Check the rubber gasket around the bin’s lid and the seal on the vacuum body where it attaches. Clean any debris from these gaskets. A single hair or speck of dust can break the seal.
- Wand Connections: Ensure each section of the wand is clicked together tightly.
- Filter Housing: The cover for the filter chamber must be fully seated and latched.
3.2. The “Paper Test” for Leaks
A simple way to find a major leak is the paper test. With the vacuum running on a hard floor, hold a small strip of paper (like a receipt) against the suction inlet (where the hose attaches). The paper should be held firmly in place. Now, go around the machine and slowly move the paper over potential leak points: hose cracks, filter housing seams, dustbin edges. If the paper falls away or the suction weakens noticeably at a spot, you’ve found your leak. Small cracks can sometimes be sealed with a tiny amount of silicone sealant, but often the part (hose, gasket) needs to be replaced.
4. Brush Roll and Belt Issues: Not Just a Suction Problem
A non-spinning brush roll doesn’t directly cause a loss of suction—you’ll still have suction through the hose—but it’s a critical part of the cleaning system for carpets. If the brush isn’t turning, you’re not agitating and lifting dirt, so it feels like the vacuum isn’t working. Furthermore, a jammed brush roll can be the *cause* of a clog, which then causes suction loss.
4.1. Diagnosing a Dead Brush Roll
With the vacuum unplugged, try to spin the brush roll by hand. If it’s stiff or won’t turn, it’s jammed (see Section 2.1). If it spins freely but doesn’t turn when the vacuum is on, the issue is likely the drive belt or motor.
4.2. Checking the Drive Belt
Most vacuums with a rotating brush use a rubber belt. Turn the vacuum over and look at the brush roll housing. You should see a rubber belt looped around the brush roll axle and a motor shaft pulley.
- Is the Belt Missing or Broken? This is obvious. The belt will be snapped or lying loose in the housing.
- Is the Belt Loose or Slipping? If the belt is present but doesn’t fit snugly, it will slip and not transfer power. It may look stretched out or glazed.
- Replacement: Belts are inexpensive and easy to replace. Note the model number of your vacuum (usually on a plate on the back or bottom) and order the exact replacement belt. Stretch it over the motor pulley first, then onto the brush roll.
4.3. Brush Roll Motor Failure
Less common, but possible, is a failure of the separate small motor that powers the brush roll. If the brush roll spins freely by hand, the belt is good, but the brush still doesn’t turn, this motor may be burned out. Diagnosis and replacement at this point usually require technical skill or a professional.
5. Advanced Troubleshooting: When the Basics Fail
You’ve emptied the bin, cleaned all filters, cleared every visible clog, and checked all seals. The motor still runs, but there’s absolutely no suction at the floor or even at the hose end. Now we need to look deeper into the machine’s internal components.
5.1. The Internal Fan or Impeller
The motor’s fan is the heart of the suction system. It’s a small, multi-bladed wheel attached to the motor shaft. If a piece of debris (a coin, a small toy, a toothpick) manages to travel up the hose and into the fan housing, it can jam the fan blades completely. This will often cause a loud grinding noise or make the motor strain and overheat quickly.
- Access: You will need to remove the outer casing of the vacuum (usually by unscrewing several bottom or side panels). Consult your manual for specific disassembly instructions.
- Inspection: Once you can see the fan, gently try to turn it by hand. It should spin freely. If it’s jammed, carefully remove the foreign object.
- Damaged Fan: If the fan blades are chipped or broken from impact, the fan must be replaced. This is a more involved repair.
5.2. Motor Wear and Failure
Vacuum motors are robust but have a finite life. The carbon brushes inside wear down, and the armature can fail. A failing motor might still spin but not at the correct speed, generating insufficient airflow. Signs include a burning smell, excessive heat, or a change in the motor’s sound (a high-pitched whine instead of a steady hum). Motor replacement is typically the last resort and often approaches the cost of a new mid-range vacuum. A repair technician can test the motor’s amperage draw to confirm failure.
5.3. Severe Clogs Deep in the System
Sometimes, a very fine, dense material like plaster dust, drywall compound, or massive amounts of baking soda can pack down inside the hose, wand, or even the elbow joints inside the vacuum body, creating a solid plug that’s impossible to see from either end. This requires systematic disconnection and cleaning of every single section of the airway, often with long flexible brushes designed for dryer vents.
6. Prevention: Your Best Offense
The best way to fix a vacuum cleaner with no suction is to never have it break in the first place. A few minutes of regular maintenance will keep your vacuum performing at its peak for years.
- Empty Frequently: Don’t wait until the bin is full. Empty bagless bins after every use, especially if cleaning up pet hair or fine dust.
- Filter Discipline: Clean foam filters monthly. Check pleated filters every three months and replace as needed. Never operate a vacuum with a filter missing.
- Mind What You Vacuum: Never vacuum sharp objects, nails, tacks, broken glass, large quantities of drywall dust, or wet debris (unless it’s a wet/dry vac). These are the primary causes of internal clogs and damage.
- Inspect the Brush Roll: Every few months, remove the brush roll and clean out the wrapped hair and fibers. This prevents bearing seizing and belt breakage.
- Check the Hose: Periodically look inside the hose for any developing clogs or cracks. A quick blast of air from your mouth can sometimes dislodge early-stage buildup.
- Store Properly: Don’t yank the cord to unplug. Wrap the cord loosely around the designated hooks. Store the vacuum in a dry place to prevent mold on filters and hoses.
Conclusion: You’ve Got This
A vacuum cleaner with no suction is almost always a symptom, not a death sentence. By following this structured troubleshooting guide—starting with the dustbin and filters, moving to blockages and seals, and finally considering internal components—you can identify and resolve the problem 90% of the time. Remember, the machine’s power comes from unimpeded airflow. Your job is to be a detective, finding where that airflow is being blocked or leaking away. With a little patience, a screwdriver, and perhaps a wire coat hanger, you have the power to restore your vacuum’s suction and make cleaning easy again. If you’ve exhausted all these steps and still have no suction, it’s likely a failed motor or fan, and at that point, consulting a professional or weighing the cost of repair versus replacement is the sensible next step.
Frequently Asked Questions
Why does my vacuum have suction at the hose but not at the floor head?
This usually indicates a clog specifically in the brush head housing or a jammed brush roll. Remove the brush roll and clean out the intake ports on either side. Also, check that the brush roll belt is intact and engaging properly.
My vacuum makes a loud whining noise and has no suction. What’s wrong?
A loud, high-pitched whine with no suction often points to a severely clogged fan or impeller inside the motor housing. A foreign object may have been sucked up and jammed the fan blades. This requires opening the vacuum’s casing to inspect and clear the obstruction.
Can I use my vacuum without a filter to get more suction?
Absolutely not. Operating a vacuum without a filter will allow all the dust and debris to blow back into your room and, more critically, will send large particles directly into the motor, causing catastrophic and irreversible damage within minutes. Always use a clean filter.
How often should I replace my vacuum’s filters?
For typical household use (2-3 times per week), foam pre-motor filters should be cleaned monthly and replaced yearly. Paper or pleated exhaust filters should be replaced every 3-6 months. If you have pets, allergies, or vacuum fine dust like baking soda, increase the frequency.
My vacuum suction is weak but not gone. What could cause this?
Weak suction is typically an early-stage version of the same problems. It’s most commonly caused by a filter that is dirty but not completely clogged, a partially full dustbin, a developing clog in the hose, or a small leak in a hose or gasket. Start with the filter and bin cleaning, then check for partial blockages.
Is it worth fixing an old vacuum with no suction?
It depends. If the issue is a clogged filter, broken belt, or blocked hose (cost: under $30), it’s almost always worth fixing. If the diagnosis points to a failed motor or internal fan, get a repair estimate first. For a vacuum over 7-10 years old, replacement might be more cost-effective, as newer models are often more efficient and powerful.