Emptying your Shark Rotator Professional is a simple but crucial task for maintaining its performance. The process involves unplugging the vacuum, detaching the dust cup, and using the one-touch release to empty its contents directly into your trash. Always clean the filters and check for blockages during this routine to ensure your vacuum operates at peak efficiency for years to come.
Key Takeaways
- Always unplug the vacuum first: This is the essential first safety step for any maintenance task.
- Use the one-touch bottom release: The primary method for mess-free emptying is the button on the dust cup’s underside.
- Separate the dust cup completely: For a deeper clean, detach it from the wand and handle assembly.
- Clean the filters regularly: Emptying the cup is the perfect time to check and clean the pre-motor and post-motor filters.
- Inspect for blockages: Use the empty opportunity to check the hose, wand, and brush roll for obstructions.
- Reassemble correctly: Ensure all components click securely into place before your next cleaning session.
📑 Table of Contents
- Introduction: Why Proper Emptying Matters
- Understanding Your Shark Rotator Professional’s Dust Cup System
- The Quick Empty Method: Your Daily/Weekly Routine
- The Deep Clean Method: Monthly Maintenance for Optimal Performance
- Reassembly: Putting It All Back Together
- Troubleshooting: What to Do When Things Go Wrong
- Establishing a Winning Maintenance Routine
Introduction: Why Proper Emptying Matters
You’ve just finished a marathon cleaning session. The carpets look fluffy, the hard floors are spotless, and your Shark Rotator Professional has performed like a champ. But your work isn’t quite done. That satisfying hum and powerful suction you just enjoyed depend heavily on one simple, routine act: properly emptying the dust cup. Neglecting this step is the fastest way to turn your high-performance vacuum into a weak, wheezing shadow of its former self.
This guide is your definitive, no-nonsense manual for emptying every model in the Shark Rotator Professional line. Whether you own the classic NV350, the advanced NV356, or any variant in between, the core principles are the same. We’ll walk through the process from start to finish, highlight common pitfalls to avoid, and explain exactly why this 60-second task is non-negotiable for the health of your machine and the cleanliness of your home. Let’s get into it.
Understanding Your Shark Rotator Professional’s Dust Cup System
Before we touch a button, it helps to understand what you’re working with. The Shark Rotator Professional uses a bagless, cyclonic dust cup system. Unlike older vacuums with disposable bags, this design uses centrifugal force to spin dirt and debris out of the air stream, depositing it into a translucent plastic cup. This system is incredibly efficient but relies on you to periodically empty its collection chamber.
Visual guide about How to Empty Shark Rotator Professional
Image source: sharkvacuum.blog
The Key Components
Your dust cup assembly has a few critical parts:
- The Main Cup Body: The large, clear chamber that holds all the dirt, hair, and debris.
- The One-Touch Release Door: A spring-loaded door on the very bottom of the cup, controlled by a large button. This is your primary emptying mechanism.
- The Cup Release Button: Usually a red or gray button on the top or side of the cup. Pressing this releases the entire cup from the vacuum’s main body/wand.
- The Filter Housing: The circular assembly on the side or top of the cup that contains the pre-motor foam and felt filters. This rarely needs removal just for emptying but is part of the full disassembly.
Knowing these parts will make the instructions in the following sections instantly clear. The genius of the design is that you can do a quick “touch-and-go” empty without fully disassembling anything, or a more thorough clean by taking the whole unit apart.
The Quick Empty Method: Your Daily/Weekly Routine
This is the method you’ll use most often. It’s designed for speed and minimal contact with dirt. You should perform this whenever the dust cup reaches the “Max Fill” line, which is clearly marked on the cup’s side. For most homes, this is every 1-3 cleaning sessions.
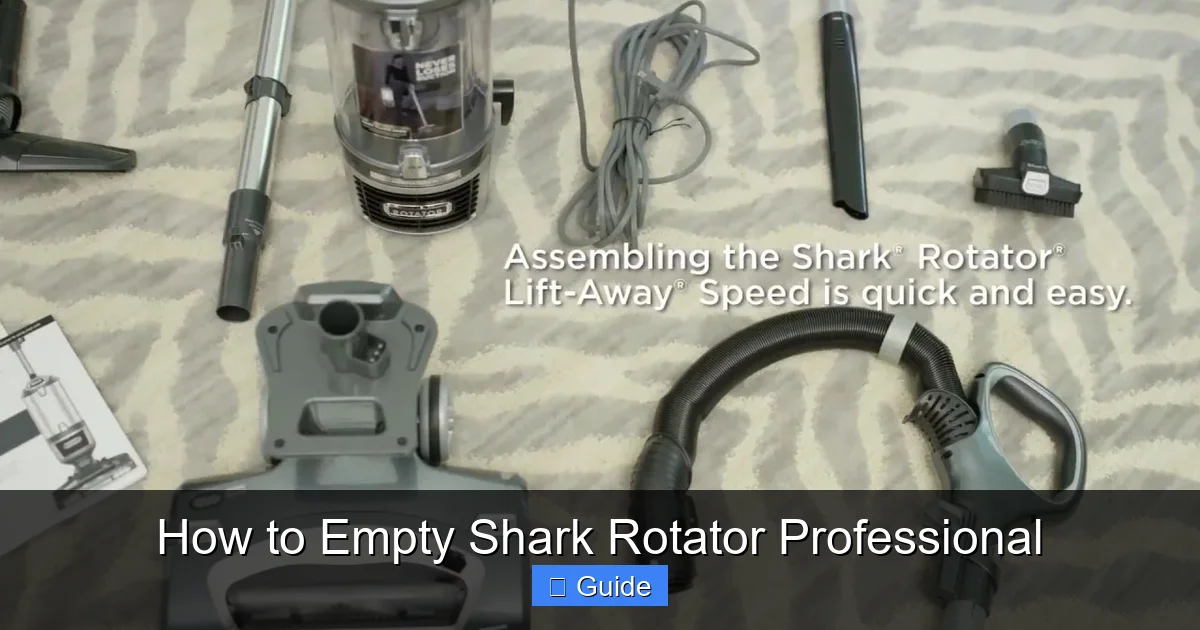
Visual guide about How to Empty Shark Rotator Professional
Image source: i.ytimg.com
Step-by-Step Quick Empty
Step 1: Prepare and Position. Take your vacuum to your main trash can. Stand over it to prevent any accidental spills. Ensure the vacuum is on a stable surface.
Step 2: Locate and Press the One-Touch Release. On the very bottom of the dust cup, you’ll see a prominent button, often labeled or with an arrow pointing down. Firmly press and hold this button. You’ll hear a click and feel the spring-loaded bottom door pop open.
Step 3: Empty the Contents. While still holding the button (or after it’s clicked open, depending on your model), gently tap the side of the dust cup over the trash can. The debris will cascade out through the open bottom door. Give it a few gentle shakes or taps to dislodge packed-in dirt, especially along the cyclonic channels inside the cup.
Step 4: Release and Close. Once the cup is mostly empty, release the button. The spring-loaded door should snap shut automatically, sealing the cup. Give it a light tap to ensure it’s fully latched. You’re done! This entire process should take under 30 seconds.
Pro-Tips for the Quick Empty
- Do it over the trash can, always. Even if you think it’s just dust, doing it over the floor will create a secondary mess you’ll then have to vacuum up.
- Don’t overfill it. Letting the cup get completely packed beyond the max line drastically reduces suction and makes emptying messier. Check the line periodically.
- Hair and fiber management: If you have pets or long hair, you’ll notice a lot of it wraps around the filter housing and the internal cyclones. The quick empty gets the bulk out, but you’ll need the deep clean method (next section) to remove this wrapped debris.
The Deep Clean Method: Monthly Maintenance for Optimal Performance
The quick empty is for daily use. The deep clean is a monthly (or bi-weekly in heavy-use/pet households) ritual that ensures your vacuum’s internal airways and filters stay clear. This involves completely separating the dust cup from the vacuum.
Visual guide about How to Empty Shark Rotator Professional
Image source: centraloutlet.com.au
Step-by-Step Deep Clean Disassembly
Step 1: Unplug and Prepare. This is non-negotiable. Unplug your Shark Rotator from the wall outlet. Have your trash can, a soft brush (an old toothbrush works great), and a damp microfiber cloth ready.
Step 2: Release the Dust Cup. Locate the main cup release button. On most Rotator Professionals, this is a large red button on the top of the dust cup, near where it connects to the wand/handle. Press this button and lift the entire dust cup assembly straight up and off the vacuum body. You should now be holding the full cup in your hands.
Step 3: Separate the Cup from the Filter Housing. With the cup detached, look at where it connects to the circular filter housing on its side. There is usually a locking tab or a twist-lock mechanism. Gently press the tab or twist the housing counter-clockwise to separate it from the cup body. You now have three main pieces: the cup body, the filter housing, and the filters themselves.
Step 4: Empty and Clean the Cup Body. Take the large, clear cup body to the trash. Press the one-touch release button on its bottom to open the door and dump the contents. Now, use your soft brush to scrub inside the cup, paying special attention to the spiral cyclonic channels where fine dust and hair love to pack in. Wipe the interior and exterior with a damp cloth. Never use soap or abrasive cleaners, as they can damage the plastic. Let it air dry completely before reassembly.
Step 5: Clean the Filter Housing and Filters. Tap the filter housing gently over the trash to dislodge loose debris. Use your brush to clean the housing’s interior. For the filters (you typically have a foam pre-motor filter and a felt post-motor filter), remove them from the housing. The Shark Rotator Professional’s filters are often washable. Check your specific model’s manual, but generally, you can rinse them under cool running water until the water runs clear. Crucially, you must let these filters dry for at least 24 hours, completely, before putting them back. Never operate the vacuum with wet filters—this will damage the motor.
Reassembly: Putting It All Back Together
Reassembly is the reverse of disassembly, but attention to detail is key to ensure a proper seal and no loss of suction.
Step-by-Step Reassembly
Step 1: Attach Filters to Housing. Ensure your filters are 100% dry. Place the foam pre-motor filter (usually the larger one) into the filter housing first, followed by the felt post-motor filter. They should sit flat and secure.
Step 2: Secure the Filter Housing to the Cup. Align the locking tabs on the filter housing with the slots on the dust cup body. Push it on firmly and twist clockwise (or press the tab until it clicks) until it is locked securely. You should not be able to twist it further.
Step 3: Mount the Cup on the Vacuum. Align the slot and tab on the back of the dust cup with the connector on the wand/handle assembly. Slide the cup upwards until you hear/feel a definitive click. The main red release button should pop out slightly, indicating it’s locked. Give the cup a firm downward tug to confirm it’s attached.
Step 4: Final Check. Press the one-touch release button on the bottom of the now-attached cup to ensure the door opens and closes freely while attached. This confirms everything is aligned. Plug in your vacuum and do a quick test on a low-pile rug to ensure there are no unusual noises and suction feels normal.
Troubleshooting: What to Do When Things Go Wrong
Even with perfect emptying, you might encounter issues. Here’s how to diagnose common problems related to the dust cup system.
“My suction is weak even after emptying!”
This is the most common complaint. A full cup is just one potential blockage. Follow this checklist:
- Check the filters: Are they installed correctly? Are they dirty or damp? A clogged filter is the #2 cause of suction loss after a full cup.
- Inspect the hose and wand: Detach the hose from both the vacuum body and the wand. Look through it. Use a broom handle or a long, flexible brush to dislodge any lodged objects like socks, hair ties, or large debris.
- Check the brush roll: Turn the vacuum over. Is the brush roll spinning freely? Is it jammed with hair and carpet fibers? Use scissors to carefully cut away any wrapped material. A seized brush roll strains the motor and kills suction.
- Examine the air pathway: Look into the opening where the dust cup attaches. Is there debris packed in there? Use a flashlight and a long tool to clear it.
“The one-touch release button is stuck or broken.”
If the button doesn’t pop back or the door won’t open, debris is likely jamming the mechanism. With the cup detached, use a thin tool (like a plastic toothpick) to gently pry around the edges of the door while pressing the button. Clear any packed dirt from the door’s groove. If the button itself is physically broken, you may need to order a replacement dust cup assembly from Shark.
“There’s a bad smell coming from my vacuum.”
A musty odor usually means damp debris or wet filters have been sitting in the cup. Immediately empty and thoroughly clean the cup and filters. Wash the filters, let them dry for a full 48 hours in a warm, dry spot, and ensure the cup is completely dry before reassembling. Running the vacuum with damp components will ruin the motor and spread mildew smell.
Establishing a Winning Maintenance Routine
Turning these steps into a habit is the secret to a long-lasting, high-performing Shark Rotator Professional. Think of it like changing the oil in your car—a small, regular investment that prevents catastrophic (and expensive) failure.
Your Simple Maintenance Calendar
After Every 1-3 Uses (Quick Empty): Check the max fill line. If it’s full or more than 2/3 full, perform the quick empty method. Give the exterior a quick wipe-down.
Monthly (Deep Clean): Regardless of use, schedule a monthly deep clean. Detach the cup, clean all internal cyclones, wash the filters, and inspect the entire air pathway for hidden blockages. This is also a great time to clean the brush roll housing on the vacuum head.
Every 6 Months (Inspection): Take a look at the seals and gaskets on the dust cup and filter housing. Ensure they are pliable and not cracked. A damaged seal breaks the vacuum’s internal pressure and kills suction. Also, check the main hose for cracks or weak spots.
As Needed (Filter Replacement): Even with regular washing, filters degrade over time. Shark recommends replacing the felt post-motor filter every 3-6 months with regular use. The foam pre-motor filter can last longer with washing but should be replaced if it becomes torn or permanently discolored. A clogged, unfixable filter will always hamper performance.
By integrating these simple habits, your Shark Rotator Professional will remain a powerful, reliable cleaning tool, delivering that signature “Shark” suction every single time you plug it in. The relationship is simple: a clean machine works harder for you. Now, go enjoy that freshly vacuumed home!
Frequently Asked Questions
Can I empty my Shark Rotator Professional without getting my hands dirty?
Yes, absolutely. The one-touch bottom release is designed for a completely hands-off empty. Simply hold the cup over your trash can, press the button, and the door opens to dump the debris. Your hands never need to enter the cup.
How often should I wash the filters on my Shark Rotator?
For normal household use, wash the pre-motor foam filter every 1-2 months and the post-motor felt filter every 3-6 months. If you have pets, allergies, or a high-dust environment, wash them monthly. Always let them air-dry for at least 24 hours before reinserting.
What happens if I operate my Shark with a full dust cup?
Operating with an overfilled dust cup severely restricts airflow, leading to a dramatic loss of suction power. It also forces the motor to work harder, generating excess heat and potentially shortening the vacuum’s lifespan. The debris can also pack so tightly that it’s difficult to empty later.
My vacuum smells like mildew after emptying. What’s wrong?
A mildew smell indicates wet debris or damp filters were left in the closed dust cup. Immediately empty and thoroughly clean the cup. Remove the filters, wash them with water, and allow them to dry completely (24-48 hours) in a warm, well-ventilated area before reinstalling.
Can I use water or cleaning sprays inside the dust cup?
No. Do not use soap, detergent, or any liquid cleaners inside the dust cup or filter housing. These can leave a residue that attracts more dirt and may damage the plastic. For cleaning, use only a damp (not wet) microfiber cloth and, for stuck-on debris, a soft brush.
The dust cup release button is stuck. How do I fix it?
A stuck button is almost always caused by packed debris jamming the mechanism. Detach the dust cup from the vacuum. Use a plastic tool (like a toothpick) to gently pry around the edges of the bottom door while pressing the release button. Carefully clear any packed dirt from the door’s groove and latch. If the button mechanism is physically broken, the dust cup assembly may need to be replaced.