Emptying your Shark upright vacuum’s dust cup is a quick, essential task for maintaining suction power and hygiene. The process involves unplugging the vacuum, detaching the dust cup, pressing the empty button over a trash can, and checking for debris. Regularly performing this simple maintenance prevents clogs, protects the motor, and ensures your vacuum works efficiently for years.
You’ve just finished vacuuming, and your Shark upright vacuum seems to be struggling. The suction feels weak, and it’s not picking up like it usually does. Before you start worrying about a broken motor or a costly repair, there’s one incredibly simple fix that solves this problem 90% of the time: emptying the dust cup. It sounds almost too basic, but a full or clogged dust cup is the arch-nemesis of powerful suction. This comprehensive guide will walk you through exactly how to empty a Shark upright vacuum, no matter which model you own. We’ll cover the universal principles, specific steps for popular series like the Navigator, Rotator, and Vertex, and essential maintenance tips to keep your machine running like new for years.
Think of your vacuum’s dust cup as its stomach. When it’s full, it can’t take in any more “food” (dirt and debris). The air pathway gets restricted, the motor has to work harder, and performance plummets. Furthermore, a neglected dust cup becomes a breeding ground for odors and can even send dust and allergens back into your home’s air. Mastering the quick, clean emptying process is the cornerstone of vacuum care. It takes less than 30 seconds but pays massive dividends in cleaning power and appliance longevity. Let’s get into it.
Key Takeaways
- Always unplug the vacuum first: This is the non-negotiable first step for safety, preventing accidental startup while your hands are near moving parts or the open dust cup.
- Identify your Shark model’s release mechanism: Most use a button or latch, but the exact location and method (push, slide, or pull) varies slightly between Navigator, Rotator, and Vertex series.
- Empty over a trash can, not the floor: Tap and shake the dust cup firmly to dislodge all debris, especially fine dust and hair that clings to the interior walls and filter.
- Check the pre-motor foam filter: This filter sits inside the dust cup. Remove it during emptying to tap out any fine dust that bypassed the primary seal, which is crucial for maintaining airflow.
- Inspect for obstructions: While the dust cup is off, quickly look into the suction inlet and hose connection points for any large debris or hair wraps that could cause a blockage.
- Reassemble securely: Ensure the dust cup clicks or locks back into place firmly. An improper seal will cause a loss of suction and blow dust back into the room.
- Establish a routine: Empty the dust cup after every 2-3 uses or when the “full” indicator (if equipped) lights up. This habit is the single most important maintenance step for performance.
📑 Table of Contents
- Why Proper Emptying is Non-Negotiable for Performance
- Universal Preparation: The First Steps for All Models
- Model-Specific Emptying Procedures: Navigator, Rotator & Vertex
- Beyond the Empty Button: Deep Cleaning During Your Routine
- Troubleshooting: When Emptying Doesn’t Fix the Problem
- Conclusion: A 30-Second Habit for a Lifetime of Clean
Why Proper Emptying is Non-Negotiable for Performance
Before we dive into the “how,” understanding the “why” will motivate you to make this a habit. Your Shark vacuum is a marvel of engineering designed for high suction. The dust cup, with its cyclonic technology, is meant to separate large debris from the air stream. But this system has a critical capacity limit.
The Domino Effect of a Full Dust Cup
When the dust cup reaches its fill line, several things happen simultaneously. First, the physical space for incoming air and debris shrinks, creating a bottleneck. Second, the fine dust and hair that have accumulated on the inner walls and the pre-motor filter start to cake and harden, further restricting airflow. This forces the motor to labor under strain, which not only reduces suction but can also lead to overheating and premature wear. You might notice a change in the vacuum’s sound—it could become higher-pitched or strained. A full dust cup doesn’t just mean less dirt in the bin; it means less clean air in your home.
Hygiene and Longevity
Beyond suction, hygiene is a huge factor. A dust cup full of pet hair, food crumbs, and skin cells is a perfect environment for bacteria and mold to grow, especially if it’s left damp from recently cleaned carpets. Every time you run the vacuum with a full, dirty cup, you risk expelling these contaminants back into your living space. Regularly and thoroughly emptying the cup, and cleaning the filters, prevents this. Furthermore, keeping the entire air pathway clear protects the expensive HEPA filters and the motor itself from dust infiltration, dramatically extending the life of your investment.
Universal Preparation: The First Steps for All Models
Regardless of whether you have a Shark Vertex, a Rotator Professional, or a classic Navigator, the initial steps are identical and form a safe, effective routine. Skipping these can lead to mess, frustration, or even minor damage.
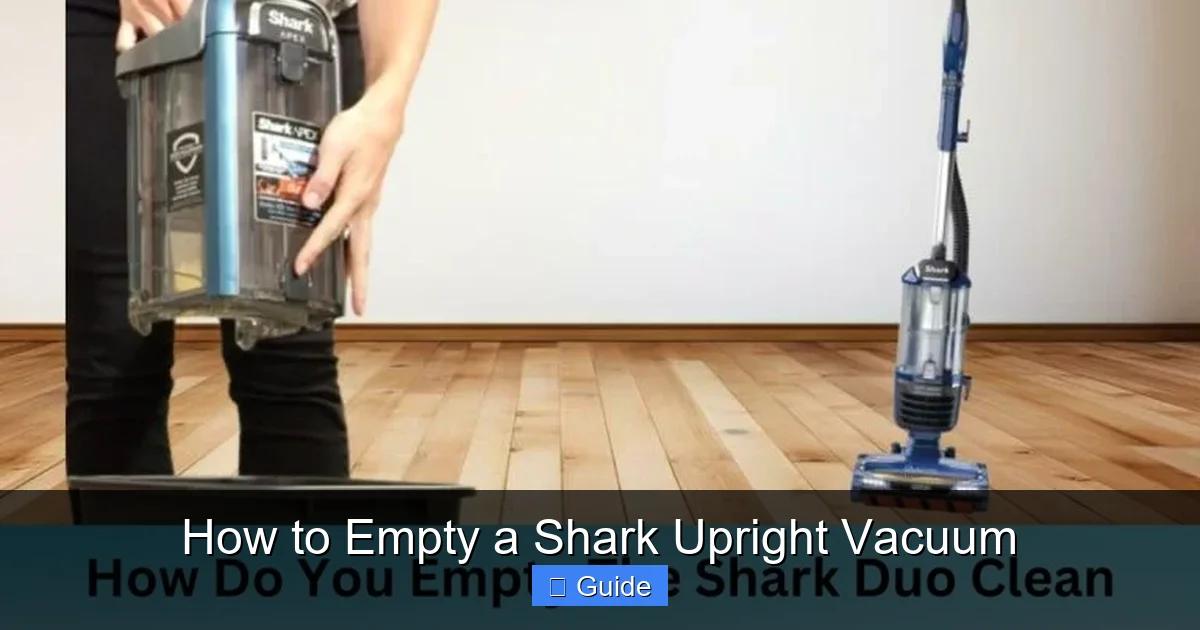
Visual guide about How to Empty a Shark Upright Vacuum
Image source: sharkvacuum.blog
Step 1: Power Down and Unplug
This is the absolute golden rule of vacuum maintenance. Always turn the vacuum off using the power switch and then unplug it from the wall outlet. This eliminates any chance of the vacuum accidentally turning on while you have your hands inside the dust cup or near the brush roll. It’s a simple safety step that protects you from a startling and potentially hazardous situation. Never, ever attempt to empty the dust cup while the machine is plugged in or powered on.
Step 2: Position Yourself and the Vacuum
Take the vacuum to a trash can. Do not try to empty it while it’s standing in the middle of your freshly cleaned floor. Place the base of the vacuum on a stable surface (like the floor) and position the trash can directly below the area where you’ll be opening the dust cup. A standard 13-gallon kitchen trash can is usually perfect. If you have a very small bin, you might want to do this over a large plastic bag inside the can to minimize any dust puff escaping.
Step 3: Locate the Release Mechanism
Look at the top of the dust cup, where it connects to the main vacuum body. You’ll find a button, a latch, or a sliding release. On most modern Sharks, it’s a large, clearly marked button, often colored (like red or orange) for visibility. On some older models, it might be a latch you pull up. Take a moment to identify it. The user manual for your specific model number (usually on a sticker on the back or bottom) is the ultimate reference, but you can almost always find it by following the dust cup up to its connection point.
Model-Specific Emptying Procedures: Navigator, Rotator & Vertex
Now for the core action. While the principle is the same—release, detach, empty, reattach—the exact motion differs slightly between Shark’s main product lines. Here’s a breakdown for the most common families.
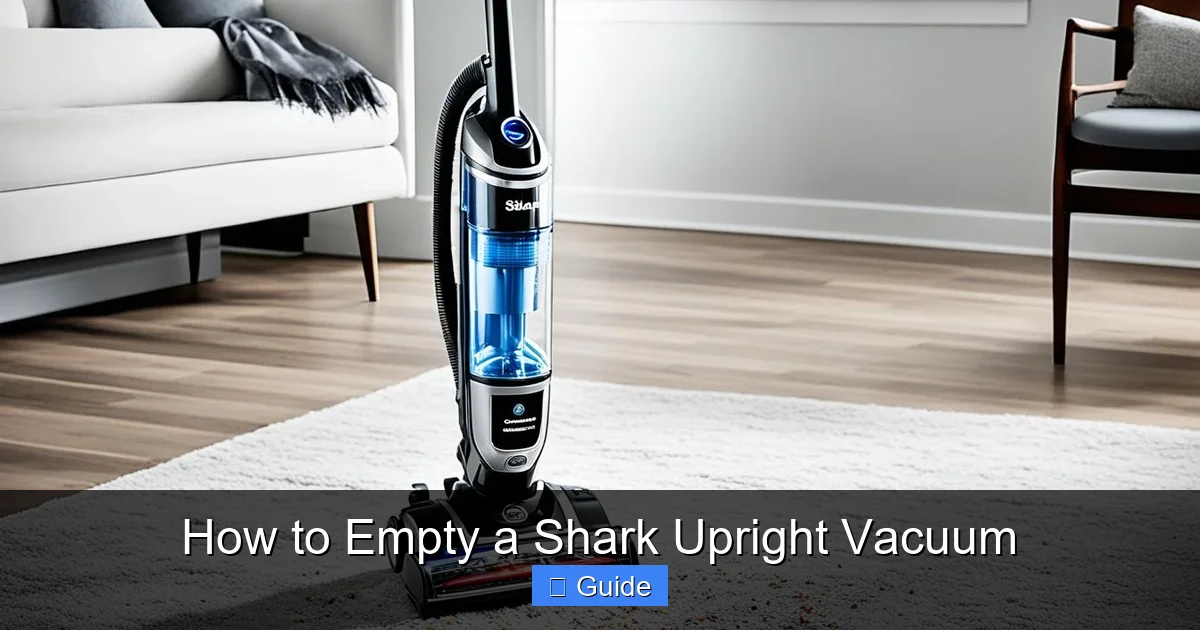
Visual guide about How to Empty a Shark Upright Vacuum
Image source: m.media-amazon.com
Emptying a Shark Navigator Upright (and similar Lift-Away style)
The Shark Navigator, with its iconic “Lift-Away” feature, has a very straightforward process.
- Release: With the vacuum upright, press the Dust Cup Release Button located on the top rear of the cup, just below the handle. You’ll hear a click.
- Detach: The entire dust cup assembly will pivot forward and down. Grasp the handle on the front of the dust cup and pull it completely away from the vacuum body. It will come off in one piece, with the hose still attached to the back of the cup.
- Empty: Hold the dust cup over the trash can. Press the Empty Button (a large button on the bottom of the cup) with your thumb. The bottom panel will spring open, and the debris will fall out. Tip: To get all the fine dust, close the bottom panel, then give the cup a few sharp taps and shakes. You can also remove the pre-motor foam filter (the rectangular foam piece inside the cup) and tap it gently over the can.
- Reattach: Align the dust cup’s connector with the slot on the vacuum body and push it up firmly until you hear it click into place. Give it a gentle tug to ensure it’s secure.
Emptying a Shark Rotator Professional/Pro
The Rotator series often has a slightly different, sometimes more compact, dust cup design but the mechanism is similar.
- Release: Locate the release button or latch on the top of the dust cup. On many Rotators, it’s a button you press inward. On some, it’s a sliding grey release tab.
- Detach: After releasing, pull the dust cup straight down and away from the handle/body. It should separate easily. Note: On some Rotator models with the “Anti-Allergen Complete Seal,” the dust cup may have a locking ring. If you see a ring with grip ridges, you’ll need to twist it counter-clockwise to unlock before pulling.
- Empty: The empty mechanism is almost always a button on the bottom. Press it to open the bottom flap. Empty contents. For stubborn dust, remove the foam filter and tap it. Also, check the clear plastic “cyclone” chamber inside—dust can accumulate here too. Give it a tap.
- Reattach: Align and push the dust cup up until it locks. If it has a locking ring, twist it clockwise until snug. Ensure a firm seal.
Emptying a Shark Vertex/Strand/Apex Series
Shark’s newer lines, like the Vertex, often feature a “DuoClean” or “Self-Cleaning Brushroll” design. The dust cup is typically very easy to access.
- Release: On the top-front of the dust cup, you’ll find a prominent button or a lever. Press or push it.
- Detach: The dust cup will often drop forward slightly. Pull it down and out from the main body. It’s usually a single, lightweight piece.
- Empty: The bottom-release button is standard. Press it over the trash. These models are known for excellent dust separation, so you might see less fine dust caked on the walls, but still tap it out. The pre-motor filter is usually accessible from a door on the side or top of the cup—remove and tap it.
- Reattach: Slide the cup back up into its guides and push until it clicks. The Vertex line is designed for tool-free, intuitive emptying.
Beyond the Empty Button: Deep Cleaning During Your Routine
Emptying the bulk debris is step one. To maintain peak performance, you need to go a level deeper during this weekly or bi-weekly maintenance session.
Visual guide about How to Empty a Shark Upright Vacuum
Image source: howtocleaning.co.uk
Filter Care: The Lungs of Your Vacuum
Your Shark has at least two critical filters: the pre-motor foam filter (inside the dust cup) and the post-motor HEPA filter (usually behind a door on the back or side of the canister). The foam filter catches fine dust that gets past the cyclonic action. During every emptying, remove this foam filter and give it a vigorous tap over the trash can to dislodge trapped particles. Once a month, depending on use, you should wash this foam filter with cold water only. Do not use soap or detergent. Rinse thoroughly and let it air-dry completely for at least 24 hours before reinserting. A damp filter in the vacuum will destroy it and can damage the motor. The HEPA filter is not washable; it needs to be replaced according to the manufacturer’s schedule (usually every 6-12 months) or when it becomes visibly dirty or discolored.
The Dust Cup Itself Needs Love
Occasionally, a fine layer of dust will form a film on the inside of the plastic dust cup. This is especially true if you have a lot of fine, powdery dirt or pet dander. Every 3-4 empties, take a damp (not wet) microfiber cloth and wipe down the interior of the dust cup, especially around the seal and the area where the bottom flap closes. Also, wipe the rubber gasket/seal on the dust cup lid—this ensures an airtight seal. A dirty seal leaks air and kills suction. Never immerse the dust cup in water or run water through it, as this can damage the sensors and seals.
Check the Hose and Wand Connections
With the dust cup off, take this opportunity to glance up into the suction inlet on the vacuum body. Use a flashlight. You might find a sock, a large hairball, or a piece of paper that has been sucked up but not made it into the cup. Also, detach the wand and hose from the back of the dust cup and look into those openings. A quick visual check here can prevent a mysterious loss of suction later.
Troubleshooting: When Emptying Doesn’t Fix the Problem
You’ve emptied the dust cup meticulously, cleaned the filters, and the suction is still weak. Don’t panic. There are a few other common culprits.
Is the Dust Cup *Truly* Empty and Sealed?
Be honest. Did you just tap it once, or did you really get in there? Sometimes a “plug” of hair and carpet fibers forms at the top of the cup, near the entrance, blocking the flow. After emptying, use your fingers (carefully) or a long, blunt tool to feel around the entrance port inside the cup. Clear any matted debris. Also, re-seat the cup with extra force. Listen for a firm click. An improper seal is a very common issue.
The Brush Roll is Jammed
A tangled brush roll creates immense drag on the motor and reduces suction at the floor. Turn the vacuum over. Can you spin the brush roll freely by hand? If it’s stiff or won’t turn, you need to clear it. Use scissors or a seam ripper to cut away any hair, string, or rug fibers wrapped around the bristles and axles. This is a critical maintenance task that should be done monthly for homes with pets or long hair.
Clog in the Airway
The blockage isn’t in the dust cup; it’s in the hose, wand, or the suction path behind the dust cup. First, detach the hose from the back of the dust cup and from the wand. Look through it. Use a long, flexible brush (a vacuum hose brush or even a straightened wire coat hanger with a cloth attached) to dislodge clogs. Next, check the wand. Finally, with the dust cup off, look into the suction inlet on the vacuum’s base. A clog here often requires a tool to reach.
Worn or Damaged Seals and Gaskets
Over time, the rubber seals on the dust cup lid, the HEPA filter housing, and the hose connections can become brittle, cracked, or warped. These seals are what create the high-pressure suction. Inspect them during your cleaning routine. If you see any damage, cracks, or they no longer sit flat, they need to be replaced. You can order replacement seals online using your model number.
Conclusion: A 30-Second Habit for a Lifetime of Clean
Emptying your Shark upright vacuum isn’t just a chore; it’s a fundamental act of care that directly translates to a cleaner home and a healthier appliance. By internalizing the simple sequence—unplug, release, detach, empty, inspect, reattach—you take control of your vacuum’s performance. Remember to couple this with monthly filter washing and periodic brush roll checks. The investment of a few minutes every couple of weeks will save you from frustrating loss of suction, costly part replacements, and the eventual need for a new vacuum. Your Shark is built to last. By giving it this basic, consistent attention, you ensure it will deliver the powerful, deep-cleaning performance you bought it for, vacuum after vacuum, year after year. Now, go forth and empty that dust cup with confidence!
Frequently Asked Questions
How often should I empty my Shark upright vacuum’s dust cup?
You should empty the dust cup after every 2-3 uses, or immediately when the “Full” indicator light comes on (if your model has one). For homes with pets, heavy carpet use, or a lot of fine dust, empty it after every single use to maintain optimal suction and hygiene.
Can I wash the dust cup itself with water?
No. You should never immerse the dust cup in water or run water through it. This can damage the electronic sensors, the seal mechanisms, and the internal cyclone chambers. Instead, wipe it out with a clean, damp microfiber cloth and let it air-dry completely before reattaching.
My dust cup is empty but suction is still weak. What should I check?
First, ensure the dust cup is properly re-seated with a firm click. Then, check the pre-motor foam filter—it may be clogged with fine dust and need tapping or washing. Next, inspect the brush roll for hair tangles that are jamming it. Finally, check for clogs in the hose, wand, or the suction inlet on the vacuum’s base.
Where is the pre-motor filter located and how often does it need cleaning?
The pre-motor foam filter is located inside the dust cup. You’ll see it when you open the cup; it’s usually a rectangular or square foam piece sitting in a holder. It should be tapped out over the trash during every emptying. It needs to be washed with cold water (no soap) once a month or when it becomes visibly grey and clogged, then dried for 24 hours.
What do I do if the dust cup release button is stuck or broken?
Do not force it. First, ensure the vacuum is unplugged. Check for any obvious debris jamming the button mechanism. Gently wiggle the dust cup while pressing the button. If it remains stuck, consult your user manual for model-specific disassembly instructions. You may need to access a secondary latch. If the button itself is broken, you will likely need to order a replacement dust cup assembly or release mechanism part from Shark using your model number.
Is it normal for some fine dust to escape when I empty the cup?
A small puff of the finest dust is somewhat normal, especially if the cup is very full. To minimize this, always empty the cup over a trash can, press the empty button firmly and quickly, and immediately close the bottom flap. Tap the cup sharply with the flap closed to dislodge dust before opening it again. For extreme dust, consider emptying the cup inside a large plastic bag placed inside the trash can, then tie the bag closed.