Cleaning the wheels of your Shark Navigator vacuum is a quick, essential maintenance task that dramatically improves maneuverability and prevents floor damage. Over time, wheels accumulate hair, string, and grit, which can cause the vacuum to stick, leave marks on hard floors, and strain the motor. The process is simple: remove the wheels, clear all debris from the axles and wheel wells, scrub the wheels with a mild cleaner, and fully dry everything before reassembly. Performing this check every 1-2 months keeps your vacuum performing like new and extends its lifespan.
Key Takeaways
- Regular cleaning is non-negotiable: The wheels are your vacuum’s only contact point with the floor. Ignoring them leads to poor handling, floor scratches, and increased wear on the machine.
- Hair and fiber are the primary culprits: They wrap around axles and form dense mats inside wheel wells, creating drag and preventing free spinning.
- You need basic household tools: A screwdriver, cotton swabs, an old toothbrush, and a damp cloth are all you need for a thorough clean. No special products required.
- Complete removal is key: Simply wiping the visible wheel surface isn’t enough. You must detach the wheels to access and clean the hidden axle and housing thoroughly.
- Dryness is critical before reassembly: Any moisture left on the axles or inside the housing can cause rust or attract more dirt. Ensure everything is bone-dry.
- Prevention saves future work: A quick weekly check and removal of visible hair from the wheel wells will prevent major clogs and make deep cleaning much easier.
📑 Table of Contents
- Why Cleaning the Wheels of Your Shark Navigator Vacuum is Absolutely Crucial
- Gathering Your Tools: A Simple, Effective Cleaning Kit
- The Step-by-Step Guide to Removing and Deep Cleaning the Wheels
- Reassembly and the All-Important Function Test
- Deep Cleaning Strategies for Stubborn, Caked-On Grime
- Ongoing Maintenance: A Simple Routine to Avoid Major Overhauls
- Conclusion: A Small Task for a Huge Difference
Why Cleaning the Wheels of Your Shark Navigator Vacuum is Absolutely Crucial
Let’s be honest: when we think about maintaining our Shark Navigator vacuum, our minds usually jump to emptying the dust cup, checking the filters, or maybe looking at the brush roll. The wheels? They’re just there to roll, right? Wrong. Those humble little wheels are the literal foundation of your vacuum’s mobility and its relationship with your floors. Ignoring them is a classic case of neglecting the small thing that causes the biggest problems. Cleaning the wheel of a Shark Navigator vacuum isn’t just a random chore; it’s a fundamental piece of preventative maintenance that directly impacts suction power, floor safety, and the overall lifespan of your trusted cleaning machine.
Beyond the Gunk: The Real Impact of Dirty Wheels
Think about what your vacuum rolls over every single time you use it. Pet hair, human hair, carpet fibers, dust bunnies, grit from shoes, and even tiny bits of gravel or sand tracked in from outside. A significant portion of this debris doesn’t make it into the dust cup; it gets trapped in the intricate spaces around the wheels. Hair, in particular, is a master of chaos. It wraps tightly around the wheel axle—the tiny metal pin the wheel spins on—and packs into the wheel well housing. This creates a brutal, two-fold problem. First, it creates physical drag. The wheels can’t spin freely, so you have to push and pull the vacuum with much more force. What should be a smooth, effortless glide becomes a strenuous workout. Second, and more damagingly, that packed mat of debris acts like an abrasive. As the stubborn wheel tries to turn, that grit grinds against the plastic wheel housing and the floor itself. On hard surfaces like hardwood, laminate, or tile, this leads to visible scuff marks and fine scratches that can ruin the finish over time. On carpet, it prevents the vacuum from properly agitating and lifting dirt because it’s literally stuck in place.
The performance impact extends to your vacuum’s internal components, too. That extra drag means the motor has to work harder to move the unit across the floor. This strains the motor bearings and can lead to premature wear, louder operation, and even reduced suction as power is diverted to overcome the resistance. You might notice your Shark Navigator suddenly feels “heavy” or is leaving streaks on your clean floors—these are classic, screaming signs that your wheels are overdue for a spa day. Taking just ten minutes every month or two to thoroughly clean the wheel of a Shark Navigator vacuum can prevent all of this, ensuring your vacuum remains a nimble, floor-friendly partner for years to come.
Gathering Your Tools: A Simple, Effective Cleaning Kit
One of the best things about this maintenance task is its simplicity. You don’t need a special toolkit or expensive Shark-branded cleaning solutions. You likely have everything you need right in a kitchen drawer or utility closet. Being prepared before you start makes the job flow smoothly and ensures you do it right the first time. The goal is to disassemble, clean, inspect, and reassemble with confidence.
Visual guide about How to Clean the Wheel of a Shark Navigator Vacuum
Image source: sharkvacuum.blog
The Essential Toolkit
- A Precision Screwdriver: This is the most important tool. Your Shark Navigator model will determine whether you need a Phillips head (#1 or #2) or a flathead. Check the screws that hold the wheel caps in place. Having the correct size prevents stripping the screw heads, which is a frustrating but common mistake.
- Old Toothbrush or Small, Stiff-Bristled Brush: An unused toothbrush is perfect for its size and bristle stiffness. It can get into the tiny crevices of the wheel well, around the axle, and into the nooks of the wheel itself to dislodge packed fibers.
- Cotton Swabs (Q-Tips) or Interdental Brushes: These are your secret weapons for the axle hole. The narrow, tapered end of a cotton swab, especially when dipped in a cleaner, can perfectly clean out the hollow center of the axle where hair loves to hide and wind.
- Microfiber Cloths: You’ll need at least two. One damp (with plain water or a mild cleaner) for scrubbing, and one completely dry for final drying. Microfiber is ideal because it’s highly absorbent and won’t leave lint.
- Mild Cleaning Solution: In 95% of cases, warm soapy water (a drop of dish soap in a cup of water) is more than sufficient. For really sticky, greasy grime (from kitchen spills), a 50/50 mix of water and white vinegar or a small amount of isopropyl alcohol on your cloth works wonders. Avoid harsh chemicals, bleach, or abrasive cleaners, as they can degrade the plastic wheels and housing.
- A Small Container or Bowl: Useful for holding the tiny screws so they don’t get lost during the process.
- Optional but Helpful: Needle-Nose Pliers: If you encounter a particularly stubborn, tangled knot of hair around the axle, a pair of needle-nose pliers can help you grip and pull it out without damaging the axle.
Safety First: A Quick Prep Checklist
Before you even flip your vacuum over, take two seconds. First, unplug the vacuum. This seems obvious, but it’s a critical safety step. You don’t want the brush roll accidentally activating while your fingers are near it. Second, perform this cleaning on a surface covered with a large towel or sheet of cardboard. This catches any loose debris, drips of cleaner, and prevents any small parts from rolling under furniture. It also keeps your clean floor from getting dirty during the process. Work in a well-lit area so you can see every speck of dirt packed into those wheel wells.
The Step-by-Step Guide to Removing and Deep Cleaning the Wheels
Now for the main event. This process is generally the same across most Shark Navigator models (like the Lift-Away, Rotator, and Pro series), but always consult your specific user manual if you have it. The key principle is accessing the wheel axle cap, removing it, and then sliding the wheel off its axle. We’ll break it down into clear, manageable stages.

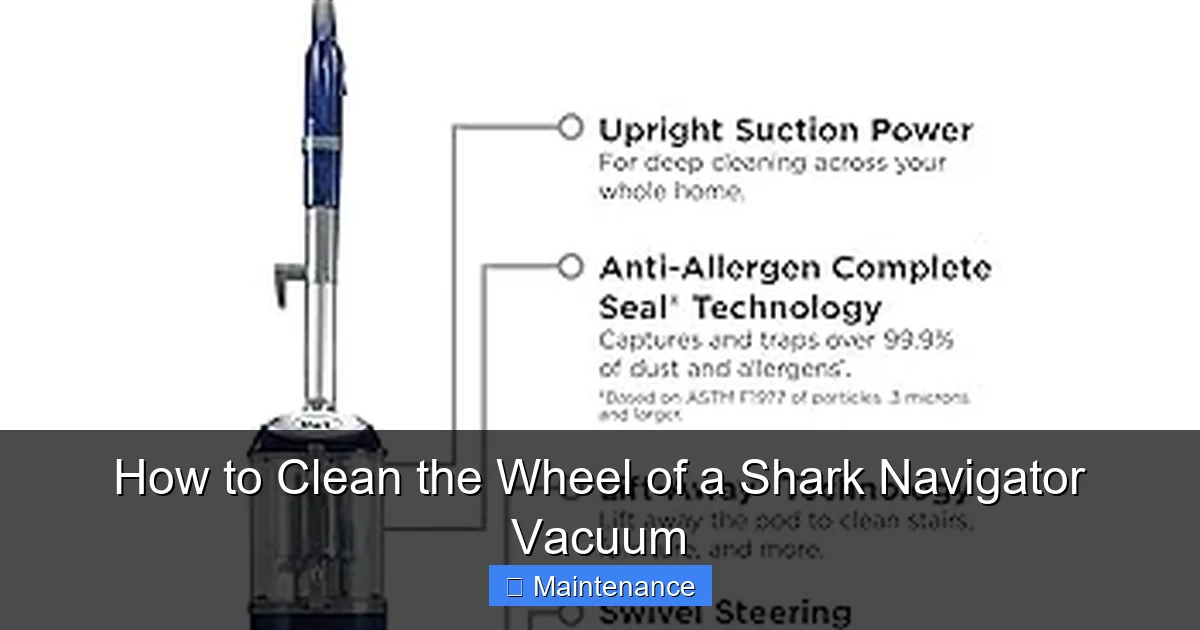
Visual guide about How to Clean the Wheel of a Shark Navigator Vacuum
Image source: sharkvacuum.blog
Stage 1: Accessing and Removing the Wheel Cap
Flip your Shark Navigator vacuum onto its back so the brush roll and wheels are facing up. Locate the wheel you want to clean (most models have two main rear wheels). At the center of the wheel, you’ll see a small plastic or metal cap. This cap is what covers the screw that holds the wheel assembly together. Using your correctly sized screwdriver, carefully unscrew this cap. Turn counter-clockwise. Be gentle; these screws and caps are small and can be easily stripped or lost. Once unscrewed, lift the cap off. You will now see the end of the axle—a short metal pin.
Stage 2: Extracting the Wheel from the Housing
With the cap off, the wheel should now be free to slide off the axle. However, it’s often held in place by friction and, of course, the debris packed around it. Gently wiggle the wheel side-to-side as you pull it straight out toward you. You might feel a slight resistance as the wheel clears the packed-in gunk. Don’t force it at a severe angle, as you could break the plastic housing. If it’s really stuck, use your toothbrush to clean out the debris from around the wheel’s inner rim and the housing socket first, then try again. Once free, carefully set the wheel aside in your clean workspace.
Stage 3: The Deep Clean – Axle, Housing, and Wheel
This is where you conquer the hidden grime. You now have three components: the wheel itself, the plastic wheel well housing attached to the vacuum body, and the small axle pin (which may stay in the housing or come out with the wheel).
- Cleaning the Axle: This is the #1 trouble spot. Take a cotton swab, dip it in your mild soapy water or vinegar solution, and insert it into the hollow center of the axle. Rotate it vigorously. You’ll see the swab come out coated in black, fuzzy gunk. Repeat with a clean swab until it comes out clean. If hair is wound tightly inside, use needle-nose pliers to gently pull it out strand by strand. An interdental brush (for cleaning between teeth) is fantastic for this job.
- Cleaning the Wheel Well Housing: This is the plastic socket the wheel sits in. It’s a deep, narrow space packed with debris. Use your damp toothbrush to scrub inside this cavity. Pay special attention to the bottom and the sides. The bristles will dislodge compacted hair and dust. You can also use a cotton swab to get into the corners. Rinse the housing by wiping it with a cloth dampened with clean water. Shake out any loose debris.
- Cleaning the Wheel Itself: Inspect the wheel. Look at the rubber tread and the plastic core. Scrub the entire surface, inside and out, with your soapy toothbrush. Pay attention to the inner rim that sits against the housing. This area often has a buildup of fine dust that acts like sandpaper. Rinse the wheel thoroughly with a clean, damp cloth.
Stage 4: The Critical Drying Phase
This step cannot be skipped. Using your dry microfiber cloth, meticulously dry every single surface. Dry inside the axle hole, inside the wheel well housing, and all over the wheel. Pay extra attention to the axle itself. Any residual moisture will cause the metal to rust or will attract dust and hair immediately upon reassembly, undoing all your hard work. Let the parts air-dry for an extra 5-10 minutes if you have the time, especially in humid environments. Ensure everything is completely, utterly bone-dry.
Reassembly and the All-Important Function Test
With all parts clean and dry, it’s time to put your Shark Navigator back together. This seems straightforward, but a small mistake here can lead to problems.
Visual guide about How to Clean the Wheel of a Shark Navigator Vacuum
Image source: m.media-amazon.com
Proper Reassembly Technique
Take your wheel and align it with the axle. The wheel should slide on smoothly and sit flush against the housing. There should be no gap. If it feels loose or wobbly, you likely have debris still in the housing or on the axle. Remove it and re-check. Once the wheel is seated properly, take the cap you removed earlier and place it over the screw hole. Insert the screw and tighten it by hand first, then use your screwdriver to snug it down firmly. Do not overtighten. Plastic can crack under excessive pressure. Tighten just until the cap is secure and doesn’t spin. Repeat for the other wheel if you’re cleaning both.
The Function Test: Before You Vacuum
Before you plug in and attack your living room, do a quick dry run. Place the vacuum upright on a hard floor. Gently push it forward and backward. Listen and feel. The wheels should rotate silently and freely with the slightest push. There should be no gritty grinding sound, no catching, and no excessive resistance. If you hear or feel anything abnormal, unplug it immediately and re-inspect that wheel’s assembly. Once the push feels smooth and quiet, plug in the vacuum, turn it on, and let it run for 10-15 seconds in an open area. Watch the wheels spin. They should be rotating quickly and smoothly without any wobble. If they are slow to spin or seem to bind, turn it off and re-check your work. A successful function test means you’ve successfully cleaned the wheel of your Shark Navigator vacuum and restored its peak mobility.
Deep Cleaning Strategies for Stubborn, Caked-On Grime
Sometimes, a simple scrub isn’t enough. If you’ve neglected the wheels for a long time, or if you’ve vacuumed up a lot of sticky spills (think syrup, glue, or candle wax), you’ll encounter a super-adhesive, hard residue. This requires a more targeted approach.
Targeted Solvent Application
For these tough jobs, you need to escalate your cleaner slightly. After disassembly, apply a small amount of isopropyl alcohol (rubbing alcohol, 70% or higher) or a dedicated plastic-safe degreaser to a cloth or cotton swab, not directly onto the parts. Focus it on the caked area. The alcohol will dissolve many sticky substances without harming the plastic. Let it sit for 30 seconds to penetrate, then scrub vigorously with your toothbrush. For wax or gum, you may need to gently pry it off with a wooden toothpick or a plastic spudger (like those used for electronics), being extremely careful not to scratch the plastic. The goal is to dissolve and lift, not to scrape.
The Soak Method for Extreme Cases
If the wheel itself is completely coated in a hardened layer of debris, you can perform a limited soak. Fill a small bowl with warm, soapy water. Submerge only the plastic wheel (never the housing or motor parts!) for 15-20 minutes. This will soften most grime. After soaking, use the toothbrush to wipe away the now-loosened gunk. Rinse thoroughly and dry completely. For the housing, you can use a cloth dampened with the soapy water to wipe the interior, but avoid getting water trapped deep inside where it can’t dry.
Ongoing Maintenance: A Simple Routine to Avoid Major Overhauls
The deep clean we’ve outlined is something you should plan on doing every 1-2 months, depending on your usage and home environment (pet owners and high-traffic homes will need it more often). But you can make your life infinitely easier by adopting a simple, 30-second weekly habit.
The Weekly Wheel Well Wipe-Down
Once a week, while your vacuum is unplugged and upright, simply flip it over onto its back. Using your fingers or a dry cloth, reach into each wheel well and pull out any visible hair, strings, or large particles you can see wrapped around the wheel or sitting in the well. You don’t need to remove the wheels for this. Just a quick de-linting. This prevents the hair from winding its way around the axle and packing in tightly. It’s the difference between a 10-minute monthly deep clean and a 30-second weekly touch-up.
Pro Tips for Long-Term Wheel Health
- Use on Hard Floors Occasionally: If you have mostly carpet, run your Navigator over a hard floor (like in a kitchen or bathroom) once a month. This helps dislodge any fine grit that might be trapped in the carpet fibers and being ground into the wheels. Just be sure the floor is clean first!
- Inspect the Tires: While cleaning, look at the rubber tread on the wheels. If you see it becoming smooth, glazed, or developing cracks, it’s a sign of wear. Shark sells replacement wheel kits. Replacing worn wheels is cheaper and easier than repairing a scratched floor or a strained motor.
- Mind Your Environment: Be extra vigilant about cleaning if you have indoor/outdoor pets, live on a dirt road, or have a gravel driveway. These environments introduce more abrasive materials that will foul the wheels faster.
- Listen to Your Vacuum: Your vacuum will tell you when it needs help. That new scraping sound, that increased effort required to push it, or those new streaks on your hardwood are all direct messages from the wheels saying, “Clean me!”
Conclusion: A Small Task for a Huge Difference
Cleaning the wheel of a Shark Navigator vacuum is the epitome of a small effort yielding massive returns. It’s a 10-15 minute investment that protects your expensive flooring, restores your vacuum’s effortless maneuverability, reduces operational noise, and extends the life of the motor by eliminating unnecessary strain. There’s no mystery to it—just a bit of disassembly, some warm soapy water, a toothbrush, and meticulous drying. By incorporating the quick weekly wipe-down and scheduling the full deep clean every month or two, you transform this from a forgotten chore into a seamless part of your home maintenance routine. Your Shark Navigator is a workhorse designed to make your life easier. Give its wheels the care they deserve, and it will continue to glide silently and effectively across your floors for years, proving that sometimes, the most important part of the machine is the smallest one.
Frequently Asked Questions
How often should I clean the wheels on my Shark Navigator?
For most households, a full deep clean every 1-2 months is sufficient. If you have pets, a lot of carpet, or track in a lot of outdoor dirt, aim for once a month. A quick weekly visual check and removal of loose hair from the wheel wells is highly recommended to prevent major clogs.
Can I use water to clean the wheel assembly?
Yes, but with caution. You can use a damp cloth and a mild soapy water solution on the plastic wheels and housing. However, you must avoid getting water into the axle hole or any internal electrical components. The most important rule is that all parts must be completely dry before reassembly to prevent rust.
What if the wheel is cracked or the rubber tread is worn smooth?
If you notice cracks in the plastic wheel or the rubber tire has become smooth and glazed, it’s time for a replacement. Shark sells official replacement wheel kits for most Navigator models. Continuing to use damaged wheels will cause poor performance and can damage your floors. Replacing them is a simple DIY fix.
My wheels still don’t spin freely after cleaning. What could be wrong?
>First, ensure everything is completely dry. A tiny bit of moisture inside the axle can cause drag. Second, double-check that you removed all hair and debris from inside the axle hole—this is the most common missed spot. Finally, confirm the wheel is seated fully and correctly in the housing and that the cap screw is snug but not overtightened.
Is there a way to prevent hair from wrapping so badly around the axles?
While you can’t eliminate it entirely, the weekly wheel well wipe-down is your best prevention. Additionally, if you have long-haired pets, consider using a preventative spray on the wheels (like a light silicone spray) after they are clean and dry. This can help hair slide off rather than grip. Just apply sparingly to a cloth and wipe the wheel surface.
Can I clean the wheels without removing them from the vacuum?
You can do a surface-level clean without removal, but it’s ineffective for the axle, which is where the worst jams happen. To truly clean the wheel of a Shark Navigator vacuum and restore full function, you must remove the wheel to access and clean the axle and the deep wheel well housing. A partial clean is better than nothing, but it’s not a substitute for the full process.