Cleaning dog poop from your Shark robot vacuum requires immediate, careful action to avoid damaging sensitive electronics and clogging the brush roll. Never use water directly on components and always disassemble key parts like the brush roll and filter for thorough sanitizing. Proper decontamination with pet-safe disinfectants and regular maintenance are crucial to eliminate odors and prevent future messes from becoming permanent hazards.
Let’s be honest: if you own a dog and a robot vacuum, you’ve either already faced this nightmare or you’re nervously reading this to prepare for the inevitable. That sickening *thump* followed by the unmistakable, awful smell. Your heart sinks. Your Shark robot, your helpful little cleaning pal, has just encountered a landmine. Panic is a natural response, but what you do in the next five minutes is critical. Cleaning dog poop from a Shark robot vacuum isn’t just about getting rid of the stink; it’s about performing delicate surgery on a complex electrical appliance to save it from permanent damage, biohazard contamination, and a lifetime of lingering odors. This guide will walk you through every single step, from the initial disaster response to a full, sanitizing deep clean, ensuring your robot lives to vacuum another day.
Key Takeaways
- Act Immediately: Turn off and unplug the vacuum the moment you discover waste to prevent smearing and motor damage.
- Avoid the Brush Roll: Never run the vacuum over poop; it will wrap around the bristles, creating a severe clog and sanitation nightmare.
- Disassemble Completely: Remove the brush roll, filter, and dustbin for separate, thorough cleaning—these are the primary contamination zones.
- Sanitize, Don’t Just Wipe: Use pet-safe disinfectants on all plastic parts and the brush roll housing to kill bacteria and neutralize enzymes that cause odors.
- Dry Everything Fully: Air-dry all washed components for at least 24 hours before reassembly to prevent mold and electrical issues.
- Check the Wheels & Sensors: Poop residue on wheels or cliff sensors can cause navigation errors; clean these overlooked areas meticulously.
- Consider Replacement: If the brush roll bristles are permanently stained or the filter holds odor after multiple cleanings, replace these consumable parts.
📑 Table of Contents
- Understanding the Risk: Why This Is a Big Deal
- Immediate Disaster Response: The First 60 Seconds
- The Deep Clean: Disassembly and Decontamination
- Sanitizing and Odor Elimination: Beyond Just Cleaning
- Reassembly and The First Test Run
- Prevention and Long-Term Maintenance
- Conclusion: A Lesson in Preparedness
Understanding the Risk: Why This Is a Big Deal
Your first instinct might be to simply run the vacuum over a dirty spot to “clean it up.” This is the single worst thing you can do. Dog waste is not just a mess; it’s a corrosive, biological hazard. When your Shark robot vacuum encounters it, several things happen at once that spell trouble for your machine.
The Brush Roll Becomes a Biohazard
The main roller brush, with its stiff bristles, is designed to agitate carpet fibers. It’s the perfect trap for anything stringy or flexible. Dog poop, especially if it’s on the softer side, will wrap around this brush instantly, coating the bristles, the rubber seals, and the bearings underneath. This creates a dense, anaerobic environment where bacteria multiply rapidly. The waste material will dry, harden, and bake onto the components as the motor heats up during operation, creating a permanent, smelly blockage. Attempting to simply “suck it up” guarantees this outcome.
Odor Molecules Infiltrate Everything
The foul smell isn’t just in your nose; it’s volatile organic compounds (VOCs) and fatty acids from the waste. The vacuum’s powerful fan will draw these odor molecules deep into the system. They will coat the inside of the plastic dustbin, the HEPA filter (if your model has one), the exhaust port, and even the motor housing itself. These molecules are stubborn. A simple wipe-down won’t remove them; they require specific enzymatic cleaners or thorough washing to break down and eliminate.
Sensors and Electronics Are in Jeopardy
Robot vacuums navigate using a suite of sensors—cliff sensors on the bottom, bumper sensors, and often optical or lidar sensors on top. Poop is wet and organic. If any of it splatters onto these sensors, it can create a film that blocks their function. Your robot might start thinking a clean floor is a cliff (constantly stopping and turning) or might fail to recognize walls, bumping into furniture repeatedly. Worse, if liquid waste seeps into any openings—around the brush roll housing, the wheel wells, or charging contacts—it can reach the main circuit board, causing short circuits and irreversible failure. The cost of repairing or replacing a motherboard often exceeds the value of the vacuum itself.
Immediate Disaster Response: The First 60 Seconds
Time is your enemy. The moment you realize what has happened, you must spring into a calm, methodical action plan. Your goal is to contain the mess and stop the vacuum from causing further damage to itself and your home.
Visual guide about How to Clean Shark Robot Vacuum Dog Poop
Image source: vetranch.org
Step 1: Power Down and Isolate
Do not try to guide the robot away. Do not let it continue moving. Immediately press the “Home” or “Pause” button on the robot or use the app to stop it. Then, physically pick it up. If the poop is on the brush roll, the robot is likely stuck or moving erratically. Carry it to a garage, laundry room, or bathroom—somewhere with a hard floor and easy cleanup. Place it on a large trash bag or old newspaper. Unplug the charging base if it’s connected, as you don’t want any residual power or signals to cause unexpected movement during cleaning.
Step 2: Contain the Spread
Inspect the immediate area. Use paper towels or disposable wipes to blot any fresh, wet spots on your floor. Do not rub, as this can push waste into grout lines or carpet fibers. For solid waste on hard floors, scoop the bulk of it away with a piece of cardboard or a putty knife, being careful not to press it into the floor surface. Your focus is now solely on the robot. Do not worry about the floor until the machine is safely in pieces.
Step 3: Prepare Your Cleaning Station
Gather your supplies before you start taking the vacuum apart. You’ll need: heavy-duty disposable gloves (nitrile is best), a set of Phillips-head and flat-head screwdrivers (check your Shark model’s manual for specifics), a dedicated bucket or sink for washing parts, old toothbrushes, soft cloths, paper towels, a trash bag for waste, a pet-safe enzymatic cleaner (like Nature’s Miracle or Rocco & Roxie), and a mild dish soap. Have a clean, dry towel ready for drying. Do not use bleach or undiluted vinegar directly on plastic parts for extended periods, as they can degrade finishes and sensors over time.
The Deep Clean: Disassembly and Decontamination
This is the heart of the operation. You must get inside the robot. Every Shark robot model (Ion, AI Ultra, IQ, etc.) has slightly different disassembly procedures, so consult your user manual for the definitive guide. However, the general principles and key components are the same.
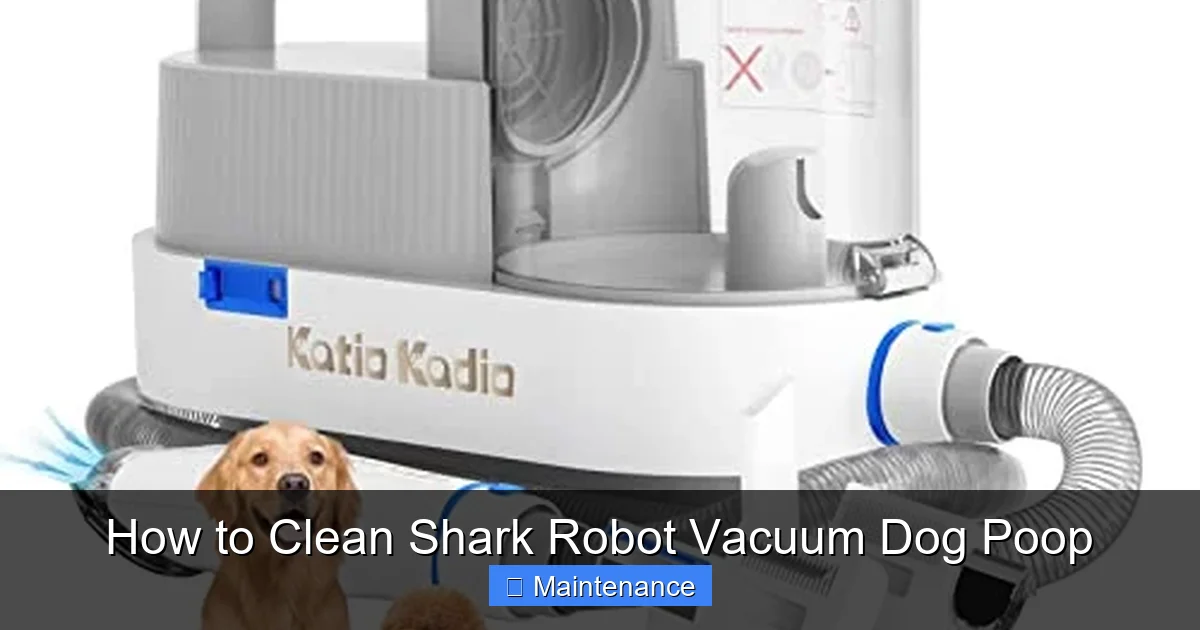
Visual guide about How to Clean Shark Robot Vacuum Dog Poop
Image source: vetranch.org
Removing the Dustbin and Filter
Locate the release latch for the dustbin, usually on the top or back. Open it and carefully lift the bin out. Do not open the bin over a trash can. Take it to your cleaning station. Dump the contents into a plastic bag, seal it, and dispose of it in an outside trash bin. The bin itself will be heavily contaminated. Using a paper towel or disposable wipe, scrape out any dried-on waste from the corners and the inlet port. Then, take it to your sink or bucket. Wash it with warm water and a drop of dish soap. Use your old toothbrush to scrub the mesh screen and the seal. Rinse thoroughly. This is non-negotiable: the filter is now a biohazard. Remove the filter (it may be a foam pre-filter, a pleated HEPA filter, or both). These are not washable unless specified. Most Shark robot filters are disposable. Given the contamination level, you should dispose of the filter immediately and replace it with a new one. Attempting to clean a poop-saturated filter is a fool’s errand and will leave your home smelling permanently.
The Critical Task: Removing and Cleaning the Brush Roll
This is the most labor-intensive part. Flip the robot over. You’ll see the brush roll cover, usually held by two clips or a single screw. Release it. The brush roll assembly will lift out. You will likely see poop wrapped around the bristles and caked on the rubber rollers at the ends. This is going to be gross. Use your disposable gloves. Have your trash bag handy. Carefully, using your fingers or the edge of a disposable tool, peel and pull the solid waste off the bristles. You may need to cut through it with scissors if it’s tightly wrapped. Once the bulk is removed, take the entire brush roll assembly to your cleaning station.
Here’s where the enzymatic cleaner is vital. Fill your bucket or sink with warm water and add the recommended amount of enzymatic cleaner. Submerge the brush roll and let it soak for 10-15 minutes. The enzymes will begin to break down the organic proteins and fats that cause odor. After soaking, use your dedicated toothbrush to scrub every bristle, the rubber end caps, and the central bearing housing. Pay special attention to the space between the bristles and the rubber. Rinse under warm running water until all suds and debris are gone. Shake off excess water and place it on your dry towel. Do not reassemble until it is 100% bone-dry, which will take many hours.
Cleaning the Brush Roll Housing and Side Brushes
With the brush roll out, you have access to its housing. This cavity will have splatter and fine particles. Use a damp cloth with a bit of dish soap or enzymatic cleaner to wipe it out completely. Use a cotton swab or toothpick to clean out the small bearing holes where the brush roll axles sit. Check the side brush (the little spinning brush on the side). Pop it off its axle and clean it similarly in your soapy water. Rinse and dry thoroughly. Also, wipe down the underside of the robot, around the wheels and the cliff sensor windows (the little clear or dark plastic pieces on the bottom edge). Any film here will cause navigation errors.
Wheels, Sensors, and Electronics: The Final Sweep
Now, examine the drive wheels. They may have tracked poop residue. Wipe them with a cloth dampened with your cleaner. Use a dry swab to clean the crevice where the wheel meets the body. Next, locate the sensors. On most Shark robots, there are small circular windows on the front bumper and the bottom edge. Gently wipe these with a microfiber cloth slightly dampened with cleaner, then immediately dry with a separate dry cloth. Never spray liquid directly onto the robot body. For any visible dirt on the top lid or charging contacts, use a dry or barely-damp cloth. The goal is to be meticulous but avoid introducing any moisture into the internal electronics.
Sanitizing and Odor Elimination: Beyond Just Cleaning
You’ve removed the physical waste. But the smell? That’s from microscopic residue and bacteria. A visual clean isn’t enough. You must sanitize and neutralize.
Visual guide about How to Clean Shark Robot Vacuum Dog Poop
Image source: vetranch.org
Choosing the Right Cleaners
Your best friend here is an enzymatic cleaner. These products contain live enzymes that specifically digest the organic compounds (proteins, fats, carbohydrates) in pet waste that cause odor. They are safe for most surfaces and are the only way to truly eliminate the smell at the source. After your initial soap-and-water wash, spray all plastic components—the dustbin, brush roll, housing, side brush—liberally with the enzymatic cleaner. Let it sit for the time specified on the bottle (usually 10-15 minutes), then wipe with a clean, damp cloth and allow to air dry. For the dustbin interior, you can even pour a small amount in, swirl it around, and let it sit before rinsing.
Avoid: Bleach (too harsh, can degrade plastics and leave its own strong smell), undiluted essential oils (can damage sensors and are toxic to pets if residues remain), and abrasive scrubbers (will scratch surfaces, creating more places for bacteria to hide).
The 24-Hour Dry Rule
This cannot be stressed enough. Reassemble your Shark robot vacuum with any component that is even slightly damp, and you are asking for mold, mildew, and a fried circuit board. Place all washed parts—dustbin, filter (if washable, but we recommend replacing), brush roll, side brush—on a clean towel in a warm, dry, well-ventilated area. A fan blowing gently across them can help. Wait a full 24 hours, preferably 48, before even considering putting them back together. This patience prevents the #1 post-cleanup failure: moisture in the electronics.
Reassembly and The First Test Run
Once every part is completely dry to the touch, you can begin reassembly. This is the moment of truth.
Step-by-Step Reassembly
First, reinstall the side brush. Snap it into its housing on the side of the robot. Next, take your completely dry brush roll. Ensure it spins freely in your hand. Slide it back into its housing, making sure the notches on the end caps align with the drive gears. Reattach the brush roll cover, clicking the clips or tightening the screw securely. Reinsert the clean, dry filter into the dustbin. Snap the dustbin back into the robot’s body until you hear it click. Double-check that the bin door is fully latched.
Initial Power-On and Observation
Place the robot on its charging base. Do not run a cleaning cycle yet. Just let it charge and power on. Watch the robot’s display or listen for any unusual sounds (grinding, whining). Use the app to send it on a short, 2-minute “Spot Clean” or “Max” mode in a clear, small area. Do not start it near the original accident site. Watch it closely. Does it move smoothly? Do the side brush and main brush spin freely? Is there any odd smell? Listen for normal suction sounds. If it sounds strained or the brushes aren’t spinning, power it off immediately and recheck the brush roll installation. If it runs normally, let it complete its short cycle. After it docks, open the dustbin and sniff. There should be no odor. If a faint smell remains, you may need to repeat the enzymatic cleaner treatment on the dustbin and run another short cycle with a few drops of a pet-safe odor neutralizer (like Zero Odor) placed in the dustbin.
Prevention and Long-Term Maintenance
You’ve survived the crisis. Now, let’s make sure it doesn’t happen again—or at least, that you’re ready if it does.
Scheduling and Boundaries Are Your Best Friends
The most effective strategy is to prevent overlap between your dog’s schedule and the robot’s. Use the Shark app’s scheduling feature. Do not run the robot when your dog is typically in the house, especially after meals or first thing in the morning. If your dog has a specific area where accidents are more likely (a certain rug, a corner), use the app’s “No-Go Zone” or virtual wall barriers to keep the robot out. This is a simple, digital fix that avoids 99% of potential incidents.
Routine Maintenance Becomes Critical
After any poop incident, your maintenance schedule should accelerate. For the next month, check and clean the brush roll weekly, even if it looks clean. Hair and dander will mix with microscopic residue. Stick to a strict filter replacement schedule—every 2-3 months with normal use, but consider monthly if you have multiple pets. Keep a spare filter on hand. Wipe down the sensors and charging contacts monthly with a dry microfiber cloth. A clean robot is a resilient robot.
Know When to Cut Your Losses
Sometimes, the damage is just too great. If, after a thorough clean, the robot still smells, or if it exhibits navigation errors (spinning in circles, constantly hitting walls), the internal electronics or sensors may have been compromised. The smell of decay can permanently embed in the plastic of the dustbin and motor housing. If you’ve gone through two cycles of deep cleaning and the odor persists, it’s time to consider part replacement. A new brush roll and filter are cheap. A new mainboard is not. Evaluate the cost of repairs versus the value of your specific Shark model. For older models, investing in a new robot might be more economical than fighting a losing battle against embedded bio-waste.
Conclusion: A Lesson in Preparedness
Cleaning dog poop from your Shark robot vacuum is a rite of passage for pet owners who embrace smart home technology. It’s messy, unpleasant, and tests your patience. But it’s also a profound lesson in appliance care. You’ve learned that your robot is not an indestructible appliance but a sensitive machine that requires respect and careful handling. You’ve discovered the importance of immediate, calm response, the necessity of complete disassembly, and the power of enzymatic cleaners. You now understand that prevention—through scheduling and barriers—is infinitely better than cure. By following this guide, you’ve not only saved your expensive device from the landfill, but you’ve also gained the confidence to handle any future pet-based disaster. Your home will be clean, your robot will be happy, and your dog, blissfully unaware of the trauma they caused, will continue to reign supreme. Now, go wash your hands. Twice.
Frequently Asked Questions
Can I use water to clean the Shark robot vacuum’s brush roll?
Yes, but only after completely removing it from the machine and after scraping off all solid waste first. Submerge the detached brush roll in warm, soapy water or an enzymatic cleaner solution. Never spray water directly into the brush roll housing while it’s attached to the robot, as this can flood the motor and sensors.
What’s the safest disinfectant to use inside my Shark robot?
A pet-safe enzymatic cleaner is ideal, as it breaks down odor-causing proteins. For general disinfecting, a 1:1 solution of white vinegar and water can be used on plastic parts (rinsed afterward), but avoid vinegar on sensors and metal. Isopropyl alcohol (70%) on a cloth is also safe for wiping down hard plastic surfaces and sensors, but ensure it evaporates completely before reassembly.
How do I get the poop smell out of the dustbin permanently?
After removing all waste, wash the bin with hot, soapy water. Then, fill it with a solution of water and enzymatic cleaner, let it soak for 15 minutes, and rinse thoroughly. Leave the bin open and the filter out to air dry completely in sunlight if possible, as UV light helps kill bacteria. If the smell persists after multiple washes, the plastic may be permanently permeated, and replacement is the only solution.
My robot smells even after cleaning. What did I miss?
The most common missed spots are: the rubber seals around the dustbin door, the small crevice where the brush roll bearings sit, the side brush housing, and the wheels. Also, ensure you replaced the filter. A soiled filter will recontaminate the entire system. Finally, the smell might be trapped in the motor housing or exhaust vent, which are not user-serviceable. Running the robot with a pet-safe odor neutralizer tablet in the dustbin for a few cycles can sometimes help draw out residual smells.
How often should I replace the brush roll after a poop incident?
Inspect it closely after cleaning. If the bristles are frayed, melted from heat, or permanently stained/discolored, replace it immediately. A damaged brush roll can scratch floors and trap more debris. Even if it looks okay, consider replacing it as a precaution after a major biohazard incident, as microscopic waste can remain embedded. Brush rolls are a consumable part and relatively inexpensive.
Will this void my Shark robot vacuum’s warranty?
Warranties typically cover defects in materials and workmanship. Damage caused by user misuse, neglect, or “acts of God” (which would include pet accidents) is almost always excluded. Opening the vacuum to clean it will not void the warranty, but if a technician determines that liquid or bio-waste caused a failure, that specific repair will not be covered. However, performing the proper cleanup yourself is your best and often only chance to save the machine without a costly service call that would be denied anyway.