Regularly cleaning your Shark hair brush is essential for hair health, brush performance, and longevity. Hair product buildup, dead skin cells, and dust clog the bristles and cushion, reducing grip and distributing dirt back onto your hair. The process is simple: remove hair, soak the brush head in gentle soap, scrub the base and cushion with a soft brush, rinse thoroughly, and air-dry completely. Avoid harsh chemicals and submersion of the handle to prevent damage. Following these steps ensures a hygienic, effective brush for every style.
Let’s be honest: your hair brush is probably one of the most-used tools in your beauty arsenal. You trust it to detangle, smooth, and style your hair day after day. But when was the last time you gave your Shark hair brush the deep clean it truly deserves? If you’re like most people, the answer is “not recently enough.” That pristine, voluminous look you’re after can be sabotaged by a dirty brush. Clogged bristles, a grimy cushion, and a base coated in hair product residue don’t just look gross—they actively work against your hair goals. They can snag and break hair, redistribute dirt and oils, and even harbor bacteria and fungi. Learning how to clean a Shark hair brush properly isn’t just about aesthetics; it’s a crucial part of your hair health routine and ensures your investment in a quality tool lasts for years.
Shark hair brushes, celebrated for their innovative designs like the popular Shark FlexStyle and various paddle and round brush models, are built to deliver salon-worthy results at home. Their unique bristle patterns, flexible cushions, and often detachable heads require specific care. Using the wrong cleaning method can damage the very features that make them effective. This comprehensive guide will walk you through everything you need to know, from a quick weekly refresh to a monthly deep clean. We’ll cover the right tools, the step-by-step process for different Shark models, deep-cleaning solutions for stubborn buildup, and essential maintenance tips to keep your brush performing flawlessly. Say goodbye to snags and hello to smooth, shiny, healthy hair—it all starts with a clean brush.
Key Takeaways
- Clean regularly to maintain performance: Buildup clogs bristles and cushions, making the brush less effective at detangling and styling, and can redistribute dirt and oils to your hair.
- Disassemble when possible: Many Shark brush heads detach from the handle, allowing for thorough cleaning of the entire head without risking water damage to the motor or electronics.
- Use gentle, effective cleaners: Mild dish soap and warm water are perfect for daily/weekly cleans. For deep cleaning, use a diluted white vinegar solution or baking soda paste.
- Focus on the hidden areas: The rubber cushion/base and the wells where bristles attach are prime spots for hidden buildup. Use a soft-bristled toothbrush to scrub these areas meticulously.
- Air-dry completely before reassembly: Never use a hair dryer. Ensure every part, especially the cushion and bristle bases, is 100% dry to prevent mold, mildew, and odor.
- Avoid these common mistakes: Never soak the entire brush (if not designed for it), don’t use harsh chemicals like bleach or acetone, and don’t use abrasive tools that can tear the bristles or cushion.
📑 Table of Contents
- Why Cleaning Your Shark Hair Brush is Absolutely Essential
- Gathering Your Cleaning Arsenal: Tools & Solutions
- The Step-by-Step Guide: Your Routine Cleaning Protocol
- Deep Cleaning Methods for Stubborn, Caked-On Buildup
- Maintenance Tips to Keep Your Shark Brush Fresh Between Cleans
- Common Mistakes That Will Destroy Your Shark Hair Brush (And How to Avoid Them)
- Conclusion: A Clean Brush is the First Step to Beautiful Hair
Why Cleaning Your Shark Hair Brush is Absolutely Essential
You might be thinking, “It’s just a brush, how dirty can it get?” The answer will surprise you. Your brush is a silent collector of everything you put on your hair and everything your hair sheds. Think about it: every stroke collects strands, transfers sebum from your scalp, and accumulates layers of hairspray, mousse, serum, and dry shampoo. Over time, this creates a dense, sticky mat around the bristles and within the cushion. This isn’t just unsightly; it directly impacts your hair’s health and your styling results.
The Hygiene Hazard: What’s Living on Your Brush?
Beyond product gunk, your brush is a breeding ground for microbes. Dead skin cells, scalp oils, and ambient dust provide a perfect buffet for bacteria and yeast. Studies have found that unwashed brushes can harbor strains of Staphylococcus and other bacteria. While most are harmless, they can potentially contribute to scalp issues like dandruff, itchiness, or even minor infections if you have a break in your scalp skin. For anyone with sensitive skin or conditions like seborrheic dermatitis, a dirty brush can exacerbate problems. Regular cleaning is a non-negotiable part of scalp hygiene.
The Performance Killer: How Buildup Ruins Your Style
A clogged brush simply doesn’t work well. The bristles, especially the flexible ones on many Shark models, need to move freely through your hair. When coated in residue, they become stiff and sticky, increasing tugging and breakage. The cushion, which is designed to flex and glide, becomes stiff and unresponsive. You’ll find yourself spending more time detangling, getting more frustrated with snags, and ultimately achieving a less smooth finish. Your blowout won’t last as long because the brush isn’t distributing natural oils evenly. Cleaning restores the brush’s original glide and tension, making every stroke count.
Protecting Your Investment: Longevity Matters
A Shark hair brush is a tool you paid for. Letting it deteriorate from neglect is like leaving your car to rust in the rain. Product chemicals can degrade plastic and rubber components over time. The trapped moisture and organic matter can lead to mold and mildew inside the cushion, causing permanent odors and material breakdown. A well-maintained brush can last for many years, consistently delivering the performance you expect. Neglect it, and you’ll be replacing it far sooner than necessary.
Gathering Your Cleaning Arsenal: Tools & Solutions
Before you start, having the right tools on hand makes the job quick and easy. The good news is you likely already have everything you need in your kitchen. The key is using tools that clean without damaging the delicate components of your Shark brush.
Visual guide about How to Clean Shark Hair Brush
Image source: sharkvacuum.blog
The Essential Toolkit
- Warm Water: The foundation of your cleaning solution. Hot water helps dissolve oils and product residue.
- Mild Dish Soap or Gentle Shampoo: A few drops are sufficient. These are designed to cut through grease and oils without being harsh. Avoid antibacterial soaps, which can be too abrasive.
- White Vinegar: A natural disinfectant and mild acid that dissolves mineral deposits and stubborn buildup. Always dilute it with water (a 1:1 ratio is perfect).
- Baking Soda: A gentle abrasive and deodorizer. Make a paste with a little water for scrubbing tough grime on the base.
- Soft-Bristled Toothbrush or Small Cleaning Brush: This is your most important tool for detail work. An old, clean toothbrush is ideal for getting into the wells between bristles and scrubbing the rubber cushion without tearing it.
- Two Small Bowls or Cups: One for your soapy wash water and one for your rinse water. This keeps you from constantly re-contaminating your clean water.
- Towel or Microfiber Cloth: For drying. Microfiber is excellent at absorbing water.
- Tweezers or a Comb: For efficiently removing tangled hair from the bristles before washing.
- Optional: Cotton Swabs (Q-Tips): Perfect for cleaning around the base where the head attaches to the handle, especially on models with seams.
What to AVOID at All Costs
Using the wrong cleaner can permanently damage your Shark brush. Never use:
- Bleach, Acetone, or Harsh Chemicals: These will degrade plastic, rubber, and the adhesive holding bristles. They can also cause discoloration and make materials brittle.
- Oil-Based Cleaners or Silicone Sprays: These will leave a residue that attracts more dirt and dust, defeating the purpose of cleaning.
- Abrive Scouring Pads or Steel Wool: They will scratch the handle and, worse, tear the rubber cushion and bend or pull out bristles.
- Dishwashers or Washing Machines: The extreme heat, powerful detergents, and aggressive agitation will warp plastic, melt adhesives, and destroy the cushion. Shark does not recommend this for any of their brush models.
- Submerging the Handle (if not designed for it): Most Shark brushes have electronic components (like in their heated styling brushes) or battery compartments in the handle. Water here can cause short circuits, rust, and complete failure. Always check your specific model’s manual. If the head detaches, only clean the detachable head.
The Step-by-Step Guide: Your Routine Cleaning Protocol
This is the maintenance routine you should aim for every 1-2 weeks, depending on how often you use your brush and the amount of product you use. This quick process prevents heavy buildup and makes the occasional deep clean much easier.
Visual guide about How to Clean Shark Hair Brush
Image source: mopreviewer.com
Step 1: Remove All Hair and Debris
This is the first and most crucial step. Don’t try to clean a brush matted with hair—it’s ineffective and frustrating. Starting at the base of the bristles, use your fingers or the end of a comb/tweezers to pull out all the trapped hair. Work your way to the tips. For brushes with a flexible cushion, you can often lift the cushion slightly (if your model allows) to access hair trapped underneath. Be thorough here. Removing this hair barrier allows your cleaning solution to reach the actual brush surfaces.
Step 2: Prepare Your Soapy Solution
Fill one of your small bowls with warm (not scalding) water. Add 2-3 drops of mild dish soap or a gentle shampoo. Swirl to create a light sudsy mixture. In your second bowl, fill it with clean, warm rinse water.
Step 3: Wash the Brush Head (Detachable Models)
If your Shark brush head detaches (most do), take it off the handle now. Submerge only the brush head in the soapy water. Let it soak for 2-3 minutes to loosen surface oils. Using your soft-bristled toothbrush, gently scrub:
- The Bristles: Scrub between the rows of bristles, paying attention to the roots where product accumulates.
- The Cushion/Base: This rubber or silicone pad is a buildup hotspot. Use circular motions with your toothbrush. If the cushion is removable (some models allow this), take it out and scrub both sides.
- The Wells and Seams: Get into every little crevice where the bristles are inserted. Use the tip of the toothbrush or a cotton swab for tight spots.
Be firm but gentle. You want to dislodge grime, not tear the bristles from their sockets.
Step 4: Rinse Meticulously
This step is critical. Leftover soap is sticky and will attract dirt immediately. Hold the brush head under a gentle stream of lukewarm running water. Rotate it to ensure all soap suds are washed away from every angle, including inside the bristle holes. You can dip it repeatedly in your clean rinse bowl. Continue until the water runs clear and no suds are visible.
Step 5: Disinfect and Deodorize (The Vinegar Rinse)
For a hygienic boost, mix a 50/50 solution of white vinegar and warm water in a bowl. Submerge the clean brush head for 3-5 minutes. The vinegar will kill most bacteria and neutralize odors. Important: After the vinegar soak, you must rinse the brush head again thoroughly under running water for at least 30 seconds to remove all vinegar taste and smell.
Step 6: Dry, Dry, Dry!
This is the step that prevents mold and mildew. Shake off excess water. Place the brush head on a clean towel, bristles down, in a well-ventilated area away from direct sunlight or heat sources. Do not stand it upright (bristles up), as water will seep into the cushion and base, trapping moisture. If your model has a removable cushion, take it out and lay it separately to dry. Allow it to air-dry completely. This can take 4-6 hours, sometimes overnight. Do not use a hair dryer or place it on a radiator. Once every part is bone dry to the touch, you can reattach the head to the handle and store it properly.
Deep Cleaning Methods for Stubborn, Caked-On Buildup
Even with regular maintenance, some brushes, especially those used with heavy waxes, pomades, or copious dry shampoo, will develop a hard, waxy residue. This requires a more aggressive but still safe approach. Perform a deep clean once a month or when you notice the bristles are noticeably stiff and coated.
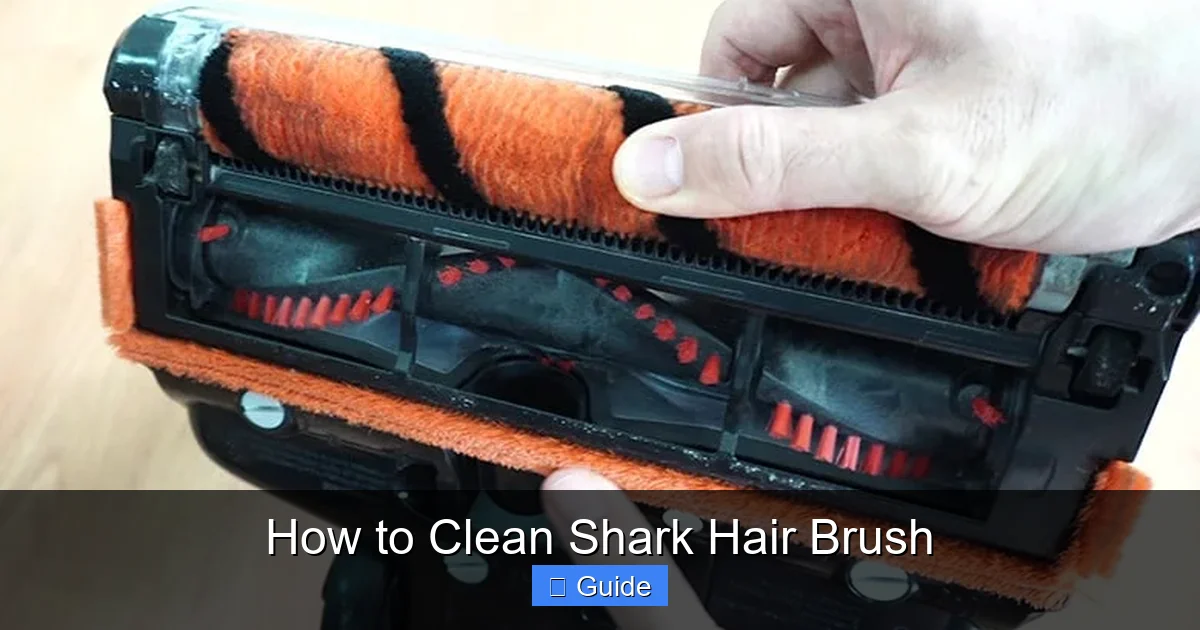
Visual guide about How to Clean Shark Hair Brush
Image source: bestcordlessvacuumguide.com
The Baking Soda Paste Scrub
Baking soda is a mild alkali that breaks down organic oils and acts as a gentle scrub without scratching.
- Make a thick paste by mixing baking soda with a tiny amount of water.
- Apply the paste directly to the rubber cushion, the base of the bristles, and any visibly gummy areas.
- Using your soft-bristled toothbrush, scrub these areas vigorously. The paste will help lift the old, caked-on product.
- Let it sit for 10 minutes.
- Rinse extremely well under running water, using your fingers to massage the cushion and ensure all paste grains are gone.
The Extended Vinegar Soak
For mineral deposits from hard water or extreme product buildup, a longer vinegar soak is effective.
- Fill a bowl or small basin with a 1:1 mixture of white vinegar and warm water.
- Fully submerge the detachable brush head. If the cushion is removable, take it out and place it in the solution separately.
- Let it soak for 30 minutes to 1 hour. You may see some residue dissolve into the water.
- After soaking, use your toothbrush to lightly scrub all surfaces again. The vinegar will have loosened the bonds.
- Rinse meticulously for at least one full minute under running water. Vinegar smell should be minimal after drying.
The “Isopropyl Alcohol Spot Treatment”
For disinfecting and tackling silicone-based product residue (which can be water-resistant), isopropyl alcohol (rubbing alcohol, 70% or 90%) is excellent. Use this sparingly and with ventilation.
- Dampen a cotton ball or pad with isopropyl alcohol. Do not pour it directly on the brush.
- Rub it directly onto the rubber cushion and the plastic base, focusing on the discolored, sticky patches.
- You’ll see the residue start to dissolve and transfer to the cotton. Use a clean section of the pad as it gets dirty.
- Immediately follow with a soap-and-water wash and a thorough rinse to remove any alcohol residue, which can be drying.
Maintenance Tips to Keep Your Shark Brush Fresh Between Cleans
The goal is to make your monthly deep clean a breeze by preventing catastrophic buildup. A little daily habit goes a long way.
The 30-Second Post-Styling Wipe Down
After you finish styling, take 30 seconds to wipe down the brush head. Use a damp cloth (with just water or a drop of soap) to wipe the bristles and cushion. Then, use a dry cloth to remove any moisture. This removes fresh product before it hardens and hair before it tangles into a mat. It’s the easiest way to stay on top of cleanliness.
Proper Storage is Key
Never store your damp brush in a closed drawer or toiletry bag. This traps moisture and creates a perfect environment for mildew. Always store your brush in a dry, well-ventilated area, bristles down or hanging, with the head exposed to air. If you travel with it, let it dry completely before placing it in its case or bag.
Use a Brush Cover (The Right Way)
Many Shark brushes come with a protective cover or sleeve. This is for protecting the bristles during travel or storage, not for storing a damp brush. Only put the cover on when the brush is completely dry. Putting a cover on a slightly damp brush seals in humidity and guarantees odor and mildew.
Know Your Brush’s Disassembly
Get familiar with how your specific Shark model comes apart. Can the cushion be removed? How does the head detach? Understanding this allows you to clean every nook and cranny. Refer to the user manual if you’re unsure. Never force parts apart; they should come off with gentle pressure.
Common Mistakes That Will Destroy Your Shark Hair Brush (And How to Avoid Them)
Even with the best intentions, it’s easy to make a mistake that causes irreversible damage. Here are the cardinal sins of brush care and how to steer clear of them.
Mistake 1: Soaking the Entire Unit (Handle Included)
The Damage: Water seeps into the joint between head and handle, potentially reaching the motor (in heated brushes), battery compartment, or internal wiring. This causes rust, short circuits, and failure. Even on non-heated brushes, water trapped in the handle can cause the plastic to crack and the internal parts to corrode.
The Fix: Always detach the brush head from the handle before cleaning. Never submerge the handle. If you accidentally splash water on the handle, wipe it dry immediately with a cloth.
Mistake 2: Using the Wrong Cleaning Tools
The Damage: A metal brush or rough scrubber will tear the soft rubber cushion, creating holes and tears. It can also bend and break the bristles. Bleach will discolor and embrittle plastic and rubber.
The Fix: Stick to soft-bristled toothbrushes, cloths, and your fingers. Your toothbrush is your best friend for detail work.
Mistake 3: Incomplete Drying
The Damage: Trapped moisture inside the cushion and base leads to a musty smell, pink or black mold spots, and eventual breakdown of the rubber. This is often the reason for a brush that smells “old” or “musty” no matter how much you clean it.
The Fix: Be patient. Lay the brush head on a towel in a spot with good airflow. If you’re in a humid climate, you can use a fan to circulate air around it. Press gently on the cushion with a dry cloth to absorb hidden moisture. Wait until it feels completely dry, inside and out.
Mistake 4: Aggressive Detangling of Hair
The Damage: Using a sharp object like a scissors or a metal pick to pry out tangled hair can cut bristles at the root or tear the cushion material. Pulling too hard on the hair can also loosen bristles.
The Fix: Use the end of a comb, a wide-tooth pick, or your fingers. Work slowly from the outer edges of the tangle inward. If hair is truly cemented on, soak the brush head first to loosen it.
Conclusion: A Clean Brush is the First Step to Beautiful Hair
Your Shark hair brush is a powerful ally in your beauty routine, but its power is only as good as its condition. A clean brush glides smoothly, distributes natural oils evenly, holds styles better, and protects your hair from unnecessary breakage and snagging. It’s a simple act of self-care that pays dividends in the form of healthier, shinier, more manageable hair. By following the routine outlined here—a quick weekly wash and a monthly deep clean with the right tools and gentle solutions—you’ll extend the life of your brush significantly and ensure it always delivers the performance you expect.
Don’t let product buildup and dust compromise your styling. Set a calendar reminder if you need to. Spend 10 minutes every couple of weeks giving your Shark brush some love. Your hair—and your wallet—will thank you for it. Now that you know how to clean a Shark hair brush the right way, there’s no excuse for a dirty tool. Go forth and enjoy smoother, healthier styling every single day.
Frequently Asked Questions
How often should I deep clean my Shark hair brush?
For most users, a thorough deep clean once a month is sufficient if you use the brush regularly with styling products. If you use a lot of wax, pomade, or dry shampoo, you may need to deep clean every 2-3 weeks. Between deep cleans, perform the quick wipe-down and hair removal routine weekly.
Can I use vinegar to clean my Shark brush, and will it leave a smell?
Yes, a diluted white vinegar solution (1 part vinegar to 1 part water) is excellent for disinfecting and removing stubborn buildup. After soaking, you must rinse the brush very thoroughly under running water to remove all vinegar residue. Once completely dry, the vinegar smell will be completely gone.
Is it safe to put my Shark brush head in the dishwasher?
No, Shark does not recommend cleaning any part of their hair brushes in a dishwasher. The high heat and harsh detergents will warp plastic, degrade rubber cushions, and melt adhesives, permanently damaging the brush.
My brush has a flexible cushion that’s now stiff. Can I fix it?
A stiff cushion is usually due to heavy product buildup. A deep clean with a baking soda paste scrub and an extended vinegar soak can often restore some flexibility. However, if the cushion is permanently deformed or torn from neglect, it may need to be replaced. Check Shark’s website for replacement cushion kits for your specific model.
What’s the best way to dry the brush to prevent mildew?
The key is air and exposure. After rinsing, shake off excess water, then place the brush head on a dry towel with the bristles pointing down. This allows any residual water to drain out of the cushion and base, not into it. Store it in a well-ventilated area, not a closed cabinet, until it is 100% dry to the touch.
My Shark FlexStyle has a heated barrel. How do I clean that part?
For the heated barrel/barrel brush attachments, the process is similar but with extra caution. Ensure the tool is completely cool and unplugged. Wipe the barrel with a cloth slightly dampened with a mild soapy water solution. Never immerse the barrel in water, as it contains heating elements. Wipe it dry immediately with a clean, dry cloth. Do not use any liquid cleaners directly on the barrel surface.