Charging your Shark cordless vacuum is simple but crucial for performance and battery longevity. Always use the official charger, connect it firmly to both the vacuum and wall outlet, and allow a full charge cycle before first use. Avoid extreme temperatures and deep discharges to keep your vacuum powered up for years.
So, you’ve unboxed your shiny new Shark cordless vacuum, ready to banish dust and pet hair with cord-free freedom. But before that first triumphant push across the floor, there’s one essential ritual: charging it up. Getting this step right isn’t just about plugging it in; it’s the foundation of your vacuum’s entire lifespan, affecting everything from suction power to how many years the battery will reliably hold a charge. Whether you’re a first-time Shark owner or just need a refresher, this guide will walk you through every detail of how to charge a Shark cordless vacuum, from the basics to pro-level battery care. Think of it as your vacuum’s user manual, but friendlier and without the tiny print.
Shark’s cordless lineup, including popular models like the IZ682, AZ6002, and Stratos series, all share a core charging philosophy, but with slight model-specific quirks. We’ll cover the universal principles first, then dive into variations. The goal? To make charging your Shark as effortless as vacuuming itself, while ensuring that battery stays healthy for the long haul. Let’s plug in and get started.
Key Takeaways
- Use Only the Official Charger: Shark vacuums require specific voltage and amperage. Third-party chargers can damage the battery and void the warranty.
- Charge Before First Use: New vacuums or those stored long-term need a complete charge cycle (3-4 hours) to calibrate the battery indicator.
- Avoid Extreme Temperatures: Never charge in freezing cold or hot environments (below 40°F/4°C or above 104°F/40°C), as it harms lithium-ion cells.
- Don’t Store Depleted: For long-term storage, charge the battery to about 50% to prevent permanent capacity loss.
- Listen for Click & Light: A secure connection produces a faint click. The charging indicator light (usually amber/red) confirms power is flowing; it turns green/blue when full.
- Clean Charging Ports: Regularly check and gently clean both the vacuum’s charging pins and the charger’s plug with a dry, soft brush to ensure good contact.
- Understand Indicator Meanings: Blinking lights often signal an issue (e.g., overheating, fault). Consult your manual, as patterns vary by Shark model series.
📑 Table of Contents
- 1. Understanding Your Shark Cordless Vacuum’s Battery & Charger
- 2. The Step-by-Step Charging Process (The Right Way)
- 3. Optimizing Battery Life: Charging Best Practices
- 4. Troubleshooting: “Why Isn’t My Shark Charging?”
- 5. Charging for Different Shark Models & Scenarios
- 6. Long-Term Storage & Seasonal Care
- Conclusion: Making Charging Second Nature
1. Understanding Your Shark Cordless Vacuum’s Battery & Charger
Before we connect anything, it helps to know what you’re working with. Shark cordless vacuums almost exclusively use lithium-ion (Li-ion) batteries, the same tech in your phone and laptop. They’re powerful, lightweight, and have no “memory effect,” meaning you don’t have to fully drain them before recharging. However, they do have preferences: they like being charged between 20% and 80% for optimal long-term health and hate being left at 0% or 100% for months on end.
The Official Shark Charger: Your Battery’s Best Friend
That power brick that came in the box? It’s not a generic accessory. It’s a precisely engineered component designed to deliver the exact voltage (typically 18V, 20V, or 22V depending on the model series) and amperage your vacuum’s battery management system (BMS) expects. The BMS is a tiny computer inside the battery that controls charging speed, prevents overcharging, and monitors temperature. Using a third-party or “universal” charger confuses this system. It might charge too slowly, too quickly (causing heat stress), or not at all. Worse, it can permanently damage the battery cells, leading to dramatically reduced runtime. The rule is simple: always use the charger that has “Shark” printed on it and matches your model’s voltage requirement.
Locating the Charging Port & Connector
On most Shark stick vacuums, the charging port is discreetly located on the back or underside of the handheld portion, often protected by a small rubber flap. This flap keeps dust and debris out when not in use. The charger connector is a simple, usually rectangular plug that fits into this port with a satisfying magnetic or physical click. Some higher-end models, like those with the “Anti-Allergen Complete Seal” system, might have the port on the base of the wand or even on the wall-mount charging dock. Your first task is to find this port on your specific model—your user manual will have a diagram, but it’s usually obvious upon inspection.
2. The Step-by-Step Charging Process (The Right Way)
Now for the main event. Charging your Shark cordless vacuum is a three-part dance: preparation, connection, and patience. Follow these steps every time for consistent results.
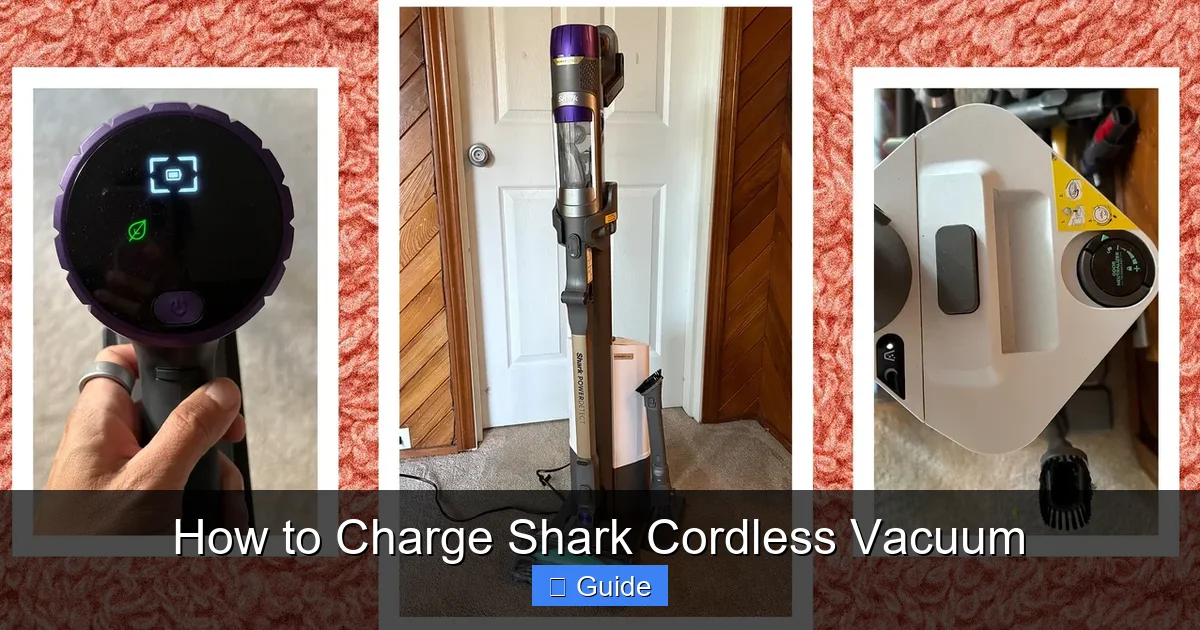
Visual guide about How to Charge Shark Cordless Vacuum
Image source: media.wired.com
Step 1: Prepare the Vacuum and Charger
First, ensure your vacuum is turned completely off. The power switch should be in the “off” position. Next, flip open the protective rubber flap covering the charging port. Give the port a quick visual inspection—if you see lint or debris, gently clean it with a dry, soft-bristled brush (like a clean toothbrush) or a can of compressed air. Do the same for the charger plug. A clean connection is a reliable connection. Place your vacuum on a stable, flat surface like a countertop or the floor, preferably near a wall outlet. If you’re using a wall-mount dock, ensure it’s securely installed per the instructions.
Step 2: Connect with Confidence
Take the charger and align the plug with the charging port. You’ll feel a slight magnetic pull on some models, or you’ll need to push it in until it’s flush. You should hear or feel a faint click or snap, indicating a secure, full connection. Don’t force it; if it doesn’t fit easily, check for obstructions. Once connected, plug the charger’s power brick directly into a standard 120V wall outlet. Avoid using power strips or extension cords if possible, as they can sometimes introduce electrical noise or voltage drop, though this is rarely a major issue with modern chargers. A properly connected charger will immediately activate the vacuum’s battery indicator light.
Step 3: Decode the Indicator Light
This is your communication hub. The light’s color and behavior tell you everything:
- Red or Amber (Solid): Battery is actively charging. This is your go-to state for most of the charging cycle.
- Red or Amber (Blinking): Often indicates the battery is very low (below 10%) or, on some models, that the battery is too hot or too cold to charge safely. The vacuum will pause charging until it reaches an acceptable temperature (usually room temp). Move it to a milder environment.
- Green or Blue (Solid): Charge is complete! The battery is full and the BMS will now maintain it by trickle-charging as needed. You can safely leave it on the charger.
- No Light: Check your connections at both ends (vacuum and wall). The outlet might be switched off. If everything seems fine, the charger or vacuum may have a fault.
Charging Time: A completely depleted battery typically takes 3 to 4 hours to reach 100% from a wall outlet. The first charge on a new vacuum may take slightly longer. You don’t need to time it religiously; the indicator light is your final authority.
3. Optimizing Battery Life: Charging Best Practices
Charging isn’t just a one-off event; it’s a habit. How you charge your Shark cordless vacuum day-to-day will determine if it still has strong suction power in three years or starts conking out after 10 minutes. Here’s how to be a battery pro.
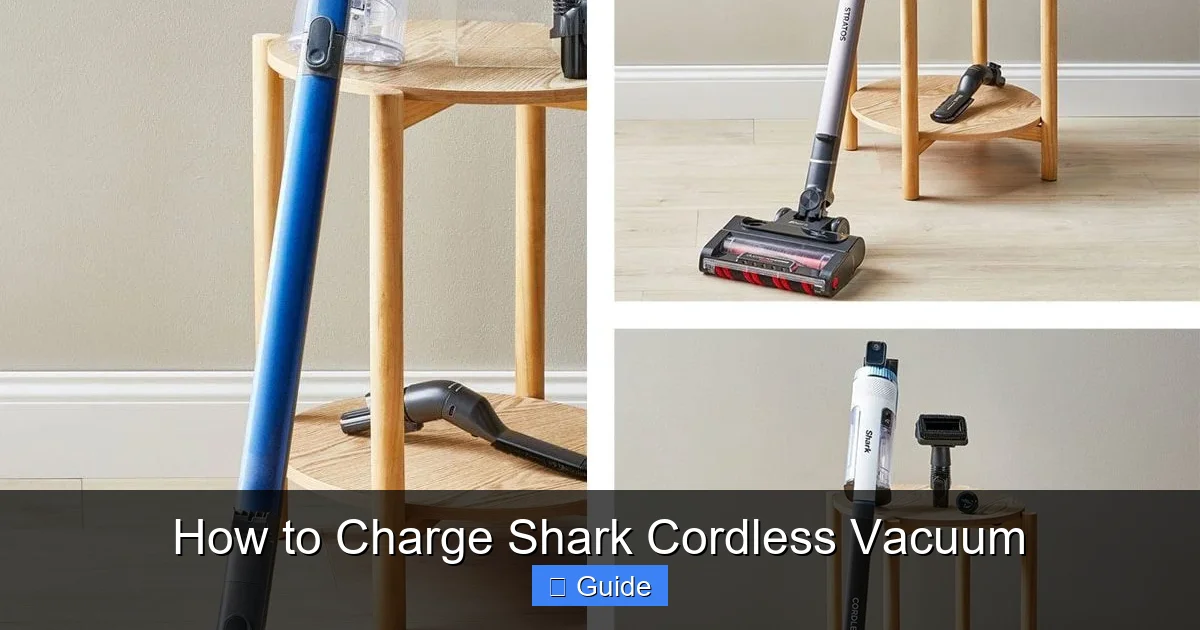
Visual guide about How to Charge Shark Cordless Vacuum
Image source: tasteofhome.com
Embrace Partial Charging (The 20-80% Rule)
This is the single most important tip for lithium-ion longevity. While it’s fine to charge to 100% for a big cleaning job, try not to routinely leave the vacuum sitting on the charger for weeks at a time at full capacity. The constant high voltage stresses the cells. Conversely, try to avoid regularly running it down to 0%. For daily or every-other-day use, just top it up when you’re done. If you know you won’t use it for a week, charge it to about 50% before storing it. This “sweet spot” minimizes chemical stress and keeps the battery healthy.
Temperature is Everything
Lithium-ion cells are sensitive to temperature. Charging, using, or storing your vacuum in extreme heat (like a hot garage in summer or a car trunk) is a surefire way to degrade the battery rapidly. Cold temperatures (below freezing) won’t necessarily damage it, but the battery will hold less charge temporarily and the charger may refuse to charge it until it warms up. Always charge and store your Shark vacuum at room temperature (65-75°F / 18-24°C). If you bring it in from a cold garage, let it acclimate for an hour before charging.
The Role of the Wall-Mount Charging Dock
Many Shark models come with or have an optional wall-mount charging dock. This is fantastic for convenience and encourages regular charging. The dock typically holds the vacuum upright and has a built-in charging contact point. The same rules apply: ensure the contacts are clean, and the vacuum is seated properly. The dock’s light will usually mimic the vacuum’s indicator light. A key advantage of the dock is that it keeps your vacuum ready and charged without a cord dangling on the floor. However, if you use the dock, still practice the 20-80% rule by occasionally unplugging it after a day or two of full charge if it’s not being used.
4. Troubleshooting: “Why Isn’t My Shark Charging?”
Sometimes, the light doesn’t come on, or it blinks in a pattern you don’t recognize. Before panicking, work through this common issues checklist.
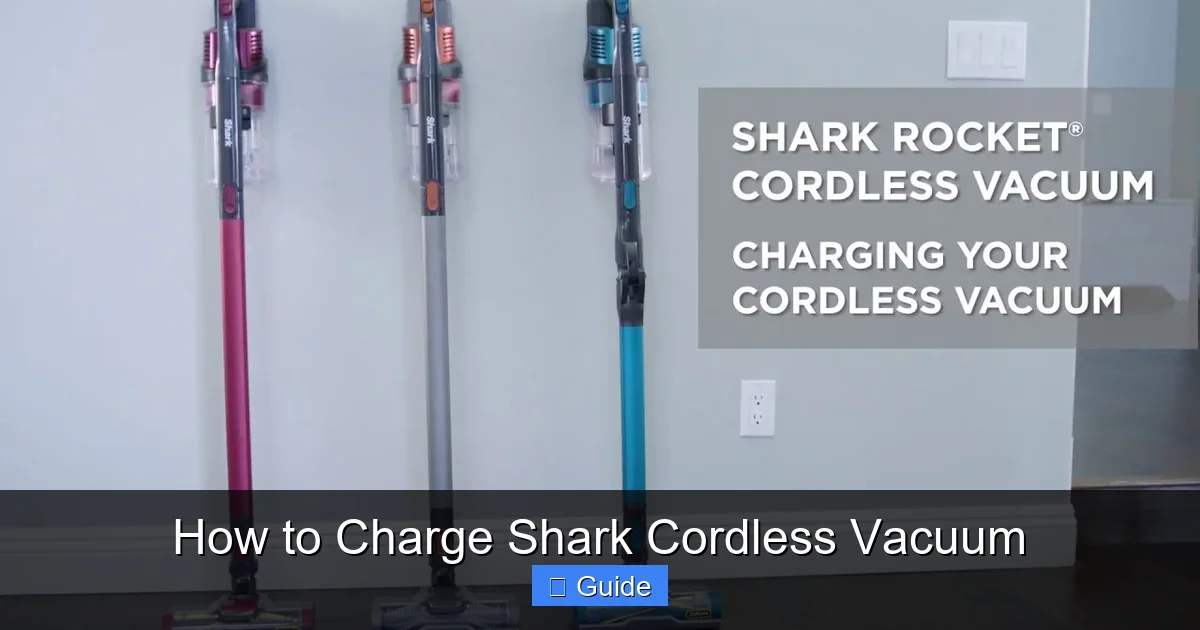
Visual guide about How to Charge Shark Cordless Vacuum
Image source: i.ytimg.com
Check the Obvious First
- Is the outlet working? Plug a lamp or phone charger into the same outlet.
- Is the charger fully plugged in at both ends? Check the wall connection and the vacuum connection.
- Is the charging port flap open and clean? Debris is a common culprit.
- Is the vacuum’s power switch OFF? It must be off to charge.
- Is the battery completely dead? On some older models, a deeply depleted battery might need 10-15 minutes on the charger before the indicator activates.
Interpreting Blinking Lights & Error Signals
Blinking patterns are your vacuum’s way of saying something’s wrong. While patterns vary, here are the most common:
- Rapid Blinking Red/Amber: Often indicates a communication error between the charger and the battery’s BMS. Try removing the battery (if your model has a removable pack), unplugging the charger for 60 seconds, then reconnecting everything.
- Slow Blinking Red/Amber: Typically means the battery is too hot or too cold. Move the vacuum to a room-temperature location and wait. It should resume charging on its own.
- Alternating Colors (e.g., red then green): On some models like the Shark Vertex, this can indicate a battery fault or that the battery has reached the end of its useful life and needs replacement.
Your Manual is Key: The exact meaning of light patterns is in your user guide. Find the “Indicator Lights” or “Troubleshooting” section. If the problem persists after basic checks, the charger or battery may need to be replaced under warranty.
When the Charger or Battery Might Be Faulty
If you’ve tried a different known-good outlet, cleaned all contacts, and the vacuum still won’t charge, the fault likely lies with the charger or the battery itself. Chargers can fail internally. Try gently wiggling the charger plug at the wall connection; if the light flickers, the brick may be dying. A swollen, hot, or leaking battery is a serious safety hazard. Stop using and charging it immediately. Contact Shark customer support for warranty replacement instructions. Never attempt to repair or disassemble a lithium-ion battery.
5. Charging for Different Shark Models & Scenarios
While the core principles are universal, a few Shark models and situations have specific considerations.
Models with Removable Batteries (e.g., Shark IZ400, IZ682)
These are the easiest to manage. You can remove the battery pack and charge it separately, leaving the vacuum body clean and ready. To remove, locate the battery release latch (usually on the back of the handheld unit), press it, and slide the battery out. Charge the battery in a cool, dry place. This is also ideal for long-term storage—you can store the battery at 50% charge separately from the vacuum. When reinstalling, ensure it clicks firmly into place.
Models with Non-Removable Batteries (e.g., Many Shark Stratos, Vertex models)
Here, you charge the entire unit. The process is identical to the standard steps. The main tip is to be extra mindful of the charging port cleanliness since you can’t separate the battery for cleaning. Use a soft, dry brush frequently. When storing long-term, you must leave the entire vacuum in a 50% charged state in a temperature-controlled environment.
Charging After a Deep Drain or First Use
If your vacuum has been sitting unused for many months and the battery is completely stone-dead (0%), it might take longer than 4 hours to show any indicator light. This is the BMS “waking up” a deeply sleeping battery. Leave it plugged in for at least 6-8 hours. If the light never comes on, the battery may have fallen below a safe recovery voltage and is permanently damaged. For a brand-new vacuum, always perform a full charge cycle before first use. This calibrates the battery’s internal fuel gauge so the percentage indicator is accurate going forward.
6. Long-Term Storage & Seasonal Care
If your Shark vacuum won’t be used for an extended period—say, you’re a snowbird heading south for the winter, or it’s a backup unit—proper storage is critical to prevent battery death.
The 50% Charge Rule for Storage
Lithium-ion batteries degrade fastest when stored at high or low states of charge. The ideal storage charge is approximately 50%. Use your vacuum normally until the battery is about half depleted (the indicator might show 2-3 bars). Then, place it on the charger and unplug it after 1-2 hours, or just before the indicator turns fully green. This 50% state minimizes internal chemical stress during the dormant period.
Storage Environment Matters
Store your vacuum (or just the battery) in a cool, dry place. A basement or closet is fine. Avoid attics, garages, or sheds where temperatures swing wildly. The ideal storage temperature is around 59°F (15°C). Remove it from the charger for storage—don’t leave it trickle-charging indefinitely in a closet. Check on it every 2-3 months. If the charge has dropped significantly (below 20%), give it a quick top-up back to 50%.
Reviving a Vacuum After Long Storage
After retrieving your vacuum from storage, it may not turn on immediately. The battery may have self-discharged. Simply place it on the charger and let it charge fully (3-4 hours) before attempting to use it. This full cycle will reawaken the BMS and stabilize the voltage. You should be back in business.
Conclusion: Making Charging Second Nature
Charging your Shark cordless vacuum is the simplest, most fundamental act of care you can provide. By using the correct charger, keeping connections clean, respecting temperature limits, and adopting the smart charging habit of avoiding extremes, you are directly investing in the long-term health and power of your appliance. That 20-80% charge range, the avoidance of hot garages, and the 50% storage rule are the secrets that separate a battery that lasts two years from one that reliably powers your cleanings for five or more. Your vacuum is a workhorse designed for convenience, and a little attention to its power source ensures that convenience never fades. So charge with confidence, knowing that with these practices, your Shark will be ready to tackle the next mess, and the next, and the next, with consistent, strong suction power.
Frequently Asked Questions
How long does it take to fully charge a Shark cordless vacuum?
A completely depleted Shark cordless vacuum battery typically takes between 3 to 4 hours to reach a full 100% charge when using the official charger. The first charge on a new unit may take slightly longer. Always rely on the indicator light—it turns solid green or blue when charging is complete.
What does a blinking red light mean while charging my Shark vacuum?
A blinking red or amber light most commonly indicates the battery is either too hot or too cold to charge safely. Move the vacuum to a room-temperature environment (65-75°F), and it should resume charging automatically once it reaches a safe temperature. It can also signal a very low battery (<10%).
Can I use a third-party charger with my Shark cordless vacuum?
No, you should only ever use the official Shark charger that came with your vacuum. Third-party chargers may not provide the correct voltage or amperage, which can damage the battery, cause poor performance, and void your warranty. The battery management system is designed to work specifically with Shark’s charger.
How can I tell if my Shark vacuum battery needs replacing?
Signs of a failing battery include: drastically reduced runtime (e.g., from 60 minutes to 10-15), the vacuum losing power during use, the battery not holding a charge (draining quickly even when not in use), or the indicator light showing a fault pattern (like alternating colors) even after troubleshooting. Contact Shark support for warranty replacement options.
Is it okay to leave my Shark cordless vacuum on the charger all the time?
While the vacuum’s battery management system prevents overcharging, leaving it at a constant 100% charge for extended periods (weeks/months) can accelerate long-term lithium-ion battery degradation. For maximum battery lifespan, it’s best to unplug it from the charger once it’s fully green, especially if it won’t be used for several days.
What should I do if my Shark vacuum won’t charge at all?
First, check that the wall outlet works, the charger is firmly plugged in at both ends, the charging port is clean and open, and the vacuum’s power switch is off. Try a different outlet. If the indicator light remains off, the charger or battery may be faulty. Do not attempt forced charging. Contact Shark customer service for troubleshooting and potential warranty replacement.