Keeping your Shark robot vacuum charged and ready is simple once you know the system. This guide explains the automatic docking process, how to manually charge it, and essential battery maintenance tips. We also cover common charging issues and their fixes to ensure your vacuum is always powered up and ready to clean.
So, your Shark robot vacuum has gone silent in the middle of a job, or you’re staring at a dead robot on its charging station wondering why it’s not powering up. You’re not alone. Charging frustration is one of the most common issues robot vacuum owners face. But here’s the good news: the system that powers your Shark is brilliantly simple, and once you understand its quirks and requirements, you’ll rarely have a charging problem again.
Think of your Shark robot vacuum not as a standalone gadget, but as part of a two-piece system: the robot itself and its dedicated docking station. The magic—and the occasional mystery—lies in the seamless communication and physical connection between these two pieces. This guide will walk you through every step, from perfect placement to troubleshooting a stubborn connection. We’ll turn you from a frustrated user into a confident charging expert.
Key Takeaways
- The docking station is the primary charging method: Your Shark vacuum will automatically return to and dock with its charging station after cleaning or when battery is low.
- Proper docking station placement is critical: It must be on a level surface, against a wall, with clear approach paths and no obstacles within 3 feet on either side.
- Manual charging is a backup: You can plug the vacuum directly into a wall outlet using its onboard charging port if it doesn’t dock automatically.
- Battery health depends on good habits: Avoid deep discharges, let the vacuum cool before charging, and store it on the dock even when not in use for long periods.
- Clean charging contacts regularly: Dirt and debris on the vacuum’s and dock’s metal contacts prevent a proper electrical connection, stopping charging.
- Error lights indicate specific problems: Understanding the light patterns on your model helps diagnose issues like failed docking, battery failure, or overheating.
- Batteries degrade over time: A significant drop in runtime (e.g., from 90 to 30 minutes) usually means the lithium-ion battery needs replacement after 2-3 years.
📑 Table of Contents
- Understanding Your Shark’s Charging System: The Robot and The Dock
- Step 1: Perfect Docking Station Placement – The Foundation of Reliable Charging
- Step 2: The Automatic Docking Process (What Should Happen)
- Step 3: Manual Charging – Your Essential Backup Plan
- Step 4: Battery Health and Long-Term Care
- Step 5: Troubleshooting Common Charging Problems
- Advanced Tips and Model-Specific Considerations
- Conclusion: Making Charging Effortless
Understanding Your Shark’s Charging System: The Robot and The Dock
Before we dive into the “how,” let’s quickly demystify the “what.” Your Shark robot vacuum uses a lithium-ion battery, similar to the one in your laptop or phone, but designed for the unique demands of constant suction and mobility. The charging station isn’t just a stand; it’s an active participant. It has two large, spring-loaded metal charging contacts on top. Your robot has two corresponding metal pads on its underside, just behind the main brushes.
When the robot successfully docks, these metal pads press firmly against the dock’s contacts, completing an electrical circuit. The dock is always plugged into your wall outlet, acting as a constant, ready power source. The robot’s brain monitors its battery level. When it drops to a preset threshold (usually around 20-30%), it will interrupt its cleaning cycle, navigate back to the dock, and attempt to mate. Once connected, it begins recharging. Most modern Shark models will also automatically resume cleaning after a recharge if the job wasn’t finished.
The Role of the IR (Infrared) Guide Beams
You might notice small, dark windows on the front bumper of your Shark and on the sides of the docking station. These are infrared emitters and receivers. The dock constantly emits a low-power IR “fence” or guide beam. The robot uses this beam like a lighthouse to find its way home, especially in low-light conditions. It also uses these signals to gently nudge itself into perfect alignment with the dock’s contacts. If this beam is blocked or the robot’s IR receiver is dirty, homing can fail.
Step 1: Perfect Docking Station Placement – The Foundation of Reliable Charging
This is the single most important factor for hassle-free charging. A poorly placed dock will cause your Shark to fail its docking attempts repeatedly, eventually leaving it stranded and dead. Follow these placement rules like gospel.
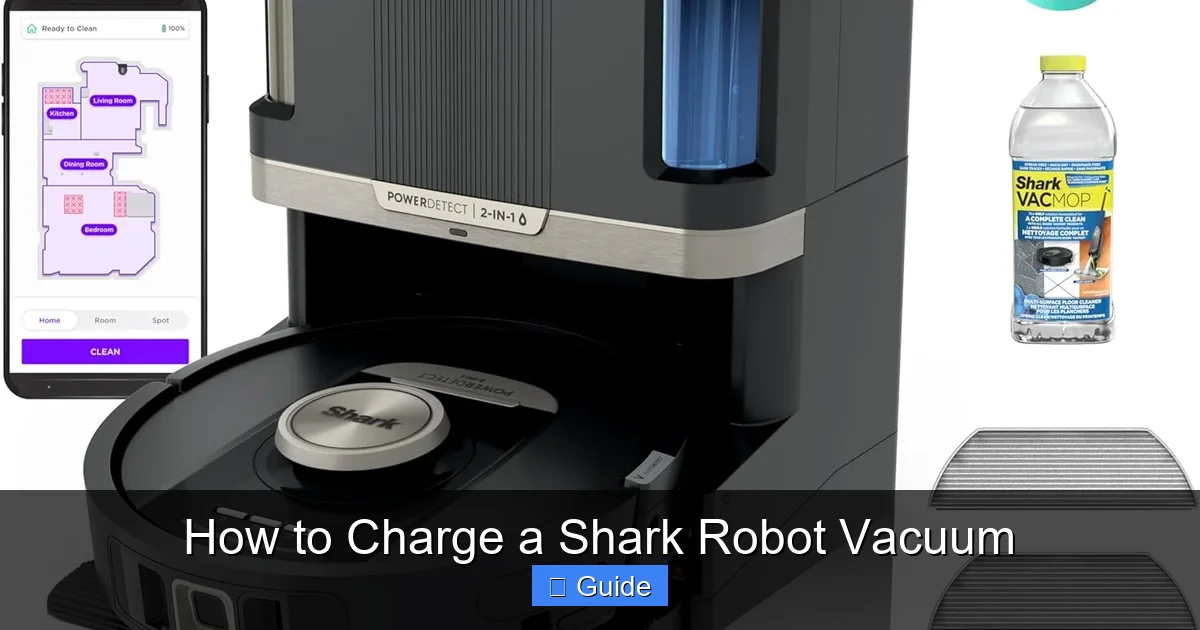
Visual guide about How to Charge a Shark Robot Vacuum
Image source: m.media-amazon.com
The “Clear Zone” Rule
Imagine an invisible rectangle extending 3 feet (about 1 meter) to the left and right of the dock, and several feet directly in front of it. This entire zone must be completely clear and open. Your robot needs a long, straight, unobstructed approach path to line up correctly. Never place the dock:
- In a corner unless it’s specifically designed for a corner (some models have corner docks). The robot needs to approach from directly in front.
- Behind furniture or in a tight space between a sofa and a wall.
- On a rug or carpet unless the dock has a hard, flat base that sits flush on the floor. Thick rres can cause the dock to wobble or sit unevenly, preventing solid contact.
- Near strong electromagnetic sources like large speakers, power strips with many devices, or microwave ovens. These can interfere with the robot’s navigation and IR signals.
Level Surface and Wall Contact
The dock must sit on a perfectly level, hard floor (hardwood, tile, linoleum, low-pile carpet). Use a small level if you’re unsure. The back of the dock should be flat against a solid wall. This prevents the dock from being nudged or kicked out of position during cleaning. If your floor is uneven, place a thin, rigid piece of plastic or wood under the dock’s base to shim it level.
Proximity to Cleaning Areas
Place the dock centrally within the main areas you want cleaned. If your home is large or multi-level, you may need to manually move the dock between floors or consider a second dock (if your model supports it). The goal is to minimize the distance the robot has to travel to return for a charge, preserving battery for actual cleaning.
Step 2: The Automatic Docking Process (What Should Happen)
With the dock perfectly placed, the automatic process should be virtually foolproof. Here’s what to expect and what to look for.
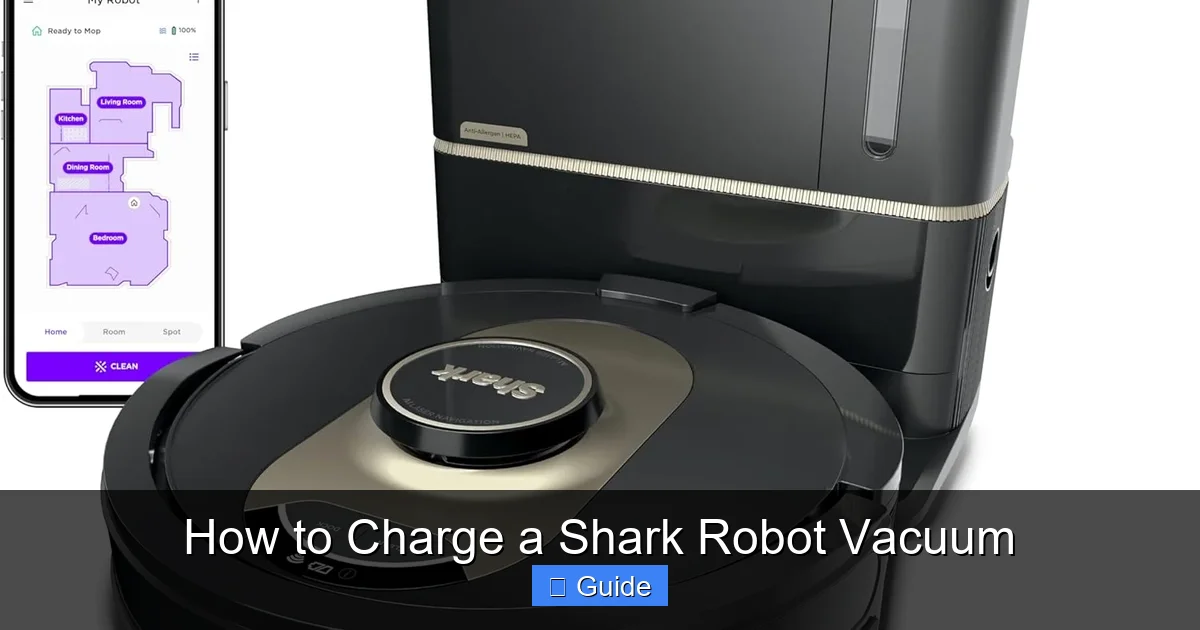
Visual guide about How to Charge a Shark Robot Vacuum
Image source: m.media-amazon.com
During a Cleaning Cycle
Your Shark’s battery indicator (usually a light on the top or a voice alert) will change color or sound as it depletes. When it reaches the “return-to-dock” threshold, you’ll hear a specific series of beeps or a voice message like “Returning to base.” The robot will stop its random pattern, spin slowly, and begin a more direct path toward the dock’s IR beam. It will back onto the dock’s ramps, making contact.
Signs of a Good Connection
Once docked, listen for a distinct clunk or click as the charging contacts engage. The robot’s power light will typically change from a breathing/flashing pattern (indicating low power) to a solid or slowly pulsating light (indicating charging). On many models, the dock’s own status light will also illuminate, showing it’s providing power. The robot’s fan may run briefly to cool the battery before charging begins, especially if it just finished a job.
The Complete Recharge Cycle
A full recharge from near-dead to 100% typically takes 3-4 hours. Do not interrupt this cycle by unplugging the dock or moving the robot. Let it charge completely. Some models will announce “Charging complete” via voice. The solid light will remain. If you have a scheduling feature, the robot will now wait for its next scheduled start or will resume the interrupted cleaning cycle if that feature is enabled.
Step 3: Manual Charging – Your Essential Backup Plan
Automatic docking is ideal, but what if your robot gets stuck under furniture, separated from its dock, or the dock itself fails? Manual charging is your universal fallback and is crucial for initial setup or after a long storage period.
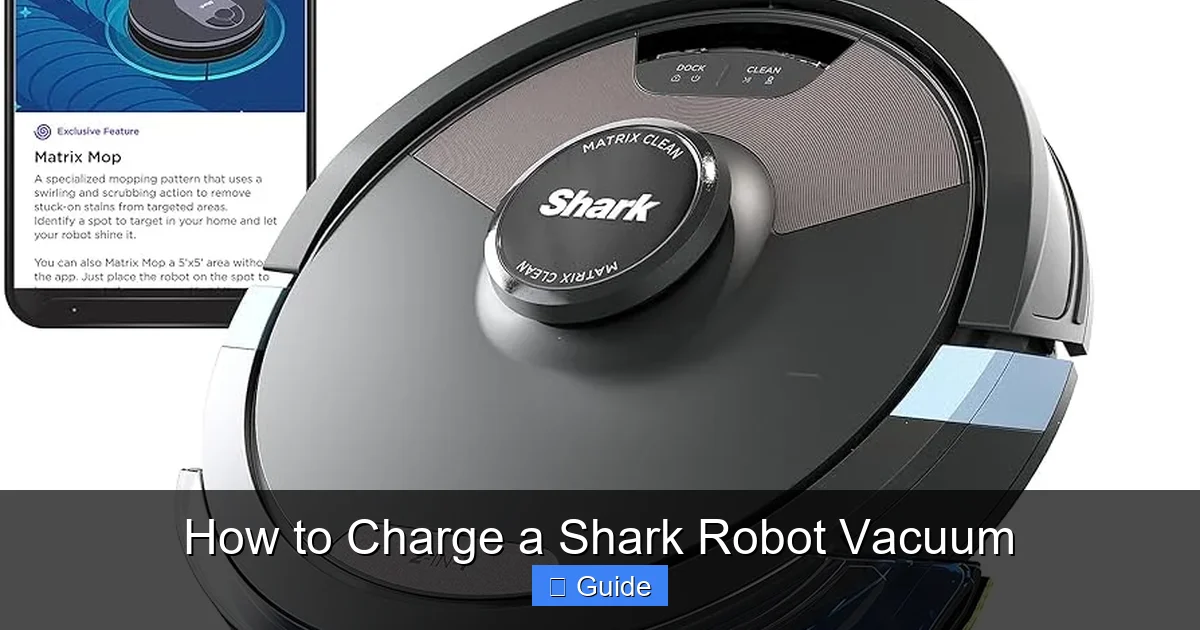
Visual guide about How to Charge a Shark Robot Vacuum
Image source: vacuumpost.com
Locating the Onboard Charging Port
Flip your Shark robot vacuum over. On the underside, near the center or slightly towards the rear, you’ll find a small, covered port. It’s often protected by a rubber flap or a small plastic door. This is the direct DC power input. It’s not for the dock; it’s for the wall charger.
Using the Included Power Adapter
Your Shark came with a proprietary power brick (the “wall wart”). It’s not a standard USB charger. Plug this adapter directly into a working wall outlet. Then, connect its pin into the robot’s onboard charging port. You should see an immediate battery status light on the robot’s top or side, indicating it’s receiving power. This method bypasses the dock entirely and charges the battery directly.
Important: Always use the official Shark power adapter that came with your specific model. Using a third-party or incorrect voltage/amperage adapter can damage the battery and void your warranty. Store the adapter in a known place—it’s the most important tool for rescuing a dead robot.
Step 4: Battery Health and Long-Term Care
Your Shark’s battery is a consumable component. With proper care, it should last 2-3 years (300-500 charge cycles). Neglect can shorten its life dramatically. Here’s how to be a good battery parent.
Embrace the “Shallow Cycle”
Lithium-ion batteries hate being fully drained (0%). They also don’t need to be charged to 100% every single time for longevity. The best practice for robot vacuums is to let them run until they automatically return to the dock (usually around 20-30% remaining) and then charge them fully. This “shallow cycle” is less stressful than deep discharges. Avoid the habit of running the robot until it dies on the floor.
Temperature Matters
Never charge a robot that is hot. If your Shark just finished a long cleaning job, especially on thick carpet, let it sit for 15-20 minutes to cool down before docking. Charging a hot battery generates excess heat, which accelerates degradation. Similarly, don’t store or charge the robot in extreme temperatures (below 50°F / 10°C or above 95°F / 35°C). Garages and unheated basements in winter/summer are bad locations for the dock.
Long-Term Storage (Over 2 Weeks)
If you won’t be using your Shark for an extended period (vacation, seasonal storage), do not store it with a completely dead or a 100% full battery. The ideal storage charge is around 50-60%. Use the manual charger to get it to this level. Then, place it on its dock (so it stays topped up) or store it in a cool, dry place. Check and recharge to ~50% every 2-3 months during storage to prevent battery damage from self-discharge.
Step 5: Troubleshooting Common Charging Problems
When charging fails, the solution is almost always one of a few common issues. Here’s your diagnostic flowchart.
Problem: The Robot Doesn’t Dock Automatically
- Check the Dock’s Power: Is the dock’s power adapter plugged into a working outlet? Is the adapter’s light on (if it has one)? Try a different outlet.
- Inspect the Dock’s Placement: Re-measure the clear zone. Is anything within 3 feet to the sides? Has the dock been nudged? Is the floor under it level? Re-position it perfectly.
- Clean the Charging Contacts: This is the #1 fix. Use a dry, lint-free microfiber cloth. Gently rub the metal pads on the dock and the corresponding pads on the robot’s underside. For stubborn grime, use a cotton swab lightly dabbed in >90% isopropyl alcohol, then dry thoroughly. Do this monthly.
- Clean the IR Sensors: Wipe the dark plastic windows on the robot’s front bumper and the dock’s sides with a dry cloth. A dusty sensor can’t “see” the guide beam.
Problem: The Robot Docks But Doesn’t Charge (Light Doesn’t Change)
- Physical Contact Failure: The robot may be docking but not making firm contact. Push the robot gently backward on the dock. You should feel resistance as the contacts compress. If it slides easily, the dock’s springs may be worn or the robot’s pads are dirty/damaged.
- Dock’s LEDs Off: If the dock has status lights and they are off, the dock isn’t receiving power or is faulty. Try the manual charger on the robot to confirm the robot itself can charge.
- Robot’s Light Flashing Error Pattern: Consult your manual. A rapidly flashing red light, for example, often indicates a battery communication error or a failed connection.
Problem: The Robot Charges But Runtime is Very Short
- Battery Calibration: Let the robot run until it dies on the floor (use manual mode to cover a small area), then immediately place it on the dock for a full charge. Repeat this 1-2 times. This can help the robot’s battery gauge recalibrate.
- Battery Degradation: If runtime has decreased drastically over time (e.g., from 90 minutes to 25), the battery has lost capacity and needs replacement. This is normal after 2+ years.
- Excessive Suction/Brush Mode: Are you running it on “Max” suction constantly on thick carpet? This drains the battery much faster. Use “Eco” or “Auto” mode for daily cleaning.
- Clogged Filters or Full Bin: A clogged air filter or a full dustbin makes the motor work harder, consuming more power. Clean the filter (tap it out, wash if washable) and empty the bin after every few runs.
Advanced Tips and Model-Specific Considerations
While the core principles are universal for all Shark IQ, ION, and AI Ultra models, nuances exist.
Shark IQ & ION Series (With Self-Empty Base)
Your “dock” is actually two pieces: the robot charging station and the large, bagged self-empty base. The robot must dock with the charging contacts on the self-empty base, not a separate small dock. The placement rules are even more critical here due to the base’s size. Ensure the self-empty base is plugged in and its own status light is on. The robot will dock with it just like a standard dock, but the base then automatically empties the robot’s bin. If the robot docks but doesn’t charge, check the connection between the robot and the self-empty base’s contacts.
Shark AI Ultra (With Matrix Navigation)
This model uses a more sophisticated navigation system but the charging principles are identical. Pay extra attention to the “clear zone” as its larger size and different shape can sometimes make it more sensitive to docking angle. Its voice prompts are very clear—listen to them! It will tell you if it’s “Returning to base,” “Docking,” or “Charging.”
When to Replace the Battery
You’ll know it’s time when:
- Runtime is less than 40-50% of what it was new.
- The robot dies mid-clean on a small area.
- The battery charges very quickly (e.g., 1 hour) but also dies very quickly.
- The battery indicator shows “low” immediately after a full charge.
Shark sells official replacement batteries for most models. Search for your specific model number (found on the underside label). Replacement is usually a simple process of removing a few screws and swapping the battery pack. Always recycle old lithium-ion batteries properly.
Conclusion: Making Charging Effortless
Charging your Shark robot vacuum shouldn’t be a daily puzzle. By mastering three things—perfect dock placement, regular contact cleaning, and understanding the manual backup—you’ve solved 95% of all charging issues. Treat your docking station like a cherished parking spot: keep it clean, level, and in a prime location. Respect the battery’s need for gentle, cool charging, and it will reward you with years of reliable, hands-free cleaning.
Remember, a robot that can’t charge is just a very expensive paperweight. A few minutes spent on the maintenance steps in this guide will save you countless hours of frustration. Your Shark is designed to work for you, not the other way around. Now, go place that dock in its perfect spot, give those contacts a wipe, and let your robot get back to what it does best.
Frequently Asked Questions
Why does my Shark robot vacuum keep failing to dock?
The most common reasons are an improperly placed docking station (not on a level surface, against a wall, or with a clear 3-foot approach zone) or dirty charging contacts on either the robot or the dock. Clean the metal pads with a dry microfiber cloth and re-position the dock according to the guidelines.
Can I charge my Shark robot without the docking station?
Yes. All Shark robot vacuums have an onboard DC charging port on their underside. You can use the included wall power adapter to plug the robot directly into any wall outlet for a manual charge. This is the best method if the automatic docking is failing or for initial setup.
How long does it take for a Shark robot vacuum to fully charge?
A full charge from a very low battery (below 20%) typically takes between 3 to 4 hours. Do not interrupt the charging cycle. The robot’s battery light will indicate when charging is complete, usually by turning a solid color (often blue or green) instead of flashing.
Is it bad to leave my Shark robot on the charger all the time?
No, it is perfectly safe and actually recommended. Modern lithium-ion batteries, like those in your Shark, have built-in charge controllers that stop charging once the battery reaches 100%. Keeping it on the dock ensures it’s always ready for a cleaning job and maintains the battery at an optimal charge level for long-term health.
What do the blinking lights on my Shark robot mean while charging?
What do the blinking lights on my Shark robot mean while charging?
Light patterns vary by model, but generally: a slowly pulsing or breathing light means it’s charging normally. A rapidly flashing red or orange light often indicates a charging error, such as a failed connection to the dock or a battery fault. A solid red light can mean the battery is critically low. Always consult your specific model’s manual for the exact light code meanings.
How often should I replace the battery in my Shark robot vacuum?
With normal use and proper charging habits, the battery should last 2-3 years or about 300-500 full charge cycles. You should consider replacement when you notice a significant, consistent drop in runtime (e.g., cleaning time cut in half compared to when it was new) or if the battery fails to hold a charge at all.