Maintaining your Shark Ion Robot’s filter is crucial for sustaining powerful suction and clean air output. This guide provides a clear, step-by-step process for safely removing, cleaning, and replacing the filter. You’ll learn to identify your specific filter type, establish a proper maintenance schedule, and avoid common mistakes to keep your robot vacuum running at its peak efficiency for years.
Key Takeaways
- Identify Your Filter Type: Shark Ion Robots use either a primary foam filter, a secondary felt filter, or a combination. Knowing which one you have is the first step to correct maintenance.
- Follow a Strict Schedule: Clean the foam filter monthly and replace it every 3-6 months. The felt filter typically needs replacement every 3 months for optimal performance.
- Cleaning is Different from Replacing: The foam filter is washable; the felt filter is not. Never wash a felt filter, as it will be ruined.
- Proper Cleaning Technique: Use only water for the foam filter. Gently squeeze, do not wring, and allow it to air-dry completely for 24 hours before reinserting.
- Use Genuine Shark Filters: For best results and to avoid damaging your vacuum, always purchase replacement filters directly from Shark or authorized retailers.
- Location is Key: The filter is always located inside the dustbin compartment, behind a dedicated access door or panel.
- Neglect Reduces Suction: A clogged or dirty filter is the most common cause of reduced suction power and poor cleaning performance in your Shark Ion Robot.
📑 Table of Contents
- Introduction: The Unsung Hero of Your Robot Vacuum
- Why Filter Maintenance is Non-Negotiable
- Step-by-Step: How to Access and Change Your Shark Ion Robot Filter
- Cleaning vs. Replacing: A Critical Distinction
- Troubleshooting: When Things Go Wrong
- Pro Tips for Long-Term Filter Health and Savings
- Conclusion: A Small Task for a Huge Impact
Introduction: The Unsung Hero of Your Robot Vacuum
Your Shark Ion Robot vacuum is a marvel of modern cleaning technology, tirelessly navigating your home to tackle dust, debris, and pet hair. But even the smartest robot needs a little help to perform its best. At the heart of your vacuum’s performance lies a simple yet critical component: the filter. This small part plays a giant role, capturing fine dust and allergens that the main brush roll and suction can’t trap, ensuring clean air is expelled back into your home. Understanding how to properly change and maintain this filter isn’t just a chore—it’s an essential skill for any Shark Ion Robot owner who wants to protect their investment and maintain a genuinely clean living environment. In this comprehensive guide, we’ll walk you through every detail, from identifying your filter to mastering the replacement process, ensuring your robotic helper operates at peak efficiency.
Why Filter Maintenance is Non-Negotiable
Before we dive into the “how,” let’s establish the “why.” The filter in your Shark Ion Robot is the final line of defense. After the main suction motor pulls air and debris through the brush roll and into the dustbin, that air must pass through the filter before being released. Without a functioning filter, your vacuum would simply recirculate dust, pollen, and microscopic allergens back into your room, essentially just stirring them up rather than removing them. A clean filter ensures:

Visual guide about How to Change the Filter on Shark Ion Robot
Image source: sharkvacuum.blog
- Sustained Suction Power: A clogged filter creates a massive bottleneck in the airflow system. The motor has to work exponentially harder to pull air through a blocked filter, leading to a dramatic drop in suction strength. You’ll notice your robot struggling on carpets and leaving debris behind.
- Improved Air Quality: This is especially vital for allergy sufferers. A high-efficiency filter traps 99.9% of particles as small as 0.3 microns, including dust mites, pollen, and pet dander. A dirty filter loses this ability, compromising your home’s air quality.
- Motor Longevity: A strained motor working against a clogged filter wears out faster. Regular filter changes are a simple, inexpensive way to protect the most expensive part of your vacuum.
- Odor Prevention: Trapped, damp debris in a neglected filter can lead to unpleasant odors being blown back into your home.
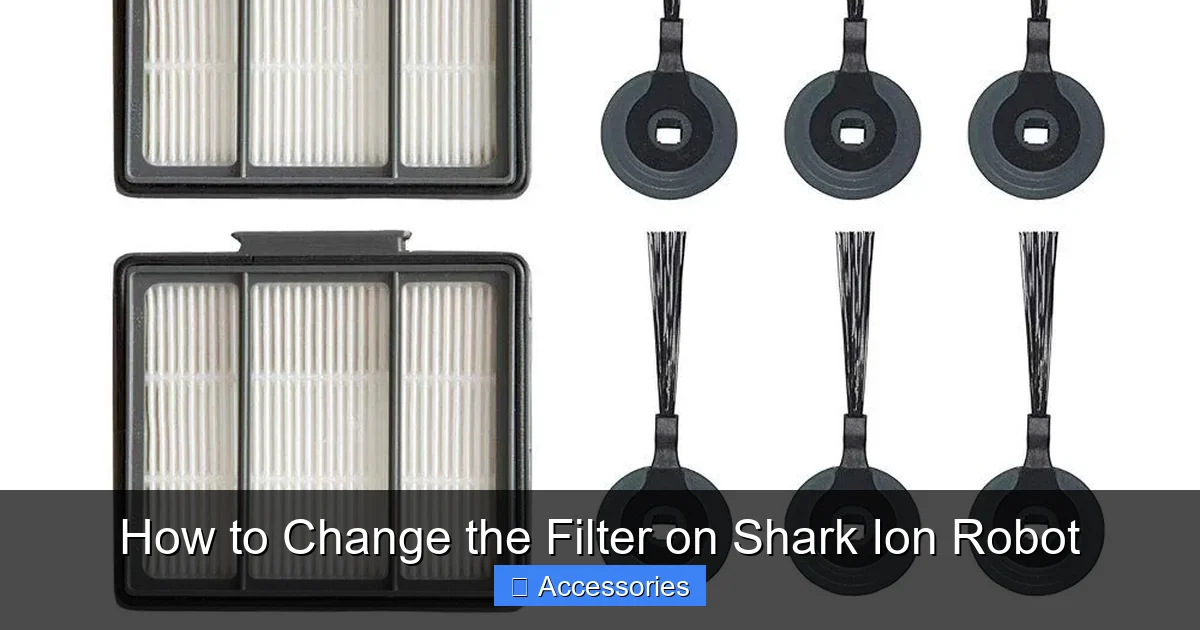
The Two Main Filter Types in Shark Ion Robots
Shark has used a couple of filter designs across its Ion Robot lineup (like the RV750, RV850, and earlier models). The most common configuration is a two-stage filtration system:
- Primary Foam Filter: This is the larger, usually rectangular or square, spongy filter. It’s designed to be washable and reusable. It catches larger particles like hair and lint.
- Secondary Felt Filter: This is a smaller, pleated, fabric-like filter, often rectangular with rounded corners. It’s a disposable, high-efficiency filter that captures the finest dust and allergens. This filter is NOT washable and must be replaced.
Some newer or specific models might integrate these into a single cartridge. The key is to check your specific model’s manual. However, the process of accessing and changing them is fundamentally similar across the range.
Step-by-Step: How to Access and Change Your Shark Ion Robot Filter
Now, let’s get our hands dirty (figuratively). The process is designed to be user-friendly. Always ensure your robot is powered off and placed on a flat surface before beginning.
Visual guide about How to Change the Filter on Shark Ion Robot
Image source: m.media-amazon.com
Step 1: Locate and Open the Dustbin Compartment
The filter is housed inside the dustbin assembly. On the side or rear of your Shark Ion Robot, you’ll find a latch or button for the dustbin. Press it and slide the entire dustbin unit out of the robot’s body. You should now be holding the main collection bin.
Step 2: Open the Filter Access Panel
On the dustbin itself, look for a small door or panel, often secured by a twist-lock, a slide lock, or a simple clip. This is the filter compartment. Release the lock and gently pull the panel open. You will see the filter(s) seated inside a plastic frame.
Step 3: Identify and Remove the Old Filter(s)
Carefully pull the filter(s) straight out. If you have both a foam and a felt filter, note their orientation—which side faced the motor intake and which faced the dustbin. Usually, there’s a tab or a specific shape that only fits one way. Gently remove both if present. For models with a single combined filter cartridge, remove it as one unit.
Step 4: Clean the Foam Filter (If Applicable)
If your model has a reusable foam filter, this is your chance to clean it.
- Take it to a sink and rinse it under lukewarm water.
- Gently squeeze and press the foam to force out trapped dust and debris. Do not wring or twist it aggressively, as this can tear the foam.
- You can use a mild dish soap if it’s particularly greasy (e.g., from kitchen debris), but be sure to rinse it thoroughly until all soap is gone.
- Do not use any cleaners, solvents, or machines to wash it.
- Shake off excess water and place the filter in a well-ventilated area, away from direct sunlight or heat sources, to air-dry completely. This is critical—never reinsert a damp filter. It can damage the motor and promote mold growth. Drying typically takes 24 hours.
Step 5: Install the New Filter(s)
Once the foam filter is completely dry (or if you’re replacing it with a new one), and you have a new felt filter ready:
- Place the felt filter into the frame first, if you have two separate filters. It usually goes in the position closest to the motor intake port (the smaller opening).
- Then, place the foam filter on top of or behind it, depending on the design. Ensure both are seated flat and fully inserted into their housing.
- If you have a single cartridge, simply align the notches and press it firmly into the housing until it clicks or sits flush.
Step 6: Reassemble and Test
Close the filter access panel securely until it locks. Slide the fully reassembled dustbin back into the robot until you hear it click into place. Power on your Shark Ion Robot and run a short cleaning cycle. You should immediately notice restored suction power and quieter operation if the old filter was clogged.
Cleaning vs. Replacing: A Critical Distinction
This is the most important concept to grasp. Not all filters are created equal, and treating the wrong one the wrong way is a common pitfall.
Visual guide about How to Change the Filter on Shark Ion Robot
Image source: images-na.ssl-images-amazon.com
The Washable Foam Filter: Reuse with Care
The primary foam filter is built for longevity. With proper monthly washing, it can last for months, even years. However, it is not indestructible. Over time, the foam structure will break down, becoming less effective at capturing particles and more prone to tearing. Signs it’s time to replace your foam filter: it develops tears or holes, it doesn’t return to its original shape after squeezing, or it remains discolored and smelly even after a thorough wash. When replacing, ensure you buy the correct foam filter model for your specific Ion Robot series.
The Disposable Felt Filter: Strictly Replace
The secondary felt filter is a precision instrument. Its dense, non-woven fibers are designed to trap the smallest particles. Water destroys this delicate structure. Washing a felt filter will:
- Clog its pores, rendering it useless.
- Cause it to shrink or warp, preventing a proper seal in the housing.
- Promote mildew and odors within the filter material itself.
There is no “cleaning” a felt filter. Its entire lifespan is based on usage. For homes with pets, allergies, or high dust levels, plan to replace the felt filter every 3 months. For average use, every 6 months is a good rule. Always have a spare on hand.
Troubleshooting: When Things Go Wrong
Even with a new filter, you might encounter issues. Here’s how to diagnose common problems.
“My suction is still weak after changing the filter.”
This points to a blockage elsewhere in the airflow path. Check these areas in order:
- The Dustbin: Is it completely full? Empty it.
- The Brush Roll: Is it tangled with hair, string, or carpet fibers? A jammed brush roll drastically reduces suction. Clean it thoroughly.
- The Intake Ports: Check the openings on the robot’s underside where air enters. Are they clogged with debris?
- The Exhaust Port: Ensure the vent where air exits the robot isn’t blocked by furniture or rugs.
“My robot is making a loud, high-pitched whining noise.”
This is often a classic sign of a clogged filter or a blocked exhaust. The motor is straining. Immediately power off the robot, check the filter (is it properly seated? is it the right model?), and clear all other blockages as described above.
“There’s a dusty smell when the robot runs.”
This means unfiltered air is being exhausted. Double-check that your filters are installed correctly and that the access panel is fully closed. If using a new felt filter, ensure it’s not damaged. If the smell persists, the filter may be defective, or there could be a leak in the dustbin seal.
“My robot won’t start after I changed the filter.”
First, ensure the dustbin is fully clicked into place. Many Shark models have a safety sensor that prevents operation if the bin is not properly seated. Next, verify the filter access panel is securely latched. Finally, check that no wires or components were accidentally dislodged during the process. A full reset (power off, remove the battery for 30 seconds if possible, reinsert) can also help.
Pro Tips for Long-Term Filter Health and Savings
Go beyond the basics with these expert recommendations to maximize your filter’s life and your vacuum’s performance.
Establish a Maintenance Calendar
Don’t rely on memory. Set recurring monthly reminders on your phone for “Shark Filter Wash” and quarterly reminders for “Shark Felt Filter Replace.” Consistency is the key to preventing performance decay.
Optimize Your Cleaning Environment
Reduce the burden on your filter by:
- Pre-sweeping high-debris areas: If you’ve had a party or your pet has shed heavily, do a quick manual sweep before running the robot.
- Using boundary strips: Keep your robot out of areas with excessive dirt, like directly in front of exterior doors or in messy workshops.
- Running more frequent, shorter cycles: This can be more effective than one long cycle, as the dustbin and filter don’t get overloaded as quickly.
Buy Filters in Multi-Packs
Shark often sells felt filters in 2-packs or 3-packs at a significant discount per filter compared to buying singles. Stock up to ensure you always have a clean one ready and to save money in the long run. The same goes for foam filters if they are a replaceable part on your model.
Know Your Model Number
Your exact model number (e.g., IZ420, RV750) is usually on a sticker on the bottom or back of the robot. When ordering replacement filters online, use this exact model number. Filters for “Shark Ion Robot” are not all universal; a filter for an RV750 may not fit an IZ420 perfectly. Using the correct part guarantees a proper seal and fit.
Conclusion: A Small Task for a Huge Impact
Changing the filter on your Shark Ion Robot is one of the simplest, most impactful maintenance tasks you can perform. It takes less than two minutes, costs very little for a replacement filter, and pays massive dividends in performance, air quality, and the lifespan of your vacuum. By understanding the difference between your washable foam and disposable felt filter, adhering to a regular maintenance schedule, and following the straightforward removal and installation steps outlined here, you ensure your robotic cleaning partner remains a powerful, efficient, and healthy part of your household for years to come. A clean filter means a clean home, and that’s exactly what you bought your Shark Ion Robot to deliver. Make this small ritual a habit, and your vacuum—and your lungs—will thank you.
Frequently Asked Questions
How often should I change the filter on my Shark Ion Robot?
The washable foam filter should be cleaned monthly and replaced every 3-6 months, depending on use. The disposable felt filter should be replaced every 3 months for homes with pets or allergies, and every 6 months for average use. Always refer to your specific model’s manual for the exact schedule.
Can I wash the felt filter in my Shark Ion Robot?
No. The felt filter is a disposable, high-efficiency filter and is not designed to be washed. Water will destroy its delicate fiber structure, causing it to clog and lose its filtering ability. You must replace it with a new one when it becomes dirty.
What happens if I put the filter in backwards?
Installing the filter incorrectly will create an air leak, drastically reducing suction power and allowing unfiltered dust to blow back into your room. It may also trigger error codes. Filters are designed with specific tabs or shapes to only fit one way. Ensure it is seated flat and fully in its housing before closing the panel.
How do I know when my Shark Ion Robot filter needs replacing?
Key signs include: a noticeable drop in suction power, a dusty smell coming from the exhaust, the robot making unusual straining noises, or if the filter is visibly discolored, damaged, or torn (for foam). Even if it looks okay, stick to your replacement schedule for consistent performance.
Can I use third-party or generic filters in my Shark Ion Robot?
While third-party filters are available, we strongly recommend using genuine Shark replacement filters. Generic filters may not fit perfectly, leading to air leaks, or may be made from inferior materials that clog quickly and provide poor filtration, potentially damaging your vacuum’s motor over time.
My robot is still dusty after changing the filter. What else should I check?
A new filter won’t fix other issues. Check that the dustbin is completely empty. Then, inspect the brush roll for hair and string tangles, which are a major cause of poor cleaning. Also, clear any debris from the robot’s intake ports on the underside and ensure the exhaust vent isn’t blocked.