Changing the brush roller on your Shark Navigator vacuum is a simple, essential maintenance task that restores suction power and prevents carpet damage. This guide provides clear, model-specific instructions for the entire process, from gathering tools to proper reinstallation. Performing this DIY fix saves you money on service calls and extends your vacuum’s life. Follow our detailed steps to get your Shark Navigator picking up debris like new again.
Key Takeaways
- Universal Process: While minor clip/latch locations differ slightly, the core steps—accessing the brush roller housing, removing the old roller, and installing the new one—are consistent across all Shark Navigator models.
- Tools Are Simple: You typically only need a Phillips head screwdriver and possibly a flathead for clips. No special tools or technical skills are required for this user-serviceable repair.
- Safety First: Always disconnect the vacuum from the power source before beginning. This prevents accidental startup and protects you from the rotating brush bar.
- Clean the Housing: Use this opportunity to thoroughly clear all hair, string, and debris from the brush roller housing and the roller’s end caps. This prevents immediate re-clogging and reduces future wear.
- Check the Belt: Inspect the drive belt for cracks, stretching, or wear while the brush roller is out. A worn belt will reduce cleaning efficiency and should be replaced simultaneously.
- Model Identification is Key: Locate your exact model number (on the back or underside) to ensure you purchase the correct replacement brush roller part (e.g., NF200, NF201, etc.).
- Listen and Feel: After reinstallation, listen for abnormal noises and feel for proper resistance on carpet. A correctly installed brush roller spins freely without excessive vibration or scraping sounds.
📑 Table of Contents
- Why Changing Your Shark Navigator Brush Roller is Non-Negotiable
- Gathering Your Tools and the Correct Replacement Part
- Step-by-Step: Removing the Old Brush Roller
- Inspecting, Cleaning, and Preparing for the New Roller
- Installing the New Brush Roller: Reassembly and Verification
- Testing, Troubleshooting, and Pro Maintenance Tips
- The Big Payoff: Enjoying Your Restored Shark Navigator
Why Changing Your Shark Navigator Brush Roller is Non-Negotiable
Let’s be honest: your Shark Navigator vacuum is the workhorse of your cleaning arsenal. It tackles pet hair, crumbs, and deep-down carpet grime with gusto. But that powerful performance hinges on one critical, often-overlooked component: the brush roller. That spinning cylinder of bristles is what agitates carpet fibers, lifting embedded dirt so the suction can whisk it away. Over time, this hardworking part wears down. Bristles become brittle and break off. The roller’s bearings can get clogged with hair, causing it to stall or spin poorly. The belt that drives it stretches and slips. The result? Your once-mighty vacuum starts pushing dirt around instead of picking it up, leaving your carpets looking dull and feeling rough. It might even start making that horrible screeching or grinding noise. Replacing the brush roller is not a fancy upgrade; it’s core maintenance. It’s the single most effective way to restore your Shark Navigator’s original cleaning power and protect your expensive carpets from being beaten up by a damaged brush bar. Think of it like changing your car’s oil—skip it, and you’ll face bigger, costlier problems down the road.
Gathering Your Tools and the Correct Replacement Part
Before you dive in, a few minutes of prep will make the entire process smooth and frustration-free. The good news is you don’t need a mechanic’s toolbox. For almost every Shark Navigator model, you’ll need just one or two simple tools.
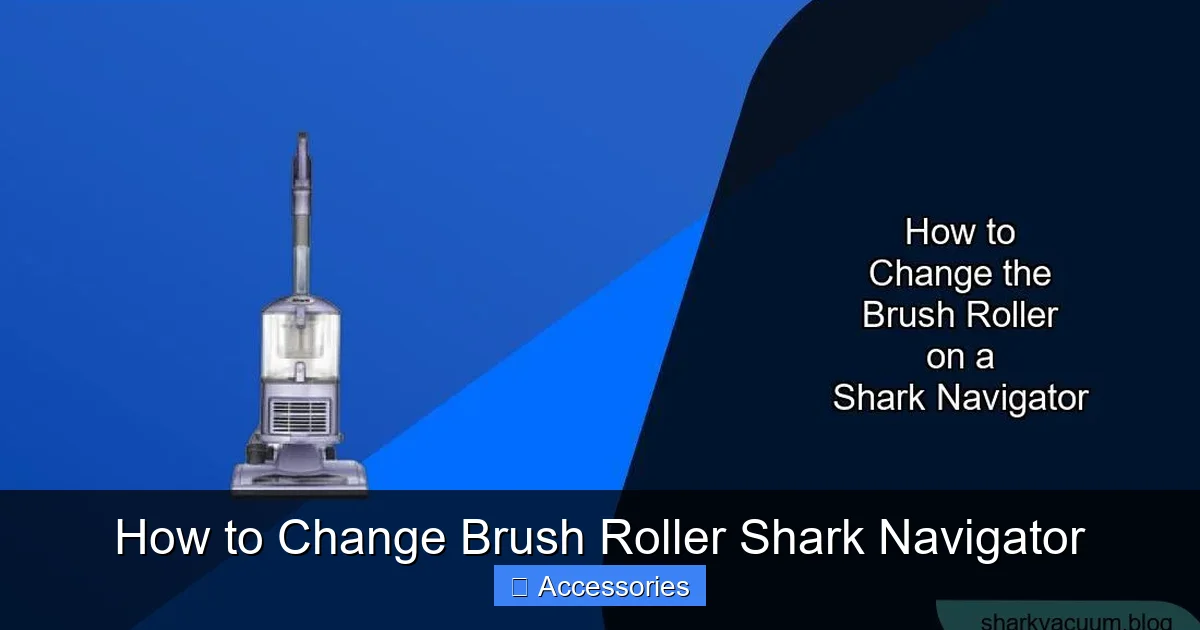
Visual guide about How to Change Brush Roller Shark Navigator
Image source: sharkvacuum.blog
The Essential Toolkit
First, a Phillips head screwdriver is your primary weapon. This is what you’ll use to remove the screws securing the brush roller housing cover. In some older or specific models, you might encounter plastic clips instead of screws. For these, a flathead screwdriver or even your fingernail can gently pry the clips apart. Have both on hand just in case. A pair of needle-nose pliers is incredibly helpful, but not strictly mandatory. They are perfect for pulling out stubborn hair and fibers tangled deep in the brush roller bristles or around the end caps. Finally, a flashlight can be a lifesaver, as the area under the vacuum head is often shadowy.
Identifying Your Exact Model & Sourcing the Right Part
This is the most important step. Shark has produced many Navigator variants (Lift-Away, Rotator, Professional, etc.), and the brush roller part numbers differ. Using the wrong part won’t fit and could cause damage. Locate your model number. It’s almost always on a sticker on the back or underside of the vacuum body, or sometimes on the inside of the dust cup. It will look like “NV350”, “NV356”, “NV501”, etc. Once you have it, search online for “[Your Model Number] brush roller” or “[Your Model Number] brush roll.” Shark’s official website, Amazon, and vacuum part retailers like eVacuumStore are reliable sources. The official replacement part will come as a complete unit—the roller with bristles and the two end caps already attached. Do not attempt to reuse old, worn end caps; they should be replaced with the new roller assembly.
Step-by-Step: Removing the Old Brush Roller
With your tools and new part ready, it’s time for surgery. The process is designed to be user-friendly, but taking it slow prevents mistakes.
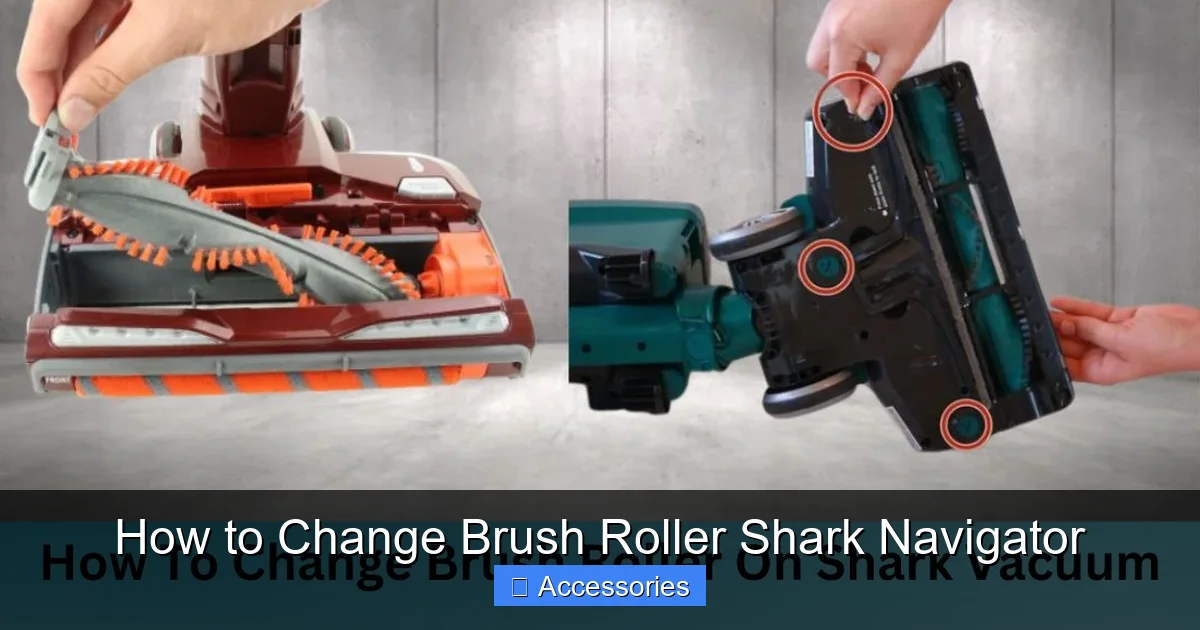
Visual guide about How to Change Brush Roller Shark Navigator
Image source: sharkvacuum.blog
1. Safety and Access
Unplug your Shark Navigator from the wall outlet. This is paramount. Lay the vacuum on its back on a clean, flat surface like the floor or a workbench. You need clear access to the underside of the vacuum head. Flip the vacuum so the brush roller housing—the rectangular area on the front bottom—is facing up.
2. Removing the Housing Cover
Examine the brush roller housing. You’ll see either two or four Phillips head screws, or a series of plastic clips along the perimeter. If it has screws: Use your Phillips screwdriver to remove them. Keep them in a small dish so they don’t roll away. If it has clips: Starting at one corner, insert your flathead screwdriver or fingernail between the housing and the cover. Gently pry upward to release the clip. Work your way around all sides until the cover pops off. The cover is usually a gray or black plastic piece that may have some suction holes in it. Set it aside carefully.
3. Extracting the Brush Roller Assembly
Once the cover is off, you’ll see the entire brush roller assembly sitting in a cradle. It’s connected by a drive belt (a rubber band-like loop) to a motor pulley on one side. On many models, you can simply lift the entire brush roller out of its slots. However, on some, the drive belt may be looped over a pulley on the roller end cap, creating tension. For belt-over-pulley designs: You will need to twist or slide the belt off the small pulley on the brush roller’s end cap before lifting the roller out. This is where needle-nose pliers can help grip the belt. Be gentle; don’t force it. Once the belt is free of that pulley, the roller should lift straight out. Important: Take a photo with your phone of the belt’s routing path before removing it! This is the best insurance against reinstallation confusion.
Inspecting, Cleaning, and Preparing for the New Roller
You’ve got the old, worn-out part out. Don’t just toss it aside yet. This is your golden opportunity for a deep clean that will maximize the life of your new investment.
Diagnosing the Old Roller
Look at your old brush roller. Are the bristles worn down, splayed out, or missing large patches? Are the two end caps (the plastic pieces on each end) cracked or difficult to spin? Is the rubber drive belt stretched, shiny, or have visible cracks? All of these are signs it was time for a change. This inspection also confirms you correctly identified the problem.
The Deep Clean
Take a moment to clean the empty housing cavity. You’ll be shocked by the accumulation of hair, thread, carpet fibers, and grit packed around the roller’s bearings and in the housing’s crevices. Use your fingers, pliers, and maybe a scissors (carefully) to cut and pull out all this debris. A clean housing ensures the new roller spins freely and efficiently. Also, wipe down the housing walls with a dry cloth. Now, look at the drive belt. If it shows any signs of wear, replace it at the same time. Drive belts are inexpensive and a worn belt will make your new brush roller perform poorly. The belt part number is usually listed in your vacuum’s manual or can be found by searching your model number + “belt”.
Installing the New Brush Roller: Reassembly and Verification
Now for the satisfying part—putting it all back together with the fresh, bristly new component.
Positioning the New Assembly
Take your new brush roller assembly out of its packaging. Verify the bristles are intact and the end caps spin smoothly. If your model uses a belt that slips over a pulley on the roller, you’ll need to put the belt on that pulley first. Stretch the belt over the new roller’s end cap pulley before placing the roller in the housing. For models where the belt connects only to the motor pulley, you can install the roller first. Gently place the brush roller into its housing slots or cradle, ensuring it sits level and the end caps are properly aligned with their bearings.
Reconnecting the Drive Belt
This is the critical step. Refer to the photo you took earlier! The belt must loop correctly from the motor pulley (usually on the right side) to the brush roller’s pulley (if it has one) or simply sit in the housing’s belt path. For the common “belt-on-motor-only” design: stretch the belt and hook it onto the small motor pulley. You should feel a slight tension. For the “belt-on-both” design: you should have already placed the belt on the roller’s pulley. Now, stretch the other side of the belt and loop it onto the motor pulley. Ensure the belt is sitting flat on both pulleys, not twisted.
Final Checks and Closure
Before replacing the housing cover, manually rotate the brush roller by hand. It should spin freely and smoothly in both directions. There should be no grinding, binding, or excessive resistance. If it doesn’t spin freely, double-check the belt isn’t pinched or misaligned, and that the roller is seated correctly in its bearings. Once it spins well, reattach the housing cover. If it used screws, tighten them securely but don’t over-tighten and crack the plastic. If it used clips, press firmly around the edges until you hear/feel them all snap into place. Give the cover a gentle tug to ensure it’s secure.
Testing, Troubleshooting, and Pro Maintenance Tips
Your vacuum is reassembled. But don’t just plug it in and start cleaning yet. A proper test is crucial.
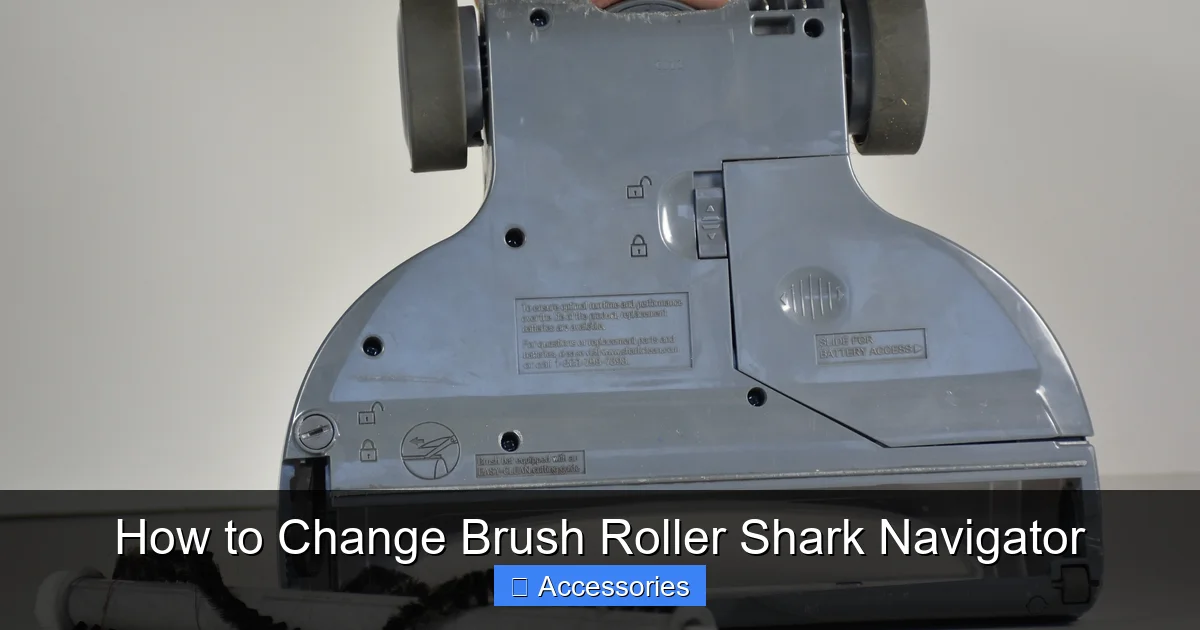
Visual guide about How to Change Brush Roller Shark Navigator
Image source: d3nevzfk7ii3be.cloudfront.net
The Critical First Test
Plug your Shark Navigator back into the wall outlet. Do not place it on the carpet yet. Turn it on in an upright position and listen. You should hear the motor running, and if you listen closely near the head, you should hear the faint whir of the brush roller. Now, gently lower the vacuum onto a bare floor or low-pile rug. Observe the brush roller through the housing gaps (if visible). It should be spinning vigorously. If it’s not spinning at all, immediately unplug it. The issue is likely a misrouted belt or a belt that slipped off during reassembly. If it’s spinning but making a loud squealing or screeching noise, the belt may be slipping due to a worn belt or a misaligned roller. If it spins but feels like it’s dragging and the vacuum is hard to push, the brush roller may be installed backward or the bristles may be damaged (unlikely with new).
Common Troubleshooting Scenarios
Roller won’t spin: 90% of the time, this is a belt issue. Unplug, remove the cover, and check the belt. Is it on the motor pulley? Is it twisted? Is it broken? Re-route it correctly. If the belt is new and on correctly, the brush roller bearings might be seized (rare with new parts).
Roller spins slowly or intermittently: Hair is probably tangled around the roller’s axles or inside the housing bearings. Remove the roller again and meticulously clean the plastic end caps and the holes they sit in.
Excessive vibration or noise: Ensure the roller is seated fully in its cradle. A missing screw on the cover can also cause rattling.
Proactive Maintenance for Longevity
To avoid needing this replacement too often, adopt a quick monthly check. Every few uses, flip your vacuum over and look at the brush roller. If you see hair wrapped around it, use scissors to cut it away before it winds down to the bearings. Once a month, remove the brush roller (this is now a 2-minute job for you) and clean the housing and the roller’s end caps thoroughly. This simple habit drastically extends the life of your brush roller and belt. Also, for different floor types, use the “hard floor” setting if your Navigator has one. This often disengages the brush roller, reducing wear when cleaning hard surfaces where agitation isn’t needed.
The Big Payoff: Enjoying Your Restored Shark Navigator
There’s a distinct sense of satisfaction that comes from fixing something yourself. But the real reward comes the first time you use your freshly serviced Shark Navigator. Push it over your living room rug. Feel that familiar, firm resistance as the brush roller agitates the fibers—that’s the sign of a healthy, functioning brush bar. Look at the debris collection cup after one pass; it should be significantly fuller than it was before. The difference in cleaning performance between a worn-out brush roller and a new one is night and day. Your vacuum will pick up more embedded pet hair, more fine dust, and more ground-in dirt. Your carpets will look brighter and feel plusher underfoot. You’ve not only saved yourself the $100+ service fee, but you’ve also gained valuable knowledge about your machine. You’re no longer at the mercy of a worn-out part. You’re in control. This 20-minute DIY project translates directly into a cleaner home, a happier vacuum, and a fatter wallet. Now that’s a win-win.
Frequently Asked Questions
How often should I change the brush roller on my Shark Navigator?
For most households, changing the brush roller every 12-18 months is a good rule of thumb. If you have pets, a lot of carpet, or notice a significant drop in cleaning performance, check it every 6 months. Visible bristle wear, cracks in the end caps, or a roller that doesn’t spin freely are clear signs it needs replacement.
What are the telltale signs my brush roller needs replacing?
The main signs are: your vacuum no longer picks up debris as well, especially on carpet; you hear a loud squealing, grinding, or screeching noise; the vacuum is harder to push; or you see visible damage like missing or melted bristles. Sometimes, if the roller is jammed with hair, a good cleaning can fix it, but persistent issues usually mean the roller itself is worn out.
Do I need special tools to change a Shark Navigator brush roller?
No. You almost always just need a Phillips head screwdriver. Some older models use plastic clips instead of screws, where a flathead screwdriver or even your fingernail will suffice. Needle-nose pliers are extremely helpful for cleaning out hair but are not required for the actual replacement.
Are the brush rollers the same for all Shark Navigator models?
No, they are not. The shape, length, and mounting mechanism can vary between models like the Lift-Away, Rotator, and Professional series. It is absolutely essential to find your exact model number (on a sticker on the back/underside) and purchase the corresponding replacement part number to ensure a perfect fit.
Can I just clean my old brush roller instead of replacing it?
You should always clean it thoroughly when you remove it. However, if the plastic end caps are cracked or difficult to spin, or if the bristles are worn down, splayed, or missing large sections, cleaning won’t restore its function. A clean but mechanically worn roller will still perform poorly. Replacement is necessary when the parts themselves are degraded.
I changed the brush roller, but it still doesn’t spin well. What now?
First, unplug the vacuum. The most common issue is an incorrectly installed drive belt. Remove the cover and verify the belt is routed correctly from the motor pulley to the brush roller (refer to your manual or a photo). Ensure the belt isn’t twisted. Next, confirm the brush roller is fully seated in its housing bearings. Finally, check that the new roller’s end caps spin freely by hand—rarely, a new part can be defective.