The roller brush belt is the heart of your Shark vacuum’s cleaning power. When it breaks or stretches, suction drops dramatically. Changing it yourself is a simple, cost-effective repair that takes under 15 minutes with basic tools. This guide provides model-specific instructions, safety tips, and troubleshooting to get your vacuum working like new.
Has your trusty Shark vacuum suddenly lost its powerful suction? Does it sound like it’s running, but it’s not picking up dirt like it used to? Before you panic and head to the store for a new vacuum, take a deep breath. The most common culprit—and one of the easiest fixes—is a worn-out or broken roller brush belt. This humble rubber loop is the critical link that transfers power from the vacuum’s motor to the spinning brush roll. When it fails, the brush roll stops agitating carpet fibers, and your vacuum’s cleaning ability plummets. The fantastic news? You don’t need to be a mechanic to change belt in Shark vacuum. With this comprehensive, step-by-step guide, you’ll have the knowledge and confidence to perform this simple repair yourself, saving you significant money and keeping your home clean.
We’ll walk you through everything from identifying your exact Shark model and sourcing the right part to the hands-on, screwdriver-level process. We’ll include specific tips for popular series like the Navigator, Rotator, and Vertex, address common pitfalls, and teach you how to verify the repair is successful. By the end, you’ll not only have a fully functional vacuum but also a deeper understanding of your appliance, empowering you for future maintenance. Let’s get started on bringing your Shark back to its full, debris-eating glory.
Key Takeaways
- Safety First: Always unplug your Shark vacuum and disconnect the power before beginning any repair to prevent accidental startup.
- Identify Your Model: Your Shark vacuum’s model number (found on the back or underside) is crucial for purchasing the correct replacement belt.
- Tools Are Simple: You typically only need a Phillips screwdriver and possibly a coin or flathead for some models—no special tools required.
- The Process Is Universal: While screw locations vary, the core steps—accessing the brush roll, removing the old belt, stretching the new one over the motor shaft and brush roll—are consistent across most Shark models.
- Inspect and Clean: Use this opportunity to clear hair and debris from the brush roll bearings and brush roll housing to prevent future clogs and belt wear.
- Test Before Reassembling: Manually rotate the brush roll after installing the new belt to ensure it spins freely and the belt is seated correctly before putting the bottom plate back on.
- Regular Checks Extend Life: Visually inspect your belt every few months for cracks, glazing, or stretching. A proactive replacement prevents poor cleaning performance and potential motor strain.
📑 Table of Contents
- Understanding the Role of the Roller Brush Belt
- Step 1: Preparation and Identifying Your Shark Model
- Step 2: Disassembly – Gaining Access to the Brush Roll and Belt
- Step 3: Removing the Old Belt and Inspecting Components
- Step 4: Installing the New Belt – The Crucial Stretch
- Step 5: Reassembly and Final Testing
- Maintenance Tips to Prolong Your New Belt’s Life
- Conclusion: Empower Yourself with Simple Repairs
Understanding the Role of the Roller Brush Belt
Before we grab a screwdriver, it helps to understand exactly what we’re fixing. The roller brush belt is a continuous rubber band, typically about 10-12 inches long depending on the model. One end loop fits over a small metal shaft coming from the vacuum’s motor. The other end stretches over a corresponding groove on the brush roll itself. When the vacuum is powered on, the motor shaft spins, turning the belt, which in turn spins the brush roll at high speed. The bristles on the brush roll then agitate carpet fibers, loosening embedded dirt and hair, which is then sucked up into the vacuum’s bin.
Signs Your Shark Vacuum Belt Needs Replacement
How do you know for sure the belt is the problem? Here are the classic symptoms:
- Sudden Loss of Suction on Carpets: The vacuum seems fine on hard floors (where the brush roll isn’t always engaged or is less critical), but on carpet, it just glides over without picking anything up. This is the #1 sign.
- Burning Smell: A distinct, acrid rubber burning odor during operation means the belt is likely slipping severely, overheating, and possibly melting against the motor shaft or brush roll housing.
- Visible Damage: If you flip your vacuum over and look at the brush roll, you might see the belt is broken (in two pieces), has a visible crack, or is stretched so thin it no longer grips the brush roll properly.
- Brush Roll Isn’t Spinning: The most obvious sign. The vacuum motor runs, but the brush roll is stationary. Always check for tangled hair or debris wrapping around the brush roll first, as this can jam it and make it appear as if the belt is broken.
- Loud Squealing or Grinding Noise: A high-pitched squeal often indicates a slipping belt. A grinding noise could mean the brush roll bearings are jammed, but the belt is often involved.
Step 1: Preparation and Identifying Your Shark Model
Every repair starts with preparation. Rushing this step can lead to buying the wrong part or struggling with disassembly.
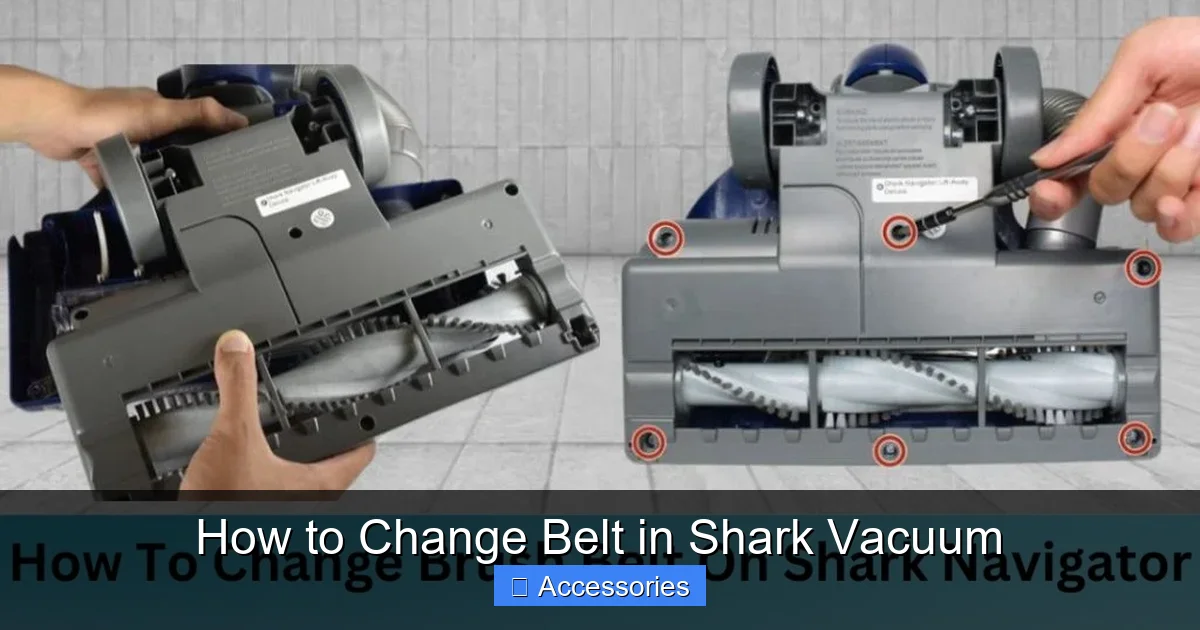
Visual guide about How to Change Belt in Shark Vacuum
Image source: sharkvacuum.blog
Finding Your Shark Vacuum’s Model Number
This is non-negotiable. Shark has hundreds of models across multiple series (Navigator, Rotator, Vertex, IZ, etc.), and belts are not one-size-fits-all. The model number is usually on a sticker or plate located:
- On the back or lower back of the vacuum’s main body (canister/upright).
- On the underside of the foot/head where the brush roll is.
- Sometimes inside the dust cup compartment.
It will look like “NV356”, “NV602”, “HV322”, “AZ6002”, etc. Write this number down. This is your key to the correct replacement belt.
Sourcing the Correct Replacement Belt
With your model number in hand, you have several options:
- Official Shark Parts: The most reliable source. Visit the Shark official website’s “Parts & Accessories” section, enter your model number, and find the exact belt part (often listed as “Belt Assembly” or “Roller Brush Belt”).
- Major Retailers: Amazon, Walmart, Target, and Home Depot often carry compatible third-party belts. Always filter by your exact Shark model number. Read reviews carefully.
- Local Vacuum Repair Shops: A great resource. They often have universal belts in stock and can confirm the correct part immediately.
Pro Tip: Consider buying a 2-pack. Belts are a wear item and having a spare means you’re never without a working vacuum for long. A good quality belt should cost between $8 and $15.
Gathering Your Tools
For 95% of Shark vacuums, you need just one tool:
- A Phillips-head screwdriver. That’s it. Some older or specific models might require a flathead screwdriver or a coin to release a clip, but the Phillips is your workhorse.
It’s also wise to have:
- A small container to hold screws.
- A well-lit workspace (floor or table).
- A pair of needle-nose pliers (optional, but helpful for stubborn belts).
- A microfiber cloth and all-purpose cleaner to clean the brush roll housing.
Step 2: Disassembly – Gaining Access to the Brush Roll and Belt
Now, the hands-on work begins. The disassembly process is remarkably similar across most Shark upright and canister models with a removable brush roll. The principle is always: remove the bottom plate/cover to expose the brush roll and belt assembly.
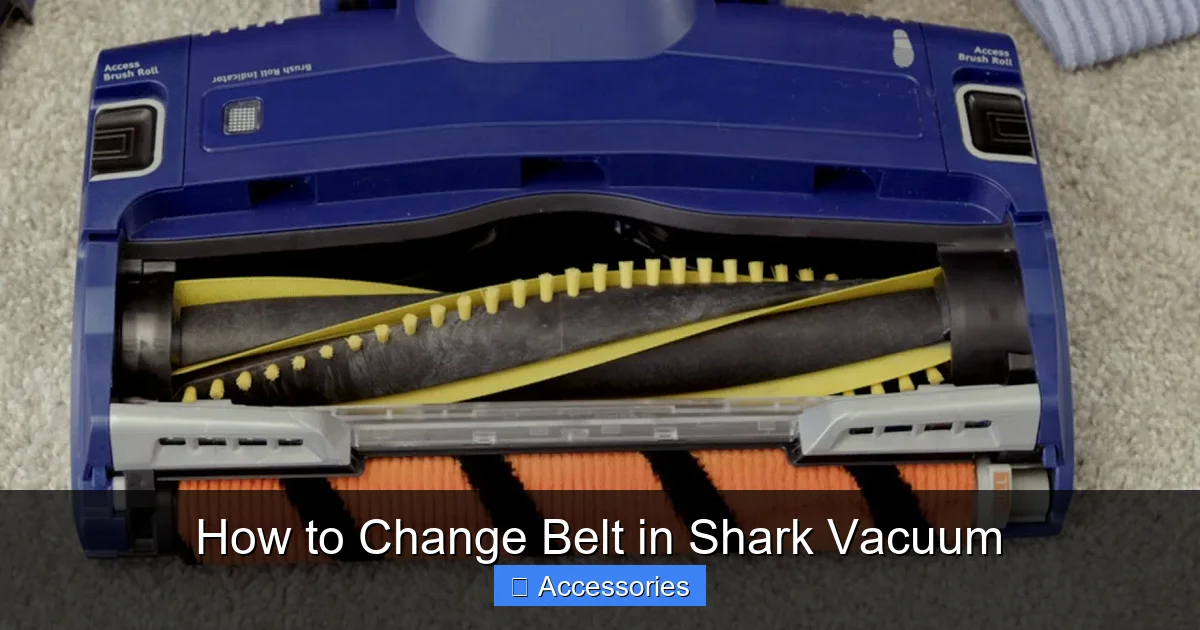
Visual guide about How to Change Belt in Shark Vacuum
Image source: i.ytimg.com
The Universal First Move: Flip It Over
Place your Shark vacuum upside down on a soft towel or blanket to protect the finish. You’ll see the large, rectangular or oval brush roll housing on the underside. This is covered by a plastic bottom plate, typically held on by 4-6 screws.
Locating and Removing the Bottom Plate Screws
Using your Phillips screwdriver, remove all screws securing the bottom plate. Pay close attention to screw length and location. Sometimes screws in the front or back are longer. A common mistake is putting a long screw into a short screw hole, which can damage the vacuum’s internal components. If the screws are different, keep them in separate little piles on your towel labeled “Front,” “Back,” etc.
For Models with a “Release” Lever/Button: Some newer Shark Vertex or IZ models have a quick-release lever or button that pops the bottom plate off without tools. If you see this, simply press or slide the lever and lift the plate away.
Gently Remove the Bottom Plate
With all screws removed, carefully lift the bottom plate straight up and off. You may need to wiggle it slightly. Set it aside safely. Now, the entire brush roll and belt mechanism will be exposed. This is your workspace.
Step 3: Removing the Old Belt and Inspecting Components
With the internals exposed, your goal is to free the old belt and remove the brush roll for a full inspection and cleaning.
Releasing Tension and Removing the Old Belt
The belt is under tension, stretched between the motor shaft and the brush roll. The easiest way to remove it is to first remove the brush roll. Here’s how:
- Locate the two plastic end caps on the brush roll. These cap the bearings and hold the brush roll in its housing slots.
- Push or slide each end cap inward (toward the center of the brush roll) to disengage it from the vacuum’s housing. They should slide off the metal axle of the brush roll. Note their orientation—one may have a small tab that fits into a slot. Take a photo if you’re unsure.
- Once the end caps are off, lift the entire brush roll assembly straight up and out of the housing. The old belt will likely come with it, still looped around the brush roll.
If the belt is broken, simply pull the pieces off. If it’s intact but stretched, you’ll need to stretch it over the motor shaft to remove it. Do not force it. Use needle-nose pliers to gently pry it off the motor shaft pulley if necessary. The motor shaft is small and fragile; be careful not to bend it.
Critical Inspection Time
Now, with everything out in the open, give your components a thorough check. This prevents repeat failures.
- The Old Belt: Look for cracks, glazing (shiny, hardened surface), thinning, or obvious stretching. This confirms it needed replacement.
- The Brush Roll: Spin it by hand. Does it rotate smoothly, or is it gritty, stiff, or making noise? Clean all hair, string, and carpet fibers from between the bristles and around the metal axles. Use scissors or a seam ripper to cut away wrapped hair. A jammed brush roll puts extra strain on the new belt.
- The Brush Roll Bearings: Check the plastic end caps. The small bearings inside should be clean and spin freely. If they are gunked up with debris, clean them. If they are worn or gritty, consider replacing the entire brush roll assembly (often sold as a “roller brush kit” with bearings and caps).
- The Housing & Motor Pulley: Look inside the vacuum’s housing where the brush roll sits. Clear any accumulated lint, hair, or debris. Check the small metal motor pulley (the shaft the belt connects to). Ensure it’s not bent and spins freely.
This cleaning step is 50% of the repair’s success. A clean system ensures your new belt lasts its full lifespan.
Step 4: Installing the New Belt – The Crucial Stretch
This is the core of the “change belt in Shark vacuum” process. It requires a bit of finesse but is straightforward.
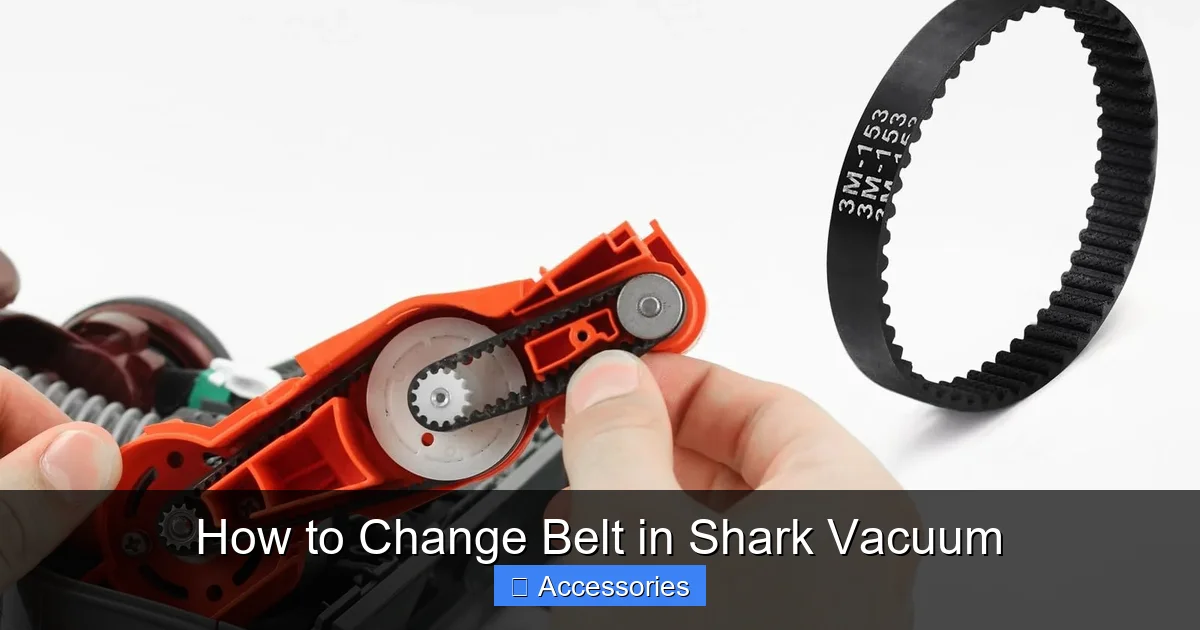
Visual guide about How to Change Belt in Shark Vacuum
Image source: m.media-amazon.com
Positioning the New Belt on the Brush Roll
Take your new, correct belt. It will be a perfect, tight loop. The first step is to get it onto the brush roll before you install the brush roll in the vacuum.
- Lay the brush roll on your work surface.
- Stretch the belt and loop it around the middle of the brush roll, seating it firmly into the groove that runs around the brush roll’s core. You should hear/feel a slight snap as it settles into place. Ensure it’s not twisted.
Visual Check: The belt should sit evenly in the groove all the way around the brush roll.
Positioning the Brush Roll and Stretching the Belt to the Motor
This is the trickiest part, but it’s easy with the right technique.
- Pick up the brush roll (with the belt already on it).
- Align the brush roll’s two axles with the slots in the vacuum’s housing where the end caps will sit. You may need to tilt the brush roll to get one axle into its slot first.
- Once one side is seated in its slot, you will need to stretch the belt to reach the motor shaft pulley on the other side of the housing.
- Reach into the housing and locate the small metal motor pulley. Stretch the belt (using both hands) and hook it over the motor pulley. You will feel significant resistance—this is the tension needed to keep the belt from slipping. Ensure the belt is fully seated on the motor pulley’s groove.
Tip: It can help to have the vacuum slightly tilted so gravity doesn’t pull the brush roll down as you stretch. If you’re struggling, use a pair of needle-nose pliers to gently grip the belt and pull it over the pulley. Do not use excessive force that could break the belt or damage the pulley.
Reinstalling the Brush Roll End Caps
With the belt stretched and hooked onto the motor pulley, the brush roll should now be held in tension within the housing. Now, slide the plastic end caps back onto the metal axles of the brush roll. They should click or slide into their seated positions in the housing. Ensure they are flush and secure. The brush roll should now be firmly held in place and able to spin freely (give it a gentle push with your finger).
Step 5: Reassembly and Final Testing
Before you declare victory, a quick test is essential to avoid having to open it all again.
Manual Rotation Test
With the vacuum still upside down, do not plug it in yet. Use your finger to manually rotate the brush roll. It should spin smoothly in the direction of normal operation (usually clockwise when viewed from the bottom, but check your old belt’s rotation direction if marked). The new belt should rotate with it without slipping off. Listen for any grinding. If it doesn’t spin freely, the belt may be pinched or the brush roll bearings are still dirty.
Reattaching the Bottom Plate
Once the manual test is successful, pick up the bottom plate you removed earlier.
- Align it carefully over the housing. The edges should match perfectly.
- Insert all the screws you removed earlier. Hand-tighten them first to avoid cross-threading. Then, using your screwdriver, tighten them securely in a star pattern (like tightening a car tire lug nut) to ensure even pressure. Do not overtighten and crack the plastic.
The All-Important Final Power Test
Place the vacuum upright on a hard floor. Plug it in and turn it on. Do not place it on carpet yet. Flip it over again and watch the brush roll. It should be spinning vigorously and smoothly. There should be no burning smell, squealing, or stuttering. If it looks good, turn the vacuum off, unplug it, and set it upright.
Now, run it over a small test patch of carpet. You should immediately feel and hear the difference—the brush roll agitating the pile, and the suction returning to its normal, powerful state. Empty the dust cup to see the first batch of freshly agitated dirt!
Maintenance Tips to Prolong Your New Belt’s Life
You’ve just fixed your vacuum. Let’s make sure you don’t have to do it again too soon.
Regular Brush Roll Cleaning is Non-Negotiable
Hair and fibers are the #1 enemy of your brush roll and belt. Every 2-3 uses, especially if you have pets or long hair, flip the vacuum over and use scissors or a dedicated brush roll cleaning tool to remove any wrapped hair. This prevents the brush roll from jamming and putting undue stress on the belt.
Check Belt Tension Periodically
About once a month, do a quick visual check. With the vacuum unplugged and the bottom plate off, press down on the brush roll in the middle. There should be slight tension, but you should be able to depress it a small amount (about 1/2 inch). If it feels loose and depresses easily, the belt is stretching and needs replacement soon.
Store Your Vacuum Properly
Don’t leave your Shark leaning against a wall with the brush roll constantly engaged. Use the “hard floor” setting or the brush roll shut-off feature (if your model has one) when storing it or cleaning hard surfaces. Constant tension on the belt when not needed accelerates wear.
Know When to Replace the Entire Brush Roll
Belt wear can sometimes be a symptom of a failing brush roll. If your new belt breaks prematurely (within a few months), the brush roll bearings are likely the issue. A stiff, gritty, or wobbly brush roll will shred belts. In this case, replacing the entire brush roll assembly (often sold as a part with bearings and caps pre-installed) is more economical than buying multiple belts.
Conclusion: Empower Yourself with Simple Repairs
Changing the belt in your Shark vacuum isn’t just about fixing a machine; it’s about taking control of your home maintenance. That disappointing loss of suction you experienced is no longer a mystery that requires a costly service call or a premature trip to the appliance store. You now hold the knowledge to diagnose the issue, source the exact $10 part, and perform a 15-minute repair that restores your vacuum to peak performance. Remember the golden rule: a clean brush roll and a correctly installed belt are the keys to success. By incorporating the quick maintenance habits we discussed, you’ll extend the life of not just the belt, but your entire Shark vacuum. The next time you feel that familiar drop in power, you’ll smile, flip it over, and know exactly what to do. Your clean carpets—and your wallet—will thank you.
Frequently Asked Questions
How often should I change the belt in my Shark vacuum?
There’s no fixed schedule, as it depends on use. For an average home (2-3 times per week), inspect the belt every 6 months and expect to replace it every 1-2 years. If you have pets, long hair, or primarily clean carpets, check it every 3-4 months and plan for annual replacement.
What are the most obvious signs that my Shark vacuum belt is broken?
The two clearest signs are: 1) The brush roll is not spinning while the vacuum motor runs, and 2) A strong rubber burning smell during operation. A sudden, dramatic loss of suction specifically on carpets is the third major indicator.
Can I change the belt without any tools?
Almost never. You will almost always need a Phillips-head screwdriver to remove the bottom plate. Some newer models with quick-release plates may not require a screwdriver for that step, but you’ll still need one to access the brush roll in certain designs. Always have a screwdriver ready.
Are Shark vacuum belts all the same size?
No. Shark uses different belt lengths and widths across its many models and series. A belt for a Shark Navigator Lift-Away will not fit a Shark Rotator or Vertex. This is why identifying your exact model number is the critical first step to purchasing the correct part.
My new belt is installed, but the brush roll still isn’t spinning. What’s wrong?
First, ensure the belt is properly stretched over both the motor shaft pulley and the brush roll groove. Second, check for obstructions—hair or debris jammed in the brush roll bearings will prevent it from spinning. Remove the brush roll again and clean it thoroughly. Finally, verify the end caps are fully seated in their housing slots.
My vacuum smells like burning rubber after I changed the belt. Is it installed wrong?
A burning smell immediately after a belt change usually means the belt is slipping. This happens if it’s not fully seated on the motor pulley or if it’s the wrong belt (too loose). Unplug the vacuum, remove the bottom plate, and check that the belt is tight against both pulleys with no slack. Also, ensure the brush roll spins freely by hand. If the belt is correct and seated, a seized brush roll bearing is the likely culprit, requiring brush roll replacement.