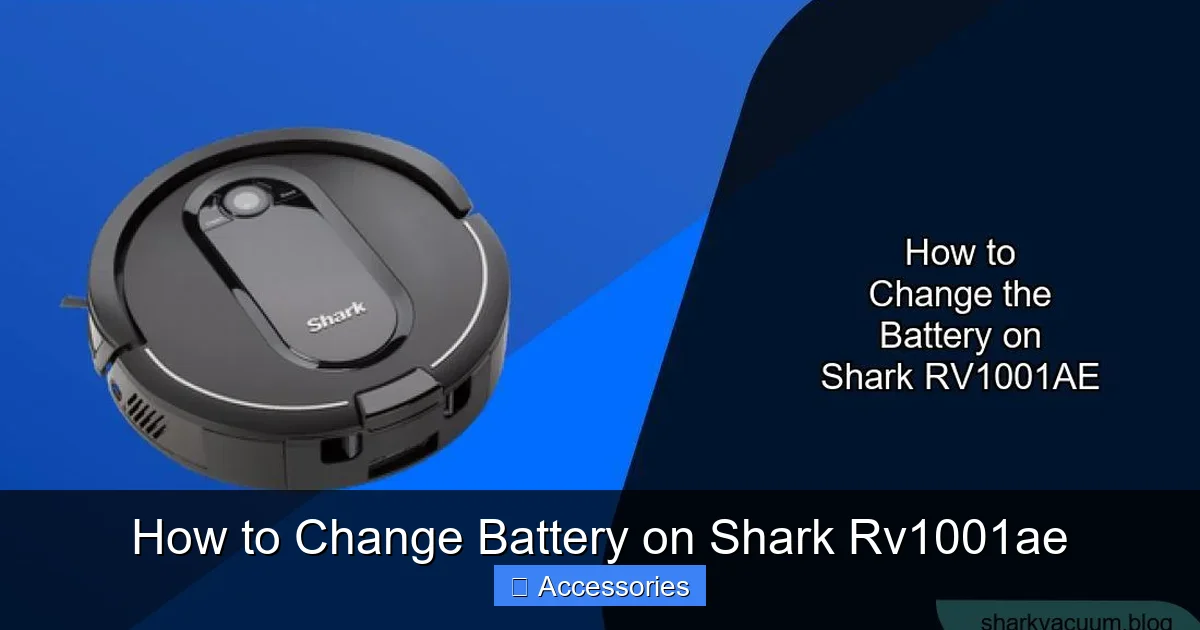
Replacing the battery in your Shark RV1001AE is a straightforward DIY task that can restore your vacuum’s original power and runtime, saving you the cost of a new appliance. You’ll need a few common tools, a compatible replacement battery, and about 30 minutes of time. The process involves carefully opening the vacuum’s housing, disconnecting the old battery, and installing the new one. Always prioritize safety by unplugging the vacuum and working gently to avoid damaging internal components. Following this guide ensures you get the most life from your new battery and your Shark vacuum.
Key Takeaways
- Confirm Battery Issues First: A significant drop in runtime or failure to hold a charge are the primary signs your Shark RV1001AE’s lithium-ion battery needs replacement, not just a problem with the charger.
- Use Genuine or OEM-Equivalent Batteries: For safety, performance, and warranty compliance, always purchase a battery specifically listed for the Shark RV1001AE model from a reputable seller.
- Safety is Non-Negotiable: Always unplug the vacuum and work on a non-conductive surface. Lithium-ion batteries can be dangerous if punctured or short-circuited.
- Document Your Disassembly: Take photos as you remove screws and disconnect connectors. This simple step prevents reassembly headaches and ensures correct cable routing.
- Post-Replacement Calibration is Key: After installing the new battery, fully charge it, then run the vacuum until it shuts off 2-3 times to calibrate the battery management system for accurate charge readings.
- Proper Care Extends Life: Avoid storing the vacuum with a completely dead or fully charged battery for long periods. Ideal storage charge is around 50% in a cool, dry place.
- Dispose of Old Batteries Responsibly: Never throw the old lithium-ion battery in the trash. Take it to an electronic waste recycling center or a retailer that offers battery recycling.
📑 Table of Contents
- Why Your Trusted Shark RV1001AE is Losing Its Suction Power
- Essential Tools, Parts, and Critical Safety Precautions
- Step-by-Step Guide: How to Change Battery on Shark RV1001AE
- Post-Replacement: Testing, Calibrating, and Optimizing Performance
- Troubleshooting: What to Do If Your “New” Battery Isn’t Working
- Conclusion: You Did It—And Saved a Trusted Tool
Why Your Trusted Shark RV1001AE is Losing Its Suction Power
You bought your Shark RV1001AE with confidence, expecting powerful, cordless cleaning for years. But lately, you’ve noticed it’s not lasting through a single room, or maybe it dies completely after just a few minutes. The frustration is real. Before you resign yourself to buying a whole new vacuum, take a deep breath. The most common culprit for this performance drop in any modern cordless vacuum, especially one that’s been used regularly for a couple of years, is a degraded lithium-ion battery. This is the heart of your machine’s cordless freedom, and like all rechargeable batteries, it has a finite lifespan. Understanding that the problem is likely the battery, not the vacuum’s motor or electronics, is the first and most empowering step. This guide will walk you through exactly how to change battery on Shark RV1001AE, turning a moment of frustration into a satisfying, cost-effective DIY victory.
Lithium-ion batteries degrade with each charge cycle and over time. They lose their capacity to hold a full charge, leading to shorter runtime. The “memory effect” is less of an issue here than simple chemical aging. Factors like frequent deep discharges, exposure to high heat, and storing the vacuum at 100% or 0% charge can accelerate this process. So, if your Shark RV1001AE is a few years old and its “juice” just isn’t what it used to be, a battery replacement is the logical and economical solution. It breathes new life into a trusted tool, saving you hundreds of dollars compared to purchasing a new vacuum cleaner. Now, let’s get you equipped and started on the process.
Essential Tools, Parts, and Critical Safety Precautions
Gathering Your Toolkit: What You’ll Actually Need
One of the best parts of learning how to change battery on Shark RV1001AE is that it doesn’t require a workshop full of specialized tools. This is a job you can do on your kitchen table with items you likely already have. Having everything ready before you start will make the process smooth and prevent frustration.
Visual guide about How to Change Battery on Shark Rv1001ae
Image source: sharkvacuum.blog
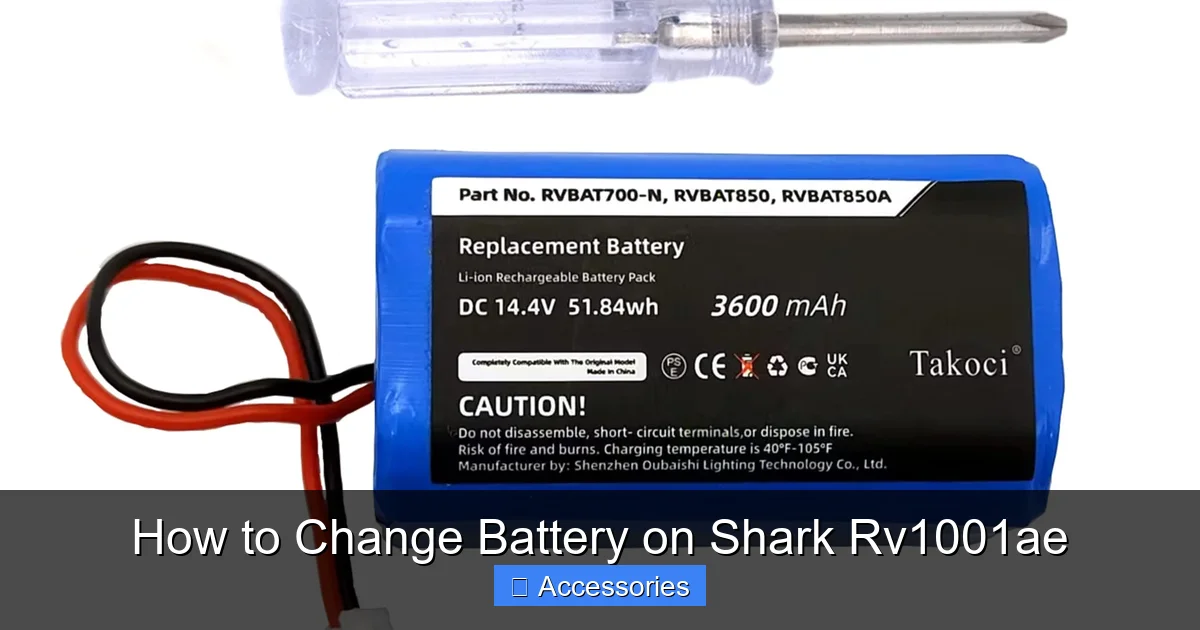
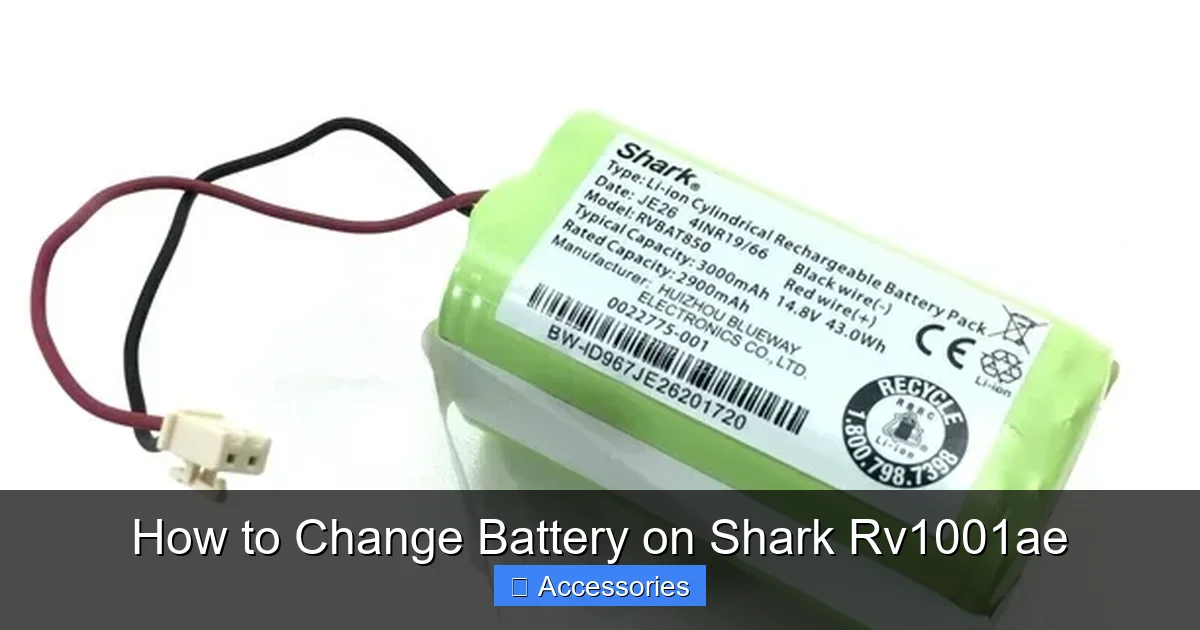
- The Correct Replacement Battery: This is the most important item. You must find a battery that is compatible with the Shark RV1001AE model. The part number is crucial. The original battery is often a Shark-branded ION battery pack. Search for “Shark ION battery RV1001AE” or “Shark cordless vacuum battery for RV1001AE.” Reputable sources include Shark’s official parts website, authorized dealers, or well-known third-party sellers on platforms like Amazon who specialize in vacuum parts. Be wary of extremely cheap, no-name batteries; they can be unsafe and perform poorly. A quality replacement will cost between $50 and $100.
- Set of Precision Screwdrivers: You will encounter small Phillips-head screws. A set of precision screwdrivers (often sold for electronics repair) is ideal. A small flat-head screwdriver can also be useful for prying open plastic clips gently.
- Plastic Pry Tools or Spudger: These are essential for releasing the plastic clips that hold the vacuum’s housing together without scratching or cracking the plastic. You can sometimes use an old credit card, but dedicated plastic tools are safer and more effective.
- A Small Container or Magnetic Tray: For the screws you remove. This seems trivial but losing a single tiny screw can halt your project for hours. A magnetic tray is perfect.
- Anti-Static Wrist Strap (Optional but Recommended): This grounds you to prevent static electricity from discharging the new battery or damaging sensitive electronics. It’s a small investment for peace of mind.
- Good Lighting: A desk lamp or flashlight will illuminate the small internal workspace, making it easier to see connectors and clips.
- Your Smartphone (for photos):strong> As mentioned, take pictures at each stage of disassembly.
Non-Negotiable Safety Protocols: Protect Yourself and Your Vacuum
Before you touch a single screw, you must internalize these safety rules. Lithium-ion batteries are safe when handled correctly, but they contain a lot of energy in a small package. A damaged or short-circuited battery can overheat, catch fire, or even explode.
- UNPLUG THE VACUUM: This seems obvious, but it’s the golden rule. The Shark RV1001AE is a cordless vacuum, but you must ensure its charging cable is not connected to any power source. Also, if your model has a removable battery that charges externally, ensure it is not in the charging dock.
- Work on a Non-Conductive Surface: Use a wooden table, a plastic cutting board, or a rubber mat. Avoid metal surfaces that could conduct electricity if you accidentally touch the battery terminals with a tool.
- Do Not Puncture or Damage the Battery: Never use excessive force when prying open the case. If you feel strong resistance, stop and reassess. A punctured lithium-ion cell is a serious hazard.
- Identify and Avoid the Battery Terminals: The battery pack has metal contact points. Be mindful not to let any metal tools (screwdrivers) bridge the gap between these terminals, as this causes a short circuit. This is where the anti-static strap and careful handling come in.
- Keep Flammables Away: Have no papers, cloths, or solvents near your work area.
- If the Old Battery is Swollen: STOP. A swollen battery is a critical failure. Do not attempt to remove it yourself. The casing is under pressure. Contact Shark customer support or a professional electronics recycler for safe disposal instructions. Do not puncture, bend, or expose it to heat.
Step-by-Step Guide: How to Change Battery on Shark RV1001AE
Now, with your tools gathered, your workspace clear, and safety rules committed to memory, we begin the physical process. Take your time. Rushing is the enemy of a successful repair. The Shark RV1001AE, like many modern stick vacuums, is designed with snap-fit plastic clips and hidden screws. The goal is to separate the main body (containing the motor and electronics) from the lower housing (containing the battery and brush roll).
Visual guide about How to Change Battery on Shark Rv1001ae
Image source: images-na.ssl-images-amazon.com
Phase 1: Accessing the Internal Battery Compartment
The battery is housed within the lower portion of the vacuum, typically under the dust cup area. Your first task is to open this section.
- Remove the Dust Cup: Press the release button on the dust cup and pull it off. Set it aside safely.
- Locate and Remove All External Screws: Carefully examine the seam where the upper and lower halves of the vacuum meet. You will likely find several small Phillips screws hidden in various places:
- Inside the dust cup release area.
- On the back of the vacuum, near the handle release or power button.
- Possibly under a small rubber plug or sticker. Use your phone’s camera to zoom in and inspect every inch of the seam.
Remove every screw you find and place them in your labeled container. Missing even one can mean the housing won’t open or will crack when forced.
- Separate the Housing Halves: With all screws removed, the two plastic halves are held together by internal plastic clips. Starting at the bottom near the brush roll, insert your plastic pry tool into the seam. Gently work your way around the entire circumference of the vacuum. You should hear a series of small clicks as the clips release. Be patient and methodical. The plastic is tough but can crack if pried too aggressively in one spot.
Phase 2: Disconnecting and Removing the Old Battery
Once the upper motor housing lifts away, you will see the internal components. The battery pack is usually a rectangular black box, often secured with more screws or adhesive tape.
- Locate the Battery Pack: Identify the large black plastic battery module. It will have a multi-pin connector plugged into the vacuum’s main PCB (Printed Circuit Board).
- Disconnect the Battery Connector: This is the most critical step. Grasp the plastic connector housing firmly. There is almost always a small locking tab or latch. Press or lift this tab (it may require a fingernail or the tip of a plastic pry tool) and gently pull the connector straight out. Do not pull on the wires. If it’s stuck, wiggle it very gently. Forcing it can break the connector on the expensive PCB.
- Unmount the Battery: After disconnecting the electrical connector, the battery pack itself is likely held in place by 1-2 small screws or a strip of strong adhesive foam. Remove any screws. If it’s glued, carefully work a plastic tool under the edges of the battery pack to break the adhesive bond. Go slowly to avoid bending the pack.
- Remove the Old Battery: Lift the old battery pack out of the housing. Set it aside on your non-conductive surface, terminals facing up. Immediately cover the battery terminals with electrical tape to prevent any accidental short circuit from tools or metal debris.
Phase 3: Installing the New Battery and Reassembly
With the old battery out, it’s time to install the new one. This is essentially the reverse of the removal process, but with extra care.
- Prepare the New Battery: Before installing, inspect the new battery. Ensure the terminals are clean. If it came with protective tape over the terminals, leave it on until it’s seated in the housing.
- Position and Secure the New Battery: Place the new battery pack into the exact same position and orientation as the old one. It should fit snugly. Reinstall any screws that held the old battery. If it used adhesive, apply a new strip of double-sided foam tape (like 3M VHB) to the bottom of the new battery to secure it. A loose battery can rattle and stress connectors.
- Reconnect the Electrical Connector: This is the moment of truth. Align the connector on the battery cable with the socket on the vacuum’s main board. Push it in firmly and evenly until you hear or feel a distinct click, indicating the locking tab has engaged. Give it a very gentle tug to ensure it’s locked in place. A loose connection will cause the vacuum to not power on.
- Test Before Full Reassembly: Before you put the housing back together, this is your chance for a vital test. Reinsert the dust cup (it doesn’t need to lock). Plug the charging cable into the vacuum. The charging indicator light should illuminate. If it does, disconnect the charger. Press the power button. The vacuum should turn on and run. If it doesn’t, do not proceed with reassembly. Re-check your connector connection. This step saves you from having to open the vacuum again.
- Reassemble the Housing: If the test is successful, unplug everything. Carefully lower the upper motor housing back onto the lower half, ensuring all internal wires (especially the one to the brush roll) are not pinched. Align the plastic clips and press firmly around the seam until all clips snap back into place. You should not need to force it.
- Reinstall All Screws: Put back every screw you removed, in their original locations. Tighten them securely but do not over-tighten, as this can strip the plastic threads.
- Final Check: Reattach the dust cup. Give the vacuum a once-over to ensure everything looks flush and secure. Your battery replacement is physically complete!
Post-Replacement: Testing, Calibrating, and Optimizing Performance
Your new battery is installed, but the job isn’t 100% done. What you do in the first few charge cycles will determine how accurately the vacuum’s battery meter reads and how long the battery lasts overall.
Visual guide about How to Change Battery on Shark Rv1001ae
Image source: i5.walmartimages.com
The Crucial First Charge and Calibration Cycle
Lithium-ion batteries are shipped with a partial charge. The first step is to fully charge it.
- Initial Full Charge: Plug your Shark RV1001AE directly into its original charger and let it charge uninterrupted until the indicator light shows a full charge (often a solid green light). This can take 3-4 hours for a new, empty pack.
- Calibration Run: After the full charge, use the vacuum on a hard floor until it completely shuts off due to low battery. Do not stop early. This tells the vacuum’s internal computer (Battery Management System or BMS) the true capacity of the new cell. Let it rest for 5-10 minutes, then run it again until it shuts off. Repeat this “deep cycle” 2-3 times over the first few uses. After this, the battery meter on the vacuum will be much more accurate.
Establishing Best Practices for Long-Term Battery Health
To get the maximum 2-3 years (or more) from your new investment, adopt these habits.
- Avoid the Extremes: Try not to regularly run the battery to 0%. Conversely, it’s also not ideal to keep it at 100% charge constantly if the vacuum is stored for weeks. The “sweet spot” for long-term storage is around 50% charge.
- Keep it Cool: Heat is the number one enemy of lithium batteries. Do not leave the vacuum charging in a hot car or in direct sunlight. Store it in a cool, dry closet.
- Use It Regularly: Unlike old nickel-based batteries, lithium-ion packs prefer to be used. Letting a fully charged pack sit for months can degrade it. Use your vacuum at least once a month.
- Stick to the Official Charger: Always use the charger that came with your Shark RV1001AE or a certified replacement. Cheap, off-brand chargers can provide incorrect voltage/current and damage the battery or BMS.
Troubleshooting: What to Do If Your “New” Battery Isn’t Working
You followed all the steps, but the vacuum still won’t turn on or the runtime is still terrible. Don’t panic. Here’s a systematic checklist.
Diagnosing Connection and Compatibility Issues
- Re-check the Connector: The number one cause of post-replacement failure is an improperly seated connector. Unplug, re-seat it firmly, and listen for the click. Inspect the connector pins for any bent or dirty contacts.
- Verify Compatibility: Double-check that the battery you purchased is explicitly listed for the Shark RV1001AE. There are many Shark ION models (RV1001, RV1002, etc.) with slightly different batteries. An incompatible battery may not fit or may have the wrong connector.
- Inspect for Damage: Look at the vacuum’s main board where the battery plugs in. Did a tool slip and scratch a trace? Is there any burnt smell? If so, the damage may be beyond the battery.
- Test the Old Battery (if possible): If you kept the old battery, carefully reconnect it (remembering to tape its terminals). If the old battery works even poorly, the problem is with your installation or the new battery. If the old battery also doesn’t work now, you may have damaged the main board during disassembly.
- Reset the Vacuum: Some Shark models have a reset procedure. Try removing the new battery, unplugging the charger, holding the power button for 10-15 seconds to discharge any residual power, then reconnecting everything.
When to Suspect a Faulty New Battery or Main Board
If you’ve triple-checked the connection and compatibility, a faulty new battery is possible, though rare from reputable sellers. Contact the seller for a replacement or refund. If the new battery tests fine on another compatible Shark model (if you have access), the fault lies with your vacuum’s main PCB. At this point, diagnosing and repairing a main board is complex and often not cost-effective. Contact Shark support or a qualified appliance repair technician for a quote on a new control board, and weigh that cost against the price of a new vacuum.
Conclusion: You Did It—And Saved a Trusted Tool
Congratulations! By following this guide on how to change battery on Shark RV1001AE, you’ve not only performed a practical repair but also gained a deeper understanding of the device that keeps your home clean. You’ve successfully navigated plastic clips, delicate connectors, and safety protocols to restore cordless power to your vacuum. This DIY accomplishment saves you significant money, reduces electronic waste, and extends the life of a machine you already know and trust. Remember the key lessons: always use the correct parts, prioritize safety above speed, and treat the new battery with care from the start. Your Shark RV1001AE is now ready to deliver many more years of powerful, untethered cleaning. The next time you glide across your floors without a cord, you can feel a special satisfaction knowing you gave your trusty vacuum a second life with your own two hands.
Frequently Asked Questions
How often should I expect to replace the battery in my Shark RV1001AE?
With proper care and typical use (2-3 times per week), the lithium-ion battery in your Shark RV1001AE should last between 2 and 3 years before a noticeable drop in performance. Its lifespan is measured in charge cycles, typically 300-500 full cycles.
Can I use a third-party battery, or should I buy a genuine Shark battery?
While third-party batteries are often cheaper, it is strongly recommended to buy a genuine Shark battery or one from an OEM-equivalent, reputable manufacturer. Genuine batteries ensure proper voltage, amperage, and connector compatibility, which is critical for safety and the vacuum’s battery management system to function correctly.
My vacuum turns on but dies immediately after installing the new battery. What’s wrong?
This is almost always due to an improperly connected battery connector. Power down, unplug, and open the vacuum again. Firmly press the battery’s plug into the socket on the main board until you hear a definitive click, ensuring the locking tab is fully engaged. A loose connection will cause an immediate shutdown.
Do I need to do anything special the first time I charge the new battery?
Yes. For the first charge, let it charge uninterrupted on the official charger until the light indicates it is fully solid (usually 3-4 hours). Then, perform a calibration cycle: run the vacuum on a hard floor until it completely shuts off. Repeat this 2-3 times to help the vacuum’s computer accurately gauge the new battery’s capacity.
How long does a full charge take on the new battery?
A full charge from empty to 100% using the original Shark charger typically takes between 3 and 4 hours. The initial charge on a brand-new battery may take slightly longer. Avoid using fast chargers not designed for your specific Shark model.
What should I do with my old Shark RV1001AE battery?
Never dispose of lithium-ion batteries in regular household trash due to fire risk and environmental concerns. Take the old battery to a designated electronic waste (e-waste) recycling facility, a hazardous waste collection event, or many retailers (like Home Depot, Lowe’s, Best Buy) offer free battery recycling drop-off programs.