Replacing the brush roller on your Shark vacuum is a simple, essential maintenance task that restores powerful cleaning performance. This guide provides clear, model-specific instructions to help you complete the swap in under 10 minutes with basic tools. Regular replacement prevents motor strain and keeps your floors impeccably clean.
Has your trusty Shark vacuum suddenly started feeling more like a gentle breeze than a cleaning powerhouse? You’re pushing it over the same patch of carpet, but the dirt just isn’t budging. Before you panic about a faulty motor or consider an expensive replacement, take a deep breath. The culprit is very likely the humble brush roller—that spinning cylinder of bristles at the front of your vacuum. Changing the brush roller on a Shark vacuum is not a complicated, technician-only job. It’s a straightforward piece of routine maintenance that you can absolutely do yourself, often in less time than it takes to find your phone to call for help. This complete guide will walk you through every single step, from understanding exactly what the brush roller does to confidently swapping it out on any Shark model. Let’s get your vacuum sucking with authority again.
Key Takeaways
- The brush roller is the vacuum’s “broom”: It agitates carpet fibers to lift embedded dirt; when worn or clogged, suction feels weak even if the motor is fine.
- Replace every 6-12 months: Frequency depends on usage, pet hair, and carpet type; high-use homes with pets may need quarterly checks.
- You only need basic tools: Typically a Phillips screwdriver and sometimes a flathead; always unplug the vacuum first for safety.
- Signs of failure are obvious: Look for flattened bristles, melted plastic, excessive noise, or the roller not spinning freely.
- Model matters: Shark Navigator, Rotator, and Vertex series use different brush roller designs; verify your exact model before buying a replacement.
- Cleaning is not replacing: Regularly remove hair and debris from the roller to extend its life, but worn bristles require a new part.
- It’s a DIY win: This is one of the easiest vacuum repairs, saving you $50-$100 in service fees and restoring like-new cleaning power.
📑 Table of Contents
- What Is a Brush Roller and Why Does It Need Changing?
- Clear Signs Your Brush Roller Needs Replacement
- Essential Tools and Preparation for the Swap
- Step-by-Step: How to Change Your Shark Brush Roller
- Model-Specific Considerations and Part Selection
- Pro Maintenance Tips to Extend Your Brush Roller’s Life
- Troubleshooting: What If It Still Doesn’t Work After Replacement?
- Conclusion: empowering your cleaning routine
What Is a Brush Roller and Why Does It Need Changing?
Think of your Shark vacuum’s brush roller as the workhorse on the front line. It’s a rotating bar, usually made of plastic with stiff nylon bristles, powered by a small motor or belt. Its sole job is to agitate the carpet or rug fibers, kicking up deeply embedded dirt, dust, pet hair, and debris so the vacuum’s suction can effortlessly capture it. On hard floors, a brush roller with softer bristles (or a rubber squeegee design on some models) helps sweep debris toward the suction path.
The Mechanical Dance of Deep Cleaning
When your vacuum is on a carpet, the brush roller spins at high speed. Those bristles dig into the pile, disturbing particles that static cling and gravity have hidden. Without this agitation, a vacuum relies on suction alone, which is great for surface debris on hard floors but often ineffective on carpets. It’s the combination of agitation and powerful suction that makes modern vacuums like Shark so effective. Over time, this constant mechanical work takes a toll.
Clear Signs Your Brush Roller Needs Replacement
Knowing when to change your brush roller is half the battle. The symptoms are usually unmistakable once you know what to look for. Ignoring a failing brush roller doesn’t just mean poor cleaning; it can strain the vacuum’s main motor and even cause overheating.
Visual guide about Change Brush Roller Shark Vacuum
Image source: sharkvacuum.blog
Visual Inspection: What to Look For
Always start by giving your brush roller a good look. Flip your Shark vacuum over and locate the brush roll housing. Most Shark models have a release lever or button to drop the housing down for easy access. Once you can see the roller:
- Bristle Condition: Are the bristles significantly flattened, matted, or missing in patches? New bristles stand stiff and upright. Worn ones look deflated and sparse.
- Physical Damage: Look for cracks, melted spots (from contact with hot surfaces like a recently used iron), or warping. Plastic can become brittle and break.
- Debris Wrap: Is the roller completely bound up with hair, string, or carpet fibers? While you should clean this regularly, a severely wrapped roller can cause bearings to seize and create uneven wear, leading to premature replacement.
Performance Symptoms: Listening and Feeling
Even if the brush roller looks okay, its performance tells the story:
- Loss of “Grab”: The vacuum doesn’t seem to pull itself into the carpet anymore. It feels like it’s just sliding over the top.
- Strange Noises: A high-pitched squeal, grinding, or a noticeable change in the motor sound often indicates the brush roller bearings are failing or it’s obstructed.
- Excessive Vibration: An unbalanced roller (from missing bristles or damage) will cause the whole vacuum to shake violently.
- No Rotation: If the roller isn’t spinning at all, check for obvious jams first. If it’s clear but still won’t turn, the roller’s internal bearings are likely shot, or the drive belt (on belt-driven models) is broken.
Essential Tools and Preparation for the Swap
One of the best parts of this DIY project is how few tools you need. Gathering everything before you start makes the process smooth and frustration-free.
Visual guide about Change Brush Roller Shark Vacuum
Image source: d3nevzfk7ii3be.cloudfront.net
The Toolbox: It’s Smaller Than You Think
For the vast majority of Shark vacuums, you will need:
- A Phillips-head screwdriver: This is the most common screw type securing the brush roller end caps. Have a few sizes on hand if possible.
- Needle-nose pliers: Incredibly helpful for pucking out stubborn hair or debris from the roller bearings and for removing any small retaining clips.
- A small flathead screwdriver: Sometimes useful for prying open plastic clips or housings that don’t use screws.
- A clean, well-lit workspace: Your kitchen table or garage floor works great. Good lighting helps you see tiny screws and clips.
Safety First and Model Identification
Step 1: Unplug the Vacuum. This is non-negotiable. Electricity and spinning parts do not mix.
Step 2: Identify Your Exact Model. This is the most critical step for buying the correct replacement part. The model number is on a sticker usually on the back, bottom, or inside the dust cup compartment. It will look like “NV356,” “AZ6002,” or “HV322.” Write it down. You can also use the Shark website’s parts finder tool by entering this number. Using the wrong brush roller can lead to poor performance or even damage.
Step 3: Prepare Your Area. Lay down a towel or large piece of paper to catch any small screws or springs that might pop out. Take a photo with your phone of the fully assembled brush roller housing before you disassemble it. This visual reference is a lifesaver during reassembly.
Step-by-Step: How to Change Your Shark Brush Roller
Now, let’s get our hands dirty. While there are minor variations between Shark’s Navigator, Rotator, Vertex, and IZ系列 series, the core process is remarkably similar. We’ll cover the universal method first.
Visual guide about Change Brush Roller Shark Vacuum
Image source: images-na.ssl-images-amazon.com
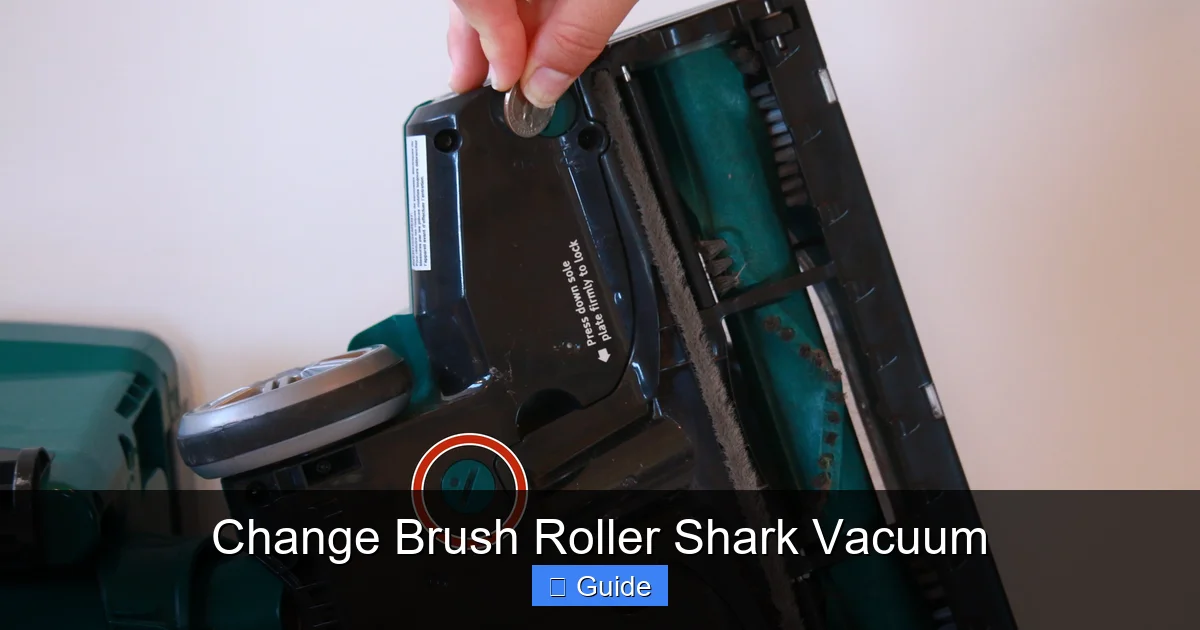
Step 1: Access the Brush Roller Housing
Flip the vacuum onto its back. Locate the large rectangular or oval brush roll housing at the front. On most Sharks, there is a large red or gray lever on the side or top of the housing. Press this lever and the entire front plate should hinge down, exposing the brush roller. If your model uses screws instead of a lever, use your Phillips screwdriver to remove them and set the plate aside.
Step 2: Remove the Old Brush Roller
With the housing open, you’ll see the brush roller assembly—a plastic bar with bristles and two colored (often red) plastic end caps.
- Locate the Retaining Mechanism: At each end of the roller, there is either a small plastic clip, a spring-loaded pin, or simply a slot that the end cap locks into. Some models have a single screw holding one end cap in place.
- Disengage the First Cap: Gently pry open any plastic clips with your flathead screwdriver. If there’s a spring pin, press it inward (you may need needle-nose pliers) and hold it while pulling the end cap off. If it’s a screw, remove it.
- Slide and Remove: Once one end cap is free, the entire brush roller assembly should slide out of the housing from the other side. Be mindful of any belts (on some older models) that might be looped around the roller. Note their position if present.
Step 3: Install the New Brush Roller
Unbox your new, correct-model brush roller. It should look identical to the old one.
- Positioning: Slide the new roller into the housing from the side where the retaining mechanism is simpler (often the side without the drive motor or belt pulley). Ensure it sits evenly in the channel.
- Secure the First End Cap: Place the end cap onto the roller’s axle. If it uses a clip, snap it firmly into place. If it uses a spring pin, push the pin through the hole in the cap and axle until it clicks. If it uses a screw, thread it in and tighten it securely but do not overtighten and crack the plastic.
- Secure the Second End Cap: Now, go to the other side. You may need to gently twist the roller to align the axle with the slot or clip on this side. Snap or clip this end cap into place. Ensure the roller spins freely by giving it a gentle push with your finger. It should rotate smoothly without wobbling or binding.
Step 4: Reassemble and Test
Double-check that the roller spins perfectly. If you removed a belt, re-loop it onto the drive pulley on the roller and the motor shaft (consult your manual for routing). Close the housing front plate, re-engage any levers, or replace the screws. Reattach the dust cup if you removed it. Plug the vacuum in, turn it on, and briefly engage the brush roll (usually by stepping on the vacuum head or flipping a switch). Watch the new roller spin. It should be quiet and steady. Run it on a carpet for a few seconds—you should immediately feel and hear the difference in agitation.
Model-Specific Considerations and Part Selection
While the basic principle is the same, Shark has iterated its brush roller design across its many popular lines. Using the wrong part can result in a roller that doesn’t fit, won’t spin, or damages your vacuum.
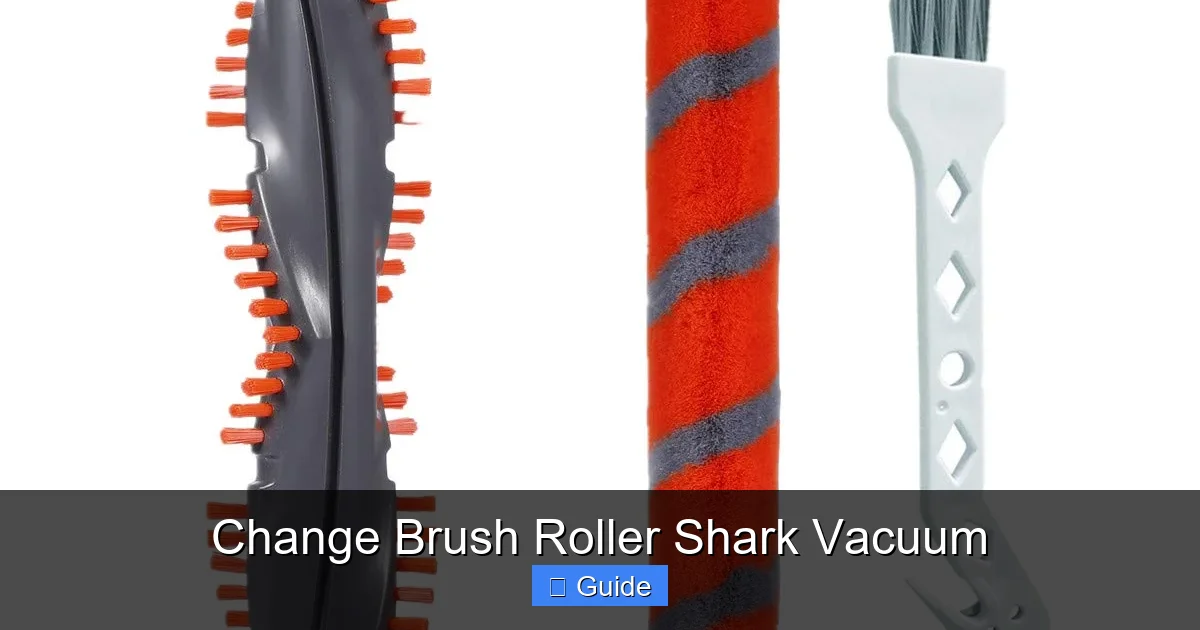
Navigator vs. Rotator vs. Vertex: What’s the Difference?
The Shark Navigator (NV series) typically uses a standard bristle brush roller with red end caps and a belt-driven system. The Shark Rotator (NV, NZ, HV series) often features a more advanced “anti-hair wrap” design with a unique rubber strip and self-cleaning mechanism; its roller may have a different shape and a single retaining screw. The newer Shark Vertex (AZ series) and Shark Stratos often use a brushless motor-driven roller (no belt) that connects directly to a small motor on the housing. These have a distinct electrical connector. This is why your model number is your best friend. Always match the part number exactly.
How to Find the Right Replacement Part
1. Use Your Model Number: Go to Shark’s official website, navigate to “Customer Support” or “Parts & Accessories,” and enter your model. It will list all compatible parts with diagrams.
2. Shop by Category: On retail sites like Amazon or Shark’s own store, filter by “Vacuum Parts” and then “Brush Rolls.” You’ll see options listed with compatible model numbers in the title or description.
3. OEM vs. Generic: OEM (Original Equipment Manufacturer) parts from Shark are guaranteed to fit and perform. High-quality third-party generic parts can be 30-50% cheaper and often work perfectly. Read reviews carefully to ensure other buyers with your same model had success.
4. Consider an “Anti-Hair Wrap” Upgrade: If you have pets or long hair, seek out a replacement that specifically markets an anti-hair wrap design, even if your original didn’t have one. It can save you future hassle.
Pro Maintenance Tips to Extend Your Brush Roller’s Life
Replacing the brush roller is a fix, but preventing premature wear saves you time and money. Integrate these habits into your vacuuming routine.
Clean It Weekly (It’s Easier Than You Think)
Once a week, after you’ve finished vacuuming, flip the machine over and use your fingers or the included cleaning tool to remove any hair, string, or fibers wrapped around the bristles and in the bearings. A pair of scissors can carefully cut through tangled mats. This simple 60-second task prevents the roller from becoming unbalanced and wearing unevenly. For hard floor-specific rollers (often rubber), just wipe them with a damp cloth.
Mind Your Surfaces and Settings
Your Shark vacuum likely has a brush roll on/off switch. Always turn the brush roller OFF when vacuuming hard floors (hardwood, tile, laminate). Spinning bristles can scatter debris and, over time, can damage delicate finishes. Only use it on carpets and rugs. If your vacuum has height adjustment, set it correctly for your pile height. Setting it too low on thick shag forces the motor to work too hard and stresses the roller bearings.
Inspect and Store Properly
Every few months, do a full visual inspection as described earlier. When storing your vacuum for long periods (like seasonal storage), consider removing the brush roller. This prevents the bristles from becoming permanently deformed under the weight of the vacuum if it’s stored upright.
Troubleshooting: What If It Still Doesn’t Work After Replacement?
You’ve installed the new roller perfectly, but something’s still off. Don’t worry; here’s your diagnostic checklist.
Common Post-Replacement Issues
- Roller Won’t Spin: Ensure any drive belt is correctly routed and not twisted. On direct-drive models, make sure the electrical connector is fully clicked in. Verify the roller isn’t jammed by debris in the housing.
- Extreme Noise or Vibration: The new roller might be slightly out of balance if a bristle cluster is missing (rare in new parts) or if it’s not seated correctly in the housing. Remove it and reinstall, ensuring it sits perfectly level.
- Suction is Still Weak: The brush roller is just one part. Check the primary vacuum filter—a clogged filter will kill suction. Also, check for blockages in the hose, wand, and dust cup. The brush roller fix only addresses the agitation problem.
- Burning Smell: This is serious. Immediately unplug. A burning smell after a brush roller change usually means the new roller is binding, causing the motor to overheat, or a belt is slipping and burning. Recheck for obstructions and ensure the roller spins freely by hand.
Conclusion: empowering your cleaning routine
Changing the brush roller on your Shark vacuum is one of the most empowering and cost-effective pieces of home maintenance you can master. It transforms a sluggish, frustrating appliance back into the efficient cleaning dynamo you originally bought. By understanding the signs of wear, arming yourself with the correct part using your model number, and following the simple removal and installation steps, you reclaim control over your vacuum’s performance. Remember, this isn’t a once-every-few-years fix; it’s part of regular upkeep. Incorporate a quick weekly hair-wrap cleanup and a bi-annual full inspection into your routine. Your floors will feel the difference, your vacuum will thank you with a longer life, and your wallet will thank you for avoiding a service call. So next time that “what happened to my suction?” feeling arises, roll up your sleeves. The solution is spinning right there at the front of your machine, and now you know exactly how to fix it.
Frequently Asked Questions
How often should I change my Shark vacuum’s brush roller?
For most households, replacing the brush roller every 6 to 12 months is a good rule of thumb. If you have pets, a lot of carpet, or long hair, inspect it every 3 months and be prepared to change it more frequently. The key is to watch for worn bristles and performance loss, not just the calendar.
What’s the difference between cleaning my brush roller and changing it?
Cleaning means removing hair, string, and debris wrapped around the bristles and in the bearings. This you should do weekly. Changing the brush roller means replacing the entire plastic and bristle assembly because the bristles themselves are permanently flattened, broken, or the roller bearings are worn out and causing noise or wobble.
Do I need special tools to change a Shark brush roller?
No. For 90% of Shark models, you only need a standard Phillips-head screwdriver and maybe a pair of needle-nose pliers for stubborn clips. Some newer models use a simple lever system and require no tools at all for the roller removal itself.
Are all Shark brush rollers the same? Can I use a universal one?
No, they are not universal. The brush roller for a Shark Navigator is different from one for a Shark Rotator or Vertex. They have different lengths, axle sizes, and mounting mechanisms. Always buy a part specifically listed for your exact vacuum model number to ensure a proper fit and function.
My new brush roller is installed but it still doesn’t spin. What’s wrong?
First, ensure the vacuum is unplugged. Manually spin the roller by hand—if it doesn’t move freely, it’s installed incorrectly or there’s debris in the housing. Check if a drive belt (on some models) is missing or broken. On direct-drive models, verify the electrical connector on the roller is fully plugged into the socket on the vacuum housing.
Can I wash my Shark brush roller with water?
You can rinse the plastic barrel and bristles with water to remove sticky grime, but you must let it dry completely (for 24+ hours) before reinstalling. Never submerge the entire assembly if it has bearings that aren’t sealed, as water can rust them. For most users, a thorough dry scraping and picking with tools is safer and sufficient for cleaning.