Changing the brush belt on your Shark Navigator is an essential maintenance task that restores powerful cleaning performance. A worn, stretched, or broken belt causes the brush roll to stop spinning, leading to poor carpet cleaning and picked-up debris being blown back out. This guide provides a detailed, model-agnostic process to diagnose the issue, replace the belt correctly, and get your vacuum working like new again, saving you from costly service calls. Proper belt replacement ensures optimal suction and prolongs your vacuum’s lifespan.
Is your Shark Navigator vacuum cleaner suddenly sounding like it’s running fine, but it’s just not picking up debris from your carpets like it used to? You might notice it glides over dirt but leaves it behind, or you see a tiny puff of dust kicked up behind it. Before you panic and think about buying a new vacuum, take a deep breath. The most common culprit for this specific symptom is a worn-out or broken brush belt. This simple, inexpensive part is the workhorse that connects your vacuum’s motor to the rotating brush roll. When it fails, your vacuum essentially becomes a suction-only tool, great for hard floors but powerless on carpets. Learning how to change the brush belt on a Shark Navigator is a core DIY skill that will save you money, reduce waste, and keep your trusty cleaning companion fighting fit for years. This guide will walk you through every single step, from confident diagnosis to a flawless replacement, with tips that apply to nearly all Shark Navigator models (like the NV350, NV356, NV501, and Lift-away variants).
Key Takeaways
- The brush belt is the critical link: It transfers power from the motor shaft to the brush roll. If it breaks, stretches, or slips off, the brush roll won’t spin, drastically reducing cleaning effectiveness on carpets.
- Diagnosis is key before you start: Always confirm the brush roll spins freely by hand and that the belt is the issue. Look for visible breaks, a loose belt, or a burnt rubber smell before disassembly.
- Use the correct replacement belt: Shark Navigator models use specific belt part numbers (like the 112F or 186B). Using the wrong size or type belt will lead to premature failure or improper fit.
- Cleanliness is part of the repair: Use this opportunity to thoroughly clean the brush roll housing, bearings, and any debris buildup. A clogged housing will strain the new belt immediately.
- Proper alignment prevents re-failure: Ensure the new belt is seated correctly on the motor shaft and the brush roll pulley. The brush roll must sit perfectly level in its housing for even wear.
- Reassembly requires attention: Pay close attention to the order of any plastic covers or clips. Forcing parts can break clips. Ensure the brush roll spins freely before final tightening.
- Regular inspection extends life: Check the brush belt every 3-6 months for wear, cracks, or elongation. Keeping the brush roll clean of hair and fibers is the best way to protect the belt.
📑 Table of Contents
- Understanding Your Shark Navigator’s Brush Belt System
- Essential Tools and the Correct Replacement Belt
- Step-by-Step Guide: Removing the Old Brush Belt
- Installing the New Brush Belt: The Critical Steps
- Reassembly and the All-Important Test
- Troubleshooting Common Problems and Maintenance Tips
- When to Consider Professional Help or Replacement
Understanding Your Shark Navigator’s Brush Belt System
Before we grab a screwdriver, let’s understand what we’re dealing with. The brush belt is not just a simple rubber band. It’s a engineered component, typically a rubber or synthetic polymer with embedded fabric cords for strength and stretch resistance. Its job is to transfer the high-speed rotation from the vacuum’s motor shaft to the brush roll’s pulley. This rotation agitates carpet fibers, lifting embedded dirt and pet hair so the suction can capture it.
What Happens When the Belt Fails?
A belt can fail in several ways. It can snap completely (often with a noticeable “pop” and sudden loss of brush action). It can stretch out over time, becoming too loose to grip the pulleys and causing the brush roll to slip or spin erratically. It can also develop cracks, glazing, or become misshapen from heat and wear. A slipping belt will often emit a distinct burning rubber odor—a sure sign it needs immediate replacement. When this happens, the motor is still running at full speed, but the brush roll is either stationary or spinning too slowly to be effective, leading to that frustrating “suction-only” performance.
Shark Navigator Model Variations
While this guide is designed to be universally applicable, it’s worth noting that Shark Navigator vacuums come in several series. The classic upright (NV350, etc.), the Lift-Away (NV501, etc.), and the newer Rotator models all have slightly different disassembly procedures. The core principle—removing the bottom plate to access the brush roll and belt—remains the same. The main differences lie in the types of clips or screws used and the exact shape of the lower housing. Always work slowly and observe how your specific model comes apart. Taking a quick photo with your phone at each major disassembly step is the best insurance against reassembly confusion.
Essential Tools and the Correct Replacement Belt
Gathering your tools before you start is the hallmark of a smooth repair. You don’t need a mechanic’s toolbox, just a few key items. Using the correct replacement belt is non-negotiable. A generic belt might fit temporarily but will likely fail prematurely or damage other components.
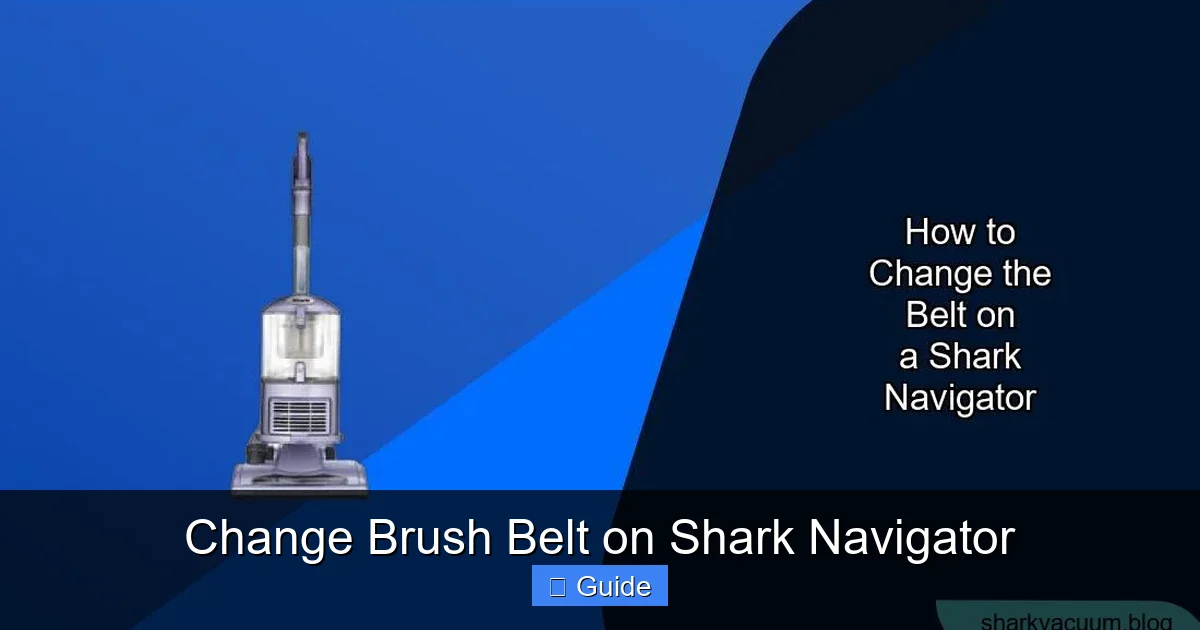
Visual guide about Change Brush Belt on Shark Navigator
Image source: sharkvacuum.blog
Tools You’ll Need
- Phillips-head screwdriver: The most common screw type in Shark vacuums. A #1 or #2 size usually works.
- Flat-head screwdriver (optional but helpful): Useful for prying off plastic retaining clips or stubborn bottom plates without damaging the plastic.
- Needle-nose pliers: Excellent for gripping and pulling the old belt off the motor shaft pulley, which can be tight.
- Scissors or utility knife: To cut away any hair or fibers tightly wrapped around the brush roll bearings.
- A clean, well-lit workspace: A kitchen table or garage bench with a towel laid down to keep parts clean and organized.
- Your smartphone: For taking those crucial “before” and disassembly photos.
Identifying the Correct Shark Navigator Brush Belt
This is the most critical step. Using the wrong belt is the #1 reason for a failed DIY replacement. There are two foolproof ways to find your belt part number.
Method 1: Check the Old Belt. Once you remove the old belt, look for a part number printed or molded onto it. Common Shark Navigator belt numbers include 112F, 186B, 195-3, and 815FFS. This number is your golden ticket.
Method 2: Use Shark’s Official Resources. Go to the Shark website and use their “Find Parts” or “Accessory Finder” tool. You’ll need your vacuum’s exact model number, which is on a sticker on the back or bottom of the canister or upright body. Entering this will show you all compatible parts, including the brush belt. You can also call Shark customer service with your model number for confirmation.
Pro Tip: Consider buying a 2-pack of belts. They are relatively inexpensive, and having a spare means you’re prepared for the next wear cycle without a trip to the store.
Step-by-Step Guide: Removing the Old Brush Belt
Now, let’s get our hands dirty. The process is methodical: gain access, remove the brush roll, take off the old belt, and inspect everything. Patience is your best tool here.

Visual guide about Change Brush Belt on Shark Navigator
Image source: planetsharkdivers.com
Step 1: Preparation and Access
First, unplug your vacuum. This is a safety must. Then, lay the vacuum on its back, resting on its handle and rear wheels, so the bottom plate is facing up and easily accessible. Locate the bottom plate. On most Shark Navigators, it’s a large, usually rectangular or slightly curved plastic cover on the underside of the head. It’s held in place by a series of plastic retaining clips (often black) and sometimes one or two screws.
Start by prying the clips. Insert your flat-head screwdriver into the small gap between the bottom plate and the main plastic housing. Gently twist the screwdriver to pop the clip open. Work your way around the perimeter. The clips can be stiff, so take your time. If your model has screws, use your Phillips screwdriver to remove them and set them aside in a safe spot. Once all clips and screws are released, the bottom plate should drop down or hinge open, revealing the brush roll and belt assembly.
Step 2: Removing the Brush Roll Assembly
With the bottom plate off, you’ll see the brush roll—a cylinder with bristles—sitting in a cradle. It’s usually held in place by two plastic end caps that snap into the housing. To remove it, you typically need to pull the brush roll straight out. However, the belt is looped around it, so you must first slip the belt off one side.
Grab the brush roll and pull it towards you gently. As it comes out, the belt will typically slide off the brush roll’s pulley (the notched wheel on one end). If it doesn’t, you can use needle-nose pliers to gently stretch and unhook it from that side first. Once the belt is free from the brush roll pulley, you can fully lift the brush roll assembly out of the housing. Set it aside on your towel.
Step 3: Removing the Old Belt from the Motor Pulley
Now you see the other end of the problem. The belt is still looped around the small, hard rubber motor shaft pulley attached to the vacuum’s motor. This pulley is often harder to reach and the belt is stretched tightly over it. This is where needle-nose plies become invaluable. Grip the belt firmly with the pliers and pull it over the pulley’s edge. It will require some force as you stretch it past the pulley’s ridge. Work it off slowly to avoid snapping it violently and potentially losing a piece. Once it’s free, pull the entire belt out from the housing.
Step 4: Inspection and Cleaning
Don’t just toss the old belt. Examine it. Where did it break? Is it uniformly stretched? Are there visible cracks or a glazed, shiny surface? This tells you about the wear pattern. Now, inspect the entire brush roll housing. Use this moment for deep cleaning. You’ll likely find a mat of hair, carpet fibers, and debris wrapped around the brush roll’s bearings (the plastic caps on each end) and stuck in the housing’s air channels. Use your scissors to carefully cut and remove all this buildup. A clogged housing creates drag, which puts extra strain on your new belt, causing it to wear out faster. Wipe everything down with a dry cloth.
Installing the New Brush Belt: The Critical Steps
Installation is the reverse of removal, but with one crucial addition: proper alignment and seating. A misaligned belt or brush roll is the fastest way to ruin your new part. Follow these steps meticulously.
Visual guide about Change Brush Belt on Shark Navigator
Image source: planetsharkdivers.com
Step 1: Loop the New Belt onto the Motor Pulley
Take your new, correct belt. It will be a perfect circle when not stretched. First, place it around the motor shaft pulley. This is usually done by stretching the belt slightly and hooking it onto the pulley’s edge. It should sit snugly in the pulley’s groove. Ensure it’s not twisted. A twisted belt will cause violent vibration and immediate failure.
Step 2: Reinstall the Brush Roll
Now, bring the brush roll assembly back into play. Before you put it in, check the brush roll itself. Spin it by hand. It should rotate smoothly and freely. If it’s gritty or stiff, you need to clean or possibly replace its bearings. With the brush roll ready, loop the other end of the new belt onto the brush roll’s pulley. The brush roll pulley is the notched wheel on one end of the brush roll. You will need to stretch the belt slightly again to get it over the pulley’s ridge. Make sure the belt sits evenly in the pulley’s groove all the way around.
Step 3: Seat the Brush Roll Correctly
This is the most important alignment step. With the belt now connecting the motor pulley and the brush roll pulley, carefully lower the brush roll back into its housing cradle. The two end caps must snap into their corresponding slots on the housing. Do not force it. If it doesn’t drop in easily, the belt may be pinched or twisted underneath. Pull the brush roll out slightly, check the belt’s position, and try again. The brush roll must sit perfectly parallel to the floor and at the same height on both ends. If one end is higher, the belt will track off. Once seated, give the brush roll a gentle spin by hand. It should turn smoothly, and the belt should move with it without slipping or binding.
Step 4: Final Check Before Closing Up
Before you reattach the bottom plate, do a final sanity check. Rotate the brush roll by hand several full revolutions. Watch the belt. It should stay perfectly centered on both pulleys. Listen for any rubbing or grinding. If everything sounds and feels smooth, you’re ready to close the housing.
Reassembly and the All-Important Test
Reassembly is simpler than disassembly, but rushing it can undo all your good work.
Reattaching the Bottom Plate
Bring the bottom plate back into position. Align any tabs or screw holes. Start by pressing the plate into the plastic clips. You should hear/feel a series of small clicks as each clip engages. Don’t use excessive force. If a clip won’t seat, the plate is likely misaligned. Remove it and try again. If your model uses screws, reinsert and tighten them securely, but do not overtighten and crack the plastic.
The No-Brush-Roll-Spin Test
Before you plug the vacuum in and turn it on, do this critical test. Lay the vacuum on its side or back again. Gently press the power button to start the motor (you can do this without the vacuum on the floor). Immediately reach underneath and feel the brush roll. It should be spinning vigorously. If it’s not, unplug the vacuum immediately. The most common reason for failure here is a belt that wasn’t fully seated on one of the pulleys. Unplug it, remove the bottom plate again, and double-check the belt’s position on both the motor shaft and the brush roll pulley.
Final Full-Power Test
If the brush roll spins freely on the test, great! Now, do a full test. Plug the vacuum in, stand it upright, and turn it on. Flip the brush roll on (if your model has a separate brush on/off button). Lower the head onto a carpeted area. Listen—you should hear the distinct agitation sound of the brush roll hitting the carpet. Watch—the vacuum should move easily, not feel like it’s sticking or dragging excessively. Finally, look. After a few seconds of vacuuming, lift the head and look at the brush roll. It should be spinning. You can also place a small piece of paper in front of the head; it should be quickly pulled in and chopped up by the brush. If all is well, your repair is a success!
Troubleshooting Common Problems and Maintenance Tips
Even with perfect execution, a few issues can arise. Knowing how to diagnose them saves frustration. Furthermore, proactive maintenance will make your new belt last as long as possible.
“My New Belt Broke/Slipped Immediately!”
This is almost always an alignment or obstruction issue. First, unplug the vacuum. Remove the bottom plate again. Check:
- Is the brush roll level? One end higher than the other will cause the belt to ride up and slip off.
- Is the belt twisted? A twisted belt will fail in seconds.
- Are the bearings clean and spin freely? A brush roll that doesn’t spin easily creates drag that breaks belts.
- Is the housing clogged? Debris packed around the brush roll creates the same drag problem.
Fix any of these issues, clean everything meticulously, and reinstall.
Brush Roll Doesn’t Spin, But the Belt Is Intact
If your new belt is on correctly and tight, but the brush roll still doesn’t spin, the issue may be upstream. The motor shaft pulley itself could be broken or cracked (plastic pulleys can wear out). Alternatively, a clutch mechanism (in some Shark models) might be faulty. This is a more advanced repair. If you’re comfortable, inspect the motor pulley for cracks. If it’s damaged, you may need to replace the motor or the pulley assembly.
Extending the Life of Your New Belt and Brush Roll
The #1 enemy of your brush belt is hair and fiber buildup. Make a habit of this simple monthly maintenance:
- Hair Removal: Use a seam ripper or a dedicated brush roll cleaning tool to slice and pull out any hair wound around the bristles and bearings. Do this with the vacuum unplugged.
- Bearing Cleaning: Every 3-6 months, remove the brush roll and wipe the bearing end caps with a cloth. Ensure they spin freely.
- Housing Wipe-Down: When you have the bottom plate off for belt replacement, wipe the entire housing channel with a dry microfiber cloth.
- Check for Wear: During your monthly hair removal, glance at the belt if you can see it. Look for cracks, glazing, or significant stretching.
When to Consider Professional Help or Replacement
While a belt change is a quintessential DIY project, there are times when calling it quits and seeking help is the smart move. If you’ve meticulously followed this guide, confirmed perfect alignment, cleaned everything, and the new belt still breaks on the first use, the problem is likely a failed motor shaft pulley or a broken clutch assembly. Replacing these components is more involved and may require specialized tools or soldering skills.
Additionally, if your Shark Navigator is very old (8+ years) and you’re frequently replacing belts, motors, or other parts, it might be more cost-effective in the long run to invest in a new vacuum. However, for most models, a belt change is a 20-minute, $15 job that adds years of service. The satisfaction of fixing it yourself and the money saved make it incredibly worthwhile.
Conclusion: Your Shark Navigator is a workhorse, and like any machine, its parts wear out. The brush belt is its most common wear item. By understanding its function, using the correct replacement part, and following the careful, methodical process outlined above, you can conquer this repair with confidence. You’ll restore that powerful carpet-cleaning agitation, eliminate that annoying “suction-only” feeling, and gain a deeper connection to your home’s tools. So next time you notice a drop in performance, don’t reach for the wallet—reach for a screwdriver. You’ve got this.
Frequently Asked Questions
How often should I change the brush belt on my Shark Navigator?
There’s no fixed schedule, as it depends on usage. As a general guideline, inspect the belt every 3-6 months for cracks, stretching, or glazing. With regular cleaning of the brush roll and housing, a belt can last 1-2 years. Heavy use on pet hair and thick carpets may require more frequent changes.
What are the signs that my brush belt needs replacing?
The primary sign is a brush roll that doesn’t spin when the vacuum is on, even though the motor sounds normal. You may also notice a burning rubber smell, visible cracks or fraying on the belt, or a sudden drop in carpet cleaning performance while hard floor cleaning remains fine.
Can I use a generic brush belt instead of the official Shark part?
While generic belts are cheaper, we strongly recommend using the official Shark part number for your specific model. Generic belts often have incorrect dimensions or material composition, leading to slippage, premature breakage, and potential damage to the motor pulley or brush roll.
My brush roll spins, but it’s very slow and the vacuum is hard to push. Is it the belt?
This is a classic symptom of a loose or slipping belt. The belt has likely stretched and can no longer grip the pulleys properly. It could also be due to a severely clogged brush roll housing creating drag. First, clean the housing and brush roll bearings thoroughly. If the problem persists after cleaning, replace the belt.
Is it normal for a new brush belt to have a slight smell when first used?
A very mild “new rubber” smell for the first few uses is normal as the belt breaks in. However, a strong burning smell indicates the belt is slipping excessively due to misalignment, a clogged housing, or a defective belt. Stop using the vacuum and recheck the installation.
My brush roll spins freely by hand, but not when the vacuum is on. Is it always the belt?
Not always. If the brush roll spins freely by hand (a crucial diagnostic step), the issue is likely the belt—it’s broken, missing, or severely stretched. If the brush roll is stiff or gritty when spun by hand, the problem is likely bearing damage or debris jam in the brush roll itself, which would need cleaning or a brush roll replacement.