Regular cleaning is non-negotiable for maintaining your Shark pet vacuum’s powerful suction and longevity. This involves a simple routine: always empty the dust cup after each use, wash the filters monthly with cool water, and thoroughly inspect and clean the brush roll, hose, and airways every 1-2 months. By dedicating just a few minutes to these steps, you prevent clogs, eliminate odors, and ensure your vacuum efficiently tackles pet hair and dander every single time.
Key Takeaways
- Unplug First: Always disconnect your Shark vacuum from the power source before beginning any cleaning or maintenance to ensure safety.
- Empty After Every Use: Get in the habit of emptying the dust cup or replacing the bag after each vacuuming session to maintain optimal airflow and suction power.
- Wash Filters Regularly: Remove and rinse the pre-motor and post-motor filters with cool water monthly (or as indicated by the indicator light). Never use soap or put them in the dishwasher.
- Inspect & Clean Brush Roll: Frequently check the brush roll for wrapped hair, string, or debris. Use scissors or a seam ripper to cut it away, and wipe the bristles clean.
- Check for Blockages: Regularly look inside the hose, wand, and suction path for obstructions. A clogged hose is a common cause of lost suction.
- Reassemble Correctly: Ensure all components—filters, dust cup, brush roll housing—are fully clicked and sealed into place before your next use to prevent air leaks.
- Establish a Schedule: Combine quick post-use empties with a deeper monthly or bi-monthly cleaning routine to keep your Shark pet vacuum in peak condition.
📑 Table of Contents
Why Cleaning Your Shark Pet Vacuum is Absolutely Essential
Let’s be honest: your Shark pet vacuum is a hero. It bravely faces the daily onslaught of dog hair bunnies rolling across the floor, the mysterious kitty litter tracked from the box, and enough dander to make an allergy sufferer weep. But a hero needs maintenance. A dirty vacuum isn’t just gross—it’s ineffective. Clogged filters, a jammed brush roll, and a full dust cup strangle your vacuum’s suction power, turning your trusted cleaning sidekick into a sad, wheezing shadow of its former self. For pet owners, this is especially critical. Pet hair is notoriously tenacious, and dander is microscopic. If your vacuum can’t pull air efficiently, it’s leaving behind the very allergens you bought it to eliminate. Regular, thorough cleaning isn’t a chore; it’s an investment in your home’s hygiene and your vacuum’s lifespan. Think of it like changing the oil in your car—skip it, and you’re heading for a breakdown.
The Domino Effect of Neglect
When you let cleaning slide, one problem leads to another. A full dust cup makes the motor work harder, generating excess heat. Clogged filters restrict airflow, further straining the motor and reducing suction at the floor. A brush roll matted with hair can’t spin properly, so it stops agitating carpet fibers and just pushes debris around. This creates a frustrating cycle where you have to vacuum over the same spot multiple times, using more electricity and wearing out parts faster. For Shark models specifically designed for pet hair, like the Vertex, Rotator, or Navigator lines, this neglect completely undermines their specialized engineering. The self-cleaning brush roll feature, for instance, is useless if the housing itself is caked with lint. By staying on top of cleaning, you protect your investment, ensure consistent performance, and keep your home truly clean for both you and your furry family members.
Gathering Your Supplies & Safety First
Before you dive in, a quick prep step saves time and hassle. You don’t need a toolbox—just a few common household items. Grab a flathead screwdriver (sometimes needed for brush roll caps), a pair of scissors (preferably with a pointed tip), a seam ripper (the absolute best tool for cutting wrapped hair), a microfiber cloth, a soft-bristle brush (like an old toothbrush or dedicated vacuum brush), and a sink or large basin for washing filters. Have your Shark vacuum’s user manual handy, too. Model-specific instructions, especially for filter removal or brush roll access, can vary slightly. The most important supply, however, is patience. Rushing can lead to missed debris or improper reassembly.
Visual guide about How to Clean a Shark Pet Vacuum
Image source: i.redd.it
Critical Safety Precautions
This cannot be stressed enough: always unplug your Shark vacuum from the electrical outlet before starting any disassembly or cleaning. It seems obvious, but it’s the single most important safety rule. The brush roll can suddenly spin if triggered, and you could easily damage internal components or injure yourself with a screwdriver. Also, never immerse the main vacuum body, motor housing, or any electrical components in water. Only the washable filters (clearly labeled) and, in some models, the dust cup are designed to get wet. If you spill liquid on the vacuum, disconnect it immediately and let it dry completely for 24-48 hours before attempting to use it again. Water and electricity are a dangerous mix inside your vacuum’s intricate pathways.
The Step-by-Step Deep Cleaning Process
Now, let’s get our hands dirty—in a good way! We’ll break this down into a logical flow, starting with the easiest, most frequent tasks and moving to the more involved monthly maintenance. Follow this sequence for the most efficient clean.
Visual guide about How to Clean a Shark Pet Vacuum
Image source: tvoutlet.ca
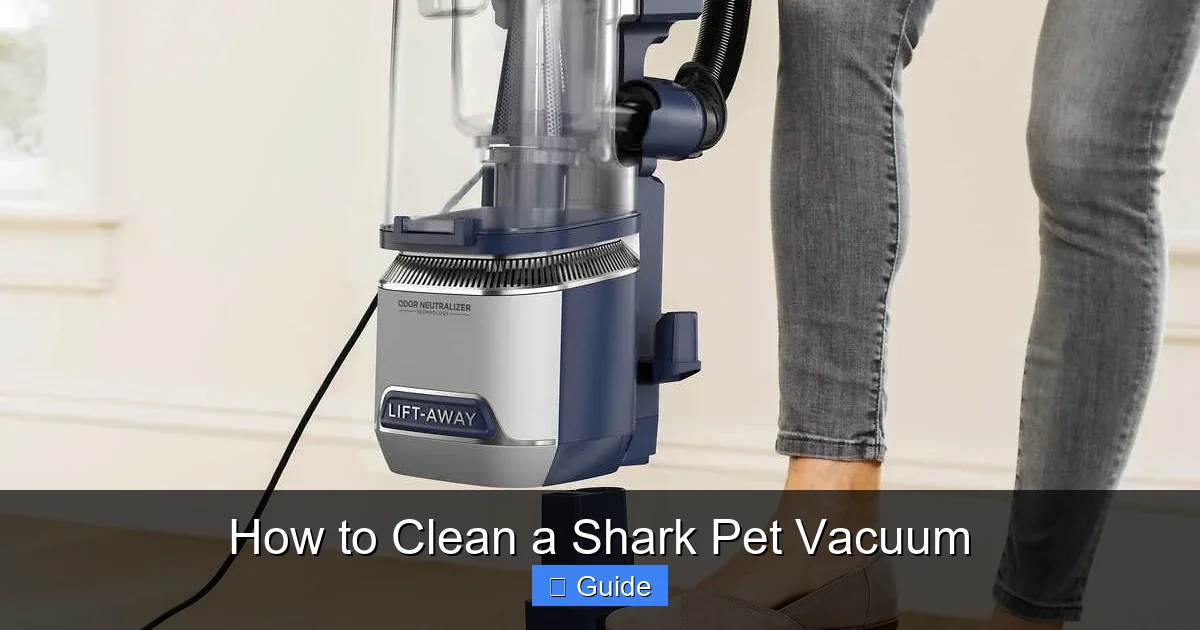
Step 1: Empty the Dust Cup & Clean the Exterior
This is your daily habit. Press the release button to detach the dust cup. Hold it over a trash can and press the bottom release button to empty the contents. For a truly clean start, give the inside of the dust cup a wipe-down with a dry microfiber cloth. Don’t be shy—tap it gently against the side of the trash can to dislodge any fine dust that’s clinging to the walls. Check the inlet at the top where it connects to the vacuum; a lot of hair and gunk can accumulate there. Use your fingers or the soft brush to clear it out. Wipe the exterior of the dust cup and the vacuum body with a damp cloth. This simple step prevents dust from being recirculated and keeps your vacuum looking sharp.
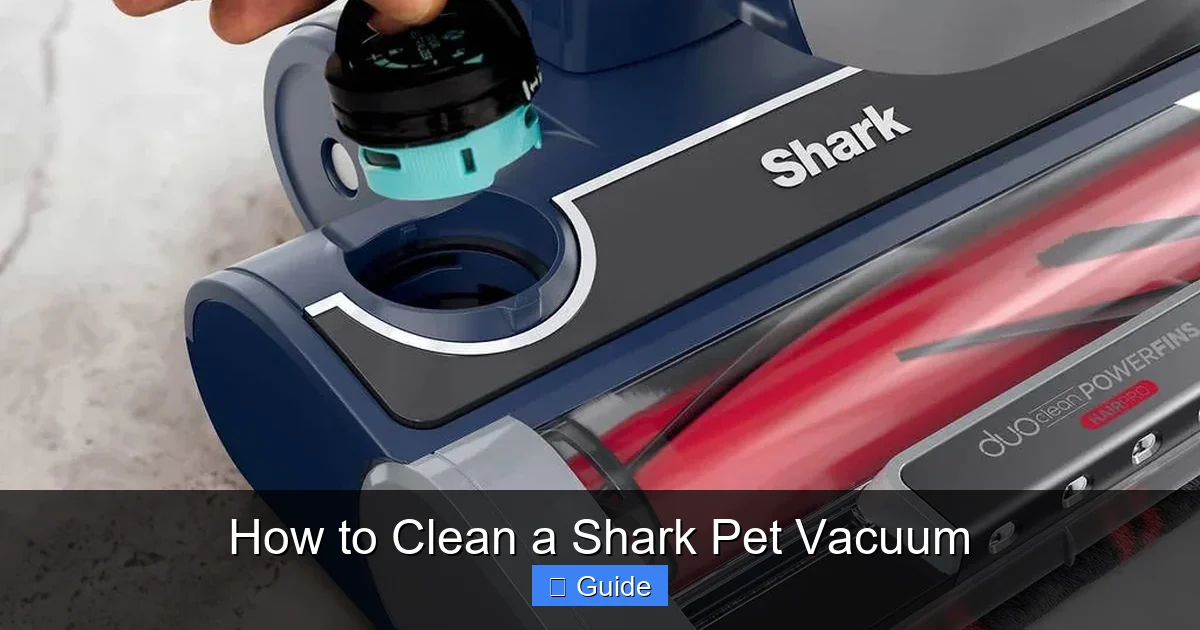
Step 2: The Filter Wash & Dry Ritual
Shark pet vacuums typically have at least two filters: a pre-motor filter (protects the motor from dust) and a post-motor filter (cleans exhaust air). Some models also have a foam filter. Locate them—usually behind a door on the back or side of the vacuum. Gently remove them. Take them to your sink. Rinse them thoroughly under cool, running water. Do not use any soap, detergent, or cleaning agents, as residues can damage the filter media and release odors when the vacuum heats up. Gently squeeze excess water—do not wring or twist, as this can tear the filter material. The most crucial part: air-drying. Place the filters in a well-ventilated area, upright or laying flat, and let them dry completely for at least 24 hours. Never use a hair dryer or place them in an oven to speed up drying. A damp filter will clog instantly when reinstalled and can damage the motor. Only reinsert filters when they are 100% dry to the touch. This monthly ritual is the single biggest factor in maintaining strong suction and healthy air quality.
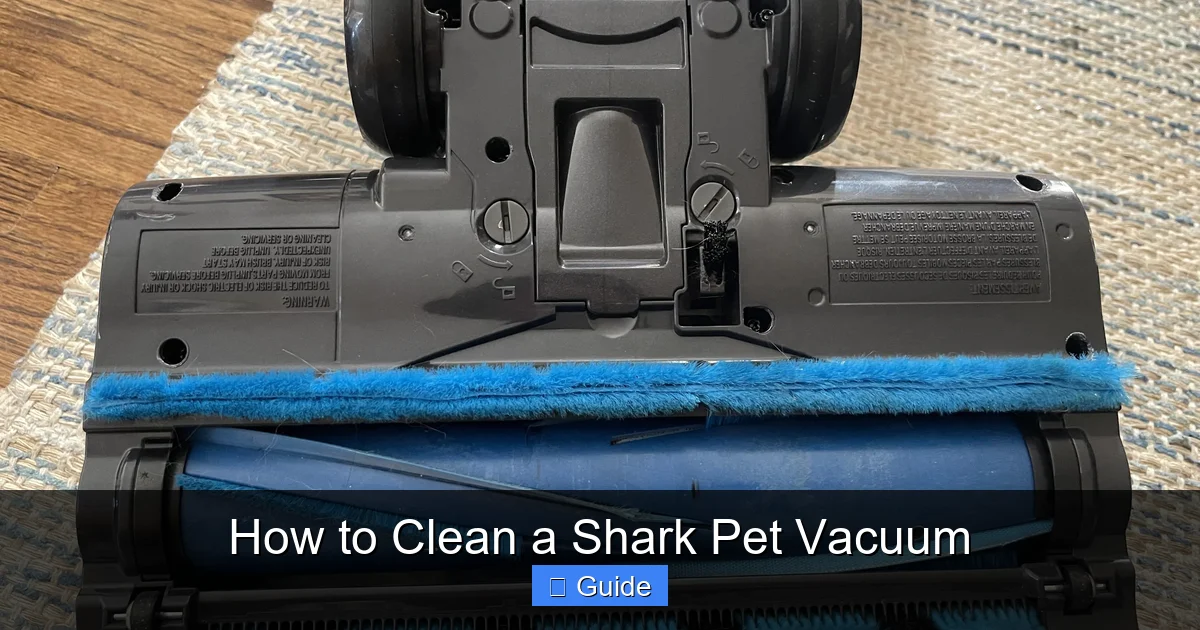
Step 3: The Brush Roll Surgery
The brush roll (or roller brush) is where the battle against pet hair is won and lost. Hair, string, carpet fibers, and even small pieces of toy can wrap around the axle and bristles, stopping it from spinning. First, lay your vacuum on its back for easy access. Most Shark models have a release lever or button on the brush roll housing. Press it and the entire brush roll assembly should pop out. If it’s stubborn, consult your manual—some require a screwdriver to remove a cap. Once out, take it to a well-lit area. You’ll likely see a solid cylinder of hair. This is where your seam ripper shines. Slip the pointed tip under the wrapped hair and gently cut it. Be careful not to cut the bristles themselves. For long hairs, you can often just unwind them by hand. Once the bulk is removed, use your soft brush or an old toothbrush to clean debris from between the bristles and around the end caps. If your model has a self-cleaning brush roll with a comb-like mechanism, ensure the comb teeth are clear of debris. Wipe the entire assembly with a damp cloth. Inspect the bristles; if they are melted or severely damaged (common from running over plastic toy parts), it’s time for a replacement brush roll. Reinstall it, ensuring it clicks securely and spins freely.
Step 4: Unclogging the Hose, Wand, and Attachments
Suction loss often comes from a hidden blockage. Detach the hose from both the vacuum body and the wand. Look through it. If you see a clog, use the handle end of a long-handled brush (or a straightened wire coat hanger with a hook on the end) to gently dislodge it. Be careful not to puncture the hose. For wand clogs, detach any extension wands and look through them. Check all the attachments—the crevice tool, upholstery brush, and pet power brush. Pet hair can pack into the narrow ends. Use a bottle brush or a long, thin tool to clear these out. Finally, check the suction opening on the vacuum’s base where the hose connects. A flashlight can help you see inside. Clear any debris you find with your brush or a damp cloth. Reattach all parts firmly.
Step 5: Final Wipe-Down & Reassembly
With the internal components clean, give the entire vacuum a final once-over. Wipe down the main body, handle, and power cord with a slightly damp microfiber cloth. Avoid getting moisture near electrical ports and switches. Pay special attention to the wheel wells and the area around the brush roll housing—these spots collect dust bunnies and hair. Let the vacuum stand upright for a few minutes to air out any residual moisture. Now, carefully reassemble. Insert the completely dry filters, making sure they seat properly in their housings. Click the dust cup back on until you hear it lock. Reattach the hose and wand. Ensure the brush roll housing is securely fastened. Give the brush roll a final spin by hand to confirm it rotates smoothly without resistance. Plug it in, and you’re ready for action.
Establishing Your Shark Pet Vacuum Maintenance Schedule
Cleaning doesn’t have to be a massive, all-day project. By breaking it into frequency-based tasks, it becomes a manageable habit. Think of it in tiers: after every use, weekly, monthly, and seasonally.
Visual guide about How to Clean a Shark Pet Vacuum
Image source: files.constantcontact.com
After Every Single Use: The 60-Second Reset
This is non-negotiable for pet owners. After you finish vacuuming, immediately empty the dust cup. Don’t let it sit full. Tap it out over the trash and give it a quick wipe. This prevents odors from setting in and stops fine dust from leaking back into your home when the vacuum is stored. Also, quickly check the brush roll visually—if you see obvious hair wrapping, cut it off now before it becomes a solid mass. Unplug the vacuum and wind the cord neatly to prevent damage.
Weekly & Monthly: The Core Maintenance
Once a week, do a quick visual inspection. Check the brush roll for hair wrapping and clear it if needed. Wipe the exterior and wheels with a damp cloth. Once a month, perform the full filter wash as described above. Also, check the hose and wand for any developing clogs by looking through them. A monthly quick-check of the brush roll bearings—if it sounds noisy or feels gritty when spun by hand—can alert you to a problem needing a part replacement before it causes bigger issues.
Every 3-6 Months: The Deep Dive
This is when you do the full process outlined in the previous section: complete filter wash, thorough brush roll removal and cleaning, and a systematic check of all airways and attachments. This schedule ensures that built-up, fine dust and compacted pet hair are dealt with before they significantly impact performance. For homes with multiple pets, heavy shedders, or if you vacuum daily, lean toward the 3-month mark for this deep clean.
Troubleshooting: When Cleaning Isn’t Enough
Sometimes, even after a meticulous clean, your Shark might not be performing as expected. Before you panic, here are some common issues and their solutions.
Loss of Suction After Cleaning
First, double-check that all filters are 100% dry. A single damp filter will destroy suction. Next, ensure every component is fully seated: the dust cup must click into place, filters must be inserted correctly, and the hose must be firmly attached at both ends. A tiny air leak anywhere in the system will kill suction. Finally, check the brush roll. If it’s not spinning (or is extremely difficult to spin by hand), there may be a broken belt or a seized bearing, requiring a part replacement.
Strange Noises or Smells
A high-pitched whine could indicate a clogged filter or a failing motor bearing. A burning smell is a major red flag—unplug immediately. This could be an overheating motor or, in rare cases, an electrical issue. Smells of burnt hair usually mean the brush roll bearings are clogged with debris and have overheated. Cleaning the brush roll thoroughly often resolves this. If the smell persists after cleaning, contact Shark customer support.
Brush Roll Not Spinning
If the vacuum runs but the brush roll doesn’t turn, the most common culprit is a broken or slipped drive belt (in models that use one). First, ensure the brush roll is properly installed and not jammed with debris. If it spins freely by hand, the belt may have snapped. You’ll need to access the belt compartment (usually on the underside) and replace it. In Shark’s “Zero-M” or self-cleaning brush roll models, a jammed internal mechanism can also stop rotation—a thorough cleaning of the brush roll and its housing often fixes this.
The Payoff: What You Gain From a Clean Shark Pet Vacuum
Sticking to this cleaning regimen pays massive dividends. First and foremost, you restore and preserve the legendary Shark suction power. You’ll notice it picks up more debris in fewer passes, making your chores faster. For pet owners, this means a visibly cleaner floor and less visible hair on furniture. More importantly, a clean filter system captures more dander and microscopic allergens, leading to noticeably better air quality in your home—a game-changer for allergy sufferers. You also extend the life of your vacuum. A motor that isn’t straining against clogs and filters lasts years longer. You’ll avoid costly repairs or premature replacement. Finally, there’s the simple satisfaction of using a tool that looks, smells, and performs like new. Your Shark pet vacuum works hard for you; this guide ensures it can keep working hard, for a very long time.
Frequently Asked Questions
Can I wash my Shark vacuum filters with soap?
No, you should never use soap, detergent, or any cleaning solutions on your Shark vacuum’s filters. Simply rinse them thoroughly under cool, running water to remove dust and debris. Soap can leave a residue that damages the filter material and may cause unpleasant odors when the vacuum’s motor heats up during use.
How often should I clean the brush roll on my Shark pet vacuum?
You should visually inspect and manually clear any wrapped hair or debris from the brush roll after every single use, as pet hair tangles quickly. For a full removal, cleaning, and inspection of the brush roll assembly, do this at least once a month, or more frequently if you have heavy shedders.
My Shark vacuum smells like burnt hair. What should I do?
Unplug the vacuum immediately. This smell usually indicates the brush roll bearings are clogged with debris and have overheated. Remove the brush roll assembly and thoroughly clean all hair, string, and lint from the bearings and inside the housing. Let it dry completely before reinstalling. If the smell persists after a thorough clean, contact Shark customer service as there may be a deeper issue.
Why is my Shark vacuum losing suction even after I cleaned the filters?
If filters are clean and dry, check for other air leaks. Ensure the dust cup is fully clicked into place and the seal is clean. Verify all hoses and wands are firmly connected. The most likely remaining culprit is a clog in the hose, wand, or the suction path behind the brush roll. Detach the hose and look through it to find and clear any blockage.
Can I use a damp cloth to clean the inside of the hose?
Yes, but with caution. You can use a damp (not soaking wet) microfiber cloth attached to a flexible tool, like a bottle brush or a long, thin stick, to scrub the inside of the hose. Afterward, push a dry, lint-free cloth through to absorb moisture, and then let the hose air-dry completely before reattaching it to prevent moisture from entering the motor.
How do I store my Shark pet vacuum to keep it in good condition?
Store it in a cool, dry place away from direct sunlight and extreme temperatures. Always empty the dust cup and ensure filters are dry before storage. Coil the power cord loosely around the cord hooks—do not kink or pinch it. If storing for a long period (e.g., seasonal), consider removing the brush roll to prevent the bristles from becoming permanently deformed under tension.