Disassembling your Shark Navigator vacuum is a straightforward process that dramatically improves cleaning power and extends the machine’s life. By following a systematic, model-agnostic approach—always starting with unplugging and power head removal—you can safely access and clean every critical component, from the brush roll and hose to the dust cup and filters. Proper cleaning and careful reassembly are key to restoring suction and preventing future clogs.
So, your trusty Shark Navigator vacuum has lost its mighty suction. That familiar, powerful whoosh has turned into a weak sigh, and it’s not picking up like it used to. Before you resign yourself to a costly replacement or a service call, take a deep breath. The solution is very likely sitting right there in your closet, waiting for a little love and attention. The most common culprit for lost suction is a clog somewhere in the intricate airway system of your vacuum. Disassembling your Shark Navigator isn’t just a repair chore; it’s a vital maintenance ritual that breathes new life into your machine. It might sound intimidating, with its hoses, buttons, and mysterious internal chambers, but we’re going to break it down into a simple, logical, and safe process. Think of it less like performing surgery and more like taking apart a Lego set—everything has a specific place and a clear way it comes apart. By the end of this guide, you’ll know your Shark Navigator better than you ever have, and you’ll have the skills to keep it performing at its peak for years to come.
The philosophy behind any vacuum disassembly is universal: follow the path of the air. Dirt and debris are pulled from your floor, through the brush roll, up the hose, into the dust cup, and finally through the motor and exhaust filters. A clog can happen at any single point along that journey. Our mission is to methodically check each segment. We’ll start with the most accessible and commonly clogged areas—the brush roll and the hose—and work our way back to the main body. This approach ensures you clear the most likely blockages first, which often solves the problem without needing to delve into the more delicate internal components. Remember, patience is your most important tool. Rushing can lead to broken clips or lost screws. Work in a well-lit area, spread a towel on the floor to catch any small parts, and give yourself plenty of time. This isn’t a race; it’s a diagnostic and cleaning session for your home’s most hardworking appliance.
Key Takeaways
- Safety First: Always unplug the vacuum and remove the power head before starting any disassembly to prevent electrical hazards and accidental activation.
- Model Variations Exist: While core steps are similar, latch mechanisms, filter types, and screw locations can differ between Navigator models (e.g., Lift-Away, Rotator, Pro). Consult your specific manual if possible.
- Focus on Airflow Paths: The primary goal is to clear blockages from the entire air pathway: brush roll, hose, wand, dust cup, and post-motor filters.
- Clean, Don’t Just Disassemble: Use this opportunity to thoroughly wash filters (if washable), clear debris from hoses with a long tool, and remove hair from the brush roll bearings.
- Document Your Process: Taking phone photos at each stage is the best way to ensure correct reassembly, especially for complex hose connections and electrical connectors.
- Reassembly is Half the Battle: Ensure all clips, latches, and seals click firmly into place. A single unsealed connection can cause a major loss in suction.
- Regular Maintenance Prevents Major Disassembly: A quick 5-minute brush roll cleaning and filter tap-out after every few uses can often eliminate the need for a full tear-down.
📑 Table of Contents
- Essential Preparation: Tools, Safety, and First Steps
- Step 1: The Brush Roll Deep Clean – The Heart of the Issue
- Step 2: Clearing the Hose and Wand – The Hidden Highway
- Step 3: Opening the Dust Cup/Canister – The Main Collection Chamber
- Step 4: The Post-Motor Filters – The Final Line of Defense
- Step 5: Final Inspection and Reassembly – The Payoff
- Conclusion: Restoring the Power and the Peace of Mind
Essential Preparation: Tools, Safety, and First Steps
Before you touch a single screw or clip, we need to set the stage for a safe and successful operation. The absolute first and non-negotiable rule is to unplug the vacuum from the wall outlet. This seems obvious, but it’s a critical safety step to prevent the motor from accidentally turning on while your fingers are inside the housing. Second, always begin by removing the main power head or floor nozzle. This is the part that actually touches your carpet. On nearly every Shark Navigator model, this detaches with a simple lever or button press. Locate the release mechanism—it’s usually a large, red or gray button on the back of the connection point between the wand and the power head. Press it and pull the power head straight off. This does two things: it makes the rest of the vacuum significantly lighter and easier to handle, and it gives you immediate access to the first common clog zone: the intake behind the brush roll.
Gathering Your Toolkit
You don’t need a full workshop. A small, dedicated toolkit will suffice. Gather these items:
- Phillips-head screwdriver: The most common screw type in Shark vacuums is the Phillips #2. A small, precision set is helpful.
- Flat-head screwdriver: Useful for prying open stubborn plastic clips without damaging them. Wrap the tip in a little masking tape to prevent marring the plastic.
- Needle-nose pliers: Perfect for gripping and removing hair tangled deep in the brush roll bearings or extracting small debris from crevices.
- A small container or magnetic tray: To corral screws and small clips. Losing one tiny screw can mean a reassembly nightmare.
- A pair of scissors: For cutting away matted hair and carpet fibers wrapped around the brush roll.
- A long, flexible cleaning brush or a straightened wire coat hanger: To gently scrub inside hoses and narrow channels.
- A microfiber cloth and mild soap: For wiping down plastic parts. Avoid harsh chemicals that could damage the plastic or leave residues.
- Your smartphone camera: The single best tool for reassembly. Snap a photo after every disconnect.
Understanding Shark Navigator Model Families
While this guide is designed to be universally applicable, it helps to know the main Shark Navigator lineages, as they have subtle differences:
- Shark Navigator Lift-Away: Characterized by a detachable pod that contains the motor and dust cup. The entire canister lifts away from the base for portable cleaning. Disassembly often involves separating this pod.
- Shark Navigator Rotator: Features a rotating power head and a more integrated dust cup system. The release mechanisms might be located differently.
- Shark Navigator Pro: Often has a more streamlined, “bagless” design with a single, large dust cup that empties with a button press. Access points are typically very user-friendly.
Don’t worry if you’re not sure which you have. The fundamental steps—remove power head, check brush roll, clear hose, open dust cup, clean filters—are identical across all models. Just pay close attention to how clips and latches feel as you work; they are designed to be intuitive.
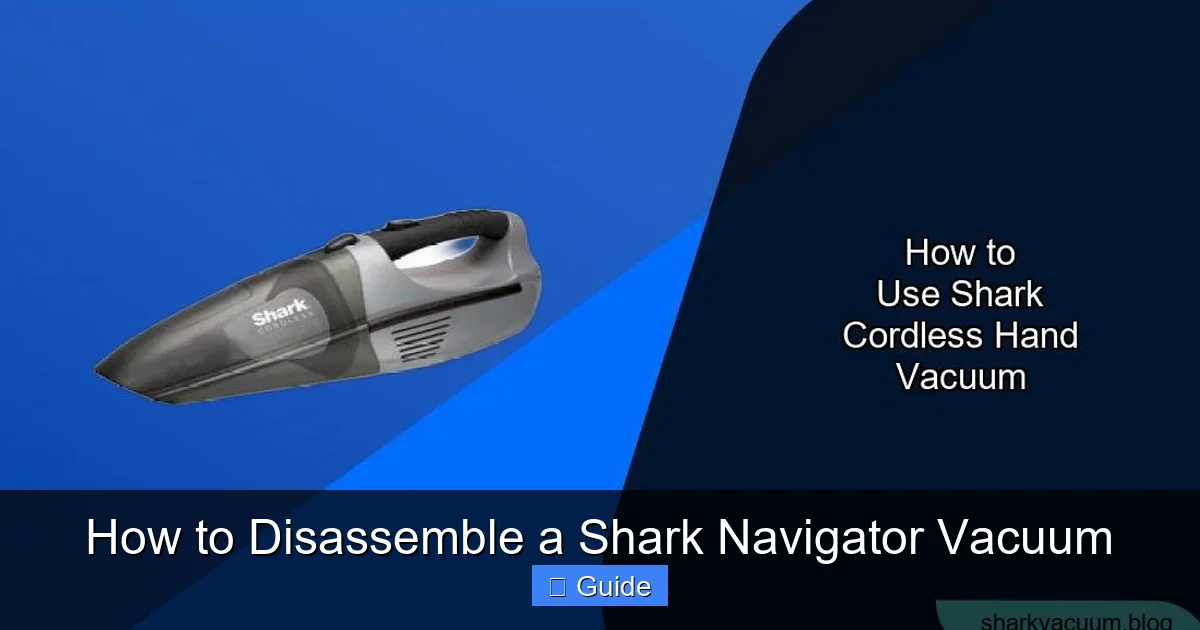
Step 1: The Brush Roll Deep Clean – The Heart of the Issue
The brush roll, that cylindrical bristle bar that agitates carpet fibers, is the number one victim of hair and fiber wrap. When it’s jammed, it can’t spin properly, which drastically reduces agitation and suction. Even if it spins, a mat of hair wrapped around the axle creates immense drag on the motor. Let’s liberate it.

Visual guide about How to Disassemble a Shark Navigator Vacuum
Image source: sharkvacuum.blog
Accessing and Removing the Brush Roll
With the power head detached and sitting on its side on your towel, flip it over. You’ll see the brush roll covered by a plastic plate or shield. This is held on by either two clips or two screws. Look carefully. If you see small plastic tabs on either side, you have clips. Use your flat-head screwdriver (wrapped in tape!) to gently pry one tab away from the housing; it should pop open. Do the same for the other side, and the plate will lift off. If you see screw heads, use your Phillips screwdriver to remove them and set them aside. With the plate off, you’ll see the brush roll itself. It’s usually held in place by a belt (a black rubber loop) and/or plastic end caps. Gently pull the brush roll straight up and out. The belt may slip off or stay on the motor shaft—that’s fine. Take this opportunity to inspect the belt. If it’s cracked, stretched, or glazed, it needs replacement. A worn belt is a silent suction killer.
De-hairing and Bearing Inspection
Now, the satisfying (and sometimes gross) part. Take your scissors and carefully cut any mats of hair, carpet fiber, or string wrapped around the bristles. Be meticulous, getting right down to the plastic core. Then, focus on the two plastic end caps that were on the brush roll axle. Using needle-nose pliers, pull out any hair packed into the tiny bearing holes inside these caps. This hair acts as a brake, stopping the bearings from spinning freely. If the bearings feel gritty or don’t spin smoothly when you flick the axle with your finger, the brush roll assembly may need to be replaced. A seized brush roll strains the motor and kills performance. Once clean, set the brush roll aside on a clean part of your towel.
Step 2: Clearing the Hose and Wand – The Hidden Highway
With the brush roll out, we move upstream. The hose is the flexible conduit that connects the power head to the main canister. It’s a common site for lodged debris, especially if you’ve vacuumed up small, hard items like paperclips, LEGO pieces, or large amounts of pet hair that can compact inside.
Visual guide about How to Disassemble a Shark Navigator Vacuum
Image source: sharkvacuum.blog
Detaching the Hose
Locate where the hose connects to the back of the power head (you may have already done this when removing the head). There is usually a large, ribbed plastic collar. Twist it counter-clockwise (lefty-loosey) to release it from the power head inlet. Now, follow the hose up to where it connects to the main vacuum body/canister. On most Navigators, this connection is also a twist-lock. Find the release tab or button—it might be a small gray or red lever. Depress it and twist the hose connector counter-clockwise to detach it completely. You now have a loose hose. Hold it up to a light source and look inside. You’ll likely see a dark obstruction. This is your clog.
Dislodging the Clog
This is where your long brush or coat hanger comes in. Gently feed it into one end of the hose. Work it back and forth, trying to break up the compacted mass. You can also try the “pressure flush” method: take the hose outside, hold it vertically, and drop a heavy, small object (like a large marble or a thick screwdriver handle) down the hose. Let it fall and bounce on the clog. The impact can often dislodge it. Be careful not to puncture the hose. Once the clog is loose, shake it out into a trash can. For a final clean, push your flexible brush through the entire length of the hose. You can also run a mild soapy water solution through it (if your model’s manual says it’s safe) and let it air dry completely overnight before reassembly. Never use a rigid metal wire, as it can easily tear the hose’s inner lining.
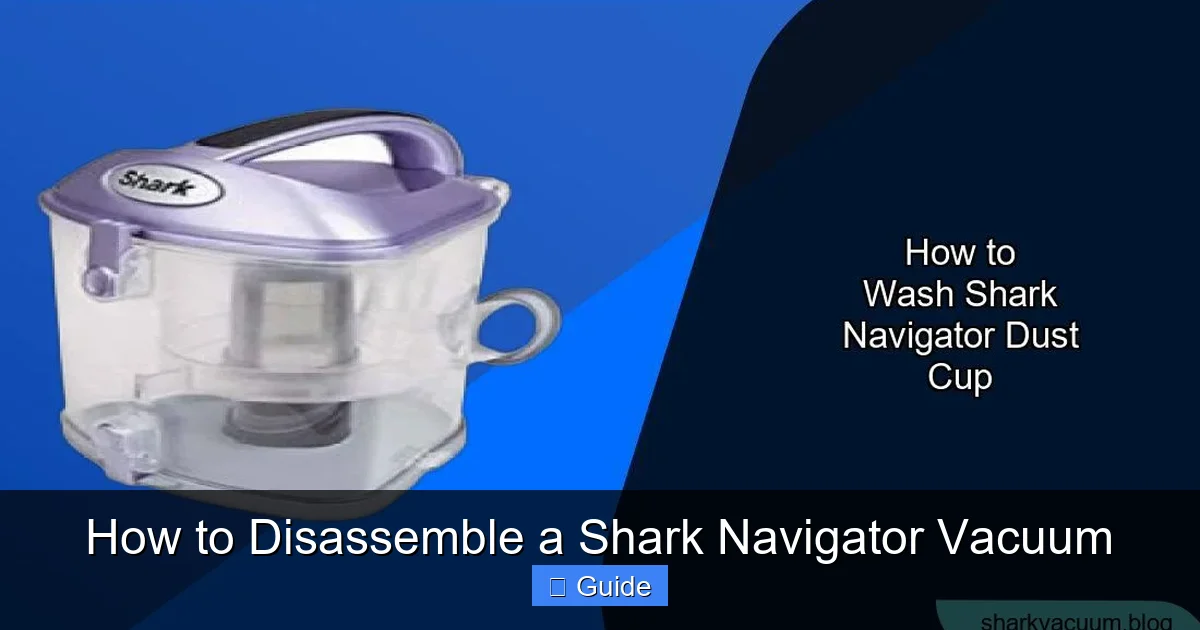
Step 3: Opening the Dust Cup/Canister – The Main Collection Chamber
Now we turn our attention to the main body of the vacuum, the part that houses the dust cup and motor. This is where the bulk of the debris ends up. Shark’s “bagless” systems are great, but they require periodic deep cleaning of the internal cyclones and filters.
Visual guide about How to Disassemble a Shark Navigator Vacuum
Image source: sharkvacuum.blog
Releasing and Emptying the Dust Cup
Stand your vacuum upright. On the front, you’ll find the large, translucent dust cup. It has a prominent “Empty” button or lever, usually at the top or bottom. Press this button. The cup should hinge open at the bottom, dumping its contents into a trash can. But we’re not just emptying; we’re disassembling for cleaning. Look for a secondary release mechanism that allows the entire cup to separate from the vacuum body. This is often a latch or a second button on the back of the cup where it connects to the main housing. Press this and lift the entire dust cup assembly straight off. You now have the primary collection chamber in your hands.
Accessing the Internal Cyclones and Pre-Motor Filter
Place the dust cup on your towel, with the opening facing up. Inside, you’ll see a central cone (the cyclone) and a cylindrical filter housing. The cyclone is the part that spins the air to separate dirt from the air stream. It must be removed for cleaning. It is almost always held in by a simple twist-lock or a single clip. Gently twist it counter-clockwise or pry the clip, and lift the cyclone out. Set it aside. Behind the cyclone, you’ll see the pre-motor filter (often a rectangular foam or pleated paper filter). This is a critical filter that protects the motor from fine dust. It will be held in by a plastic frame or a simple clip. Release it and remove the filter. This filter is typically washable (check your manual!). Rinse it under cool water until the water runs clear, gently squeeze out excess water, and let it air dry for at least 24 hours. Never use a wet filter in the vacuum.
Step 4: The Post-Motor Filters – The Final Line of Defense
With the pre-motor filter out, you’ve cleared the air path up to the motor. But the air must be cleaned *again* after it passes through the motor to protect your home’s air quality. These are the post-motor or exhaust filters.
Locating and Removing Exhaust Filters
Turn the main vacuum body over so you’re looking at the bottom. You’ll see a large, usually circular or rectangular, plastic cover held on by clips or screws. This is the motor housing cover. If it has clips, use your flat-head screwdriver to gently pry around the edge until the cover pops off. If it has screws, remove them. Be prepared—this cover can be stiff. Once the cover is off, you’ll see the motor itself (a cylindrical metal component) and attached to its exhaust port, one or two filters. Common configurations are a foam filter and/or a pleated HEPA-style filter. They are held in by plastic frames or simply sit in a recess. Carefully pull them out. These filters are almost always washable on Navigator models, but again, confirm in your manual. Wash them as you did the pre-motor filter and set them aside to dry completely.
Step 5: Final Inspection and Reassembly – The Payoff
At this point, you have every major component of the airflow path disassembled and accessible. Before you start putting things back, do a final, thorough inspection.
Clearing the Final Channels
With the motor cover off, look into the large chamber where the dust cup used to connect. Use your flashlight and flexible brush to clean out any dust that has settled in the bottom corners. Check the rubber seals and gaskets on the dust cup and motor housing; they should be pliable and free of tears. Wipe all plastic parts down with your damp microfiber cloth. Now is also the time to check the electrical connectors. You might see a small plastic plug where the power head’s cord connects to the main body. Ensure those contacts are clean and not corroded.
The Golden Rule of Reassembly: Reverse Order, with Vigilance
Reassembly is simply the disassembly process in reverse, but with intense attention to fit and seal. Do not force any part. If it doesn’t click or slide in easily, you’re misaligned. Refer to your photos. Here is the general order:
- Filters First: Insert the completely dry post-motor filters back into their slots in the motor housing. Ensure they sit flush.
- Motor Cover: Snap or screw the motor housing cover back on. Ensure all clips are fully engaged. A loose cover can create an air leak.
- Pre-Motor Filter & Cyclone: Place the dry pre-motor filter in its frame, then reinsert the cyclone into the dust cup, twisting or clipping it secure. Place this entire assembly back into the main vacuum body, aligning the tabs and pushing until it clicks into its sealed position.
- Dust Cup: Reattach the empty dust cup to the main body, ensuring the latch clicks firmly. Test the “Empty” button to make sure it still functions.
- Hose: Reconnect the hose to the main body first, twisting it clockwise until it’s tight and the lock tab engages. Then connect it to the power head.
- Brush Roll: Slip the cleaned brush roll back into the power head housing. Reattach the drive belt if it’s the type that sits on a motor pulley. It can be tricky; you may need to stretch it over both the brush roll axle and the motor shaft simultaneously. Then, snap the brush roll cover/plate back on, ensuring all clips are seated.
- Final Connection: Align the power head with the wand connection and push it in until you hear a definitive click. Test the release button to ensure it still works.
Conclusion: Restoring the Power and the Peace of Mind
You did it. You’ve navigated the intricate pathways of your Shark Navigator, from the bristles of the brush roll to the final exhaust filter. The process of disassembly, while detailed, is a powerful act of ownership and care. You’ve not only likely solved the immediate suction problem by clearing a stubborn clog or washing a saturated filter, but you’ve also gained an intimate understanding of how your vacuum works. This knowledge is invaluable. Future issues will be less mysterious, and you’ll be able to perform quick, targeted cleanings—like a 2-minute brush roll de-hairing—that prevent the need for a full teardown again. Your Shark Navigator is engineered for durability and serviceability. By embracing this maintenance routine every 6-12 months depending on use, you protect your investment, ensure optimal cleaning performance, and contribute to a healthier home environment by ensuring the air expelled from your vacuum is truly clean. That powerful, satisfying whoosh you hear when you plug it back in and turn it on? That’s the sound of a machine restored, and a job well done.
Frequently Asked Questions
Do I need special tools to disassemble my Shark Navigator?
No, you only need common household tools: a Phillips-head screwdriver, a flat-head screwdriver, and needle-nose pliers. A long flexible brush or coat hanger is helpful for cleaning hoses.
My Shark Navigator model doesn’t have obvious screws on the brush roll housing. What do I do?
Look carefully for plastic tabs on the sides of the brush roll cover. These are clips. Use a flat-head screwdriver (wrapped in tape to protect the plastic) to gently pry them open. Many Navigator models use clips instead of screws for this access panel.
Can I wash the HEPA filter in my Shark Navigator?
Most Shark Navigator models have washable pre-motor foam filters and washable post-motor foam/HEPA-style filters. Always check your specific user manual first. If washable, rinse with cool water only, squeeze gently, and air-dry completely for 24 hours before reuse.
What’s the most common mistake people make during reassembly?
The most common mistake is not fully engaging a clip or latch, particularly on the dust cup or motor cover. This creates an air leak that severely reduces suction. Ensure every connection—twist-locks, clips, and seals—is firmly clicked or twisted into place before testing.
My vacuum still has no suction after a full disassembly and cleaning. What could be wrong?
If all airways and filters are clear, the issue may be a severely worn or broken brush roll belt, a failed motor, or a torn internal hose that’s leaking air. A burned smell often indicates motor failure. At this point, professional diagnosis is recommended.
How often should I perform a full disassembly and deep cleaning?
For most households with pets or high-traffic areas, a full disassembly and deep clean is recommended every 6 to 12 months. Light use without pets can extend this to once a year. Regular quick maintenance (emptying the cup, tapping out filters, removing brush roll hair) after every few uses will prolong the time between major teardowns.