Regularly emptying your Shark robot vacuum’s dust cup is the single most important maintenance task for sustaining peak cleaning performance. A full dust cup severely reduces suction power, leaves debris behind, and can overwork the motor. The process is simple: locate the release button, open the dust cup over a trash bin, tap or brush out debris, and check the filters. This quick 60-second routine, done after every 1-2 runs, ensures your Shark continues to pick up dirt, hair, and allergens effectively, extending the life of your investment.
Key Takeaways
- Empty After Every 1-2 Runs: For best performance, get in the habit of emptying the dust cup after each cleaning cycle or at least every other cycle. A full cup is the #1 cause of lost suction.
- Locate the Release Mechanism: All Shark robots have a clearly marked release button or latch on the dust cup. Familiarize yourself with its location on your specific model (top, side, or bottom).
- Empty Over a Trash Bin: Always open the dust cup directly over a wastebasket to contain dust and debris. Tap the cup firmly and use the included cleaning tool or a soft brush to dislodge packed-in dirt.
- Check and Clean Filters: The dust cup contains at least one pre-motor foam filter and often a pleated filter. Remove these during emptying and tap out excess dust. Rinse the foam filter monthly and let it dry completely for 24 hours before reinserting.
- Inspect for Blockages: While the cup is empty, look inside the intake port and at the brushes. Clear any hair or string wraps from the roller brush and check the side brushes for tangles to maintain optimal cleaning efficiency.
- Re-seat Securely: Ensure the dust cup is clicked or snapped back into place firmly until you hear a click. An improperly seated cup will cause error lights and prevent the robot from starting.
[FEATURED_IMAGE_PLACEHOLDER]
📑 Table of Contents
- Why Emptying Your Shark Robot Dust Cup is Non-Negotiable
- Identifying Your Shark Robot Model & Dust Cup Design
- Step-by-Step: How to Empty Any Shark Robot Dust Cup
- Maintenance Beyond the Dust Cup: A Holistic Approach
- Troubleshooting: What to Do When Emptying Doesn’t Fix It
- Conclusion: Your 60-Second Path to Peak Performance
Why Emptying Your Shark Robot Dust Cup is Non-Negotiable
You’ve just set your Shark robot vacuum loose on your floors, trusting it to tackle the daily grind of pet hair, crumbs, and dust. An hour later, it docks itself, mission seemingly accomplished. But is it? If you haven’t emptied the dust cup recently, your Shark’s performance has likely been silently deteriorating with every pass it makes. The dust cup is the collection point for everything your robot sucks up. When it’s full, it’s not just a messy inconvenience—it’s a direct bottleneck that cripples your vacuum’s core function.
Think of it like trying to drink a thick smoothie through a straw that’s already full of pulp. You have to suck much harder, and even then, you get very little liquid. Your Shark’s motor works the same way. A clogged dust cup creates immense resistance, forcing the motor to strain while dramatically reducing airflow and suction power. The result? A robot that pushes debris around instead of collecting it, leaving trails of dirt on hard floors and matting down carpet fibers without picking up the deep-down grit. Furthermore, a neglected, overflowing cup can force dust and allergens back into your home’s air during operation and places undue stress on the motor and bearings, potentially shortening your robot’s lifespan. Making dust cup emptying a consistent habit is the cheapest, fastest, and most effective way to keep your Shark robot performing like new.
Identifying Your Shark Robot Model & Dust Cup Design
Shark has released several generations of robot vacuums, and while the core emptying principle is the same, the exact mechanism varies. Knowing which category your robot falls into is the first step to mastering the process. The main families you’ll encounter are the Shark IQ Series (including the IQ RV1001A, RV1001AE, etc.) and the Shark ION Series (like the ION RV750, RV860, etc.). There are also newer Shark AI Ultra models. The primary difference lies in where the dust cup is located and how it releases.
Visual guide about How to Empty Shark Robot Dust Cup
Image source: robotchores.com
The Top-Loading Dust Cup (Common in ION Series)
Many Shark ION models feature a dust cup that is accessed from the top of the robot. You’ll see a large, rectangular lid on the upper surface, often with a prominent gray or black release button or a finger groove. This design is very intuitive—you simply press the button or slide your finger into the groove and lift the entire lid straight up. The dust cup and its internal filter assembly are attached to this lid. This is often the easiest type to empty, as you can hold the cup over a trash can and give it a few firm taps.
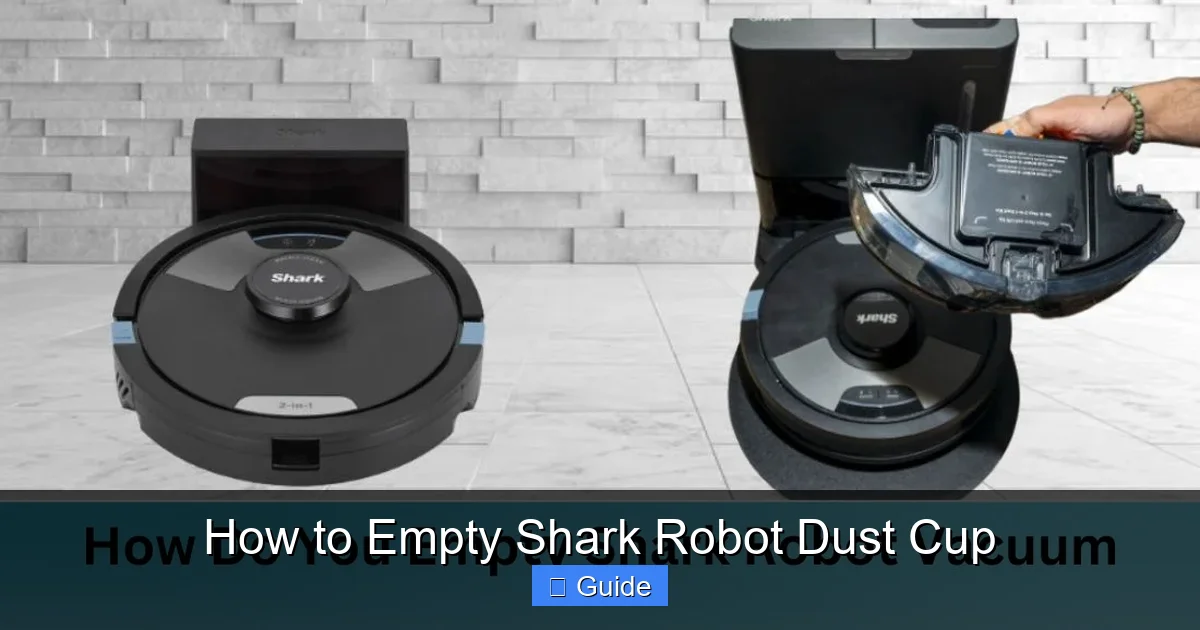
The Rear/Side Dust Cup (Common in IQ & AI Ultra Series)
Shark’s higher-end models, like the IQ and AI Ultra, typically house the dust cup in the rear or side of the robot’s body. On these, you’ll find a release button or latch on the side or back panel. Pressing this releases the entire dust cup module, which slides or pulls out from the robot’s chassis. The cup is usually a cylindrical or square canister with a handle on top. This design is also very user-friendly but requires you to turn the robot over or pull it from its dock to access.
Pro Tip: If you’re unsure, simply look at your robot. The dust cup is the largest removable plastic component that isn’t the side brush module or the charging contacts. It will have a filter visible inside when open. Your user manual will have an exact diagram, but a quick visual inspection will tell you everything you need to know.
Step-by-Step: How to Empty Any Shark Robot Dust Cup
Now for the practical part. While the location differs, the fundamental steps are universal. Follow this guide, and you’ll have a clean dust cup in under a minute. Always perform this task over a trash receptacle, ideally a large one, to minimize mess.
Visual guide about How to Empty Shark Robot Dust Cup
Image source: sharkvacuum.blog
1. Power On and Locate
Ensure your Shark robot is powered on. You can do this with the physical power button on the robot or via the Shark app. This isn’t strictly necessary for emptying, but it ensures any error lights related to a full cup are active and will reset once the empty cup is reinserted. Now, identify your dust cup’s release mechanism as described in the previous section.
2. Release and Remove the Dust Cup
For Top-Loading Models: Press the release button firmly. You should hear a click. Grasp the handle on the lid and lift it straight up and off the robot’s body. The entire dust cup assembly will come with it.
For Rear/Side Models: Press the release button or slide the latch. You may need to pull the dust cup module outward gently. It should slide out smoothly. Grasp the handle and pull it completely free from the robot’s chassis.
Note: If the cup feels stuck, do not force it. Check for any debris jamming it in place. A gentle wiggle usually frees it.
3. Open and Dump the Debris
Hold the dust cup over your trash can. For most models, you’ll need to open a separate lid or flap on the cup itself to access the debris chamber.
- Top-Loading: The lid you removed is the dust cup. You’ll see a hinged flap or a separate inner lid on the underside of this lid. Open this secondary lid to dump the contents.
- Rear/Side: The cylindrical canister you pulled out will have a release button or latch on its top or side. Press it to open the main debris door.
Now, turn the cup upside down over the bin and give it several firm, sharp taps. The goal is to dislodge all the compacted dust, hair, and dirt. For models with a lot of pet hair, you may need to reach in (with a gloved hand) and pull out a dense hairball. Shark includes a small cleaning tool with most robots—use its brush end to sweep debris out of corners and the filter housing.
4. Clean the Filters (The Critical Second Step)
Emptying the cup is only half the battle. Inside, you’ll find filters that are now coated in fine dust. These must be cleaned regularly.
- Pre-Motor Foam Filter: This is usually a rectangular or square piece of black foam. Gently remove it from its slot. Tap it firmly over the trash can to remove loose dust. For a deeper clean, rinse it under lukewarm water once a month. Do not use soap or detergent. Squeeze out excess water and let it air-dry completely for at least 24 hours. Never reinsert a damp filter.
- Pleated/HEPA-Style Filter: This is a white, accordion-folded paper filter. It is not washable. Simply tap it over the trash can to dislodge dust. If it becomes excessively dirty or damaged, it needs to be replaced (typically every 3-6 months depending on use).
Also, take this moment to use the cleaning tool or a soft brush to wipe out the interior of the dust cup itself and the filter slots in the robot. Dust can accumulate in these hidden areas.
5. Reassemble and Reinsert
Once all parts are clean and completely dry (especially the foam filter), reassemble the dust cup. Place the filters back into their correct positions inside the cup, then close the debris door securely until it clicks. Now, align the dust cup with its slot in the robot.
- Top-Loading: Lower the lid straight down onto the robot’s body. Press down firmly on all corners until you hear a definitive click. The release button should pop back out.
- Rear/Side: Slide the dust cup module back into the robot’s chassis. Push it in firmly until you hear a click and the release button resets.
Give the cup a gentle tug to ensure it’s locked in place. An improperly seated cup is a common reason for a robot not to start. Finally, press the power button or return it to the dock. The “Empty Dust Bin” indicator light on the robot or in the app should now be off.
Maintenance Beyond the Dust Cup: A Holistic Approach
Emptying the dust cup is the cornerstone of maintenance, but it doesn’t exist in a vacuum (pun intended). A truly well-maintained Shark robot requires a few additional quick checks that take just minutes but have a massive impact on cleaning quality and longevity.
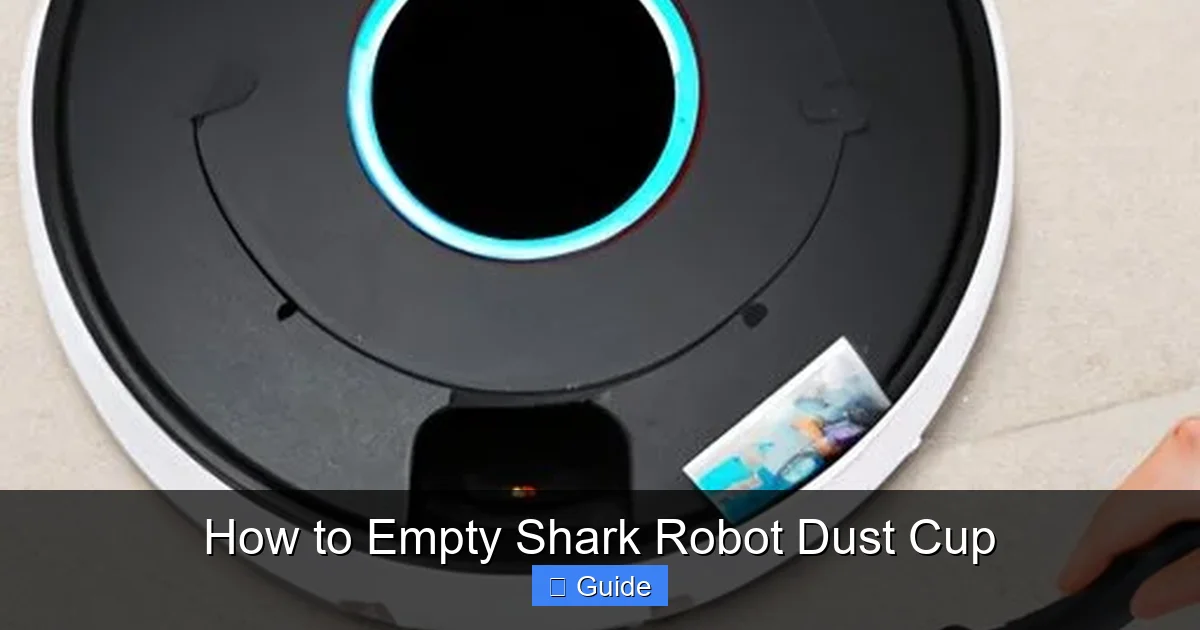
Visual guide about How to Empty Shark Robot Dust Cup
Image source: lihpao.com
Roller Brush & Side Brush Care
The roller brush (the main brushroll under the robot) is a magnet for hair, string, and fibers. After every 2-3 emptyings, flip your robot over and inspect it. Use the included cleaning tool or scissors (carefully!) to cut away any wraps around the brush and its end caps. Clear debris from the rubber blades of the side brushes. Tangled brushes create drag, wear down the motor, and leave streaks on hard floors.
Wheels and Sensors
Wipe off the large rubber drive wheels with a dry cloth. Grit and grime here can reduce traction. Then, locate the cliff sensors (the small windows on the underside) and the charging contacts on the robot and dock. Gently wipe these with a dry microfiber cloth. Dirty sensors can cause navigation errors and charging problems. A cotton swab lightly dampened with isopropyl alcohol can be used for stubborn grime on contacts, but ensure everything is dry before operation.
The Charging Dock Area
Keep the area around your charging dock clear. The robot needs a clear approach and at least 2-3 feet of space on either side to dock reliably. Wipe the dock’s charging contacts periodically with a dry cloth. A dirty dock can lead to intermittent charging, leaving your robot with a low battery when it’s time to clean.
Troubleshooting: What to Do When Emptying Doesn’t Fix It
You’ve emptied the cup, cleaned the filters, and checked the brushes, but your Shark still isn’t picking up like it used to. Don’t panic. There are a few other common culprits.
The “Full Cup” Light Won’t Go Off
First, ensure the dust cup is seated perfectly. Remove it and reinsert it, listening for the click. Next, check that the small plastic tab on the dust cup (which presses a sensor in the robot) isn’t broken or obstructed. Finally, power cycle the robot: turn it off, remove it from the dock for 30 seconds, place it back on the dock, and let it reboot.
Suction is Weak, But Cup is Empty
This points to a blockage past the dust cup. The most common spot is the intake hose that runs from the dust cup to the motor. With the dust cup removed, look into the opening in the robot’s body. You should see a clear path. If you see a clog of hair or debris, use a long, flexible brush (like a bottle brush) to gently clear it. Also, check the exhaust vent on the back of the robot for blockages.
Unusual Noises or Smells
A grinding noise could mean a piece of debris (like a small toy or a hard crumb) is caught in the roller brush housing. Turn the robot over and manually rotate the roller brush to feel for obstructions. A burning smell is serious—immediately power off the robot and contact Shark customer support, as this could indicate a motor issue.
Conclusion: Your 60-Second Path to Peak Performance
Mastering the art of emptying your Shark robot’s dust cup transforms it from a set-and-forget gadget into a consistently powerful cleaning workhorse. It’s a tiny ritual with an enormous payoff: immaculate floors, healthier indoor air quality, and a robot that will faithfully serve for years to come. Remember the core mantra: Empty the cup, clean the filter, check the brushes. Integrate it into your routine—perhaps right after the robot docks each morning. By treating this simple maintenance step with the importance it deserves, you protect your investment and ensure your home stays truly clean, one autonomous run at a time. Your Shark robot is designed for convenience, but a little bit of user-side care is the secret ingredient that unlocks its full, long-lasting potential.
Frequently Asked Questions
How often should I empty my Shark robot’s dust cup?
For optimal performance, empty the dust cup after every 1-2 cleaning cycles. If you have pets or a lot of debris, empty it after every single run. A full cup is the primary cause of reduced suction.
Can I wash the dust cup itself with water?
Yes, the plastic dust cup body and lid can be rinsed with water. However, ensure it is completely dry before reinserting it into the robot to prevent electrical damage. Never submerge the entire unit with filters inside.
My Shark robot says the dust cup is full, but it’s empty. What’s wrong?
This is usually a sensor issue. First, remove and firmly reinsert the dust cup to ensure it’s seated correctly. Check that the small plastic tab on the cup isn’t broken or dirty. A power cycle (turning the robot off and on) often resets the sensor.
Is there a difference between emptying a Shark IQ and a Shark ION?
The main difference is location. The ION typically has a top-loading cup, while the IQ and AI Ultra have a rear/side loading cup. The steps (release, open over trash, tap, clean filters, reseat) are identical. Always consult your specific model’s manual for exact button locations.
What happens if I never empty the dust cup?
Neglecting to empty it will cause a severe drop in suction power, leaving dirt on your floors. It forces the motor to work harder, leading to premature wear and potential failure. It also recirculates dust and allergens back into your home’s air and can cause clogs that require professional cleaning.
Do I need to replace the filters if I clean them regularly?
The washable foam pre-motor filter should last 6-12 months with regular rinsing. The non-washable pleated filter should be replaced every 3-6 months, even if you tap it clean, as its efficiency degrades over time. A clogged filter will also cause loss of suction.