Regularly cleaning the brush roll on your Shark Navigator is crucial for maintaining peak suction power and preventing clogs. This guide provides a detailed, safe process for removing hair and debris from the brush roll and its housing. By following these simple steps every few uses, you’ll extend your vacuum’s life, improve cleaning performance, and avoid frustrating blockages. It’s a quick task that makes a world of difference.
Key Takeaways
- Unplug First: Always disconnect your Shark Navigator from power before attempting any brush roll cleaning for complete safety.
- Frequency is Key: Clean the brush roll every 2-3 uses, especially if you have pets or long hair, to prevent severe tangles.
- Use the Right Tools: A seam ripper, scissors, and a microfiber cloth are your best friends for efficient hair removal without damage.
- Inspect the Whole System: Don’t just clean the brush; check the bearings, end caps, and the suction intake in the housing for hidden debris.
- Check for Wear: While cleaning, inspect the bristles for damage or uneven wear; a damaged brush roll should be replaced.
- Reassemble Correctly: Ensure the brush roll is seated properly and the belt (if present) is correctly aligned before turning the vacuum back on.
📑 Table of Contents
- Why Cleaning Your Shark Navigator Brush Roll Isn’t Optional
- Essential Tools & Safety First: Your Prep Checklist
- Step-by-Step Guide: Disassembling for Access
- The Deep Clean: De-hairing and Debris Removal
- Inspection, Lubrication (If Applicable), and Reassembly
- Establishing a Maintenance Routine & Troubleshooting
- Conclusion: The Simple Secret to a Powerful Clean
Why Cleaning Your Shark Navigator Brush Roll Isn’t Optional
Let’s be honest. That satisfying whir of your Shark Navigator vacuum can quickly turn into a frustrating whine when its performance drops. You might notice it’s not picking up debris like it used to, or maybe it’s struggling on carpets. Before you panic about a broken motor or a clogged hose, the most likely culprit is hiding right at the business end: the brush roll. That spinning cylinder of bristles is a magnet for hair, string, carpet fibers, and general floor debris. Over time, this gunk wraps tightly around the axles and bristles, creating a dense, felt-like jacket. This doesn’t just look gross—it actively sabotages your vacuum’s cleaning power.
When the brush roll is jammed, it can’t spin freely. This puts extra strain on the motor and, in belt-driven models, can cause the belt to slip, burn, or break. More importantly, a bound brush roll agitates the carpet less effectively, so it fails to lift embedded dirt and pet hair. The suction pathway can also get blocked by debris pulled off the floor but not ejected because the brush is stuck. Simply put, a clean brush roll is the heart of your Shark Navigator’s performance. Mastering how to clean the brush on a Shark Navigator is the single most important piece of regular maintenance you can do. It takes less than five minutes, requires no special skills, and will instantly restore your vacuum’s power and efficiency. This guide will walk you through every single step, from safety to final reassembly, ensuring you do it correctly and safely every time.
Essential Tools & Safety First: Your Prep Checklist
Before you even touch your Shark Navigator, gather your tools. Having everything within arm’s reach makes the process smooth and prevents you from improvising with something that could damage the vacuum. You likely have most of these items around the house already.
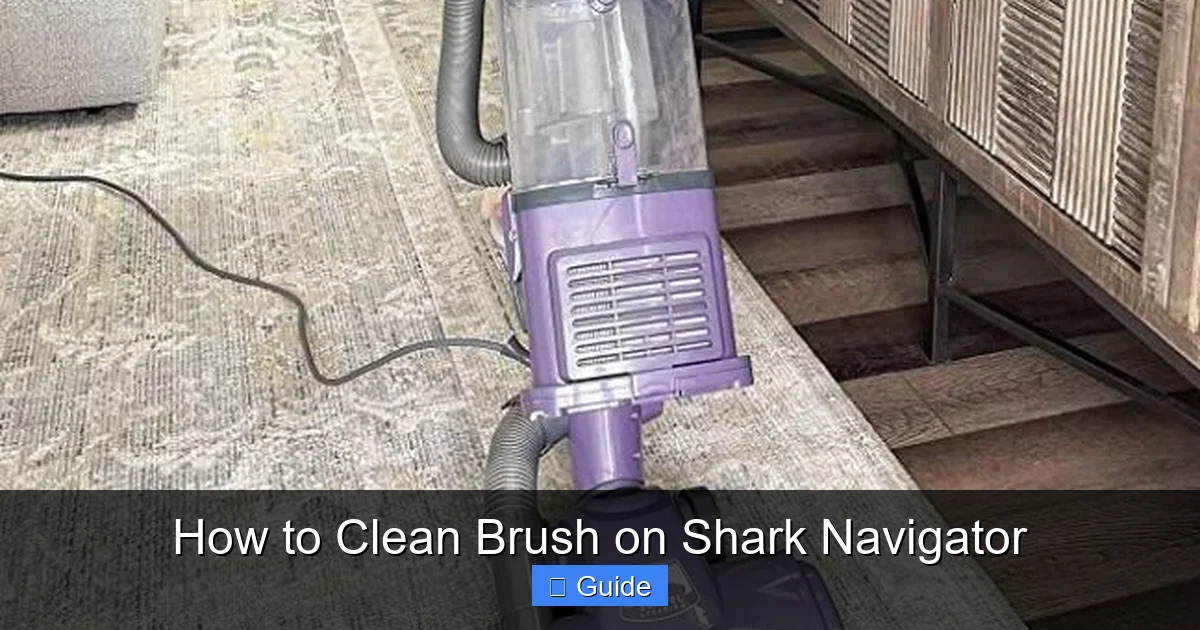
Visual guide about How to Clean Brush on Shark Navigator
Image source: mopreviewer.com
The Core Cleaning Toolkit
- Seam Ripper or Small Scissors: This is the MVP tool. A seam ripper (the tiny, curved blade tool used in sewing) is perfect for slicing through wrapped hair and fibers without poking or scratching the brush roll or housing. If you don’t have one, a small, sharp pair of scissors (like nail scissors) works in a pinch. Avoid large, bulky scissors.
- Microfiber Cloth: Dampen this slightly with water (or a mild cleaning solution) to wipe down the brush roll housing, end caps, and any accessible internal parts. Microfiber is ideal because it traps dust and doesn’t leave lint.
- Old Toothbrush or Small Bristle Brush: Perfect for scrubbing the small crevices, the area where the brush roll meets the suction intake, and the bearings inside the end caps.
- Flashlight or Headlamp (Optional but Helpful): The inside of the brush roll housing can be dark. A light source helps you see all the trapped debris and ensures you get everything.
Safety Precautions: The Non-Negotiable Steps
This cannot be stressed enough: ALWAYS unplug your Shark Navigator vacuum cleaner from the electrical outlet before beginning any cleaning or inspection. The brush roll is connected to the motor, either directly or via a belt. If you accidentally trigger the power switch while your fingers are near the brush roll, you could suffer a serious injury. The motor could also be damaged. Once unplugged, locate the power switch and turn it to the “Off” position as an extra precaution. Place the vacuum on a stable surface, like a kitchen table or a clean floor, where you have good lighting and can easily access the underside.
Step-by-Step Guide: Disassembling for Access
Now for the hands-on part. Every Shark Navigator model has a slightly different mechanism, but the fundamental process is the same. You need to remove the brush roll housing from the vacuum’s floor nozzle to get full access. If your model has a removable brush roll, you’ll take that out too.
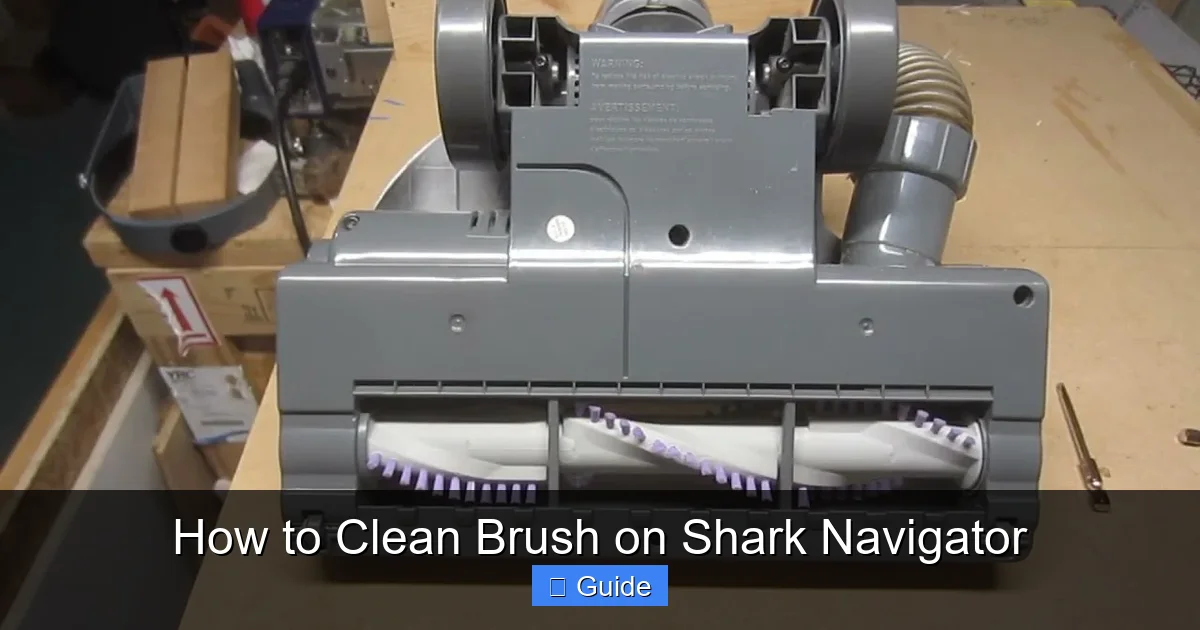
Visual guide about How to Clean Brush on Shark Navigator
Image source: i.ytimg.com
Locating and Releasing the Brush Roll Housing
Flip your Shark Navigator over so you’re looking at the underside—the part that touches the floor. You’ll see the brush roll housing, typically a rectangular or oval plastic casing with the brush roll visible inside. On most models, there are either two release latches (one on each side) or a single central release lever/button. Press these latches inward or push the lever, and the entire housing should swing or pop down, hinging away from the vacuum body. Gently lower it until it’s resting on the floor or your work surface. You should now see the brush roll itself, held in place by two plastic end caps.
Removing the Brush Roll
With the housing down, examine the brush roll. It will have a small drive pin or square peg on one end that fits into the motor housing or belt. On the other end, it usually just sits in a bearing. To remove it, you typically need to pull it straight out. It might require a slight wiggle. Be mindful of any belts (in some Navigator models, the brush roll is belt-driven; in others, it’s direct drive). If you see a rubber belt looped around the brush roll and a pulley, you’ll need to slip it off first. Don’t force anything. If it’s stuck, check if you missed a retaining clip or if there’s a large chunk of debris physically blocking it from sliding out.
The Deep Clean: De-hairing and Debris Removal
This is the satisfying part. With the brush roll free in your hands, you can finally see the extent of the blockage. You’ll likely find a solid tube of compressed hair and carpet fibers wrapped around the core, between the bristles, and packed into the bearings at each end.

Visual guide about How to Clean Brush on Shark Navigator
Image source: i.ytimg.com
Techniques for Cutting and Removing Hair
Do not try to pull or pick the hair off with your fingers. This is ineffective and can pull out the bristles. Instead, use your seam ripper or scissors.
- The Slice-and-Peel Method: Starting at one end, use the seam ripper to carefully slice the hair lengthwise along the brush roll. Don’t press too hard against the plastic. Once you have a few strategic cuts, the massive clump should start to loosen. You can then peel the sections away in your hands.
- Target the Bearing Caps: The worst tangles are almost always packed into the plastic end caps where the brush roll spins. Use the point of the seam ripper to dig into these compacted mats of hair and cut them free. This is critical for restoring smooth rotation.
- Work Between Bristles: For hair woven tightly between the bristle rows, use the tip of your scissors or seam ripper to cut it at intervals, then pull the short segments out.
Cleaning the Housing and Intake
Don’t forget the housing itself! With the brush roll out, you have a perfect view of the suction intake—the opening that leads to the hose and motor. This area is a collection point for larger debris that the brush knocks loose but can’t always pull through. Use your hands (or a tool) to scoop out any leaves, paper, or large dirt clods. Take your damp microfiber cloth and wipe down the entire interior of the housing, paying special attention to the rubber seals and the area right around the intake opening. Use your old toothbrush to scrub any sticky residue or fine dust from the corners and the inside of the end cap sockets. A clear intake path is just as important as a clean brush roll.
Inspection, Lubrication (If Applicable), and Reassembly
With everything clean, it’s time for a quick inspection before putting it all back together. This step ensures you’re not reassembling a system with a failing component.
Inspecting for Damage and Wear
Examine your brush roll closely. Are the bristles all the same length and firmly attached? Are any broken off, leaving sharp plastic nubs? Is the plastic roller itself cracked or warped? If the bristles are significantly uneven or missing large patches, the brush roll’s agitation will be ineffective. A cracked roller can break apart and cause a major clog. In either case, this is the time to order a replacement brush roll for your specific Shark Navigator model (e.g., NV350, NV356, etc.). Also, spin the brush roll by hand. It should rotate smoothly and silently. If you hear grinding or feel gritty resistance, the bearings inside the end caps are likely full of fine grit or are worn out. You can sometimes clean these bearings by prying off the plastic cap (if your model allows) and flushing them with water, but often, a new brush roll is the most cost-effective fix.
Reassembly: Getting It Back Together Right
Reassembly is the reverse of disassembly, but attention to detail matters. First, if your model uses a belt, loop it back over the brush roll’s drive pin and onto the motor pulley before inserting the brush roll. Align the square drive peg on the brush roll with the square socket in the motor housing or the belt pulley. Gently but firmly push the brush roll straight in until it clicks or seats fully. Ensure both end caps are properly inserted into their housings—they should be flush with the housing. Now, swing the entire brush roll housing back up into its locked position on the vacuum’s nozzle. You should hear a definitive click from the latches. Give the brush roll a final spin by hand to make sure it turns freely without hitting the housing walls.
Establishing a Maintenance Routine & Troubleshooting
Now that you’ve done the deep clean, the goal is to make future cleans easier and less frequent. A proactive approach is always better than a reactive one.
How Often is “Often Enough”?
There’s no one-size-fits-all answer. A general rule: inspect and do a quick hair removal every 2-3 uses. If you have pets that shed, or you have long hair yourself, you should check it after every single use. A quick 60-second de-hairing session with your seam ripper after vacuuming prevents the dense, compacted tangles that require a full removal. A full deep clean, as described above, should be done every 1-2 months, or whenever you notice a performance drop. This routine keeps the brush roll operating at peak efficiency and prevents undue wear on the motor and belt.
What If It Still Smells or Isn’t Picking Up?
If you’ve cleaned the brush roll and housing thoroughly but notice a musty odor or poor suction, the issue may lie elsewhere. The smell often comes from damp debris sitting in the dust cup or filters. Empty the dust cup completely and wash the filters (check your manual—some are washable, some are not). Also, check the entire suction pathway: the hose for blockages, the wand connections, and the exhaust filter. A clogged filter will kill suction regardless of a clean brush. If the brush roll spins but the vacuum doesn’t pick up, the issue is almost certainly a clog in the hose or a full/blocked dust cup.
Conclusion: The Simple Secret to a Powerful Clean
Cleaning the brush on your Shark Navigator isn’t a glamorous chore, but it’s arguably the most impactful maintenance task you can perform. It directly connects to the vacuum’s core function: agitation and pickup. By dedicating a few minutes every few weeks to this process—unplugging, removing the housing, slicing through hair with a seam ripper, wiping the housing, and inspecting for wear—you are investing in the longevity and performance of your machine. You’ll avoid costly part replacements, prevent motor strain, and enjoy that powerful, deep-clean feeling with every push. Remember, a vacuum is only as strong as its weakest link, and that weakest link is almost always a neglected brush roll. Make this guide your standard procedure, and your Shark Navigator will reward you with years of reliable, powerful cleaning.
Frequently Asked Questions
How often should I clean the brush roll on my Shark Navigator?
For optimal performance, do a quick visual check and remove any visible hair or debris every 2-3 uses. If you have pets or long hair, check it after every use. Perform a full deep clean, including removing the brush roll from the housing, every 1-2 months.
Can I wash the brush roll with soap and water?
Yes, you can. After removing all hair and debris, you can rinse the brush roll under lukewarm water and use a drop of mild dish soap with your toothbrush to scrub it clean. Ensure it is completely dry—at least 24 hours—before reinstalling it to prevent motor damage.
My brush roll bristles are melting or discolored. Is this from cleaning?
No, this is typically caused by excessive heat from a jammed brush roll. When hair wraps tightly and prevents the brush from spinning, friction generates intense heat that can melt the plastic bristles. This is a key sign that cleaning was long overdue and the brush roll may need replacement.
I cleaned the brush roll, but my vacuum still has no suction. Why?
A clean brush roll solves agitation issues, but suction is a separate system. Check the dust cup—it must be completely empty and properly seated. Then, inspect the hose and wand for blockages. Finally, check the exhaust filter; a clogged filter will severely restrict airflow.
Do I need to lubricate the brush roll bearings?
Generally, no. Shark Navigator brush rolls are designed as sealed units and are not meant to be user-lubricated. If the bearings feel gritty or don’t spin freely after cleaning, the brush roll assembly should be replaced. Adding oil can attract more dust and create a bigger mess.
What should I do if the brush roll spins but makes a loud squealing noise?
This is often a sign of a slipping or worn-out drive belt (in belt-driven models). The belt may be loose, glazed, or broken. Inspect the belt for cracks or fraying and replace it if necessary. In direct-drive models, a loud noise could indicate a failing motor bearing, which requires professional service.