Using the right Shark vacuum accessory for each job is the secret to effortless, spotless cleaning. This complete guide demystifies every tool, from the crevice tool to the pet multi-tool, showing you exactly when and how to use each one. You’ll learn professional techniques for floors, furniture, cars, and more, plus essential maintenance tips to keep your accessories—and your vacuum—performing like new for years.
So you’ve unboxed your shiny new Shark vacuum, and it’s already proving its might on your carpets and hard floors. But nestled in that bag or box is a curious collection of tools and attachments. What are they all for? More importantly, how do you actually use them to get the most out of your investment? Think of these Shark vacuum accessories not as extras, but as a specialized toolkit. A mechanic doesn’t use just a wrench for every job, and you shouldn’t use just the standard floor nozzle for every surface. Mastering these attachments is what separates a good clean from a truly transformative one. This guide will walk you through every common Shark accessory, with clear, practical instructions on where to use it, how to attach it, and pro-tips to make your cleaning faster and more effective.
Key Takeaways
- Each accessory has a specific purpose: Using the correct tool (like the dusting brush vs. the crevice tool) dramatically improves cleaning efficiency and prevents damage to surfaces or your vacuum.
- Attachment storage is key: Most Shark vacuums have onboard storage; knowing where each tool clips ensures they’re always accessible and prevents loss.
- Pet tools are engineered for hair: The Pet Multi-Tool’s rubberized bristles and tangle-free design are specifically for lifting embedded pet hair from fabrics and carpets.
- Check for blockages regularly: Clogs in wand or accessory ports are the #1 cause of suction loss; always inspect tools after use, especially with fine dust or hair.
- Maintenance goes beyond the filter: Wash non-electronic attachments (dusting brushes, crevice tools) with mild soap to maintain performance and prevent odor.
- Compatibility matters: While most accessories fit across Shark lines, always verify your specific model number against accessory packaging for guaranteed fit.
📑 Table of Contents
- Why Using the Right Accessory Matters: Beyond the Floor Nozzle
- The Essential Toolkit: A Tour of Your Shark Vacuum Accessories
- Strategic Application: Matching Tools to Real-World Tasks
- Maintenance & Care: Keeping Your Accessories in Top Shape
- Troubleshooting: When Attachments Cause Problems
- Conclusion: Your Path to Pro-Level Cleaning
Why Using the Right Accessory Matters: Beyond the Floor Nozzle
It’s tempting to just grab the main vacuum body and tackle everything with the standard floor head. But this approach is inefficient and can even cause damage. The right accessory does three critical things: it maximizes suction power at the source, it’s engineered to be gentle on specific surfaces, and it makes your job physically easier.
For instance, the wide floor nozzle is designed for open, flat surfaces. Trying to clean the dust between your radiator fins or the crumbs in your sofa crevices with it is like trying to eat soup with a fork—it’s the wrong tool for the narrow job. You’ll get frustrated, and you won’t get results. Conversely, using a delicate dusting brush on your thick carpet will just push dirt deeper. The engineering behind each Shark vacuum accessory is specific. The Pet Multi-Tool has rubberized bristles that grab hair without tangling, something a standard brush head simply cannot do. By matching the tool to the task, you leverage the full engineering prowess of your Shark vacuum, ensuring every watt of suction is used effectively.
The Universal Connection: Understanding the Click & Lock System
Before we dive into specific tools, let’s master the fundamental action: attaching and detaching accessories. Shark’s iconic “Click & Lock” wand and hose system is designed for one-handed operation and a secure seal. Here’s how it works:
- Attaching: Align the accessory’s connector with the end of the wand or hose. Push firmly until you hear and feel a distinct CLICK. This indicates the locking mechanism is engaged. Give it a gentle tug to be sure it’s secure.
- Detaching: To remove an accessory, press the large, usually silver or colored, release button on the connector. While holding the button, pull the accessory straight off. Do not try to pull it off without pressing the button, as this can damage the latch.
- Extending/Retracting the Wand: For the telescopic wand, twist the middle section counter-clockwise to unlock, pull to your desired length, then twist clockwise to lock. Always ensure it’s locked before applying force or leaning on it.
Practicing this simple motion a few times will make it second nature. A poor connection is the most common cause of sudden suction loss, so always ensure a firm click.
The Essential Toolkit: A Tour of Your Shark Vacuum Accessories
Let’s identify the standard cast of characters. Your specific Shark model (Navigator, Rotator, Vertex, etc.) may have slight variations, but the core functionality is the same. We’ll start with the most versatile tools and move to the specialists.
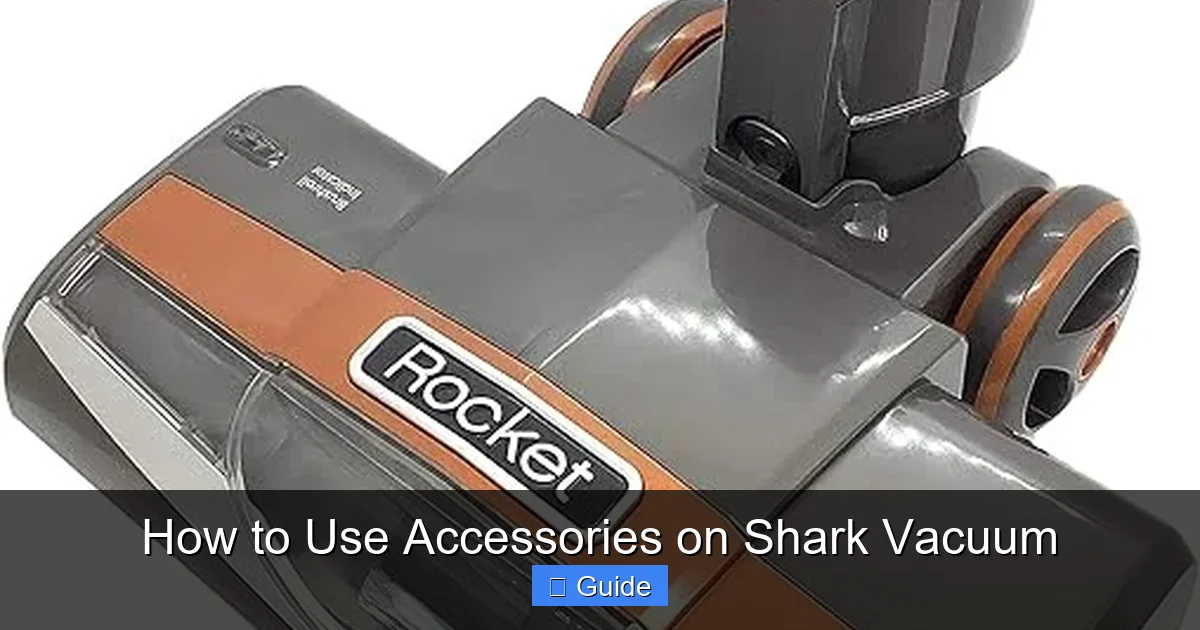
Visual guide about How to Use Accessories on Shark Vacuum
Image source: images-na.ssl-images-amazon.com
1. The Dusting Brush: Your Delicate Surface Hero
This is the fluffy, oval or rectangular brush with soft, long bristles. Its purpose is gentle agitation and capture of light debris without scratching.
When & Where to Use It:
- Blinds & Window Treatments: The soft bristles perfectly fit between slats, lifting dust and pollen without bending them. Run it along the top and bottom edges.
- Baseboards & Crown Molding: The flexible head conforms to the angle where the wall meets the floor, pulling out the “dust bunnies” that a floor head misses.
- Electronics & Lamp Shades: Safely dust computer keyboards, speaker grilles, and fabric or glass lamp shades. The soft bristles won’t scratch screens or delicate finishes.
- Bookshelves & Decor: Perfect for clearing dust from book spines, ceramic collectibles, and picture frames.
Pro-Tip: For heavier dust on hard surfaces, first use the crevice tool to dislodge compacted dust, then finish with the dusting brush to capture it all. Always use this tool on suction only—never with the roller brush engaged—to avoid flinging debris.
2. The Crevice Tool: The Narrow-Reach Specialist
This is your long, thin, rigid plastic tube, typically about 12-18 inches long. It’s all about focused, high-velocity suction in tight spaces.
When & Where to Use It:
- Between Cushions & Car Seats: Slide it into the gaps where remote controls, popcorn kernels, and loose change hide.
- Along Radiators & Heat Vents: The narrow profile reaches deep into fins and grilles to pull out years of accumulated lint and dust.
- Cabinets & Under Appliances: Get the debris that gets pushed under the fridge or stove but is too far back for a standard nozzle.
- Car Interiors: The ultimate car vacuum accessory. Clean out air vents, cup holders, and the track between seats and center consoles.
Pro-Tip: For car cleaning, first use the Pet Multi-Tool on seats and floor mats (see below), then switch to the crevice tool for the hard-to-reach nooks. You can even gently wiggle it to loosen packed-in dirt before sucking it away.
3. The Pet Multi-Tool (or Pet Upholstery Tool): The Fur-Fighting Powerhouse
This is arguably the most valuable accessory for pet owners. It typically features a wide, flat head with a combination of stiff, rubberized bristles and a small, traditional brush row.
When & Where to Use It:
- Upholstered Furniture: The rubber bristles are magic. They grab and hold embedded pet hair from sofas, armchairs, and pet beds without the hair wrapping around a brush roll. Push and pull firmly.
- Carpeted Stairs: The width matches most stair treads perfectly. The rubber bristles effectively pull hair from the pile.
- Car Seats & Floor Mats: Especially effective on cloth surfaces. The tool’s design prevents long pet hair from tangling in the vacuum’s main brush roll.
- Rugs (especially shag): The rubber bristles can penetrate deep pile to extract trapped hair and dander.
Pro-Tip: Use this tool with the main vacuum brush roll OFF (on suction-only mode). The Pet Multi-Tool does the agitation itself with its rubber fingers. Running it with the main brush roll on can cause jamming and is less effective. For very thick, matted hair, use the crevice tool’s sharp edge to break it up first.
4. The Dusting Brush (Mini) or Dust-Away: The Quick-Fix Detailer
This is a smaller, often rounder, version of the standard dusting brush. It’s designed for speed and precision on smaller items.
When & Where to Use It:
- Countertops & Tables: Quickly clear crumbs and dust from dining tables, kitchen counters, and coffee tables before wiping.
- Small Decor & Knick-Knacks: Dust figurines, vases, and picture frames without having to move them.
- Inside Drawers & Shelves: Perfect for giving a quick clean to the interior of a kitchen drawer or a bookshelf shelf.
- Lamp Bases & Small Appliances: Get dust out of the ridges on a stand lamp or the base of a toaster.
Pro-Tip: Keep this tool attached to your wand for a “quick clean” setup. When you see a dusty surface, you can grab the vacuum and instantly address it without swapping tools. Its small size makes it ideal for this.
5. The Dust-Away Wide Upholstery Tool: The Large Fabric Specialist
This is a wide, flat tool, often with a microfiber pad on the bottom and sometimes a small brush edge. It’s for large, flat fabric surfaces.
When & Where to Use It:
- Large Sectional Sofas & Mattresses: The wide head covers massive surface area quickly. The microfiber pad helps grab fine dust and dander from fabric.
- Curtains & Drapes (if removable):strong> Lay a curtain panel on a bed or clean floor and vacuum it with this tool to remove dust before washing.
- Car Seats (front/back): Excellent for the large, flat bench seat of a truck or the back of a minivan seat.
Pro-Tip: Some versions have a removable, washable microfiber pad. Use it dry for dusting, or slightly damp (wringed out completely) for picking up more stubborn lint and pet hair from microfiber furniture.
Strategic Application: Matching Tools to Real-World Tasks
Knowing what each tool is called is one thing; knowing which one to grab in the moment is the real skill. Let’s build some mental workflows for common cleaning scenarios.
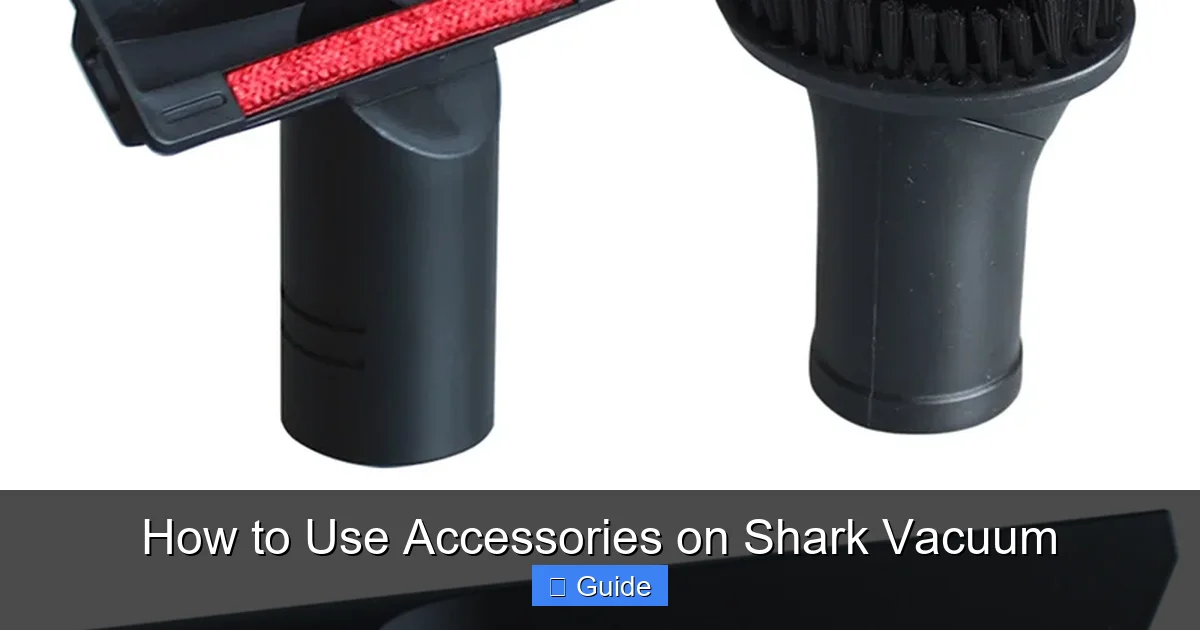
Visual guide about How to Use Accessories on Shark Vacuum
Image source: i5.walmartimages.com
The Full-Room Clean (Living Room)
Start high and work down. Use the Dusting Brush (Mini) on ceiling fan blades, light fixtures, and the tops of bookshelves. Let the dust fall. Next, use the Dusting Brush (Standard) along the top edge of baseboards and on window blinds. Then, attack the furniture: use the Pet Multi-Tool on the sofa and armchairs (if fabric), followed by the Dust-Away Wide Tool on any large, flat ottoman or bench. Finally, vacuum the floor with your appropriate floor head (hard floor or carpet). Finish by running the Crevice Tool along the baseboard/skirt board line where the floor meets the wall to get the final line of dust.
The Automotive Deep Clean
Remove all floor mats and headrests. Start with the trunk/cargo area: use the Pet Multi-Tool on carpeted mats and seats. Switch to the Crevice Tool for the side panel pockets, seat track grooves, and around the spare tire well. For the front seats, use the Pet Multi-Tool on the seat bottoms and backs. The Dust-Away Wide Tool is great for the wide dashboard and rear shelf. Finally, use the Crevice Tool for air vents, the center console, and the seams between seats. Don’t forget to vacuum the door panels with the appropriate brush.
The Staircase & Upholstery Challenge
Stairs are a mix of vertical and horizontal surfaces. Use the Pet Multi-Tool (or the upholstery tool if you have no pets) on each stair tread and riser. Its width is perfect for the step. For the sides and spindles, switch to the Dusting Brush to gently clean the wood or painted surfaces. For the often-forgotten area where the carpet meets the stair base, use the Crevice Tool.
Maintenance & Care: Keeping Your Accessories in Top Shape
Your accessories work hard and get coated in a cocktail of dust, hair, dander, and fine particulates. A dirty accessory is a less effective accessory and can even spread odors or reduce suction.

Visual guide about How to Use Accessories on Shark Vacuum
Image source: media.currys.biz
Routine Cleaning After Use
After each major cleaning session, take 60 seconds to:
- Tap Out Debris: Hold the tool over a trash can and give it a few firm taps to dislodge packed-in hair and dust.
- Use the Cleaning Tool: Most Sharks come with a small, comb-like cleaning tool. Run it through the bristles of your dusting brushes and the teeth of the Pet Multi-Tool to remove tangled hair. This is crucial for maintaining suction.
- Check for Blockages: Look into the open end of each tool. If you see a visible clog (a wad of hair, a large piece of debris), use the handle of the cleaning tool or a long, blunt object to gently push it out from the opposite end.
Deep Cleaning Monthly
For non-electronic, non-motorized tools (dusting brushes, crevice tools, pet tools), a monthly wash is beneficial.
- Disassemble if Possible: Some Pet Multi-Tools have a removable bristle head. Take it apart.
- Wash: Use warm water and a drop of mild dish soap. Gently agitate the bristles. For hair-heavy tools, let them soak for 10 minutes.
- Rinse Thoroughly: Ensure all soap residue is gone. Soap left on bristles can attract more dirt.
- Dry Completely: Shake off excess water and stand the tools upright in a well-ventilated area. Do not reassemble or use until 100% dry. Moisture can cause mildew and damage internal components if you’re unsure of water resistance.
Never wash motorized components or tools with electrical connections (like the rotating floor heads). Just wipe the exterior with a damp cloth.
Storage Solutions
Your Shark vacuum has onboard storage for a reason—use it! The most common spots are:
- On the Canister/Hose: clips on the back or sides for the dusting brush and crevice tool.
- On the Wand: a slot or clip near the handle for the Pet Multi-Tool or mini brush.
- Inside the Accessory Bag: if your model came with one, use it for less-frequently-used tools to keep them dust-free.
Storing tools on the vacuum prevents loss and creates a seamless workflow. Just ensure they are clean and dry before clipping them on to prevent mold or odors.
Troubleshooting: When Attachments Cause Problems
Sometimes the issue isn’t the main vacuum but the accessory interface. Here’s how to diagnose.
Symptom: Sudden Loss of Suction When Using a Specific Tool
Diagnosis: Almost certainly a blockage in that specific tool or at its connection point.
Fix: Detach the tool. Look straight through it. Use your cleaning tool or a straightened wire coat hanger (gently!) to dislodge the clog from the exhaust end (the end that attaches to the wand). Also, check the wand port for debris. Re-attach firmly.
Symptom: Vacuum Sounds Different or Struggles with a Particular Tool
Diagnosis: You might be using a tool not designed for your vacuum’s power, or there’s a significant air leak.
Fix: Ensure the tool is a genuine Shark accessory designed for your model series. Check that the tool’s connector is undamaged. Re-click it into place. If using a wide tool on a high-pile carpet, the motor may sound strained as it works harder—this can be normal, but reduce your pass speed.
Symptom: Hair Constantly Wraps Around the Pet Multi-Tool Bristles
Diagnosis: The tool is likely being used with the main vacuum brush roll engaged, or the hair is of a very specific, sticky type (like some long-haired dog breeds).
Fix: Always use the Pet Multi-Tool in suction-only mode. After use, immediately clean the bristles with the provided tool. For extremely tangled hair, you may need to carefully cut it away with small scissors, being very cautious not to cut the bristles themselves.
Conclusion: Your Path to Pro-Level Cleaning
Your Shark vacuum is more than just a floor cleaner; it’s a central cleaning system. The accessories are its specialized limbs, each built to conquer a specific domain of dirt and grime. By taking the time to understand the dusting brush’s gentle touch, the crevice tool’s surgical precision, and the pet tool’s hair-grabbing power, you transform your cleaning routine from a chore into an efficient, satisfying process. You’ll spend less time fighting with the wrong tool and more time enjoying truly clean surfaces—from the tops of your picture frames to the deep recesses of your car seats. Remember the golden rule: high and dry first, then low and dirty. Start with dusting tools on elevated surfaces, letting debris fall, then tackle floors and upholstery with the appropriate agitating tools. With this knowledge, you’re no longer just operating a vacuum; you’re conducting a targeted cleaning operation. Now, go forth and unlock the full, incredible potential of your Shark vacuum.
Frequently Asked Questions
Can I use Shark vacuum accessories on any Shark model?
Most current Shark accessories are designed to be compatible across their major product lines (Navigator, Rotator, Vertex, etc.) due to the universal Click & Lock system. However, always check your specific model number and the accessory packaging for confirmed compatibility, as some older models or specialized attachments (like certain motorized heads) may have specific requirements.
How often should I clean my Shark vacuum attachments?
You should give non-electronic attachments (dusting brushes, crevice tools) a quick tap-out and comb-through with the cleaning tool after every major use. Perform a full wash with mild soap and water monthly, or immediately if they become heavily soiled or develop an odor. Always ensure they are 100% dry before storing or reattaching.
My Pet Multi-Tool is clogged with hair. How do I clean it?
First, detach the tool. Use the small comb-like cleaning tool provided with your Shark to meticulously brush through the rubber bristles from the base outward. For severe clogs, you can carefully use a pair of scissors to cut away tangled hair, being extremely cautious not to snip the bristles. Never use the tool while the main vacuum brush roll is engaged, as this is a common cause of excessive wrapping.
Where is the best place to store Shark vacuum accessories?
The best place is the onboard storage clips designed into your Shark vacuum canister, wand, or hose. Storing them on the unit ensures they are always with your vacuum and prevents loss. If your model lacks sufficient clips, use the accessory bag that came with it, stored in a dry closet. Never store tools while they are damp or dirty.
Why does my vacuum lose suction when I use the Dust-Away Wide Upholstery Tool?
This is often due to a poor seal between the tool and your wand/hose, or a blockage within the tool itself. First, ensure the tool clicks firmly into place. Second, the wide, flat design can sometimes seal too effectively against a fabric surface, slightly reducing airflow. This is normal and the trade-off for effective fabric cleaning. If suction is nearly gone, check for a full blockage in the tool or the wand port.
Can I make my own cleaning solution for washing the attachments?
It’s best to use just warm water and a drop of mild dish soap. Avoid harsh chemicals, bleach, or abrasive cleaners, as they can degrade the plastic and bristles over time. For disinfecting, a very dilute solution of white vinegar and water (1 part vinegar to 10 parts water) can be used, followed by a thorough rinse with clean water to remove any vinegar scent.