Cleaning the belt on your Shark Rotator Professional is a simple yet crucial maintenance task that restores suction power and prevents costly repairs. It involves safely accessing the brush roll, removing the belt, cleaning it with mild soap, and checking for wear. Regular cleaning, every 3-6 months, keeps your vacuum performing like new.
Key Takeaways
- Unplug First: Always disconnect the vacuum from power before any maintenance to ensure safety.
- Access the Brush Roll: The belt is located underneath the vacuum head; you’ll need to lay the machine flat and remove the brush roll cover.
- Inspect Before Cleaning: Check the belt for cracks, glazing, or stretching; a damaged belt must be replaced immediately.
- Gentle Cleaning: Use a damp cloth with mild soap to wipe the belt; never use harsh chemicals or submerge it in water.
- Reinstall Correctly: Ensure the belt is properly seated in the brush roll groove and the motor pulley before reassembling.
- Check Brush Roll: While the belt is off, always clean the brush roll of hair and debris for optimal performance.
- Regular Schedule: Incorporate belt and brush roll cleaning into your routine every 3-6 months, or more often with heavy use.
📑 Table of Contents
- Why Cleaning Your Shark Rotator Professional Belt is Non-Negotiable
- Understanding Your Shark Rotator Professional’s Belt System
- Essential Tools and Safety First: Your Preparation Station
- The Step-by-Step Disassembly: Accessing the Belt
- Deep Cleaning the Belt and Pulley System
- Reassembly: Getting It Back Together Perfectly
- Testing, Final Checks, and Establishing a Maintenance Routine
Why Cleaning Your Shark Rotator Professional Belt is Non-Negotiable
Let’s be honest. Your Shark Rotator Professional is a workhorse. It tackles pet hair, crumbs, and deep-down carpet dirt with impressive power. But that power doesn’t come from the motor alone. A secret hero lies underneath: the drive belt. This humble rubber loop is the critical link that transfers the motor’s raw torque to the brush roll, making those bristles spin and agitate carpet fibers. When that belt gets clogged with grime, stretched out, or coated in a sticky film of debris, your vacuum’s performance nosedives. You might notice a loss of suction, a burning smell, or the brush roll simply not spinning. Cleaning this belt isn’t just a “nice to do”—it’s essential maintenance that saves you money on replacements and keeps your home truly clean.
Think of it like this: you wouldn’t drive your car with a dirty, worn-out serpentine belt. The same principle applies here. A clean, flexible belt ensures efficient power transfer, reduces strain on the motor, and prevents annoying clogs. In this complete guide, we’ll walk through every single step, from safely taking your Shark apart to putting it back together for a flawless spin. No special tools, no mystery—just clear, actionable instructions.
Understanding Your Shark Rotator Professional’s Belt System
The Anatomy of Power Transfer
Before we touch a screwdriver, a quick understanding helps. In your Shark Rotator Professional, the belt is a continuous, rubber loop. One end wraps around the brush roll’s central shaft. The other end fits onto a small pulley attached to the vacuum’s motor shaft. When the motor runs, it spins this pulley, which grabs the belt and makes it rotate, thereby spinning the brush roll at high speed. This system is designed for efficiency, but it’s also an exposed system. Every time you vacuum, the belt is in motion, potentially picking up fine dust, hair, carpet fibers, and tiny debris particles that can work their way into the belt’s grooves and the pulley itself.
Visual guide about How to Clean Belt on Shark Rotator Professional
Image source: centraloutlet.com.au
Signs Your Belt Needs Immediate Attention
How do you know it’s time? Listen and look. A high-pitched squealing or a smell of burning rubber is the belt’s cry for help—it’s likely slipping on the pulley due to debris or wear. If the brush roll doesn’t spin at all when the vacuum is on and upright, the belt may be broken, stretched too far, or completely jammed with gunk. You might also notice a dramatic drop in cleaning performance on carpets, as the lack of brush agitation means dirt isn’t being loosened. Reduced suction at the hose/wand is another symptom; a jammed belt can create a blockage that restricts airflow. Don’t ignore these signs. Addressing a dirty belt takes minutes; replacing a burnt-out motor because of a neglected belt costs hundreds.
Essential Tools and Safety First: Your Preparation Station
This is the easiest part. You likely have everything you need already. Gather a Phillips head screwdriver (the most common size for Shark vacuums), a clean, dry microfiber cloth, a slightly damp cloth with a drop of mild dish soap, a pair of needle-nose pliers (optional but helpful for stubborn hair), and a flashlight. That’s it. No specialty tools, no solvents.
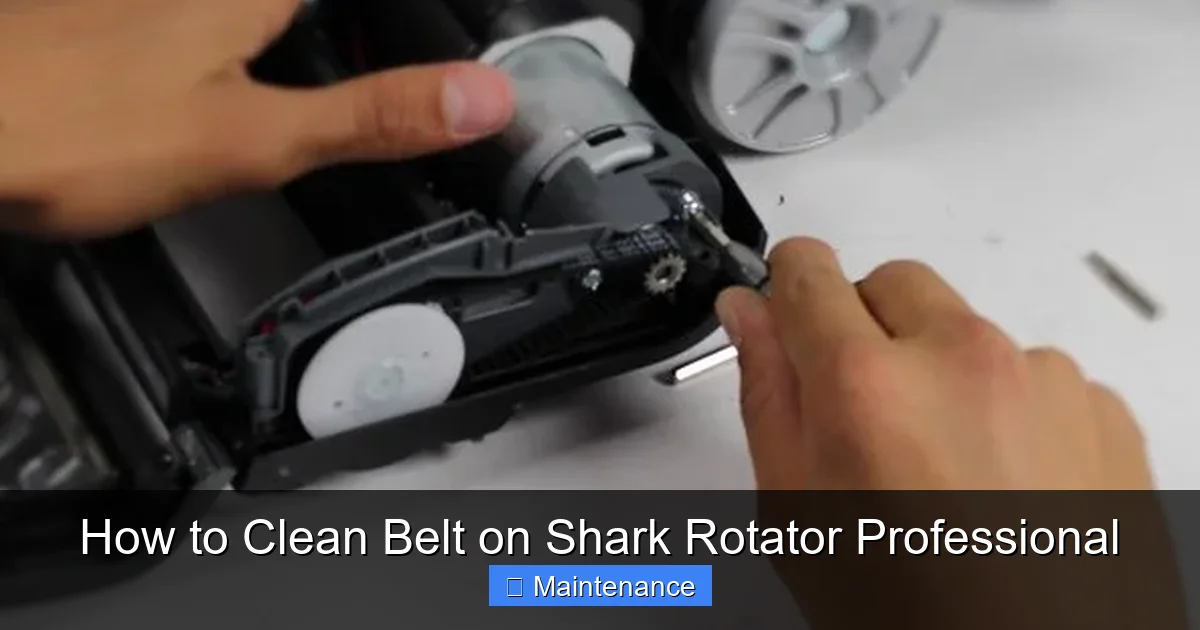
Visual guide about How to Clean Belt on Shark Rotator Professional
Image source: d3nevzfk7ii3be.cloudfront.net
Safety is paramount. The number one rule: ALWAYS unplug your Shark Rotator Professional from the wall outlet. This is non-negotiable. The motor and electrical components are right there. A accidental bump of the switch while your fingers are near the brush roll can cause serious injury. Once unplugged, place the vacuum on a stable, flat surface—a kitchen table or clean floor works. Have your tools laid out within reach. Good lighting is key; the belt area can be shadowy. A headlamp or a lamp positioned nearby makes a huge difference. Take a deep breath. You’ve got this.
The Step-by-Step Disassembly: Accessing the Belt
Step 1: Lay It Flat and Remove the Bottom Plate
First, lay your Shark Rotator Professional completely flat on its side or back, whichever gives you comfortable access to the underside of the cleaning head. You’ll see the brush roll exposed, with a series of clips or screws holding a plastic cover (the “brush roll housing” or “bottom plate”) in place. On most Rotator Professional models, you’ll find 4-6 clips around the perimeter. Use your fingers or a flat-head screwdriver to gently pry them open. If your model uses screws, use your Phillips screwdriver to remove them. Keep these small parts in a safe spot—a small bowl or cup is perfect. Once all clips/screws are free, lift the bottom plate off and set it aside. You now have a clear view of the brush roll and the belt.
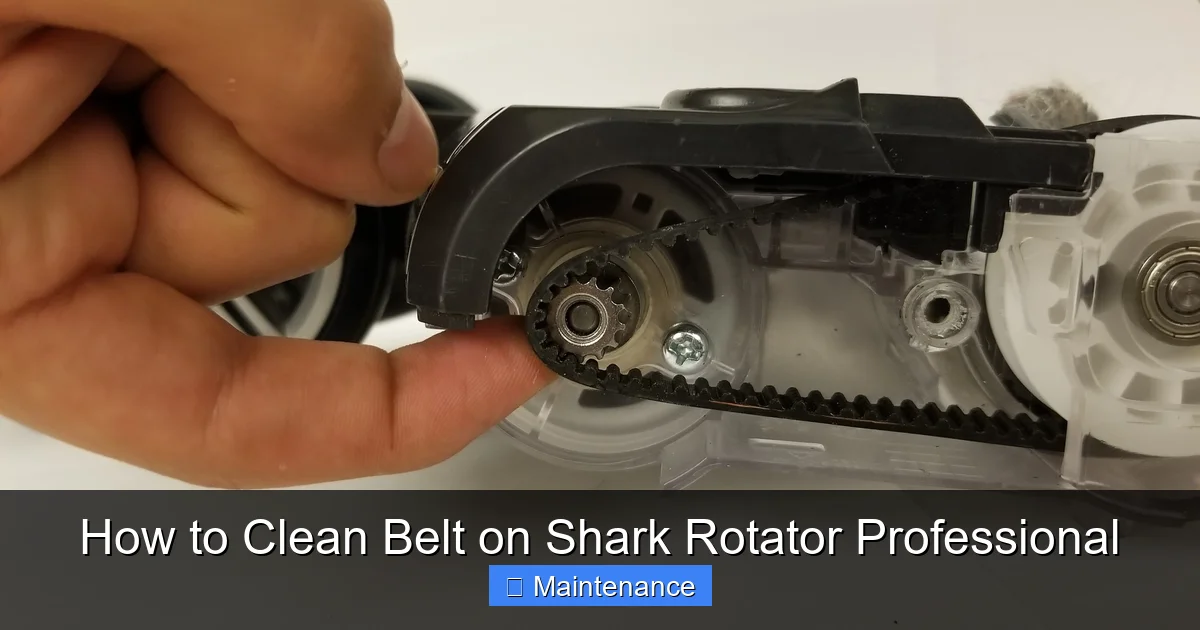
Visual guide about How to Clean Belt on Shark Rotator Professional
Image source: d3nevzfk7ii3be.cloudfront.net
Step 2: Removing the Brush Roll Assembly
The brush roll (that long cylinder with bristles) is usually held in place by two plastic end caps. These caps often have a small tab or slot that allows them to be pried outward. Gently use your screwdriver or fingers to pop each end cap off its housing. Be careful; they can sometimes be tight. Once both ends are free, you can lift the entire brush roll assembly straight up and out. Pay attention to how it sits—note which side faces up and how the belt is looped around it. This will make reinstallation much easier. Place the brush roll on a towel or cloth.
Deep Cleaning the Belt and Pulley System
Inspecting and Removing the Belt
With the brush roll out, the belt will be loose or still attached to the motor pulley. First, give it a visual inspection. Look for cracks, a glazed/shiny surface, deep grooves, or any signs of stretching. If you see any of these, the belt needs replacement, not just cleaning. A new Shark belt is inexpensive and easy to install. If it looks generally flexible and intact, proceed. To remove it, simply slide it off the motor pulley (the small rubber wheel attached to the motor shaft). It should slip off easily. If it’s stuck due to grime, use needle-nose pliers to gently grip and slide it off. Once free, hold the belt up and give it a gentle stretch. It should feel supple, not brittle.
Cleaning the Belt Itself
This is the core task. Lay the belt out on your clean cloth. Do not rinse it under running water or soak it. Water can degrade the rubber over time. Instead, take your damp, soapy cloth (a drop of dish soap in a cup of water is perfect) and wring it out thoroughly so it’s only slightly moist. Gently wipe the entire inner and outer surface of the belt. Focus on the grooves where debris loves to hide. Use your fingertips to feel for any grit trapped inside. For stubborn lint or hair wrapped *around* the belt (not in the grooves), use your needle-nose pliers to pick it off. Once you’ve wiped it down, immediately go over it with a second dry microfiber cloth to remove all soap residue and moisture. The belt must be completely dry before reinstallation. Set it aside on the dry cloth.
Cleaning the Pulley and Brush Roll Housing
Now, clean the areas the belt contacts. Use your dry microfiber cloth to wipe the motor pulley. You’ll often find a layer of black rubber dust and debris coating it. Wipe it clean. Then, look into the brush roll housing where the pulley sits. You’ll likely find a accumulation of hair, carpet fibers, and dust bunnies. Use your fingers, pliers, or the corner of your cloth to remove all of this debris. This is critical—any leftover fluff will immediately re-gunk your clean belt. Finally, take this opportunity to clean the brush roll itself. Use your seam ripper or a sharp scissors to cut away any hair or string wrapped around the bristles, pulling it out with your pliers. Wipe the bristles with a dry cloth to remove dust.
Reassembly: Getting It Back Together Perfectly
Positioning the Belt and Brush Roll
Now, the reverse process, but with specific attention. Take your clean, dry belt. First, loop it around the motor pulley on the vacuum’s body. It should sit flat in the pulley’s groove. Next, take your clean brush roll. You’ll need to stretch the belt slightly to get it over the brush roll’s shaft. The belt has a specific groove it sits in on the brush roll end. Align the belt with that groove and gently twist/push the brush roll into the belt until the belt snaps fully into the groove on the brush roll’s drive end. You should feel it seat properly. The brush roll should now be held in place by the tension of the belt. It should spin freely by hand but not fall out.
Securing the Brush Roll and Bottom Plate
Carefully lift the brush roll assembly (with the belt on it) and align the two end caps with their respective slots in the vacuum’s housing. Gently push each end cap in until it clicks or sits flush. Give the brush roll a few spins by hand. It should rotate smoothly and evenly. If it’s wobbly or catches, the end caps aren’t seated correctly—reposition them. Now, take your bottom plate. Align it with the clips or screw holes. If it has clips, start by engaging one side, then work your way around, pressing until you hear each clip snap shut. If it has screws, reinsert and tighten them securely, but don’t over-tighten and crack the plastic. Double-check that the brush roll spins freely through the hole in the bottom plate.
Testing, Final Checks, and Establishing a Maintenance Routine
The All-Important Test Run
Before you stand the vacuum up, do a final check. Ensure no tools are left inside. Plug your Shark Rotator Professional back into the wall outlet. Stand it upright. Turn it on. You should immediately hear the familiar sound of the motor and the brush roll spinning. No squeals, no grinding. Now, carefully lower the vacuum head onto a bare floor or low-pile rug. Gently push it forward and back. You should feel the brush roll agitating the floor and see debris being picked up. Listen for any abnormal noises. If the brush roll doesn’t spin or you hear a loud squeal, unplug it immediately and recheck your belt installation—it’s likely not seated on the pulley correctly.
Creating a Sustainable Cleaning Schedule
Don’t wait for symptoms to appear. Proactive maintenance is the key to a long-lasting vacuum. For the average household with a mix of carpet and hard floors, plan on cleaning the belt and brush roll every 3 to 4 months. If you have multiple pets, lots of carpet, or fine dust (like from a craft room), shorten that to every 6 to 8 weeks. Make it a habit: every time you change your vacuum’s filter (which should also be done regularly), take five extra minutes to check the brush roll and belt. A quick wipe-down during filter changes prevents major buildup. Keep a small brush (like a clean, dry paintbrush) near your vacuum storage area. A quick sweep of the brush roll housing after each major vacuuming session can dislodge hair before it winds tightly. This small habit makes the deep clean every few months a breeze.
Frequently Asked Questions
Can I use water or cleaner directly on the belt?
No. Never submerge the belt or spray cleaners directly on it. This can degrade the rubber and cause it to slip or break prematurely. Always use a slightly damp cloth with mild soap, then dry it thoroughly.
My belt looks fine but the brush roll still doesn’t spin. What’s wrong?
>First, ensure the belt is properly seated on both the motor pulley and the brush roll groove. If it is, the issue may be a broken belt (internal tear) or a seized brush roll bearing. Remove the brush roll and spin it by hand; it should rotate smoothly. If it’s stiff, the bearings are likely clogged and need cleaning or the brush roll needs replacement.
How much does a replacement Shark belt cost?
Official Shark replacement belts are very affordable, typically ranging from $8 to $15. You can find them on the Shark website, Amazon, or at most major retailers that sell vacuum parts. Always use the correct model number for your specific Shark Rotator Professional.
Is there a way to tell if my belt is stretched without removing it?
Yes. With the vacuum unplugged, try to gently roll the brush roll by hand. If it spins very easily with almost no resistance, the belt may be so stretched it’s not making proper contact with the motor pulley. A good belt provides slight resistance. The definitive check, however, requires removal for inspection.
My vacuum smells like burning rubber but the belt looks okay. What should I do?
This is an urgent sign. Unplug the vacuum immediately. The smell indicates the belt is slipping severely on the pulley, generating heat. This is usually caused by a belt clogged with debris that can’t grip the pulley, or a belt that is glazed (shiny) from age. Remove and clean the belt and pulley as described. If the belt returns to a flexible, non-shiny state, it may be okay. If it remains glazed or shows cracks, replace it. Running it in this state will destroy the belt and potentially damage the motor.
Can I clean the belt without removing the brush roll?
It’s possible but not recommended. You cannot effectively clean the belt’s grooves or inspect it for damage without full access. You also cannot clean the brush roll housing or the motor pulley properly. Removing the brush roll is a simple, quick step that ensures a thorough clean and allows you to inspect all wear parts. Skipping it leads to a half-hearted job that won’t solve the problem.